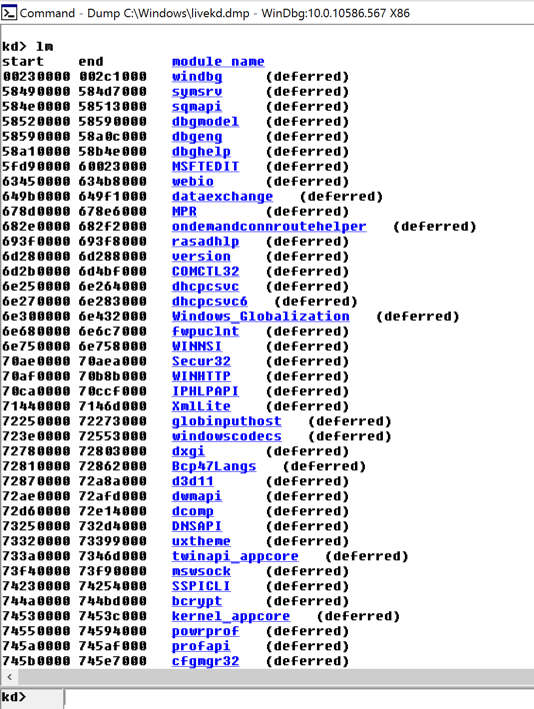
lm
Scroll back to see the lm command you entered, and the first few loaded kernel modules, as shown below.
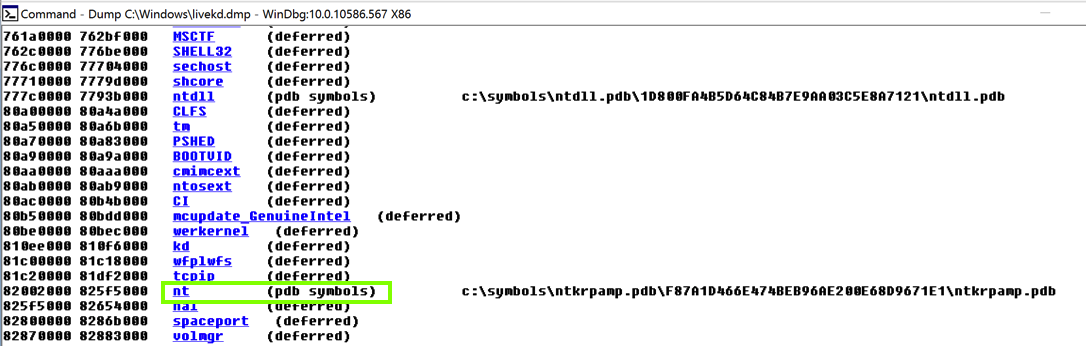
Scroll down to find the module named nt, as shown below. It's easy to spot because it'e one of the few modules that shows a Symbols path.
This is Ntoskrnl, the main kernel module.
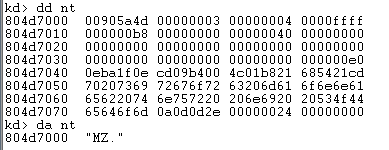
dd nt
You see the first several bytes of Ntoskrnl.exe, as shown below.
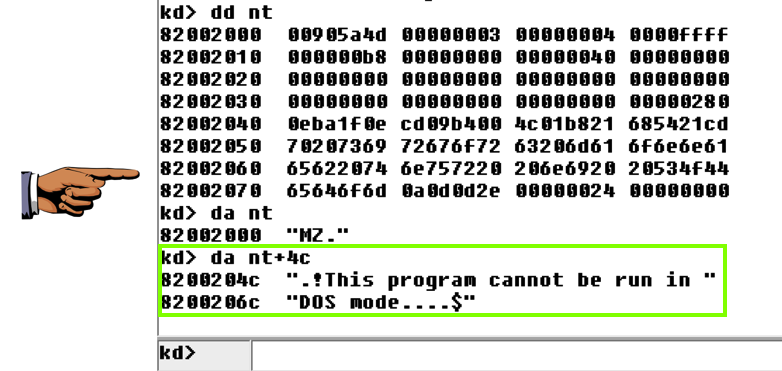
This may be more familiar in ASCII.
In WinDbg, execute this command:
da nt
You see the characters "MZ" --they are at the start of every EXE file.
In WinDbg, execute this command:
da nt+4c
You see the message "This program cannot be run in DOS mode", as shown below:
On your keyboard, press the PrntScrn key.
Open Paint and paste the image in.
YOU MUST SUBMIT WHOLE-DESKTOP IMAGES TO GET FULL CREDIT.
Save the image with a filename of "Proj 13a from YOUR NAME".
x nt!*
This finds all the functions in Ntoskrnl.
There are a lot of them, as shown below:

In WinDbg, execute this command:
x nt!*Create*
This finds all the functions in Ntoskrnl that contain the word "Create".
There are a lot of them, too.
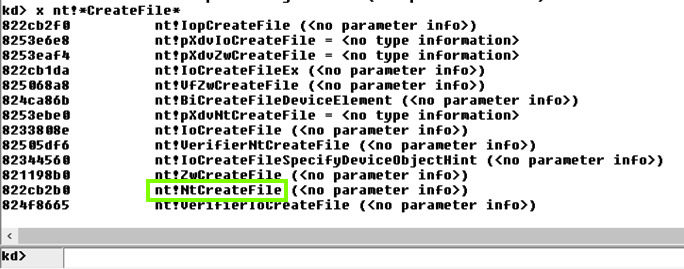
In WinDbg, execute this command:
x nt!*CreateFile*
This finds all the functions in Ntoskrnl that contain the word "CreateFile".
There are only about ten of those, including "nt!NtCreateFile", as shown below:
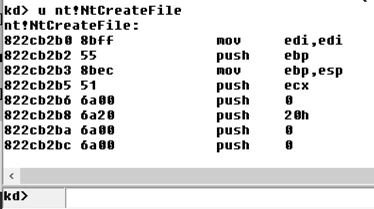
u nt!NtCreateFile
This shows the first few bytes of the function, disassembled, as shown below:
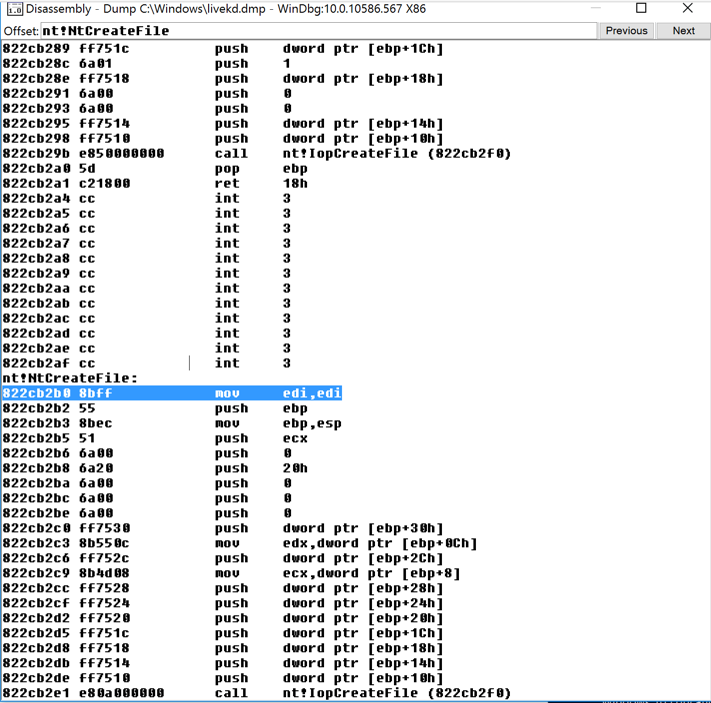
To see more of this function, it helps to use the WinDbg Disassembly window.
If the Command window is maximized, make it smaller.
From the WinDbg menu bar, click View, Disassembly.
In the Offset bar at the top, enter
nt!NtCreateFile
This shows the assembly code before and after the start of the NtCreateFile function, as shown below:
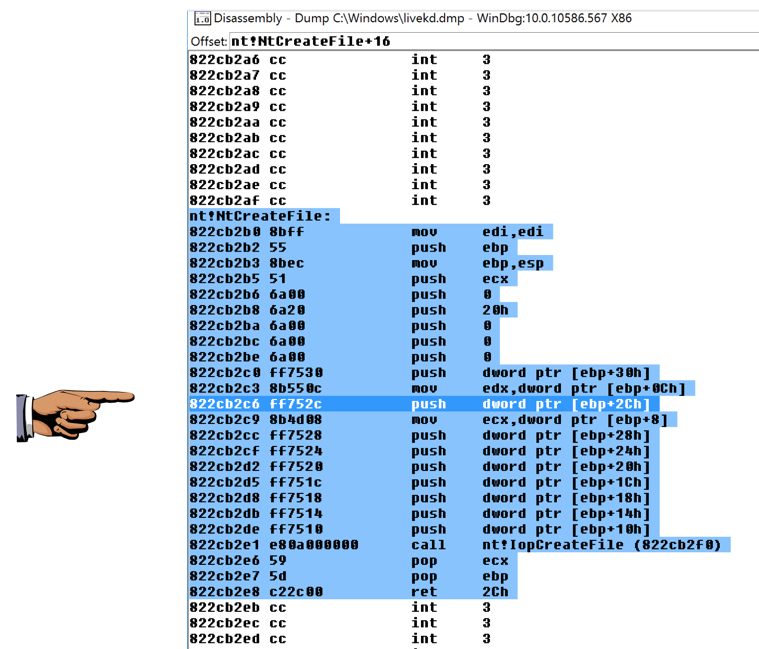
In the Offset bar at the top, enter
nt!NtCreateFile+16
Resize this window to make the entire function visible. Drag the mouse through it to highlight the entire function, as shown below.
For Windows Server 2008 Users
Use this offset instead:nt!NtCreateFile+11
On your keyboard, press the PrntScrn key.
Open Paint and paste the image in.
YOU MUST SUBMIT WHOLE-DESKTOP IMAGES TO GET FULL CREDIT.
Save the image with a filename of "Proj 13b from YOUR NAME".
In WinDbg, execute this command:
?
You see the first page of the online help, as shown below:
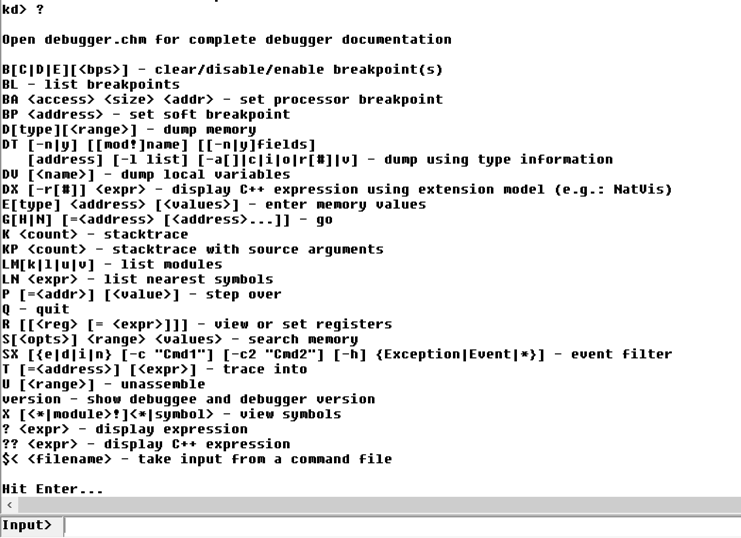
Press Enter to see the other page.
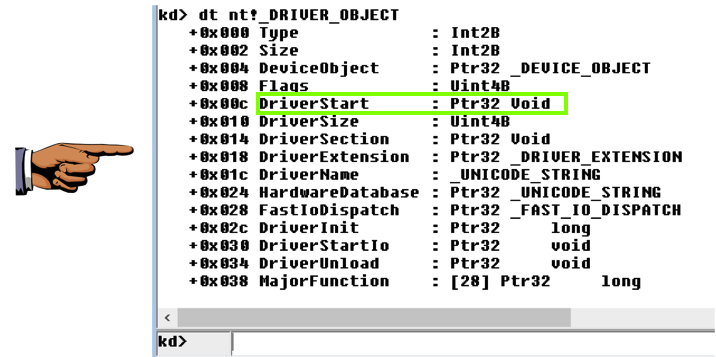
dt nt!_DRIVER_OBJECT
This shows the first few lines of a driver object structure, which stores information about a kernel driver, as shown below. Notice the DriverStart pointer--this contains the location of the driver in memory.
On your keyboard, press the PrntScrn key.
Open Paint and paste the image in.
YOU MUST SUBMIT WHOLE-DESKTOP IMAGES TO GET FULL CREDIT.
Save the image with a filename of "Proj 13c from YOUR NAME".
Posted 4-19-17 by Sam Bowne