You won't actually fix any problems now--that comes in the next project.
Here are general steps, in a common order. This is not a strict order--experienced troubleshooters will often skip steps, but following a systematic series of steps will usually result in a solution within a reasonable time.
To practice them, open this file in Packet Tracer. To download it, right-click the link and save the file on your desktop.
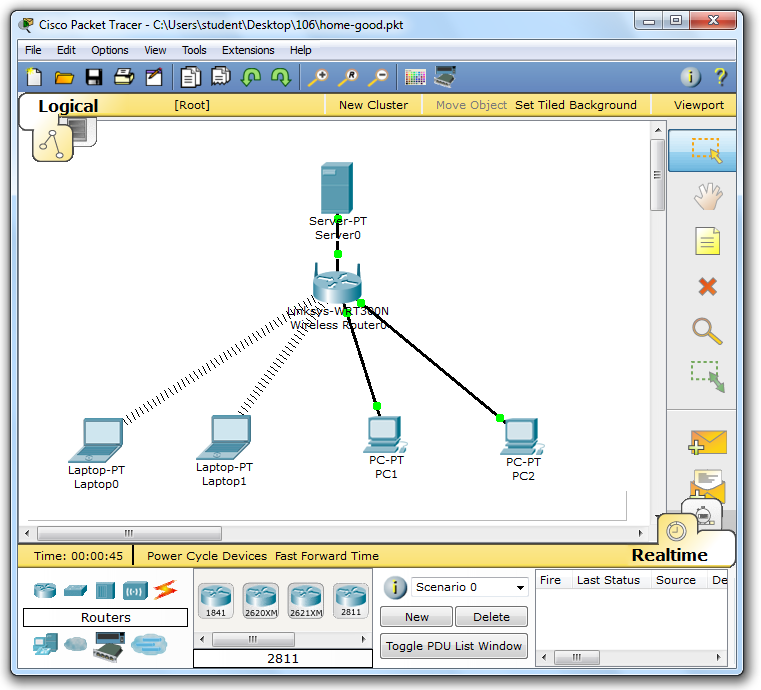
You should see a small network, as shown below.
Wait a few seconds for all the link lights to turn green.
For reference, the address table is also shown.
Device Address Subnet Mask Default Gateway Laptop0 192.168.0.101 255.255.255.0 192.168.0.1 Laptop1 192.168.0.102 255.255.255.0 192.168.0.1 PC1 192.168.0.201 255.255.255.0 192.168.0.1 PC2 192.168.0.202 255.255.255.0 192.168.0.1 Wireless Router0 LAN 192.168.0.1 255.255.255.0 Wireless Router0 WAN 8.8.8.1 255.255.255.0 8.8.8.8 Server0 8.8.8.8 255.255.255.0 8.8.8.1
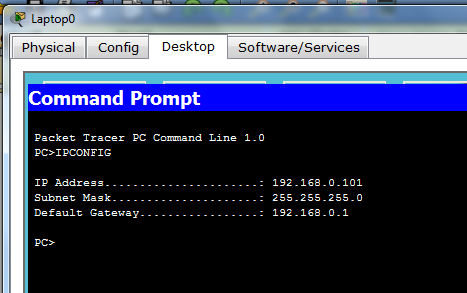
On the Desktop tab, click "Commmand Prompt".
In the Command Prompt window, execute this command:
IPCONFIG
In the Command Prompt window, execute this command:
PING 192.168.0.1
If you don't get replies from the default gateway, that means the problem is either in the PC or in the device it is connected to (usually a router or switch).
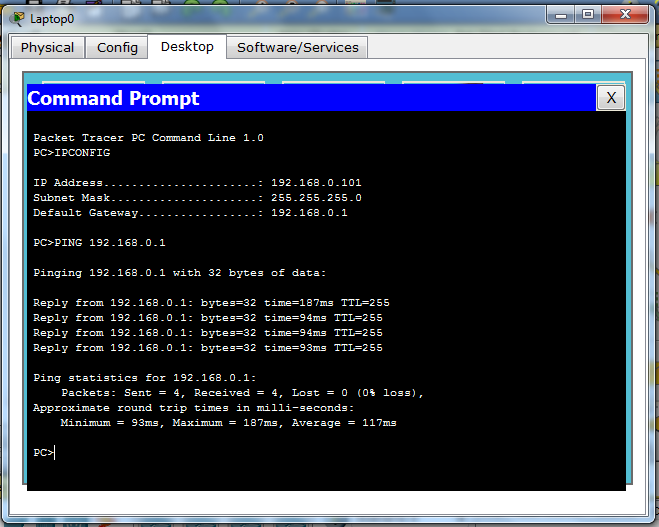
Because it's easy to remember, it's a handy way to test networks.
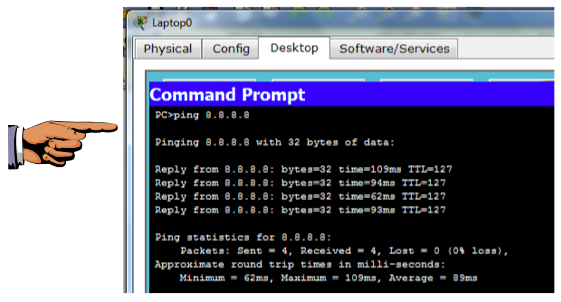
This Packet Tracer simulation is not connected to the real Internet, so the only Internet host you can use for testing is 8.8.8.8.
In the Command Prompt window, execute this command:
PING 8.8.8.8
On your keyboard, press the PrntScrn key.
Click Start, type in PAINT, and open Paint.
Press Ctrl+V to paste in the image of your desktop.
YOU MUST SUBMIT WHOLE-DESKTOP IMAGES TO GET FULL CREDIT.
Save the image with a filename of "Proj 14a from YOUR NAME".
It shows all the hops between a PC and a remote host.
In the Command Prompt window, execute this command:
TRACERT 8.8.8.8

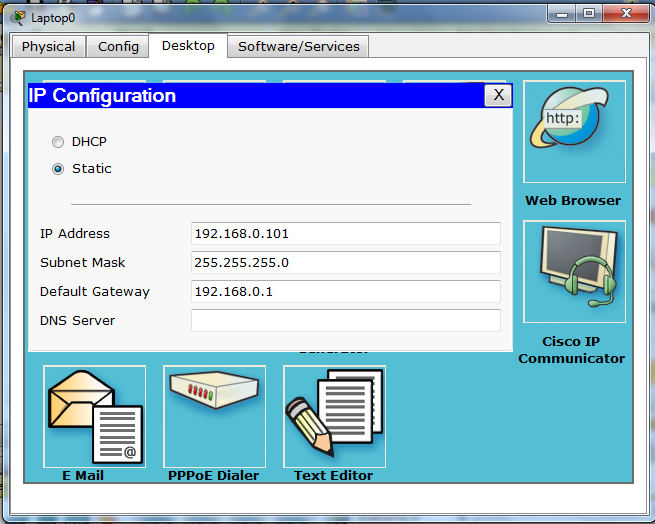
On the Desktop tab, click the "IP Configuration" tile.
The "IP Configuration" window opens, as shown below.
This is a good place to correct any errors.
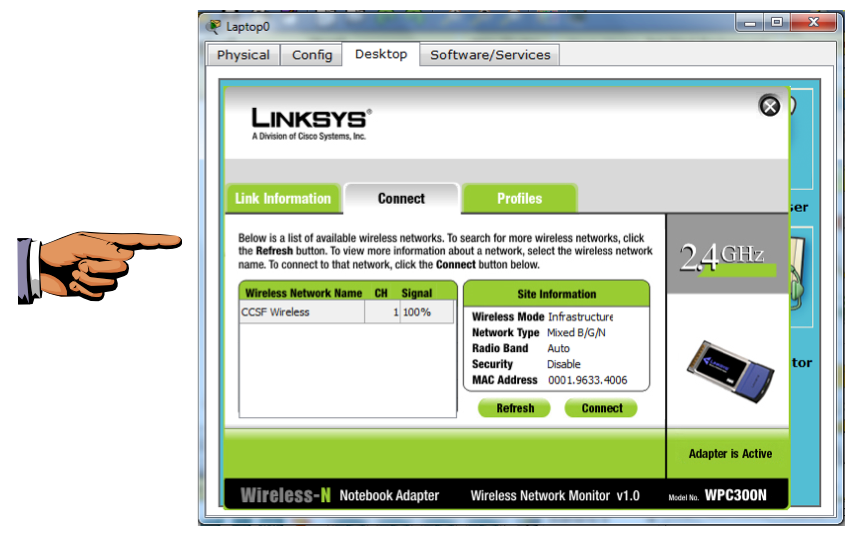
On the Desktop tab, click the "PC Wireless" tile.
A "Linksys" box opens. Click the Connect tab.
After a few seconds, the network name "CCSF Wireless" appears, as shown below.
This is a good place to correct wireless configuration errors.
On your keyboard, press the PrntScrn key.
Click Start, type in PAINT, and open Paint.
Press Ctrl+V to paste in the image of your desktop.
YOU MUST SUBMIT WHOLE-DESKTOP IMAGES TO GET FULL CREDIT.
Save the image with a filename of "Proj 14b from YOUR NAME".
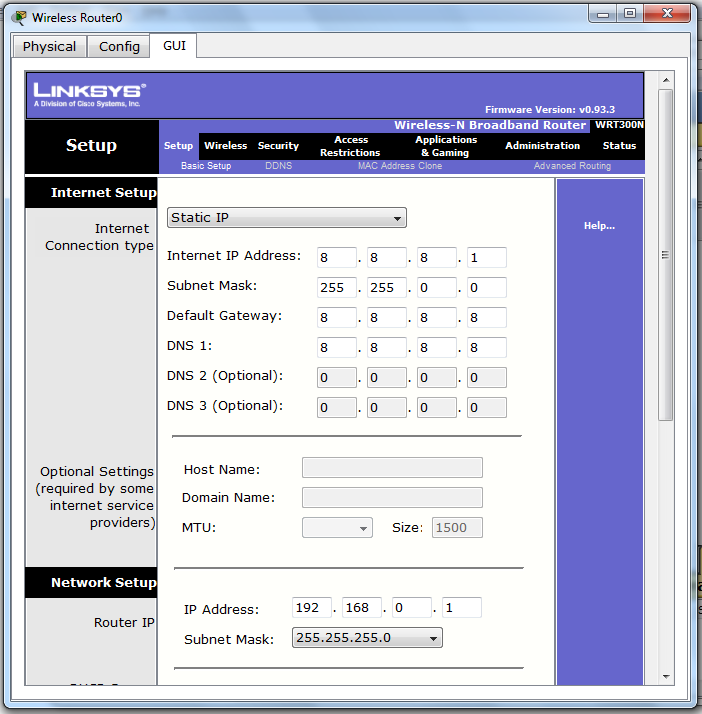
Click the "Wireless Router0" icon.
Click the GUI tab.
The WAN configuration is at the top of this page, labelled "Internet Setup", and the LAN setup is at the bottom, in the "Network Setup" section, as shown below.
This is the place to correct router configuration errors.
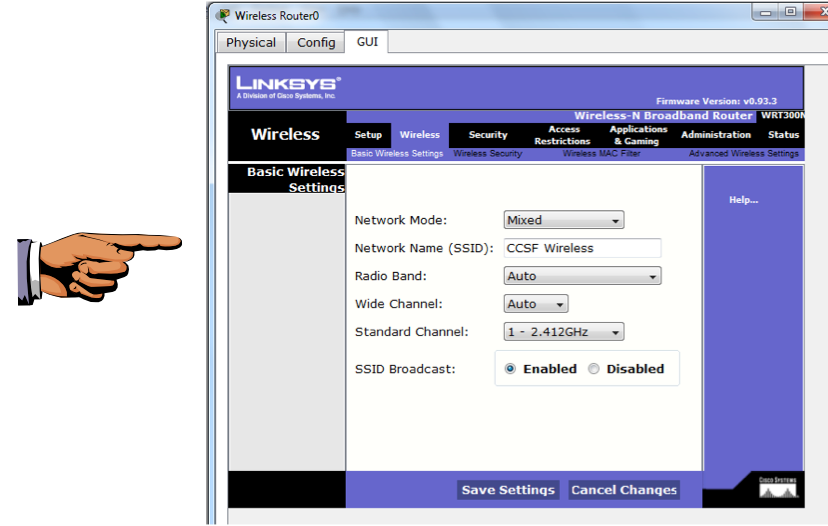
In the Linksys setup page, at the top center, click the Wireless tab.
This is the place to adjust any errors in the wireless configuration.
On your keyboard, press the PrntScrn key.
Click Start, type in PAINT, and open Paint.
Press Ctrl+V to paste in the image of your desktop.
YOU MUST SUBMIT WHOLE-DESKTOP IMAGES TO GET FULL CREDIT.
Save the image with a filename of "Proj 14c from YOUR NAME".
Last Modified: 10-19-13 11:45 am