
Make a note of it.
In your Windows 2008 Server, open a Command prompt and execute the IPCONFIG command to find your IP address.
Make a note of it.
In the "Computer name, domain, and workgroup settings" section, find the "Full computer name".
In the example below, the name is x.YOURNAME.local
Make a note of this name--you will need it later.
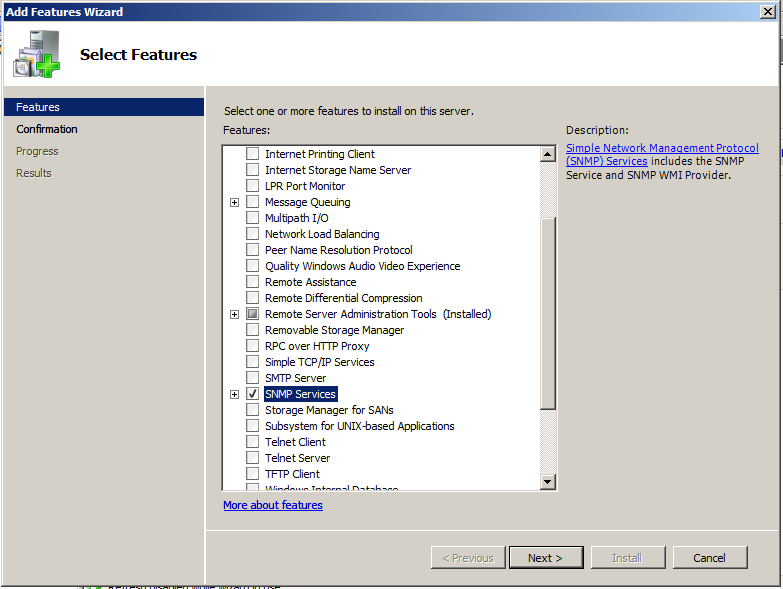
In Server Manager, in the left pane, click Features.
On the right side, click "Add Features".
In the "Select Features" box, click "SNMP Services", as shown below.
Click Next.
Click Install.
When you see the message saying "Installation succeeded", click Close
In the center pane, scroll down to find "SNMP Service".
Right-click "SNMP Service" and click Properties, as shown below.

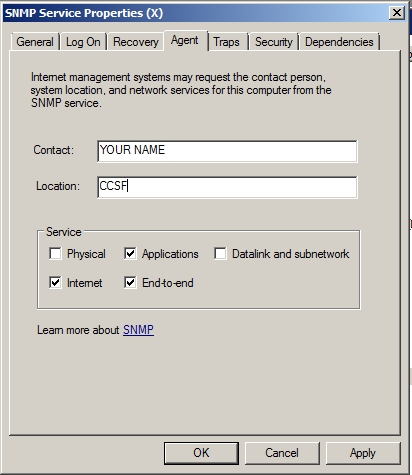
In the "SNMP Service Properties" sheet, click the Agent tab.
Enter a Contact of "YOUR NAME", using your own name rather than the literal text "YOUR NAME" and enter anything in the Location box, as shown below.
Click Apply.
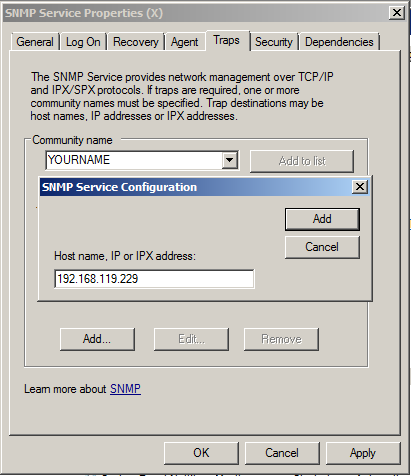
In the "SNMP Service Properties" sheet, click the Traps tab.
Enter a Community name of "YOURNAME", using your own name (without any spaces) rather than the literal text "YOURNAME".
Click the "Add to list" button.
In the lower left portion of the "SNMP Service Properties" sheet, click the Add... button.
In the "SNMP Service Configuration" box, enter your Windows 7 machine's IP address, as shown below.
Click Add.
Click Apply.
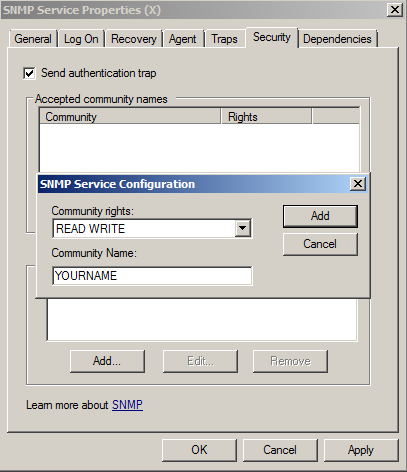
In the "SNMP Service Properties" sheet, click the Security tab.
In the "Accepted community names" button, click the Add... button.
In the "SNMP Service Configuration" box, select "Community rights" of "READ WRITE".
Enter a Community Name of "YOURNAME", using your own name (without any spaces) rather than the literal text "YOURNAME", as shown below.
Click Add.
In the center of the "SNMP Service Configuration" box, click "Accept SNMP packets from any host" button.
Click OK.
On your Windows 2008 Server, click Start, right-click Computer, and click Manage.
In the "Roles Summary" section of Server Manager, on the right side, click the blue "Add Roles" link.
In the "Before You Begin" page, click Next.
In the "Select Server Roles" page, check these two items, as shown below:
Terminal services allows other computers to remotely use programs installed on the server.
I have some other services installed in the image below, you don't need those.

Click Next.
In the "Introduction to Terminal Services" page, click Next.
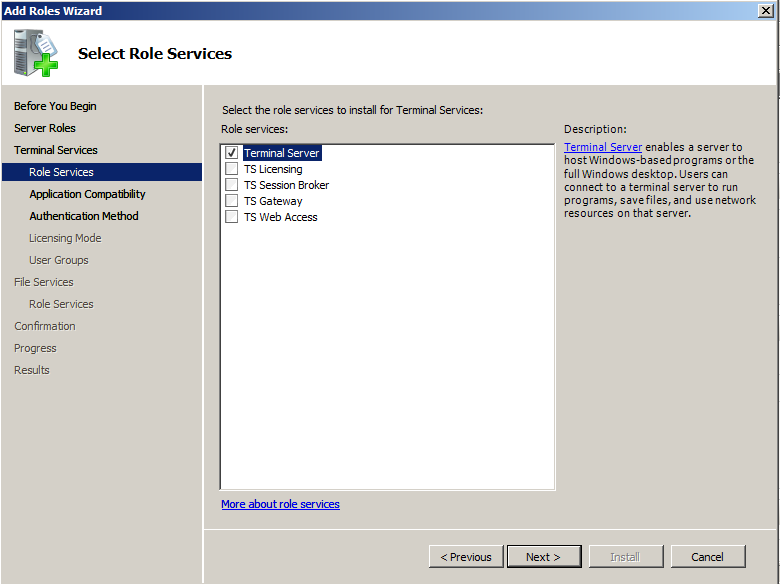
In the "Select Role Services" page, check the first item "Terminal Server", as shown below, and click Next.
In the "Uninstall and Reinstall Applications for Compatibility" page, click Next.
In the "Specify Authentication Method for Terminal Server" page, check "Do not require Network Level Authentication" and click Next.
In the "Specify Licensing Mode" page, click Next.
In the "Specify User Groups Allowed Access To This Terminal Server" page, click Next.
In the "File Services" page, click Next.
In the "Select Role Services" page, click Next.
In the "Confirm Installation Selections" page, click Install.
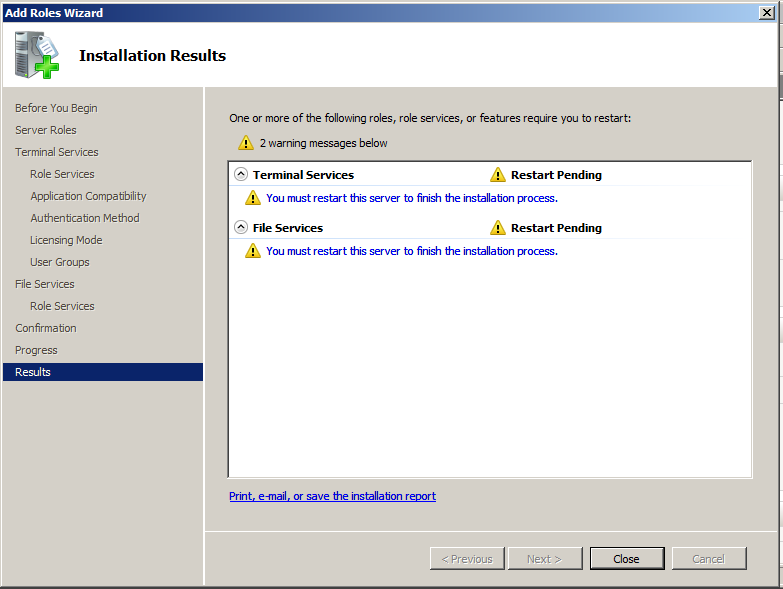
When you see the screen below, close all windows and restart your server.
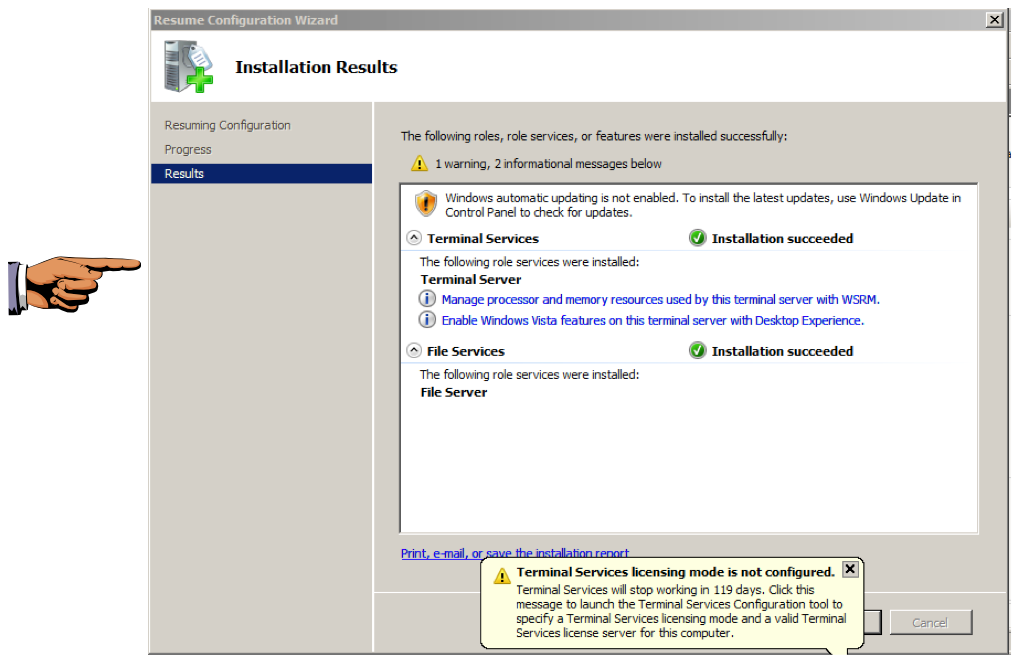
When you log in again, you should see the "Results" screen below.
Press the PrintScrn key in the upper-right portion of the keyboard. That will copy the whole desktop to the clipboard.
YOU MUST SUBMIT A FULL-DESKTOP IMAGE FOR FULL CREDIT!
Paste the image into Paint and save it with the filename "YOUR NAME Proj 18a", replacing "YOUR NAME" with your real name.
On the next page, enter your email address and click the "Get Free License" button.
The next page shows you your license key.
Save that key--copy it to a Notepad file.
000014-5KGKFM-8FFKFA-QU3RHH-AVHD27-VDX2NB-NNFAZW-WDY216-PJ3Y2G-1EBKV5
A prtg.zip file downloads.
Unzip the file and run the installer. Install it with the default options.
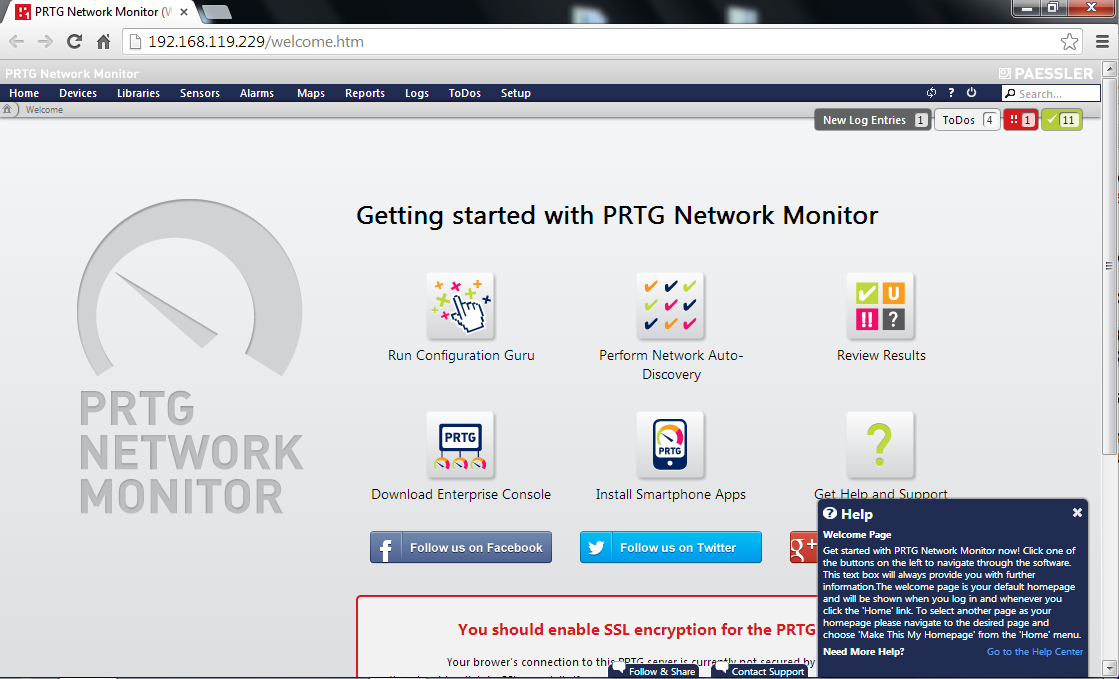
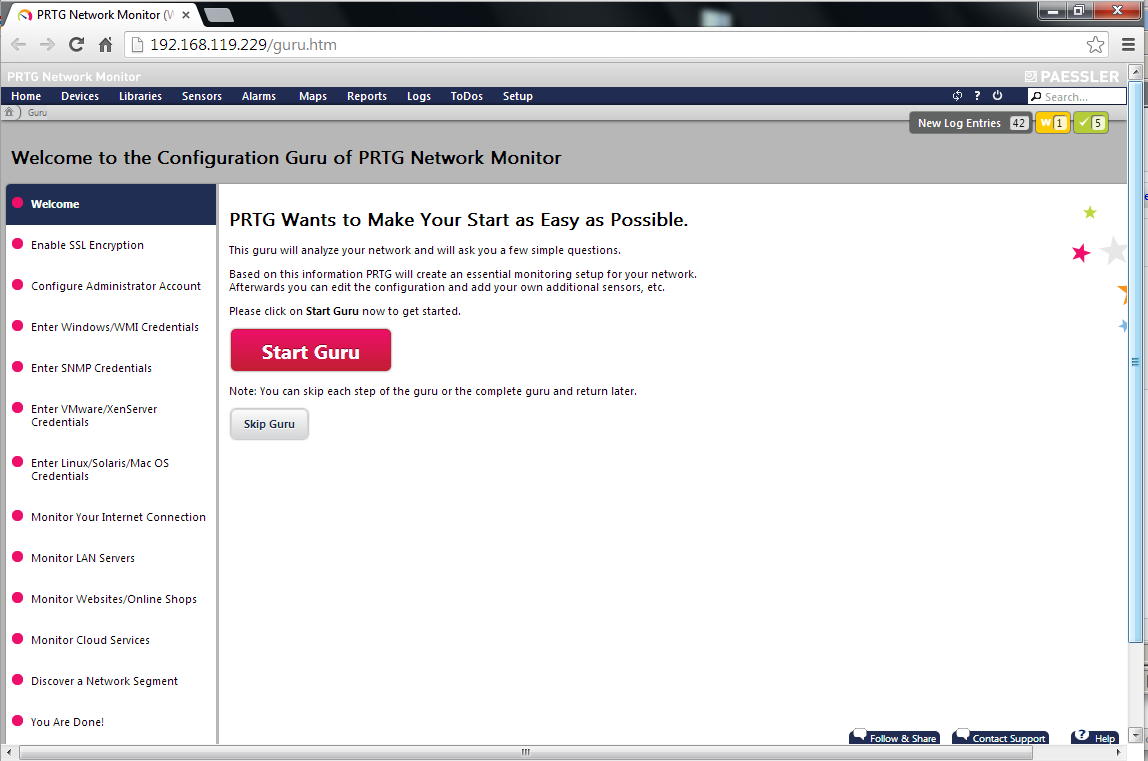
PRTG opens. as shown below.
Click the "Run Configuration Guru" button.
In the "Guru: Enable SSL Encryption..." page, click the "Don't tell me again" button.
This is obviously an insecure choice, not appropriate for real-world deployment.
In the "Guru: Configure Aministrator Account" page, accept the default login name of "prtgadmin" and enter P@ssw0rd in the "New password" and "Retype password" boxes, as shown below.
In the "Old password" box, enter prtgadmin
In a real-world deployment, use a secure customized name and password, of course.
Click the "Save & Next" button.

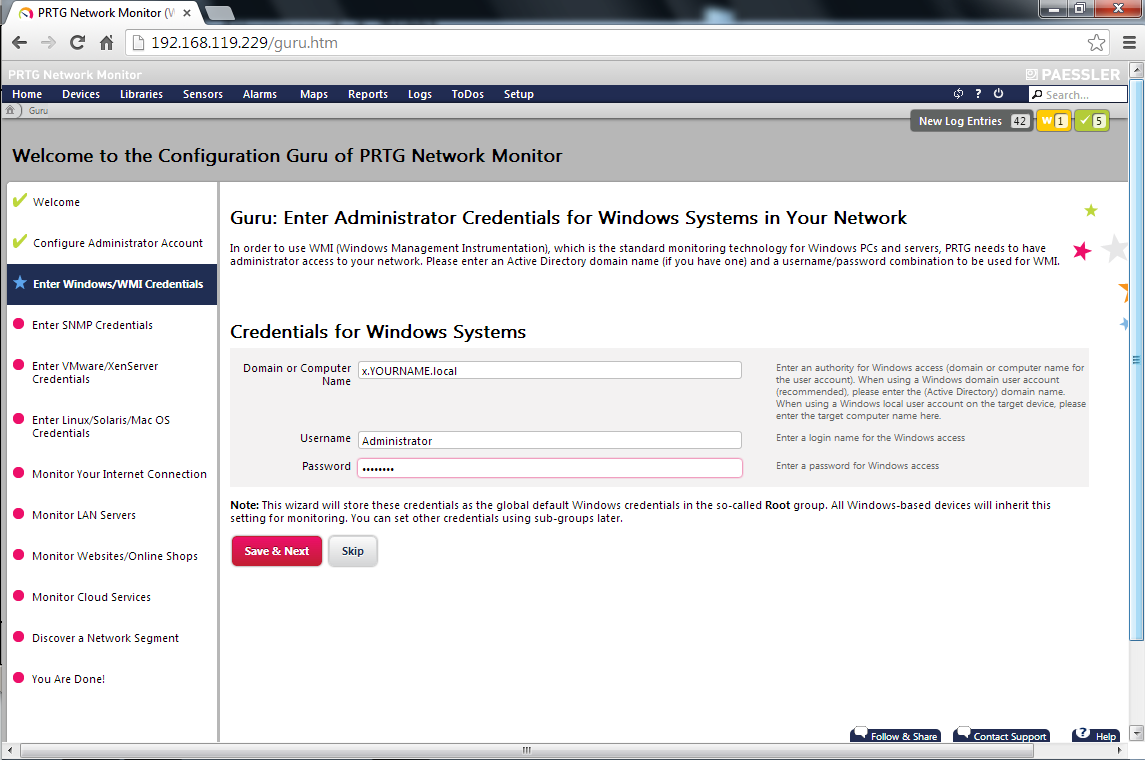
In the "Guru: Enter Aministrator Credentials for Windows Systems in Your Network" page, enter the "Computer Name" of your Windows 2008 Server machine in the top box, as shown below.
You found this name earlier in this project and noted it.
If you are using the Windows 2008 Server I handed out on a DVD, the Username is Administrator and the password is P@ssw0rd
Click the "Save & Next" button.
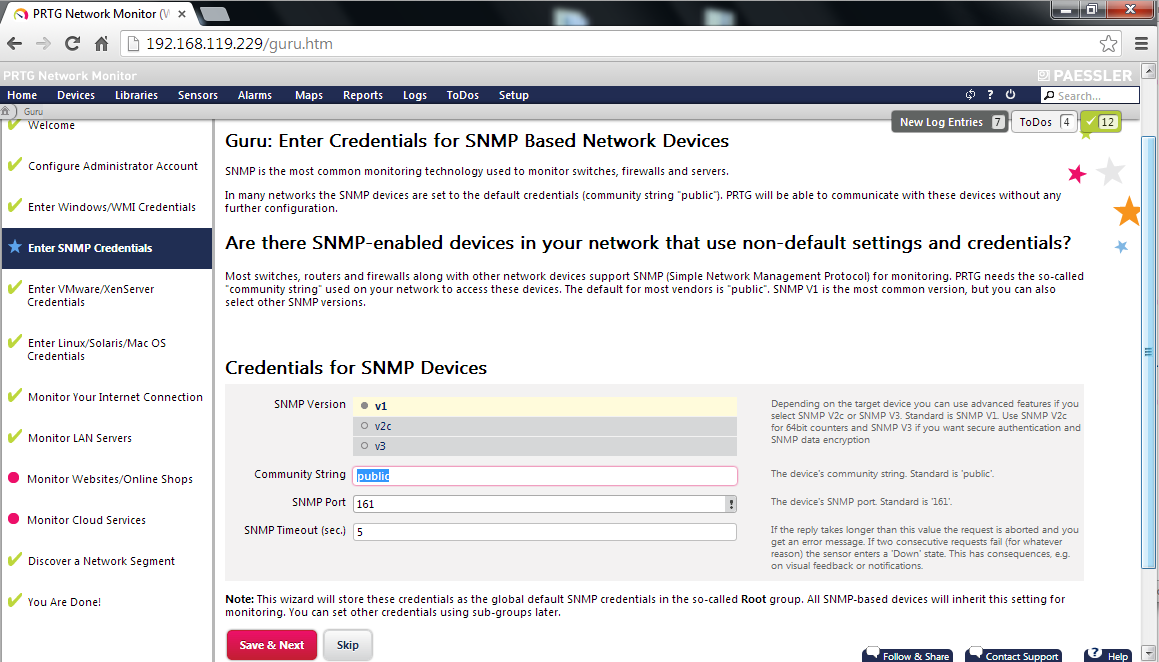
In the "Guru: Enter Credentials for SNMP-Based Network Devices" page, click the "SNMP Version v1" button, as shown below.
Leave the other settings at their default values and click the "Save & Next" button.
In the "Guru: Enter Credentials for VMware/XenServer" page, accept the default settings and click the "Save & Next" button.
In the "Guru: Enter Credentials for Linux/OSX Servers" page, accept the default settings and click the "Save & Next" button.
In the "Guru: Set up Monitoring for Internet Connection" page, accept the default values and click the "Save & Next" button.
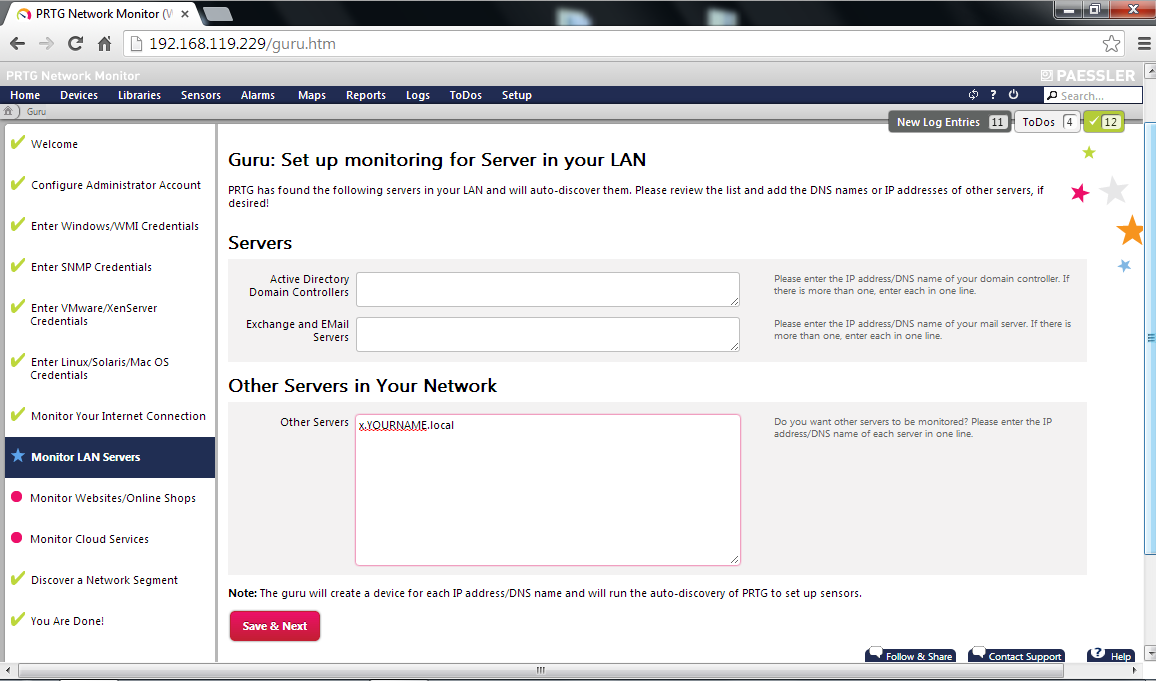
In the "Guru: Set up monitoring for Server in your LAN" page, in the "Other Servers in Your Network" box, type the hostname of your Windows 2008 Server, as shown below.
Click the "Save & Next" button.
In the "Guru: Set up monitoring for Websites and Online Shops" page, enter samsclass.info into the URLs box empty and click the "Save & Next" button.
In the "Guru: Set up monitoring for Cloud Services" page, click Yes for the first item, "Google Search..", and click the "Save & Next" button.
In the "Guru: Auto-Discover a Segment of Your Network" page, leave all the items set to their default values and click the "Save & Next" button.
In the "Thank You for Using the Configuration Guru of PRTG Network Monitor" page, click the "OK! Let me view my new sensors!" button.
A "Group Root" page appears, showing various devices, as shown below.
At the bottom of the page, in small italic letters, a message shows "Auto-Discovery in progress".
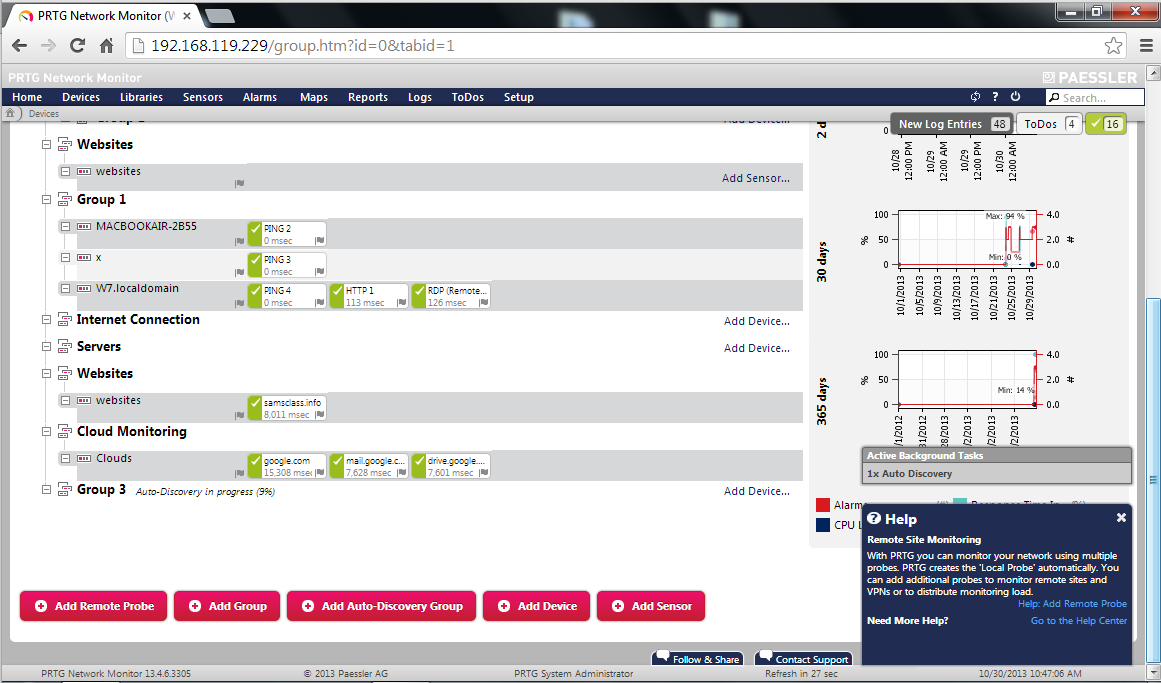
Mine appeared in "Group 1" with its hostname, "x", as highlighted below.
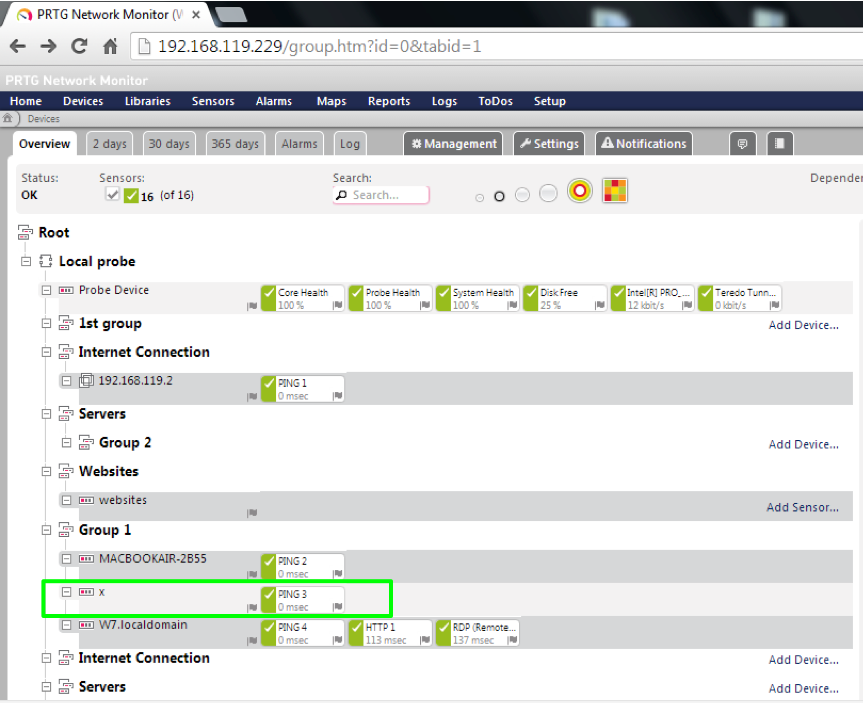
Click your server name.
A "Device" page opens, showing details about the monitoring of your server, as shown below.
At present, the only test being performed on your server is PING.
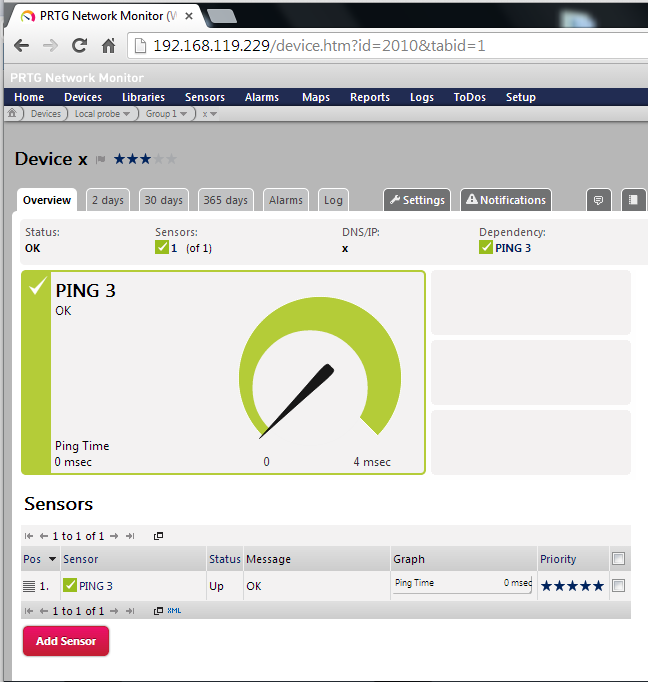
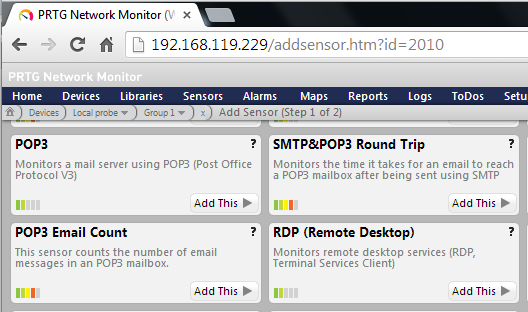
In the "Device" page, at the lower left, click the red "Add Sensor" button.
An "Add Sensor to Device" page opens, as shown below.
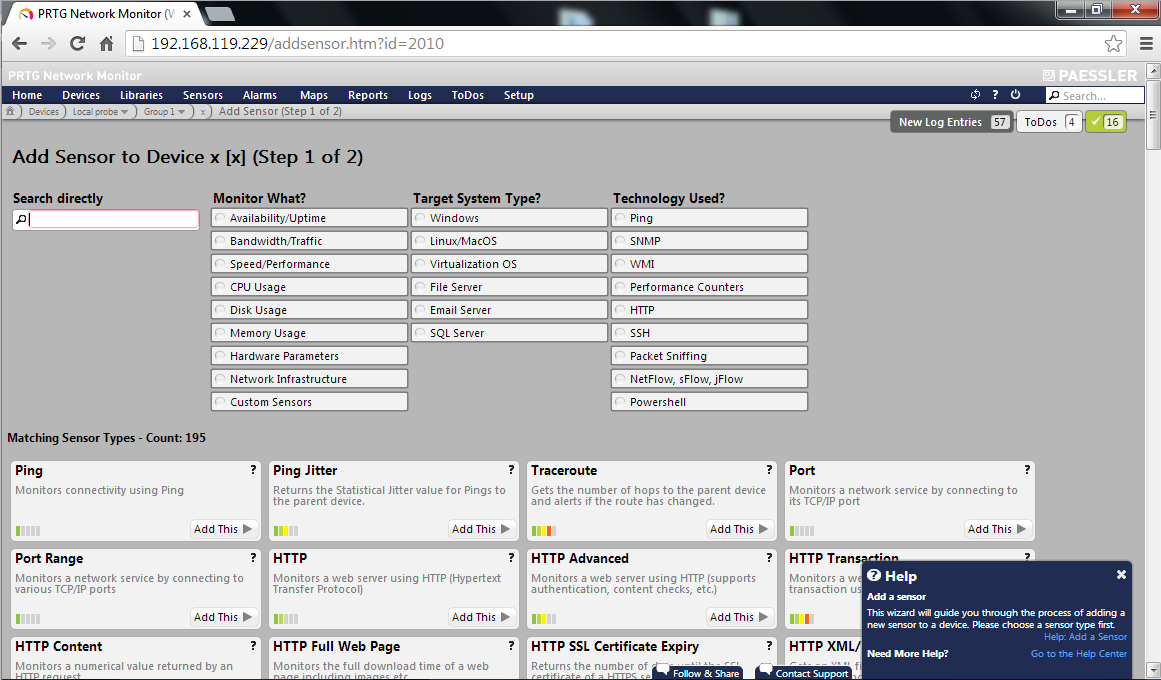
Scroll down, find the "RDP (Remote Desktop)" box, as shown below, and click "Add This".
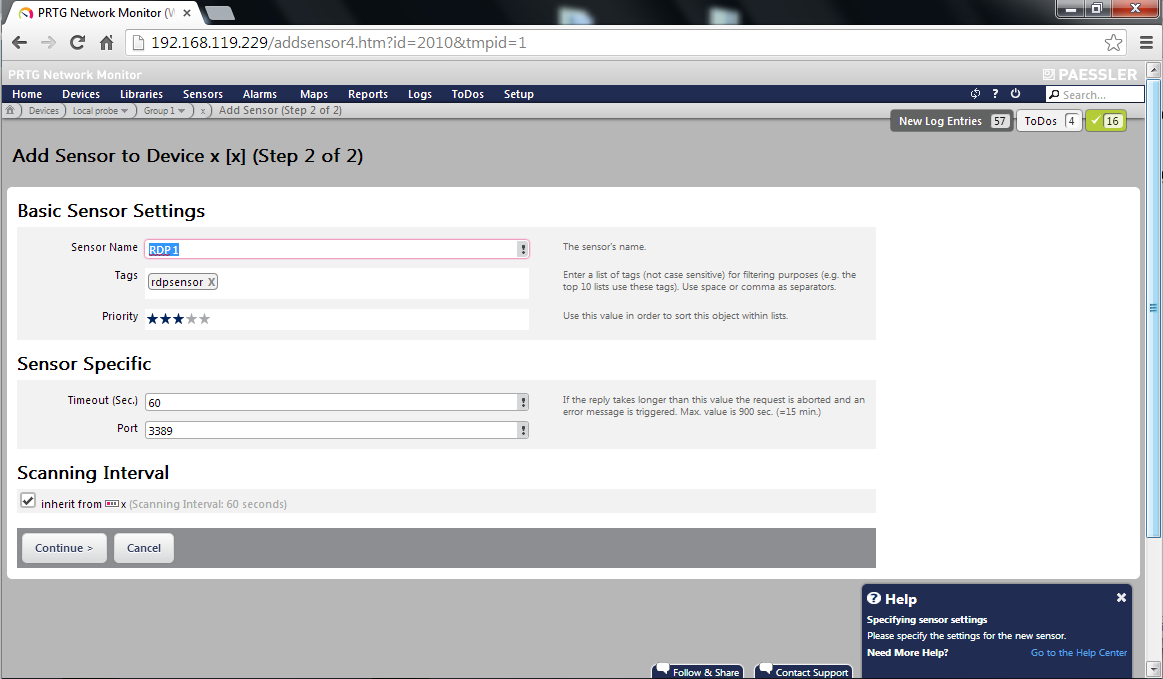
In the next "Add Sensor to Device" page, accept the default options, as shown below, and click the Continue button.
The "Device" page opens again.
In the "Sensors" section at the bottom, there are now two items: PING and RDP.
Wait for a minute until they both show green checkmarks, as shown below.
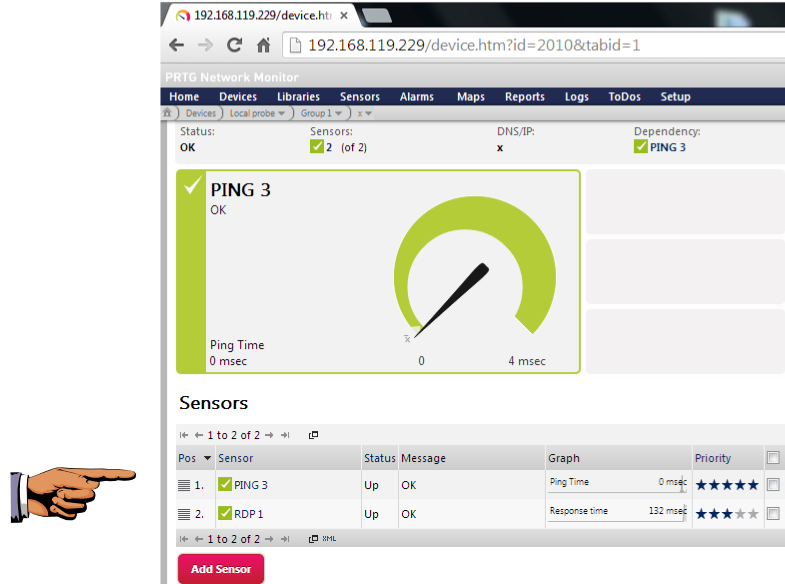
Press the PrintScrn key in the upper-right portion of the keyboard. That will copy the whole desktop to the clipboard.
YOU MUST SUBMIT A FULL-DESKTOP IMAGE FOR FULL CREDIT!
Paste the image into Paint and save it with the filename "YOUR NAME Proj 18b", replacing "YOUR NAME" with your real name.
Send a Cc to yourself.