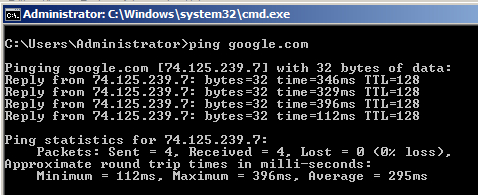
In the Command Prompt window, type this command, and then press Enter:
ping google.com
Repeat the process on your Windows Server 2008 machine.
If either machine fails this test, you need to troubleshoot your network and fix it before you can proceed with this project.
ipconfig
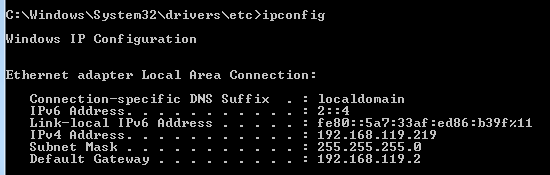
Repeat this process on your other computer.
Compare the two addresses to see if they are on the same subnet. Most networks have a subnet mask of 255.255.255.0, so the first three octets must match.
In the example above, the address is 192.168.119.129, so the other machine's address must start with 192.168.119 to match.
If the machines are not on the same subnet, change your virtual networking mode to "Bridged" as explained in project 7.
If you cannot connect with bridged networking, you could make a second virtual machine on the same host and set the networking to "NAT" on both machines instead.
Near the top of the search results, click "View network connections".
The Network Connections window opens, as shown below:
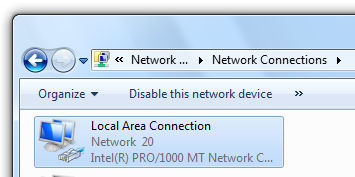
Right-click "Local Area Connection" and click Properties.
In the "Local Area Connection Properties" box, double-click "Internet Protocol Version 6 (TCP/IPv6)".
In the "Internet Protocol Version 6 (TCP/IPv6) Properties" box, click the "Use the following IPv6 address" button.
Carefully enter these values, as shown below:
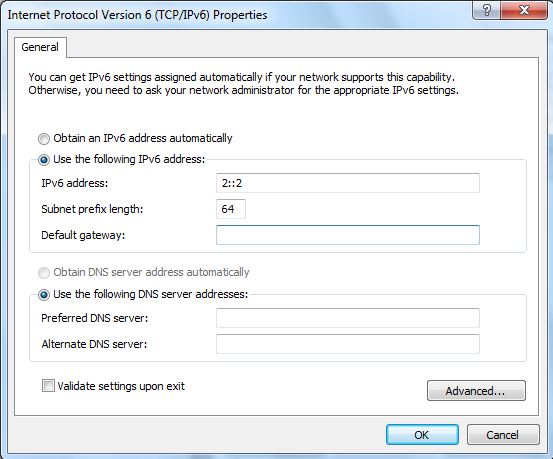
In the "Internet Protocol Version 6 (TCP/IPv6) Properties" box, click OK.
In the "Local Area Connection Properties" box, click OK.
In "Network and Sharing Center", on the left side, click "Manage network connections".
Right-click "Local Area Connection" and click Properties.
In the "Local Area Connection Properties" box, double-click "Internet Protocol Version 6 (TCP/IPv6)".
In the "Internet Protocol Version 6 (TCP/IPv6) Properties" box, change the IPv6 address to 2::2 with a subnet prefix length of 64, as shown in the image above.
In the "Internet Protocol Version 6 (TCP/IPv6) Properties" box, click OK.
If a warning box pops up about the blank DNS server field. Click OK.
In the "Local Area Connection Properties" box, click OK.
You have now created an impossible situation: two machines with the same address. Or have you?
In the "Local Area Connection Status" box, click the Details button.
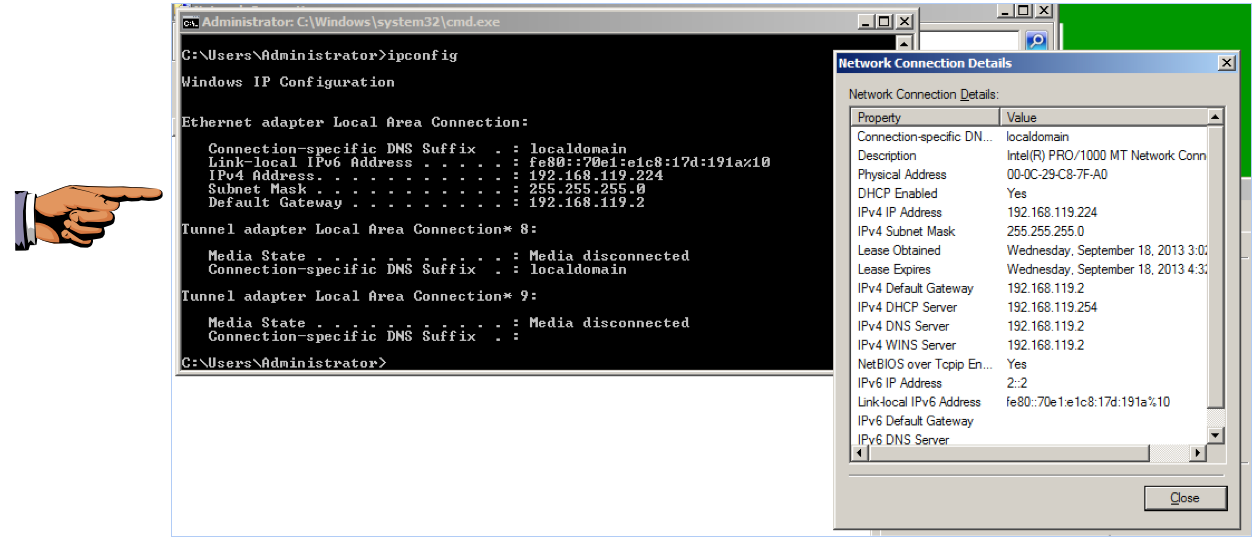
The "Network Connection Details" box should now show an IPv6 address of "2::2", as shown below.
On your Windows Server 2008 machine, in the Command Prompt window, type this command, and then press Enter:
ipconfig
Move the windows so both the IPCONFIG and Status addresses are visible at the same time.
As shown below, they do not agree. IPCONFIG shows the truth: the adapter did not accept the 2::2 address. The only IPv6 address it has is one starting with "fe80", the so-called "Link-Local IPv6 Address".
This is sad state of affairs--Windows is lying to you. The graphical "Status" tool is wrong, and the command line is correct, as you can verify by pinging 2::2 on both machines. Windows 7 got that address and Windows Server 2008 did not.
This is a very common problem with IPv6--vendors have not tested their products enough so they are full of bugs.
On your keyboard, press the PrntScrn key.
Click Start, type in PAINT, and open Paint.
Press Ctrl+V to paste in the image of your desktop.
YOU MUST SUBMIT WHOLE-DESKTOP IMAGES TO GET FULL CREDIT.
Save the image with a filename of "Proj 2x from YOUR NAME".
Last Modified: 9-18-13 4:16 pm