Download and install the latest Java version.
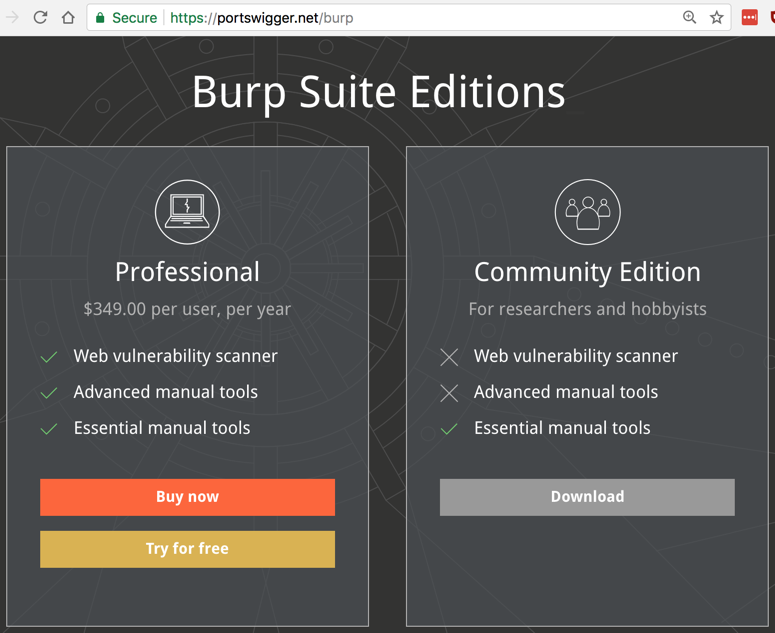
At the bottom of the "Community Edition" column, click "Download now", as shown below.
A "burpsuite_free_v1.7.03.jar" file downloads (you may have a more recent version). Double-click it to launch it.
In the first screen, accept the default selection of "Temporary project" and click Next. Click "Start Burp".
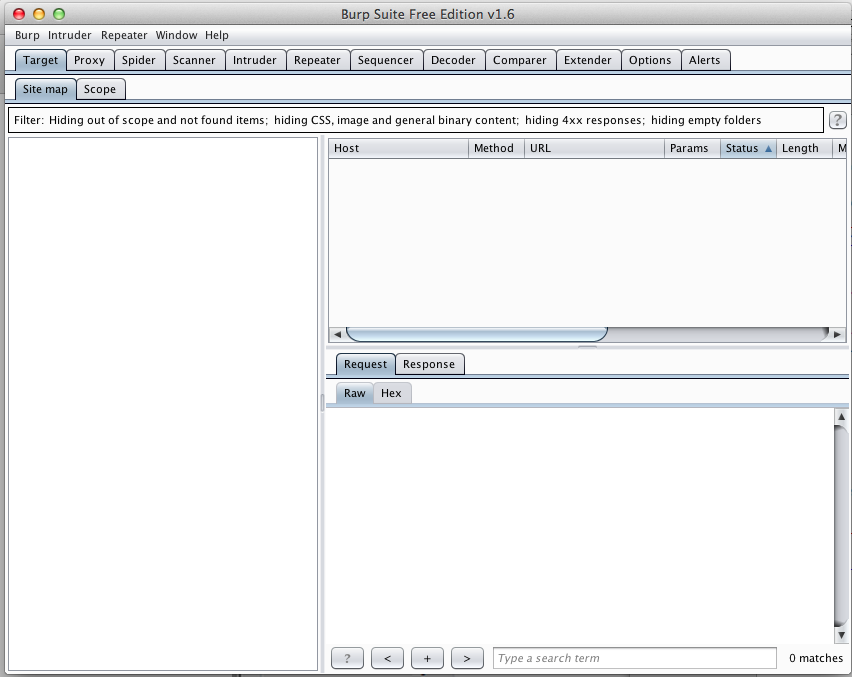
Burp opens, as shown below.
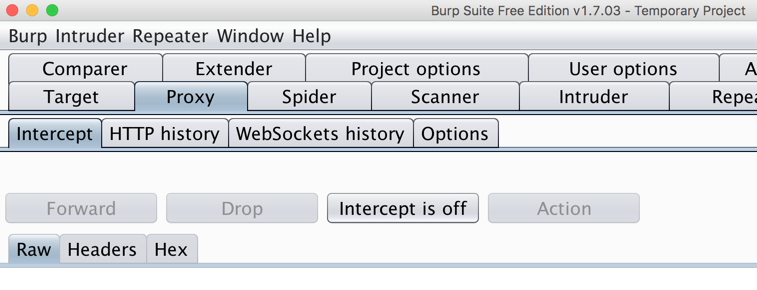
In Burp, click the Proxy tab. Click the Intercept button. If the button label reads "Intercept is on", click it to make it show "Intercept is off", as shown below.
To use Burp, you need to adjust the proxy settings on a browser on your computer. I recommend using Firefox for this purpose, so the other browsers like Chrome remain available for normal Internet use.
If you don't have Firefox, go here and get it:
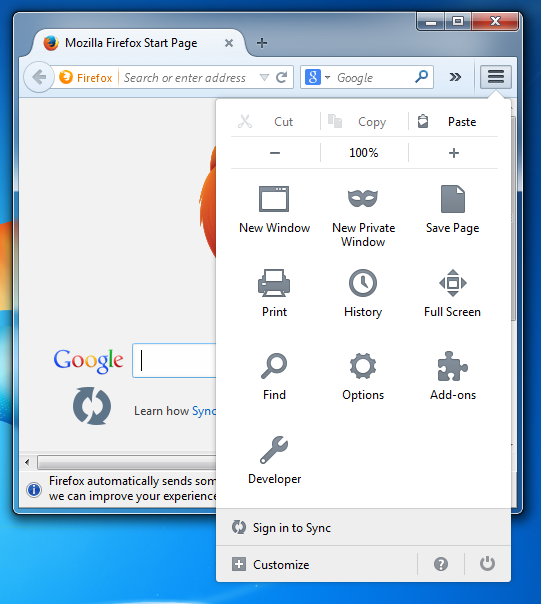
Once Firefox is installed and running, in the upper right corner, click the icon with three horizontal bars, as shown below.
Click the gear-shaped icon. If you are using a PC, it's labelled Options. If you are using a Mac, it's labelled Preferences.
On the left side, click Advanced.
On the Network tab, click the Settings button.
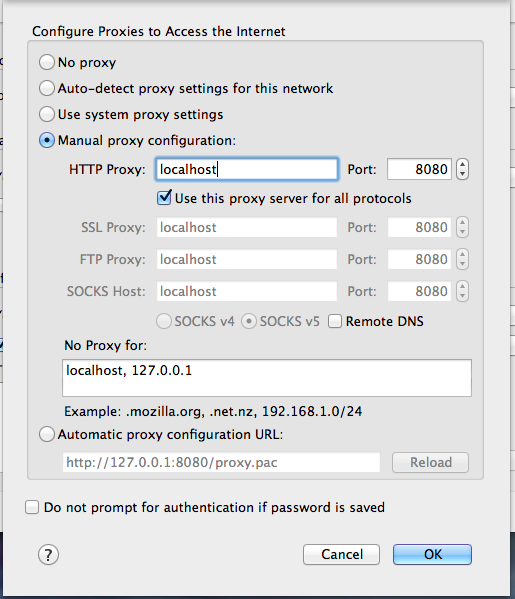
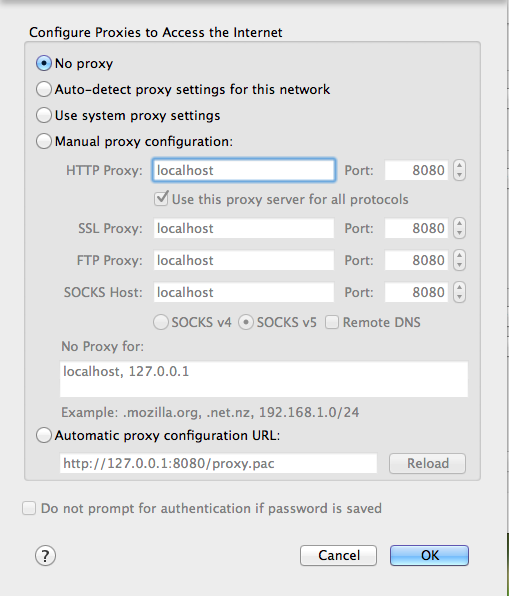
Click the "Manual proxy configuration" button and enter an HTTP Proxy address of 127.0.0.1 and a Port of 8080
Also check the "Use this proxy server for all protocols" box, as shown below.
Click OK.
If you are using a PC, click OK again.
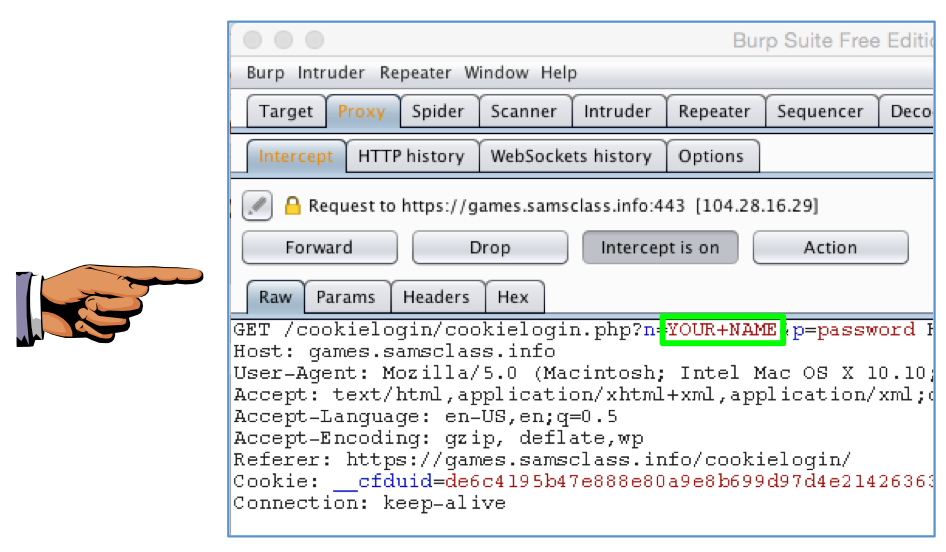
In the search bar, type your name, as shown below.
Then press Enter.
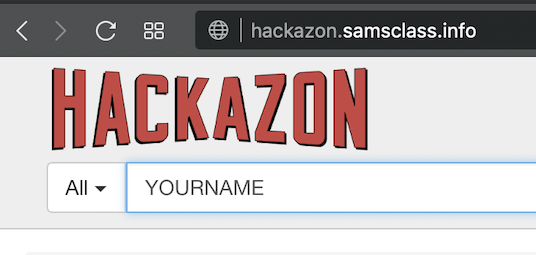
Don't use the literal text "YOUR NAME", use your own name.
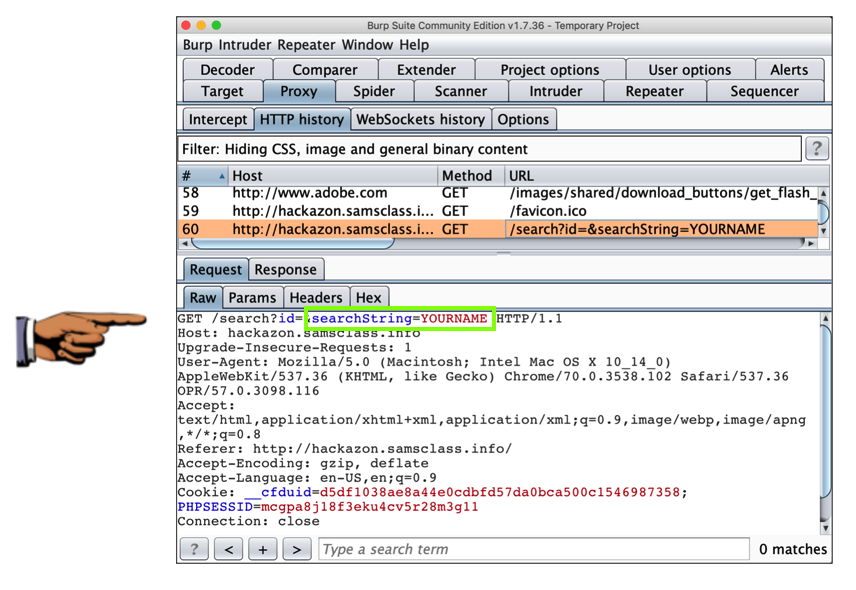
In Burp, click the Proxy tab. Click the "HTTP history" sub-tab.
Find the request to hackazon.samsclass.info containing your name, as shown below.
On your keyboard, press the PrntScrn key.
Click Start, type in PAINT, and open Paint.
Press Ctrl+V to paste in the image of your desktop.
YOU MUST SUBMIT WHOLE-DESKTOP IMAGES TO GET FULL CREDIT.
Save the image with a filename of "Proj 3a from YOUR NAME".
A certificate warning appears, as shown below.

Click Advanced, "Add exception", and "Confirm security exception".
Those warnings are telling you that your connection is being intercepted by a third-party (burp) which is pretending to be samsclass.info.
If the warning does not appear, that means a previous student has already confirmed the exception on that machine.
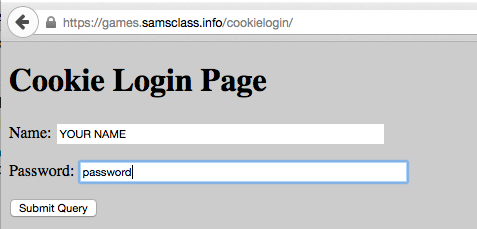
In the Cookie Login Page, type your name, as shown below.
Don't use the literal text "YOUR NAME", use your own name.
Enter a password of password
In Burp, click the "Intercept is off" button. The label changes to "Intercept is on", as shown below.
In Firefox, in the Cookie Login Page, click the "Log In" button.
In Burp, you want to capture the Burp shows the Web request shown below. If you see a different request, such as a "Detect Portal" request, click the Forward button. You may have to forward through several requests to get to the correct request.
Notice that your name appears in this request, even though it's encrypted.
That's because Burp is performing a man-in-the-middle attack, acting as a Certificate Authority, delivering a fake public key instead of the genuine samsclass.info key.
Your browser warned you about this problem, but when you added the security exception you told it to proceed anyway.
On your keyboard, press the PrntScrn key.
Click Start, type in PAINT, and open Paint.
Press Ctrl+V to paste in the image of your desktop.
YOU MUST SUBMIT WHOLE-DESKTOP IMAGES TO GET FULL CREDIT.
Save the image with a filename of "Proj 3b from YOUR NAME".
Your username and password are rejected. That's OK.
In Burp, click the Target tab.
In the lower set of tabs, click the Scope tab.
In the "Include in scope" section, click the Add button.
In the "Add URL to include in scope" box, in the "Host or IP range" field, enter samsclass.info as shown below.
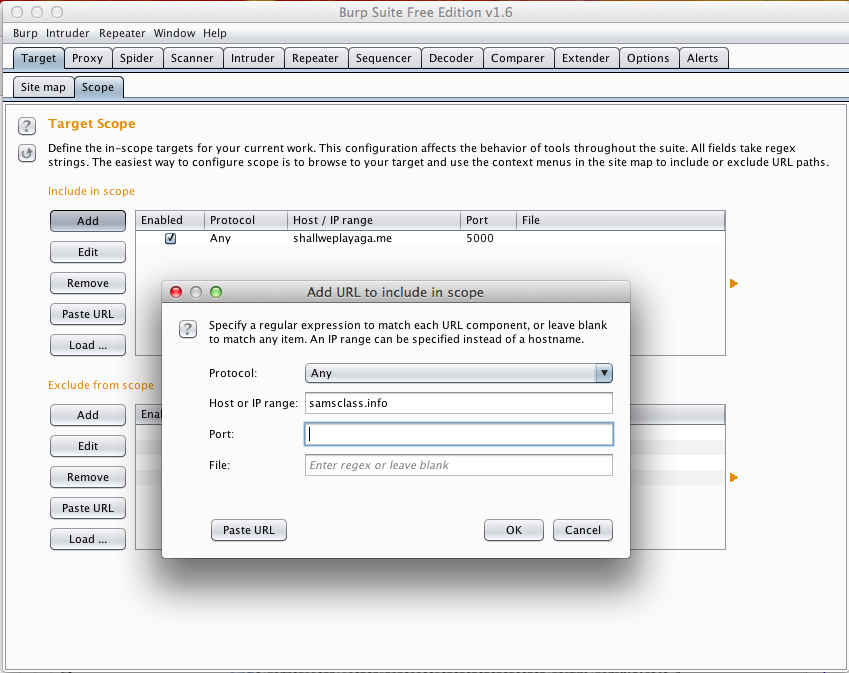
Click OK.
In Burp, click the "Site map" tab.
In Firefox, go to https://samsclass.info
If Firefox shows a messge saying "This Connection is Untrusted", click Advanced, "Add exception", and "Confirm security exception".
Burp shows the domain name samsclass.info, as shown below.
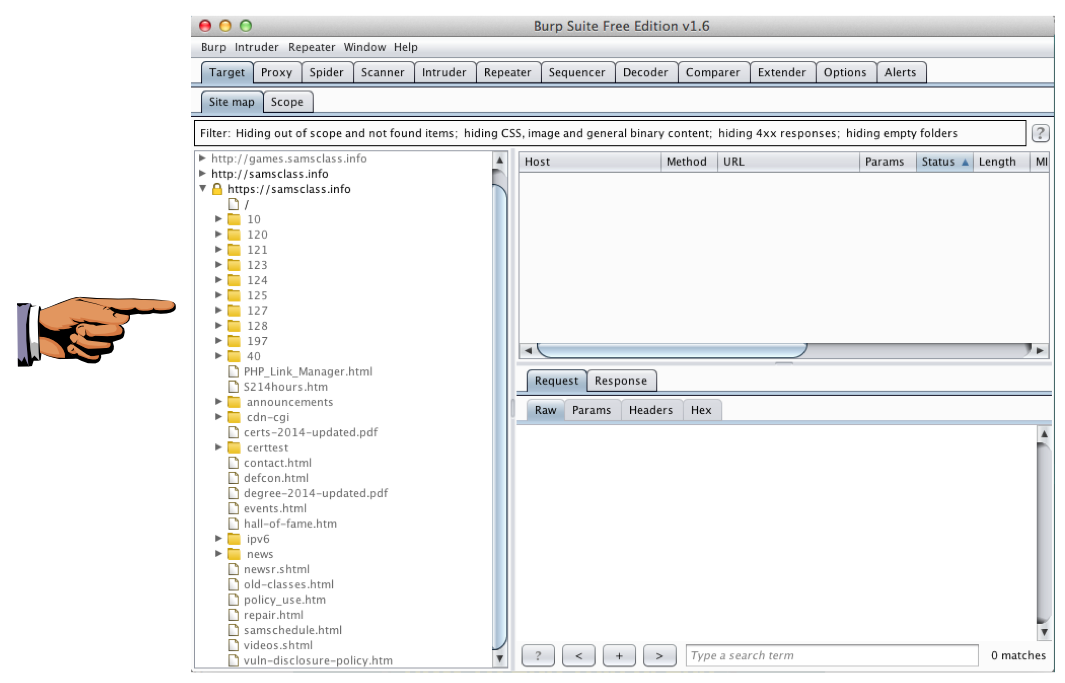
Expand the https://samsclass.info section, as shown above. All the files and folders are visible, making it easy to hunt for interesting items and security vulnerabilities.
On your keyboard, press the PrntScrn key.
Click Start, type in PAINT, and open Paint.
Press Ctrl+V to paste in the image of your desktop.
YOU MUST SUBMIT WHOLE-DESKTOP IMAGES TO GET FULL CREDIT.
Save the image with a filename of "Proj 3c from YOUR NAME".
Click the gear-shaped icon.
In the Options box, at the upper right, click Advanced.
Click the Network tab.
Click the Settings button.
Click the "No proxy" button, as shown below.
Click OK.
If you are using a PC, click OK again.