After installing a DNSCrypt client, you'll see that some private DNS traffic is now encrypted.
wireshark
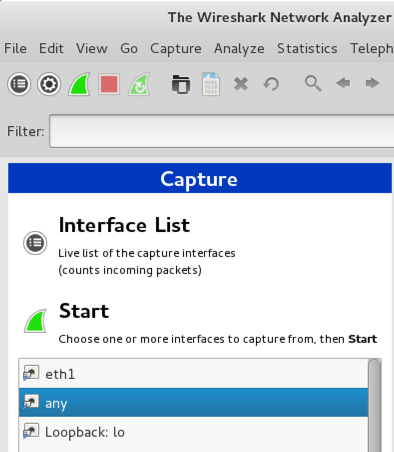
Open Wireshark. On the left side of the screen, click any, as shown below, and click Start.
At the top of the Wireshark window, in the Filter: bar, enter this code:
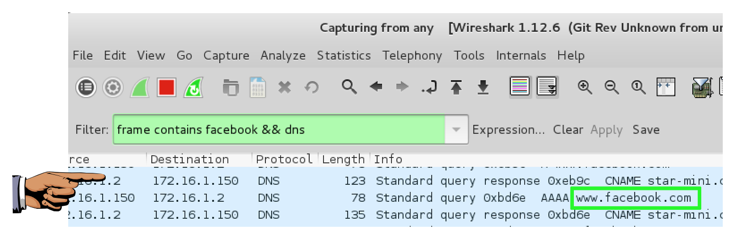
frame contains facebook && dns
Now Wireshark will only show DNS traffic containing "facebook".
Open the Firefox web browser and go to
Wireshark should show DNS traffic resolving domain names at facebook, as shown below. You may need to expand the window, or scroll sideways, to see it.
From the Wireshark menu bar, click Capture, Stop.
Capture a whole-desktop image.
Save the image with the filename "Your Name Proj 2xa". Use your real name, not the literal text "Your Name".
YOU MUST SUBMIT AN IMAGE OF THE WHOLE DESKTOP TO GET FULL CREDIT!
wget https://download.dnscrypt.org/dnscrypt-proxy/binaries/linux/dnscrypt-proxy-i486-linux-musl.tar.gz

tar xzf dnscrypt-proxy-i486-linux-musl.tar.gz
wget https://download.dnscrypt.org/dnscrypt-proxy/binaries/linux/dnscrypt-proxy-x86_64-linux-musl.tar.gz
tar xzf dnscrypt-proxy-i486-linux-musl.tar.gz

cd dnscrypt-proxy

./installer.sh

/opt/dnscrypt-proxy/i486-linux-musl/bin/dnscrypt-proxy /opt/dnscrypt-proxy/i486-linux-musl/etc/dnscrypt-proxy.conf
At the top of the Wireshark window, in the Filter: bar, enter this code:
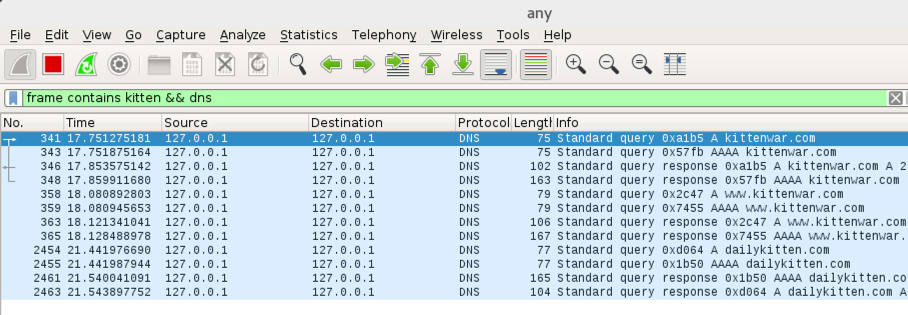
frame contains kitten && dns
Now Wireshark will only show DNS traffic containing "kitten".
In a Terminal window, execute this command:
dig @127.0.0.1 kittenwar.com
Wireshark shows DNS requests for kitten-related domains, but they aren't leaving your computer--they are going to 127.0.0.1, which is your own machine, as shown below.
From the Wireshark menu bar, click Capture, Stop.
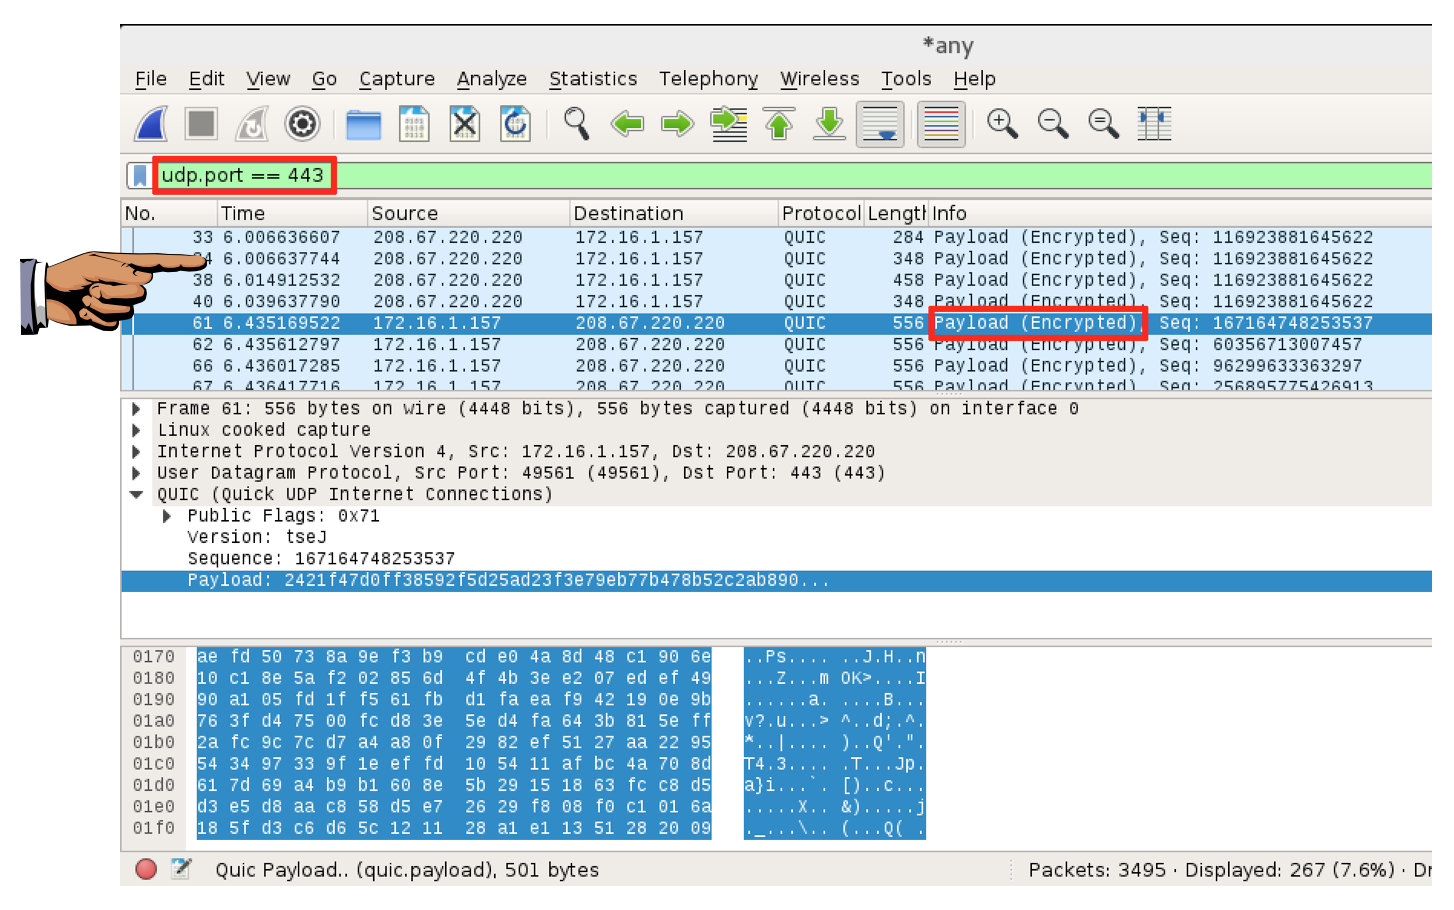
udp.port == 443
Wireshark now shows the DNSCrypt packets, as shown below. The domain names are encrypted and unreadable.
Capture a whole-desktop image.
Save the image with the filename "Your Name Proj 2xb". Use your real name, not the literal text "Your Name".
YOU MUST SUBMIT AN IMAGE OF THE WHOLE DESKTOP TO GET FULL CREDIT!