After installing a DNScurve client, you'll see that some private DNS traffic is now encrypted.
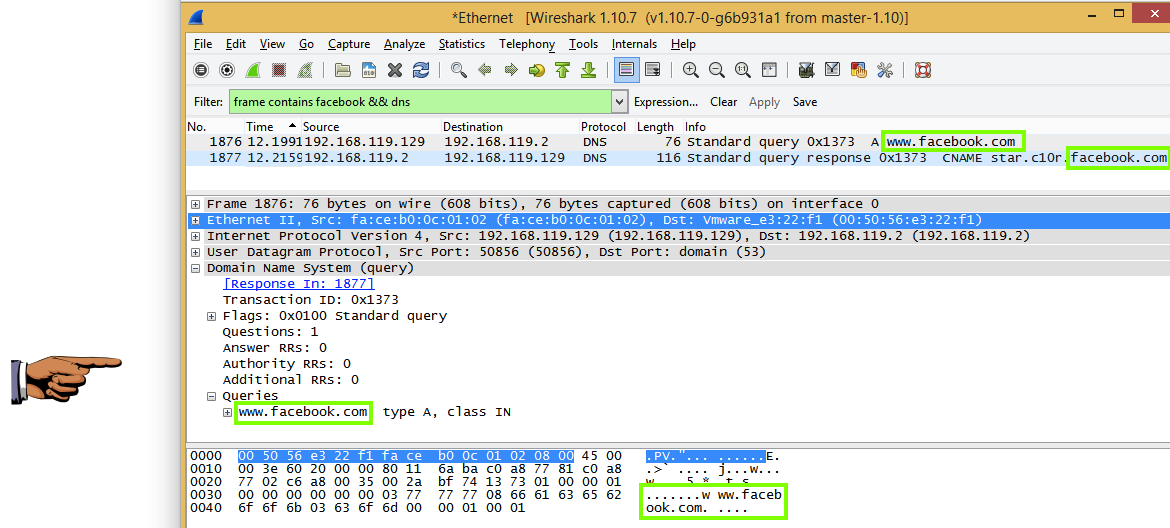
At the top of the Wireshark window, in the Filter: bar, enter this code:
frame contains facebook && dns
Now Wireshark will only show DNS traffic containing "facebook".
Open a Web browser and go to
Wireshark should show DNS traffic resolving the domain name, as shown below.
From the Wireshark menu bar, click Capture, Stop.
Click on the host machine's desktop.
Press Shift+PrintScrn. That will copy the whole desktop to the clipboard.
Open Paint and paste in the image.
Save the image with the filename "Your Name Proj 13a". Use your real name, not the literal text "Your Name". YOU MUST SUBMIT AN IMAGE OF THE WHOLE DESKTOP TO GET FULL CREDIT!
Monitoring DNS is a common technique used to catch employees doing forbidden Web surfing at work.
To maintain privacy, this traffic should be encrypted, but the DNS protocol doesn't include that option.
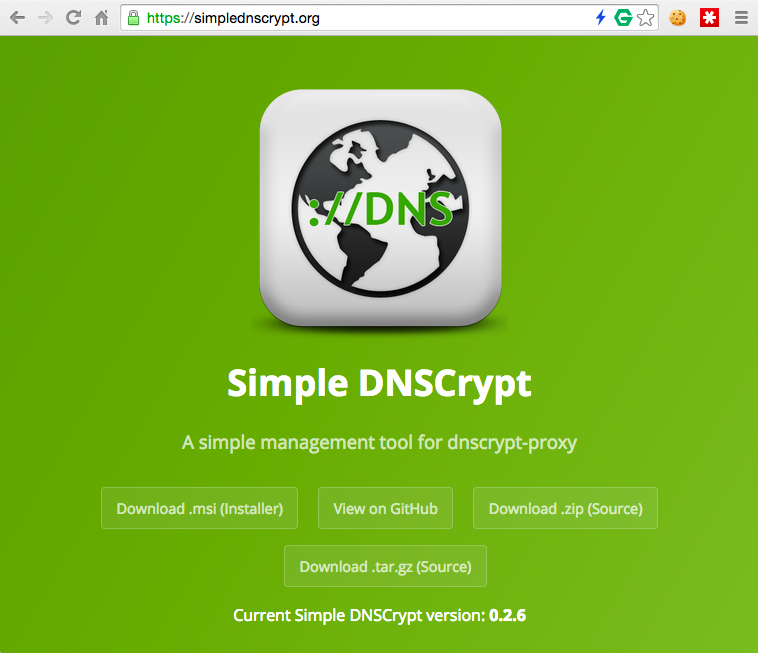
Click the "Download .msi (Installer)" button, as shown below.
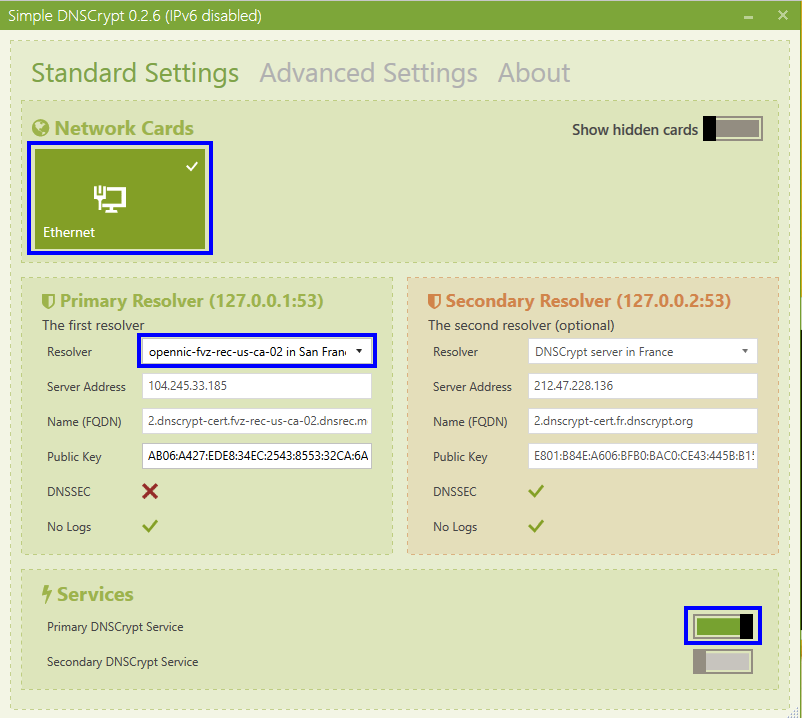
Install the software with the default options. After the installation, a "Standard Settings" box appears, as shown below.
You need to make three changes here, as indicated by the blue boxes above.
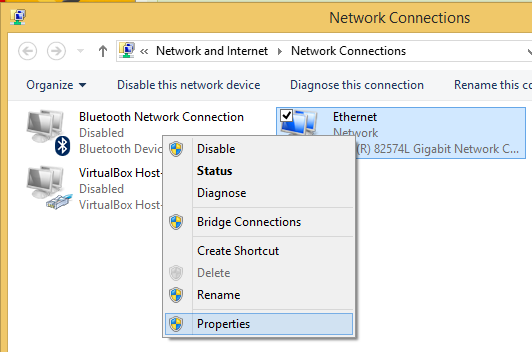
Click Start. Type "NETWORK AND SHARING". Open "Network and Sharing Center". In the top left, click "Change adapter settings". (Note: On some Windows versions, this link is labelled "Manage network connections" instead.)
Right-click the adapter that connects to the Internet and click Properties, as shown below.
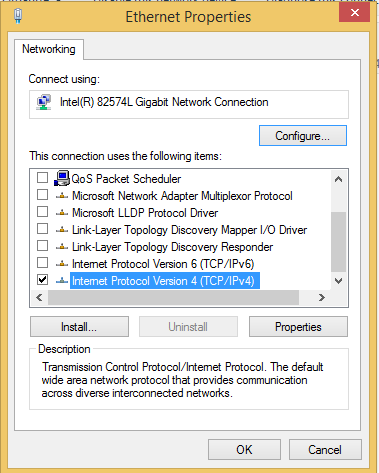
In the "Ethernet Properties" box, scroll down and double-click "Internet Protocol Version 4 (TCP/IPv4)", as shown below.
In the "Internet Protocol Version 4 (TCP/IPv4) Properties" sheet, in the lower section, select "Use the following DNS server addresses" and enter a "Preferred DNS server" of 127.0.0.1, as shown below.
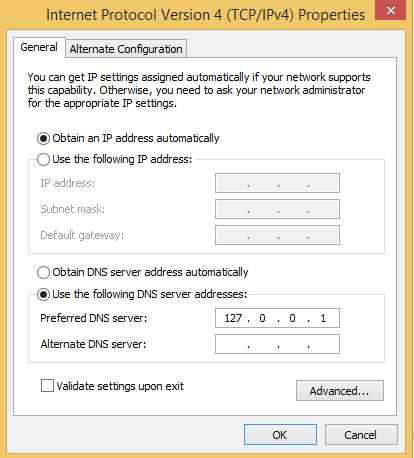
Click OK. Click OK.
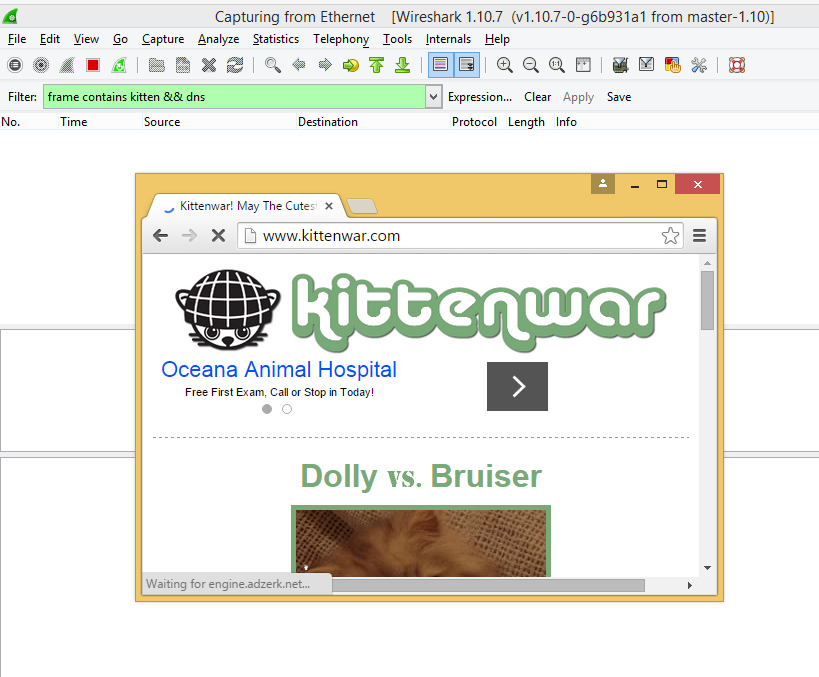
At the top of the Wireshark window, in the Filter: bar, enter this code:
frame contains kitten && dns
Now Wireshark will only show DNS traffic containing "kitten".
Open a Web browser and go to
The Web page opens, but Wireshark doesn't find any kitten-related DNS packets, as shown below.
From the Wireshark menu bar, click Capture, Stop.
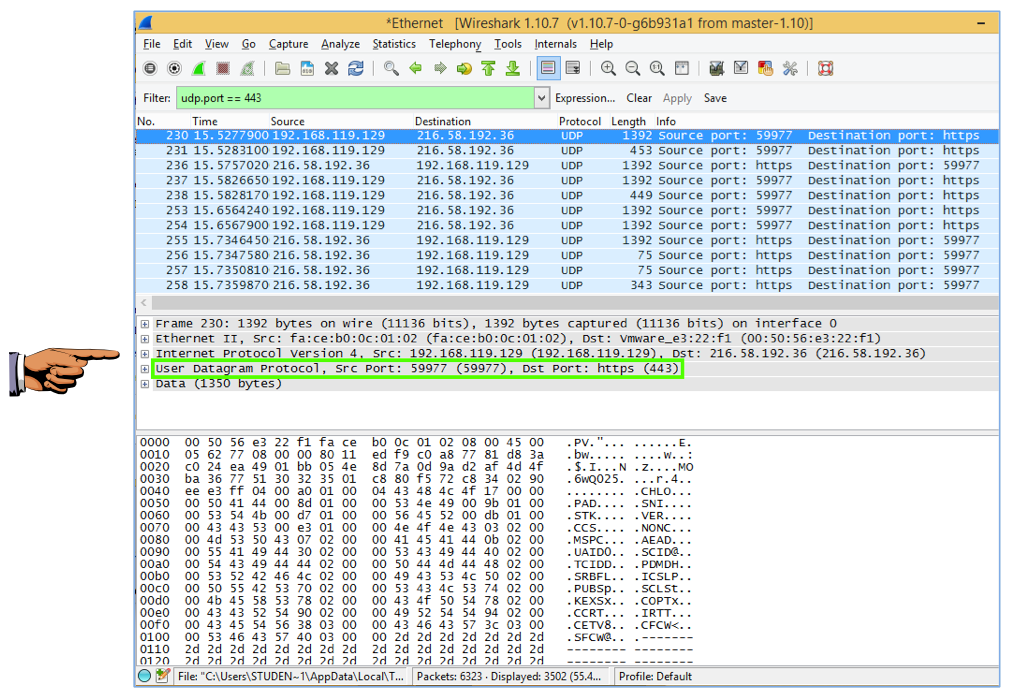
udp.port == 443
Wireshark now shows the DNSCurve packets, as shown below. The domain names are encrypted and unreadable.
In the middle pane of Wireshark, the layer 4 line should show "User Datagram Protocol" and either a "Src Port" or "Dst Port" of 443, as shown below.
Click on the host machine's desktop.
Press Shift+PrintScrn. That will copy the whole desktop to the clipboard.
Open Paint and paste in the image.
Save the image with the filename "Your Name Proj 13b". Use your real name, not the literal text "Your Name". YOU MUST SUBMIT AN IMAGE OF THE WHOLE DESKTOP TO GET FULL CREDIT!