
In the right pane, click "Add Roles".
In the "Before You Begin" screen, click Next.
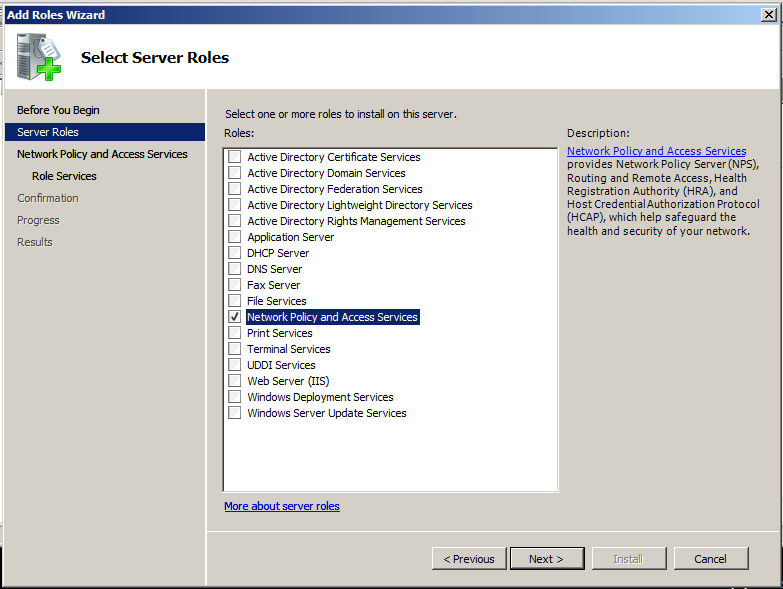
In the "Select Server Roles" screen, check the "Network Policy and Access Services" role, as shown below, and then click Next.
In the "Introduction to Network Policy and Access Services" screen, click Next.
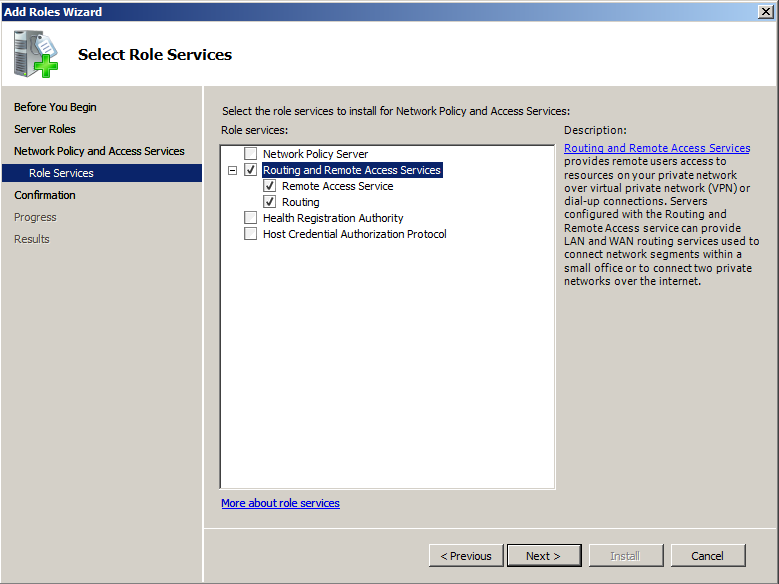
In the "Select Role Services" screen, check "Routing and Remote Access Services", as shown below, and then click Next.
In the "Confirm Installation Selection" screen, click Install.
When you see the "Installation succeeded" message, click Close.
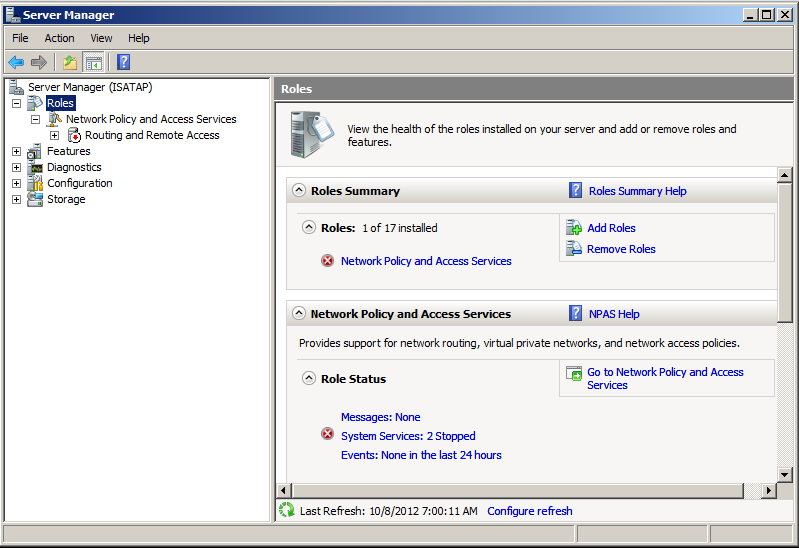
In the left pane of "Server Manager", right-click on "Routing and Remote Access" and click "Configure and Enable Routing and Remote Access".
In the "Welcome to the Routing and Remote Access Server Setup Wizard" screen, click Next.
In the "Configuration" screen, click "Custom configuration, as shown below, and click Next. (You might expect to use the top option, but that requires two network interfaces.)

In the "Custom Configuration" screen, click "VPN access, and click Next.
In the "Completing the Routing and Remote Access Server Setup Wizard" screen, click Finish.
A box pops up saying "Start the service". Click the "Start service" button.
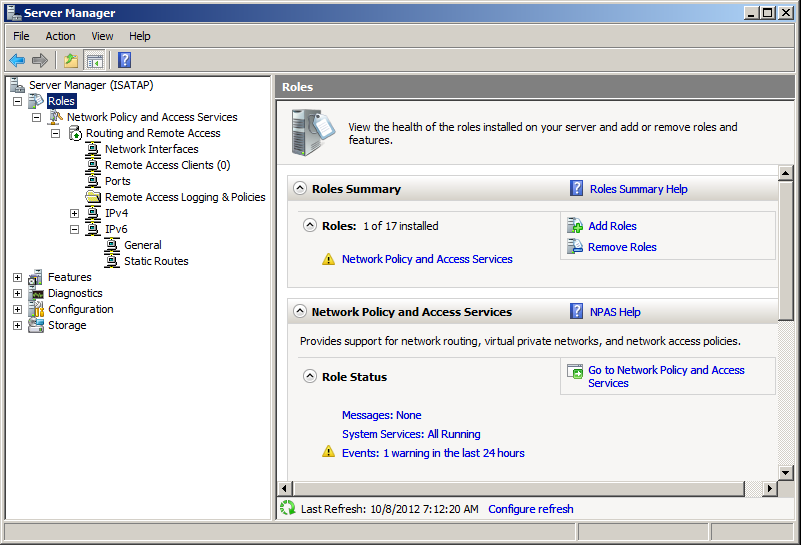
In the left pane of "Server Manager", the "Routing and Remote Access" item gets marked with a little green up-arrow badge, and expands to show several items, as shown below:
In the Command Prompt window, type IPCONFIG and press Enter.
Make a note of your IP address.
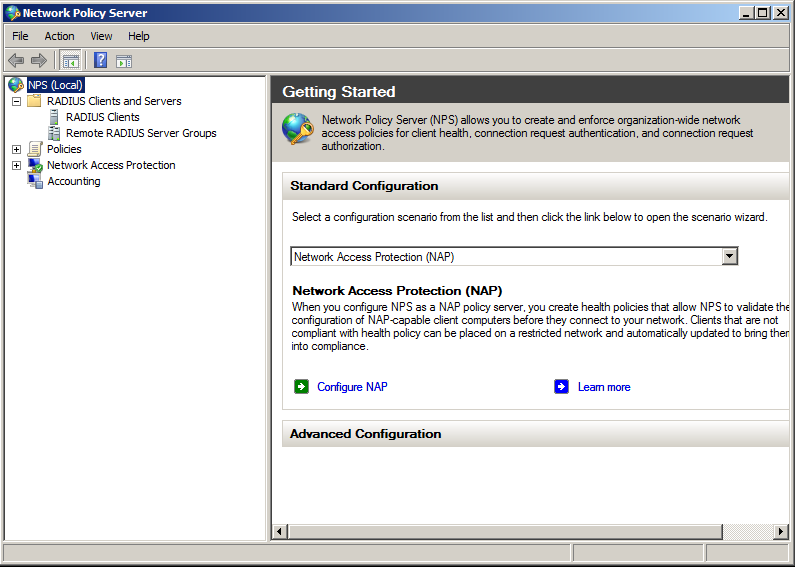
Click Start, "All Programs", "Administrative Tools", "Network Policy Server".
In the left pane of the "Network Policy Server" window, expand "RADIUS Clients and Servers", as shown below:
Right click on "RADIUS Clients and click "New RADIUS Client".
In the "New RADIUS Client" box, make these entries, as shown below:
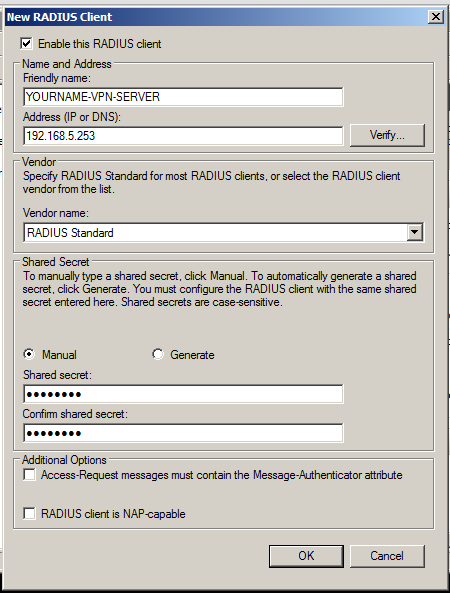
In the "New RADIUS Client" box, click OK.
In the left pane of the "Network Policy Server" window, expand Policies, as shown below:
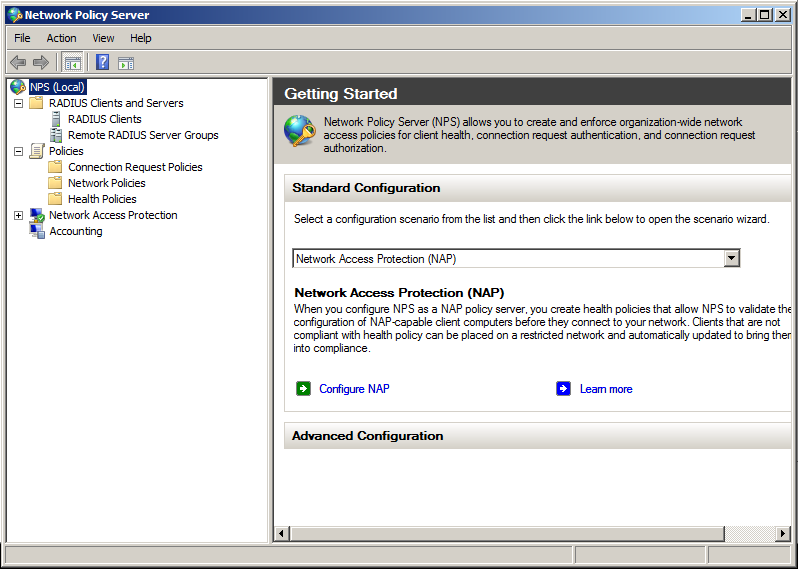
In the left pane of the "Network Policy Server" window, right-click "Network Policies" and click New.
In the "Specify Network Policy Name and Connection Type" box, enter a "Policy Name" of YOURNAME-VPN.
Select a "Type of network access server" of "Remote Access Server (VPN-Dial up)", as shown below:
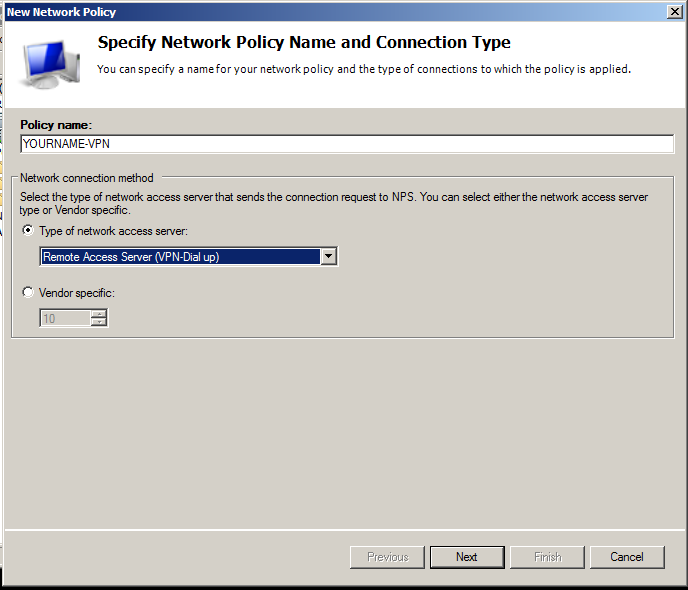
In the "Specify Network Policy Name and Connection Type" box, Click Next.
In the "Specify Conditions" box, click Add.
In the "Select condition" box, click "User Groups" as shown below:

In the "Select condition" box, click Add....
In the "User Groups" box, click "Add Groups...".
In the "Select Group" box, type Users, as shown below:
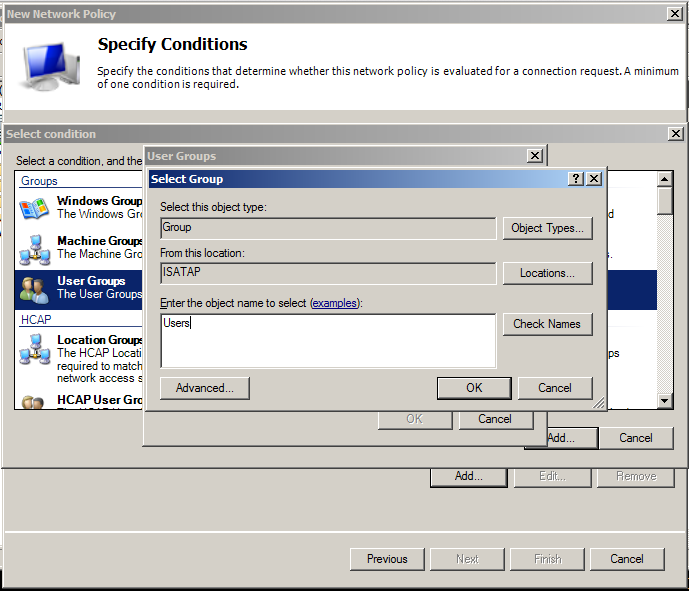
Note: It's better to define a "VPN Users" group, either locally or in Active Directory, and add the authorized accounts to that. I am just allowing all Users in to make the project simpler.
In the "Select Group" box, click OK.
In the "User Groups" box, click OK.
In the "Specify Conditions" box, click Next.
In the "Specify Access Permission" box, accept the default selection of "Access granted" and click Next.
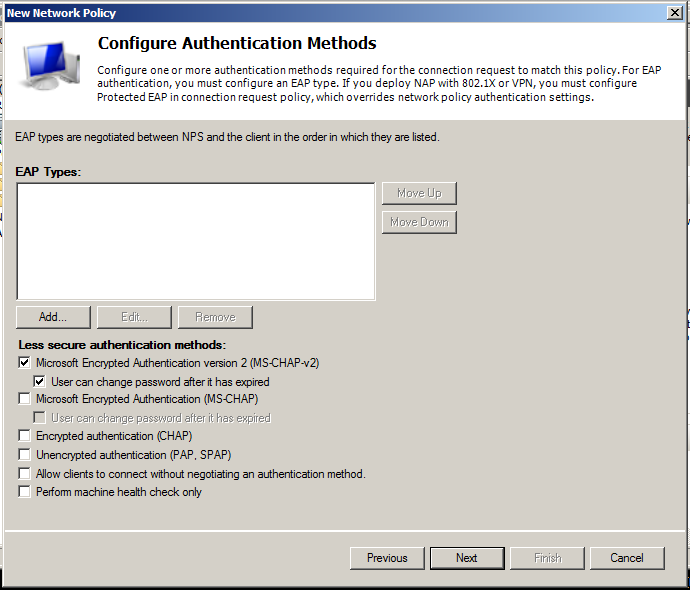
In the "Configure Authentication Methods" box, clear the "Microsoft Encrypted Authentication (MS-CHAP)" box, as shown below, and then click Next. We will allow only the most secure option available, MS-CHAP-v2.
In the "Configure Constraints" box, in the left pane, click "NAS Port Type".
In the right pane, in the "Common dial-up and VPN tunnel types" section, click "Virtual (VPN)", as shown below:
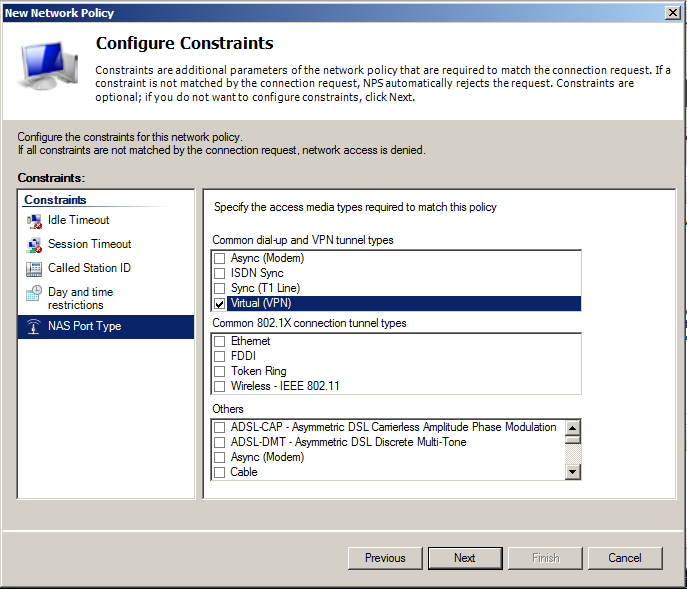
In the "Configure Constraints" box, click Next.
In the "Configure Settings" box, in the left pane, click Encryption.
In the right pane, notice that Microsoft is calling 56-bit encryption "Strong", which is pretty outrageous.
Clear all the check boxes except "Strongest encryption (MPPE 128-bit)", as shown below:
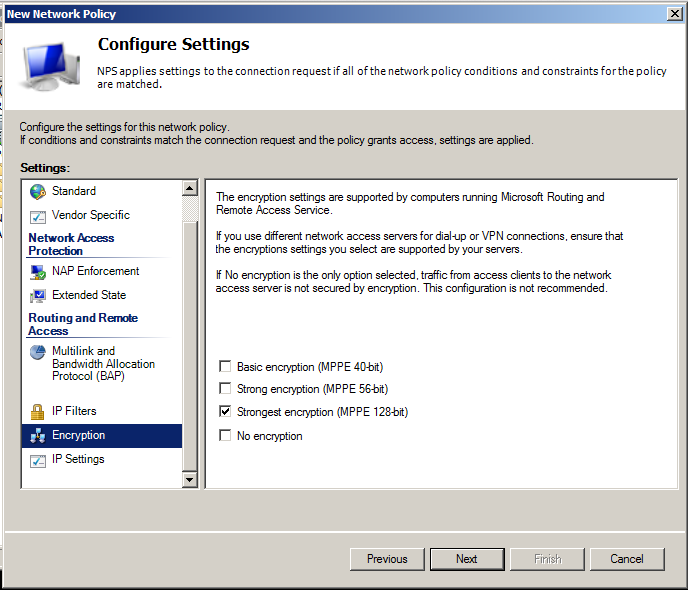
In the "Configure Settings" box, click Next.
In the "Completing New Network Policy" box, click Finish.
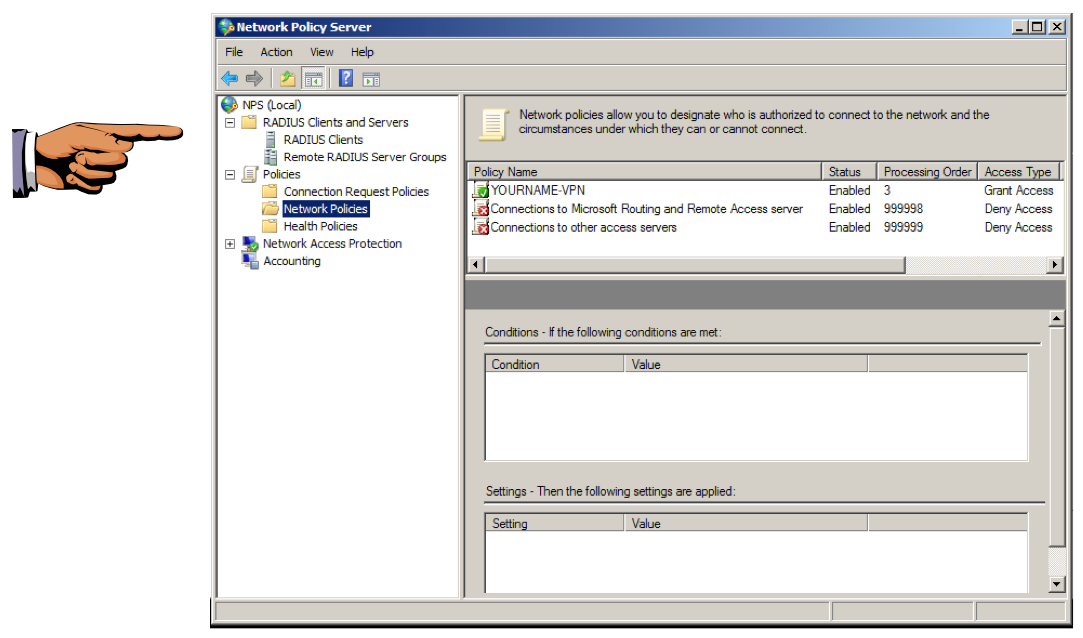
In the left pane of the "Network Policy Server" window, click "Network Policies".
The YOURNAME-VPN item should appear in the right pane, as shown below:
Press the PrntScrn button to capture the whole desktop.
YOU MUST SUBMIT A WHOLE-DESKTOP IMAGE FOR FULL CREDIT
Save a screen capture with a filename of "Proj 5xa from YOUR NAME".
If you have been using an account with no password, add a password to your account now.
The instructions below assume you log in to your Windows Server 2008 machine as "Administrator" with a password of "P@ssw0rd", which is obviously insecure.
In the "Network Connections" window, on the VPN tab, click the Add button, as shown below:
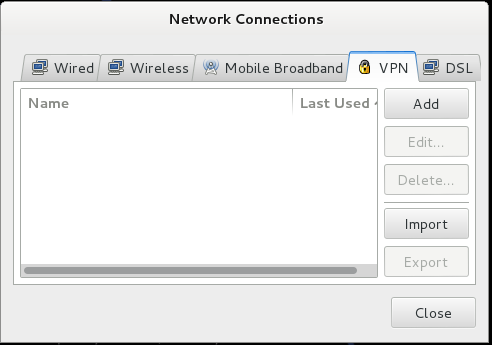
In the "Choose a VPN Connection Type", accept the default of "Point-to-Point Tunneling Protocol (PPTP)" and click Create.
Troubleshooting
If the "Add" button is grayed out, do this:
Then restart Kali.sudo apt-get install network-manager-openvpn network-manager-pptp network-manager-vpnc network-manager-pptp-gnome -yThis should not be necessary if you are using the Kali I handed out in class because I already did it.
In the "Editing VPN connection" box, type your Windows server's IP address into the "Gateway" field, and fill in a User name of Administrator and a Password of P@ssw0rd as shown below:
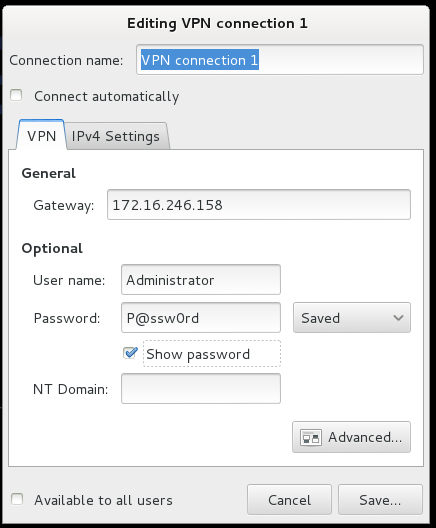
Click the Advanced button.
In the "PPTP Advanced Options" box, opens with PAP highlighted, as shown below.
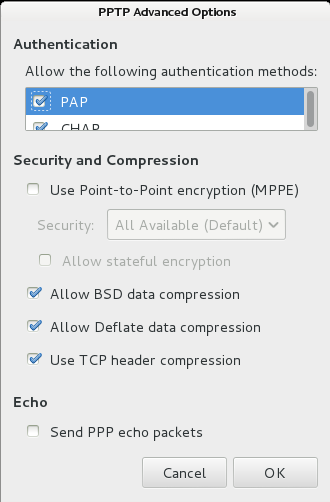
Press the SPACEBAR to uncheck PAP.
Press the down-arrow key to select CHAP and press the SPACEBAR to uncheck it.
Press the down-arrow key to select MSCHAP and press the SPACEBAR to uncheck it.
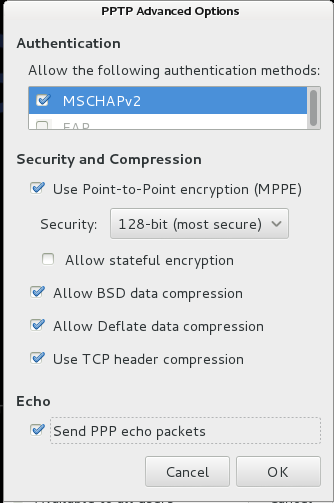
Press the down-arrow key. Leave MSCHAPv2 checked.
Press the down-arrow key to select EAP and press the SPACEBAR to uncheck it.
Click the "Use Point-to-Point encryption (MPPE)" box. In the Security drop-down list, select "128-bit (most secure)", as shown below.
At the bottom of the PPTP Advanced Options box, click "Send PPP echo packets", as shown below.
In the PPTP Advanced Options box, click OK.
In the "Editing VPN connection 1" box, click Save.
In the "Network Connections" box, click Close.
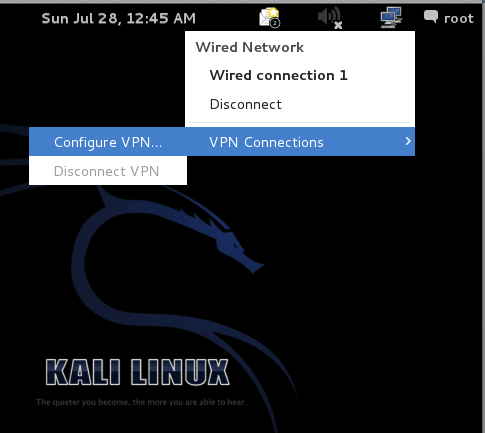
On your Kali Linux desktop, at the upper right, click the icon that shows two blue computer screens, click "VPN Connections", and click "VPN connection 1", as shown below:

A littie yellow dot moves around on the icon that shows two blue computer screens, and when it stops, the connection is made.
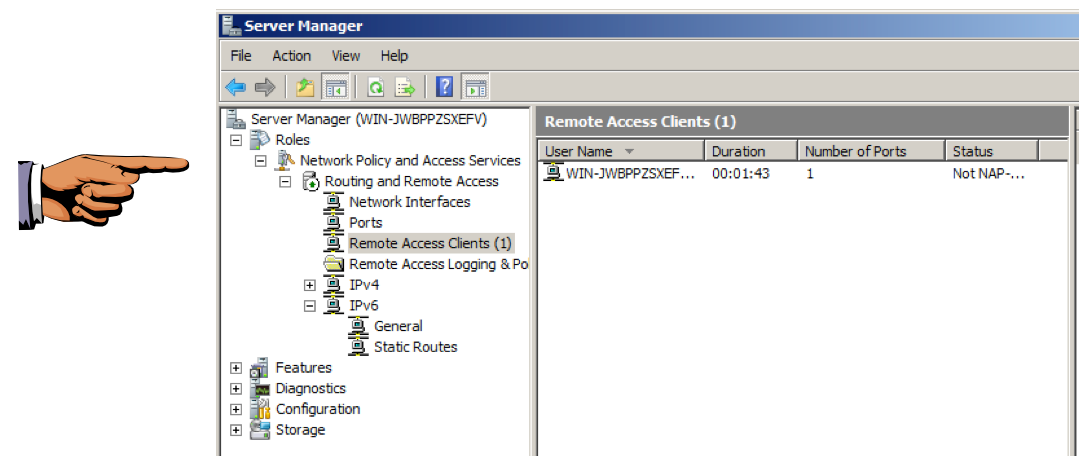
In the left pane, click "Remote Access Clients (1)". Your connection should appear in the right pane, as shown below:
Save a screen capture with a filename of "Proj 5xb from YOUR NAME".
Email the images to cnit.120@gmail.com with a subject of "Project 5x from YOUR NAME".
http://www.cyberciti.biz/faq/deiban-ubuntu-linux-networkmanager-pptp-cisco-vpn-tab-disabled/
http://ivan.kanis.fr/vpn-greyed-out-in-debian-squeeze.html
http://www.ghacks.net/2010/03/02/connecting-to-a-microsoft-vpn-with-linux/
Last modified: 7-27-13 9:30 pm