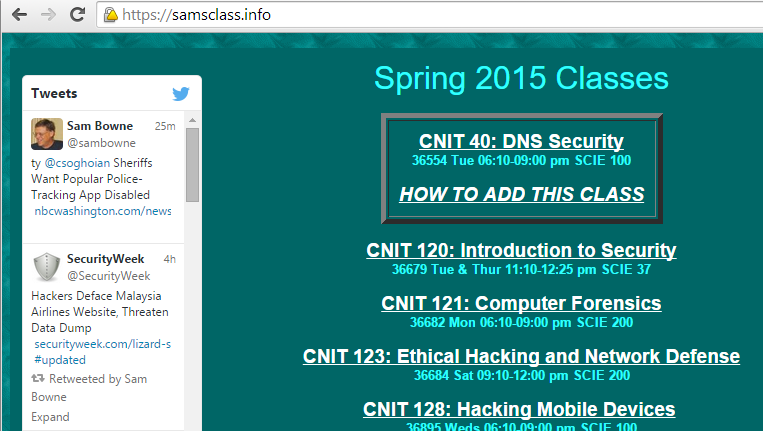
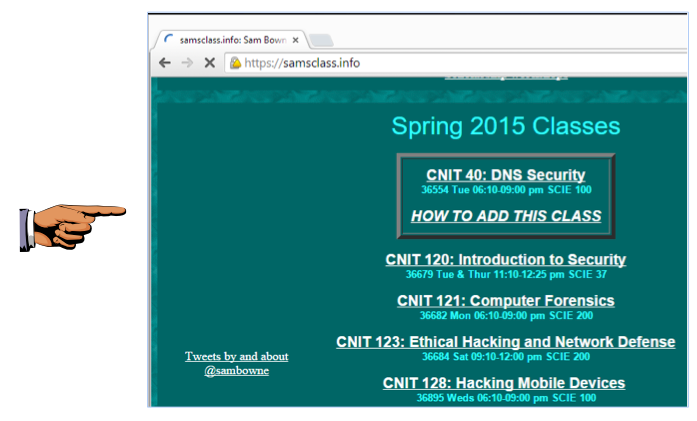
You can see the Twitter feed on the left side of the page, as shown below.
The Twitter widget loads from platform.twitter.com.
Press the Windows logo key, next to the Ctrl key at the lower left of your keyboard.
Type RESTORE into the Search box.
Click "Create a Restore Point".
"System Properties" opens, as shown below.
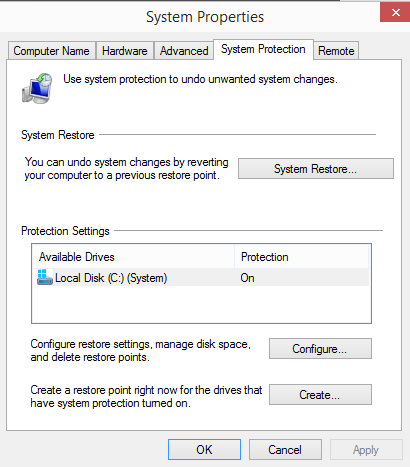
In the "System Properties" box, click "Create".
In the "Create a restore point" box, enter a name of "Your Name - Before ad-blocking" and click the Create button. Wait while the restore point is created.
A box appears saying "The restore point was created successfully". Click Close.
Close "System Properties".
Click Start. Type in NOTEPAD.
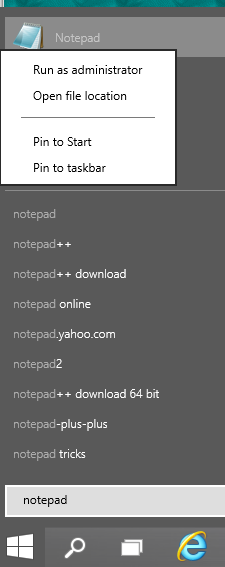
In the Search results, point to Notepad and right-click.
In the context menu, click "Run as Administrator", as shown below.
In the User Account Control box, click Yes.
In the Notepad window, click File, Open.
Navigate to the C:\Windows\System32\Drivers\etc folder.
In the lower right portion of the Open box, set the file type to "All files (*.*)", as shown below on this page.
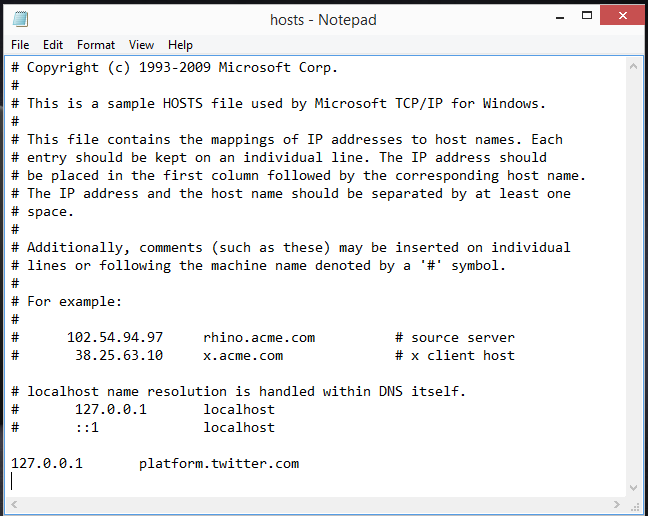
Double-click the hosts file.
Add this line to the end of the hosts file, as shown below on this page:
127.0.0.1 platform.twitter.com
Press Ctrl+S to save the file.
Close Notepad.
This entry will redirect platform.twitter.com to the localhost, which is not a Web server, and won't provide the Widget. As far as your machine is concerned, that Web site has vanished.
In the Search results, point to Command prompt and right-click.
In the context menu, click "Run as Administrator".
In the User Account Control box, click Yes.
In the Administrator Command Prompt window, type this command, and then press the Enter key:
ipconfig /flushdns
In the browser, press Shift+Ctrl+R to reload the page.
The Widget shoulld be gone, as shown below. In its place, you see the text "Tweets by and about @sambowne".
Press Shift+PrntScrn to copy the entire desktop to the clipboard.
Open Paint and paste in the image.
Save the image with the filename "YOUR NAME Proj 6a", replacing "YOUR NAME" with your real name.
YOU MUST SUBMIT A FULL-SCREEN IMAGE FOR FULL CREDIT!
and type RESTORE into the Search box.
Click "Create a Restore Point".
"System Properties" opens, as shown below.
In the "System Properties" box, click "System Restore".
In the "Restore system files and settings" box, click Next.
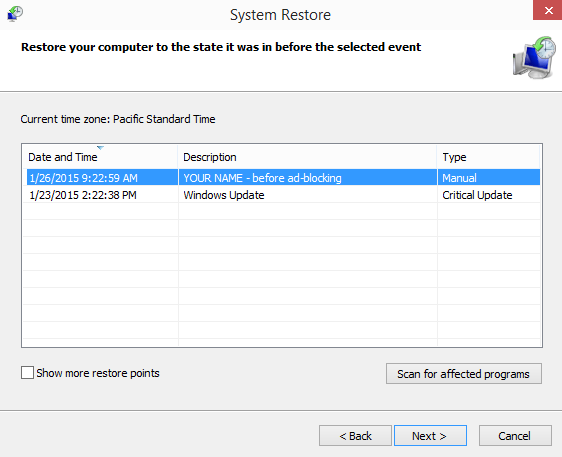
In the "Restore system files and settings" box, click the restore point with your name on it, as shown below.
In the "System Restore" box, click Next.
Click Finish.
Another box pops up, saying "System Restore cannot be interrupted". Click Yes.
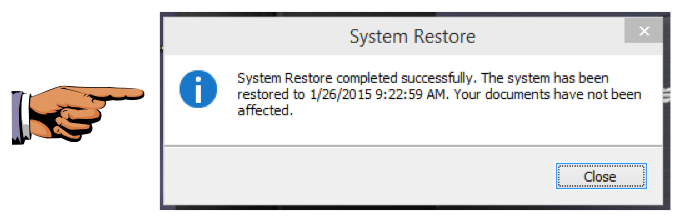
The restore completes, and your machine restarts. Log in as before. You should see a message saying "System Restore completed successfully", as shown below.
Press Shift+PrntScrn to copy the entire desktop to the clipboard.
Open Paint and paste in the image.
Save the image with the filename "YOUR NAME Proj 6b", replacing "YOUR NAME" with your real name.
YOU MUST SUBMIT A FULL-SCREEN IMAGE FOR FULL CREDIT!