At the top of the page, click Download.
On the next page, click a mirror link. When I did it, the only mirror was "HTTP – GAAR PRIMARY mirror".
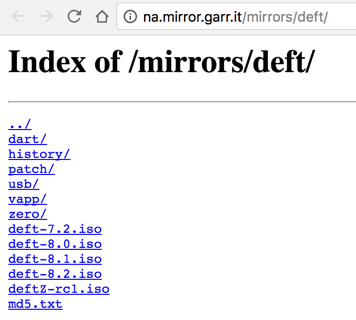
On the next page, click the latest ISO version. When I did it, it was deft-8.2.iso, as shown below.
The download tok 2 hours when I did it on the CCSF campus. The file is on some of the computers in the S214 lab, so you can copy it there, to make it faster.
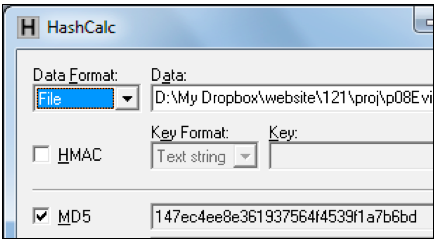
Drag the deft8.2.iso file and drop it on the HashCalc window.
Verify that the MD5 hash value matches the image shown below. This proves that your download worked properly.

Click "Create a new Virtual Machine".
In the "New Virtual Machine Wizard", click the "I will install the operating system later" button, as shown below. Click Next.

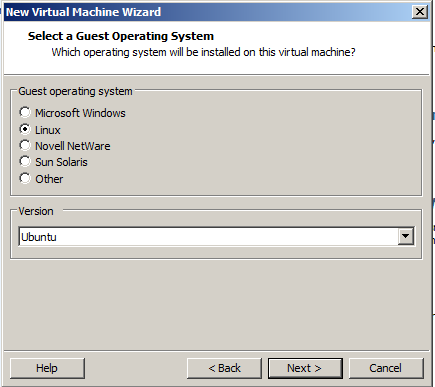
In the "Select a Guest Operating System" box, select Linux and Ubuntu, as shown below. Click Next.
Note: This is important so VMware will use the right mouse driver, especially on netbooks and systems with USB mice.
In the "Name the Virtual Machine" box, enter a Virtual machine name of YOURNAME-Proj10.
Set the Location to the YOURNAME-proj10 folder on the VMs-S214 drive. Click Next. In the "Specify Disk Capacity" box, accept the default options and click Next.
In the "Ready to Create Virtual Machine" box, click the "Customize Hardware" button.
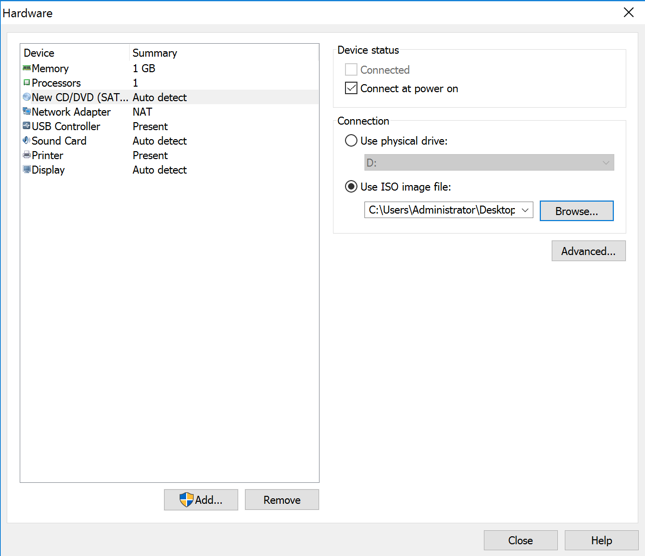
In the Hardware box, in the left pane, click "New CD/DVD". In the right pane, click "Use ISO image file". Click the Browse... button and navigate to your deft-8.2.iso file, as shown below.
In the Hardware box, click Close.
In the "Ready to Create Virtual Machine" box, click Finish.
In VMware Player, on the right side, click "Play virtual machine".
You should see a DEFT bootup screen, as shown below. If you don't, you need to increqse the Vmware boot delay and change the BIOS boot order.

Don't bother booting up your VM further at this point, because you don't have the evidence drive connected yet. In VMware Player, click Player, Power, "Shut down guest", and Yes.
Click Start, Computer. Open the VMs-S214 drive. Open the folder with your name on it. Make a subfolder named YOURNAME-proj10.
Right-click on the link below, and save this Evidence File on your desktop :
http://samsclass.info/proj/p10Evidence.zip
On your desktop, right-click the p10Evidence.zip file and click "Extract All", Extract. A window opens containing a file named "Windows 2000 Professional-sparse.vmdk". Copy that file into the your YOURNAME-proj10 folder on the VMs drive. This is a virtual hard disk containing evidence.
Verify that the MD5 hash value matches the image shown below. This proves that your download worked properly.
If you are using Mac OS X, use the command-line utility md5, as shown below:

In the "Virtual Machine Settings" box, click the Add... button.
In the "Hardware Type" box, click "Hard Disk". Click Next.
If it asks for a drive type, select IDE
In the "Select a Disk" box, click "Use an existing virtual disk". Click Next.
In the "Select an Existing Disk" box, click the Browse... button. Navigate to your "Windows 2000 Professional-sparse.vmdk" file and double-click it.
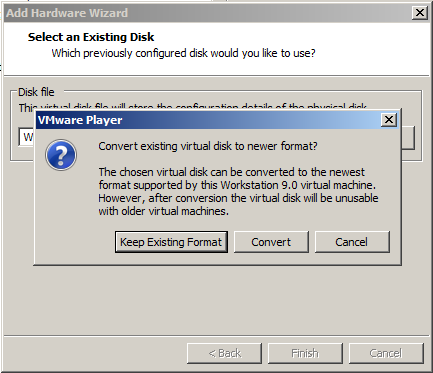
A box pops up asking if you want to 'Convert existing virtual disk to newer format?", as shown below.
This is the evidence drive, we certainly don't want to change anything, so click "Keep Existing Format".
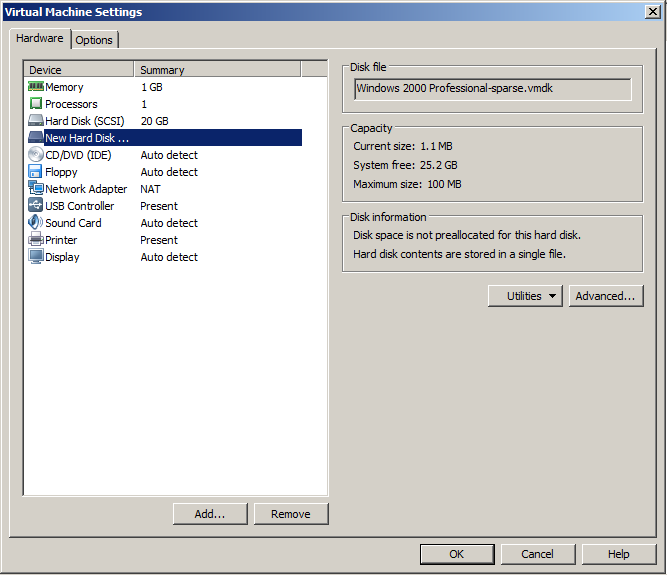
The "Virtual Machine Settings" box now shows a "New Hard Disk", as shown below.
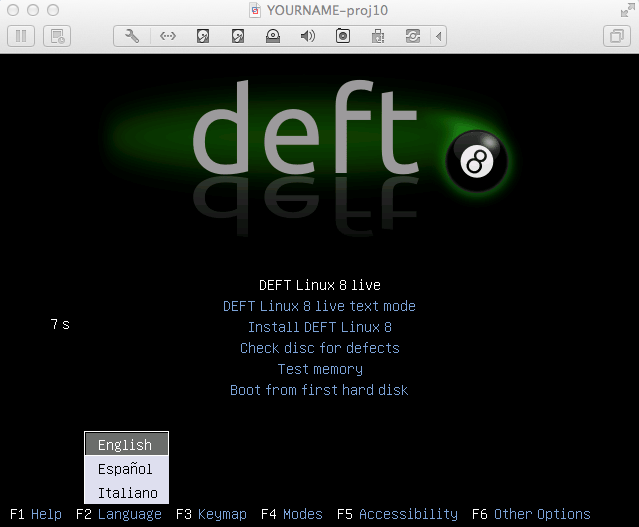
DEFT starts, as shown below.
Press Enter to accept the default language of English.
Press Enter to accept the default boot selction of "DEFT Linux 8 LIVE".
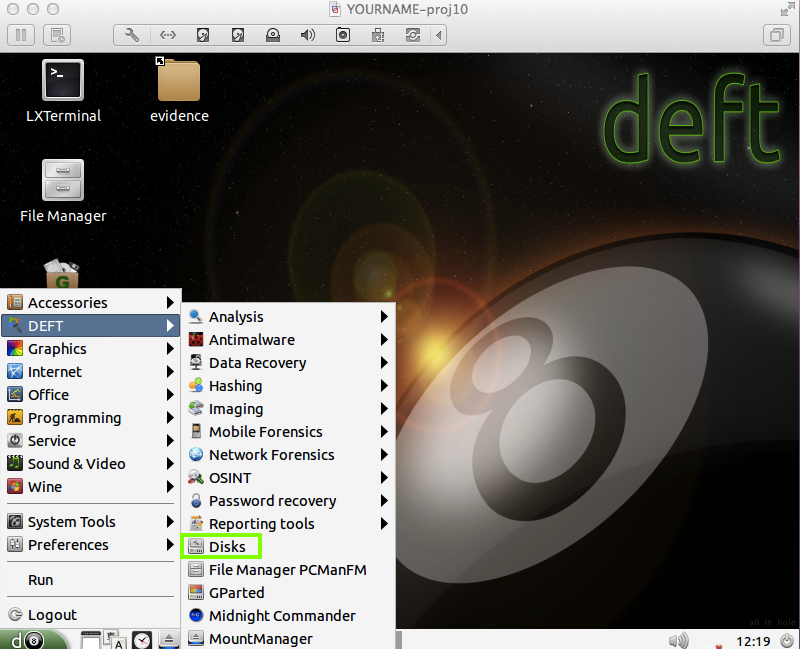
In the lower left, click d, DEFT, Disks, as shown below:
In the "DEFT - Warning!" box, click "I know what I'm doing".
A Disks window opens, as shown below.
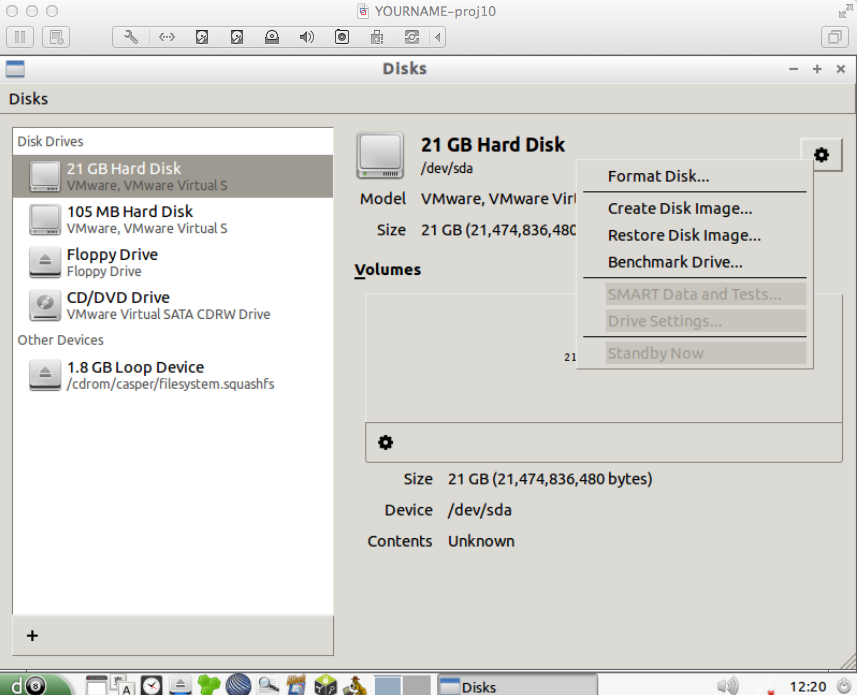
In the left pane, click "21 GB Hard Disk". This is the new, empty drive which will be used to capture the image.
Notice on the lower right that the drive is labelled "Unknown", as shown below.
The OS can't put files on it until the drive is partitioned.
In the right pane, in the top right of the window, click the gear icon, and then click "Format Disk..." button, as shown below.
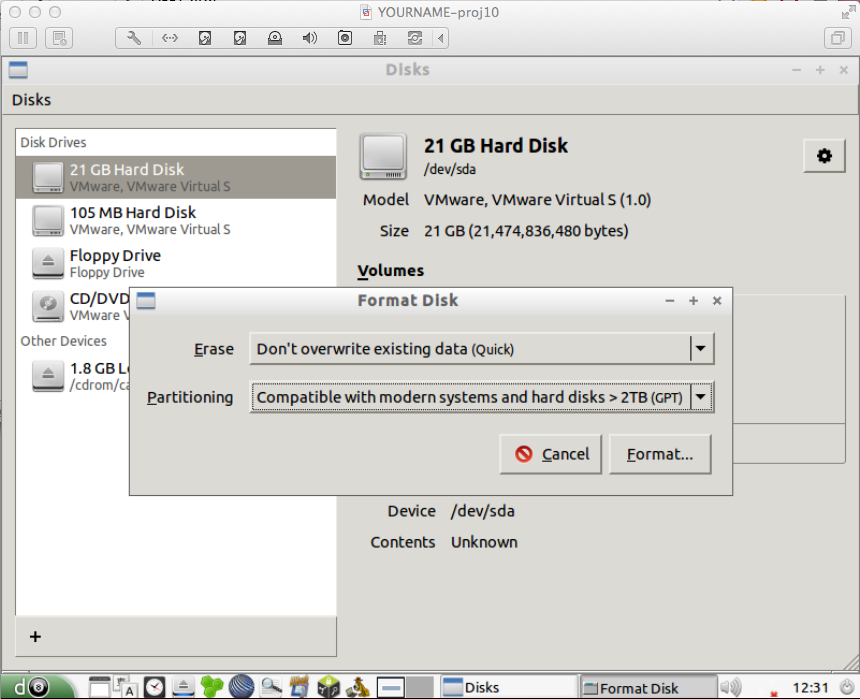
A box pops up, as shown below, asking whether to erase the disk and what partitioning to use.
Accept the default selections, as shown below, and click the Format button.
In the "Are you sure..." box, click the Format button.
In the lower right center of the "Disks" window, click the + icon, as shown below.
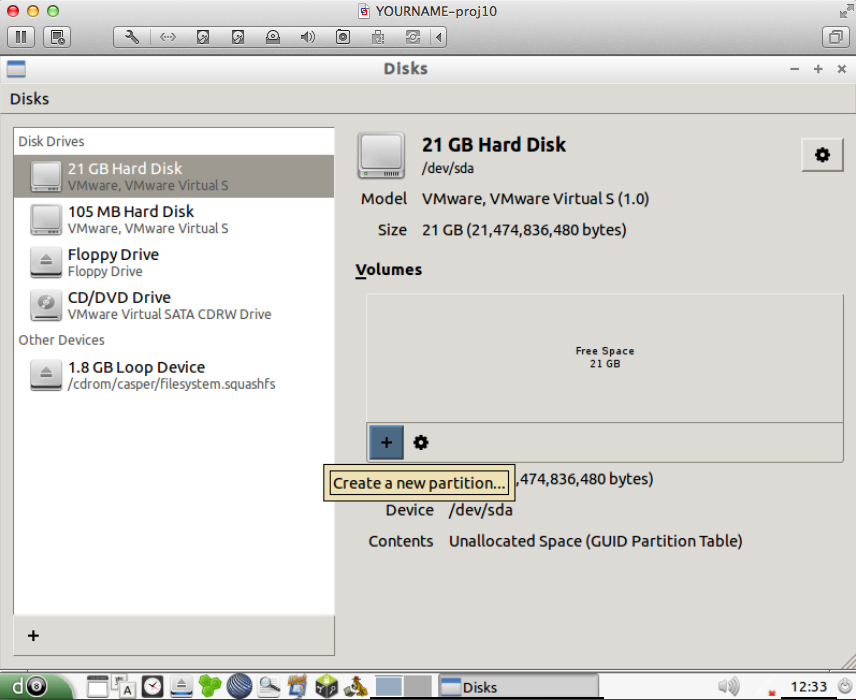
A "Create Partition" box pops up.
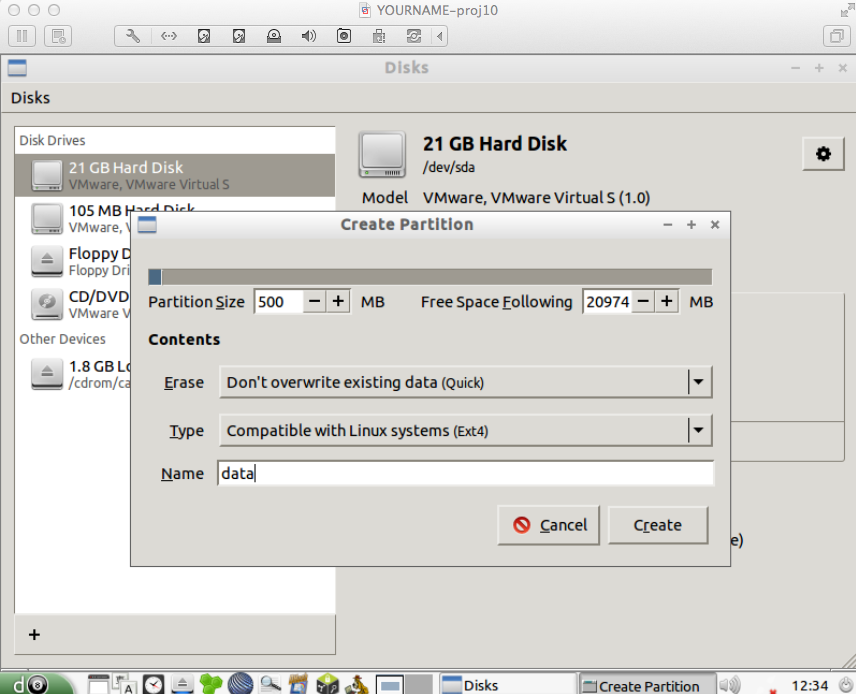
Enter a Size of 500 and a Name of data as shown below.
Click the Create button.
In the center right, there is a rectangular stripe representing the hard disk.
Click the "data" partition.
A black triangular right-arrow icon appears below the "data" partition, as shown below.
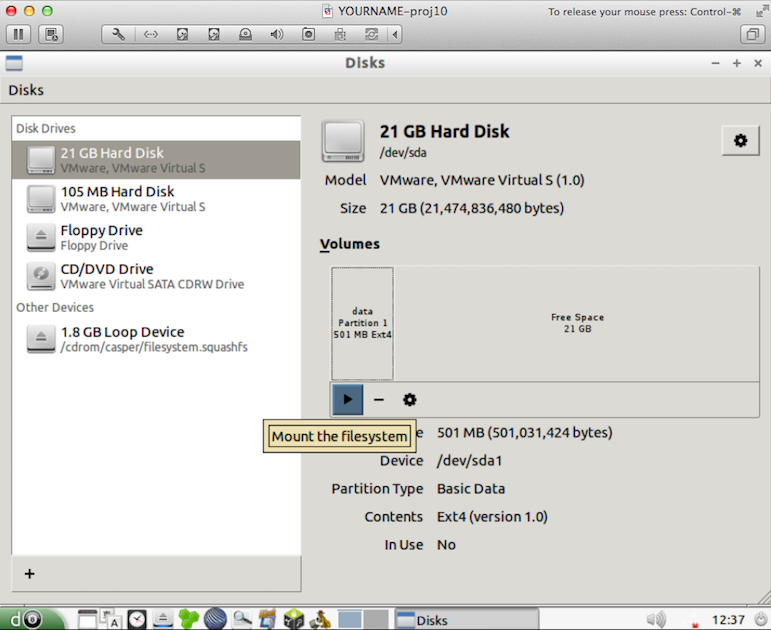
Click the black triangular right-arrow icon to mount the partition.
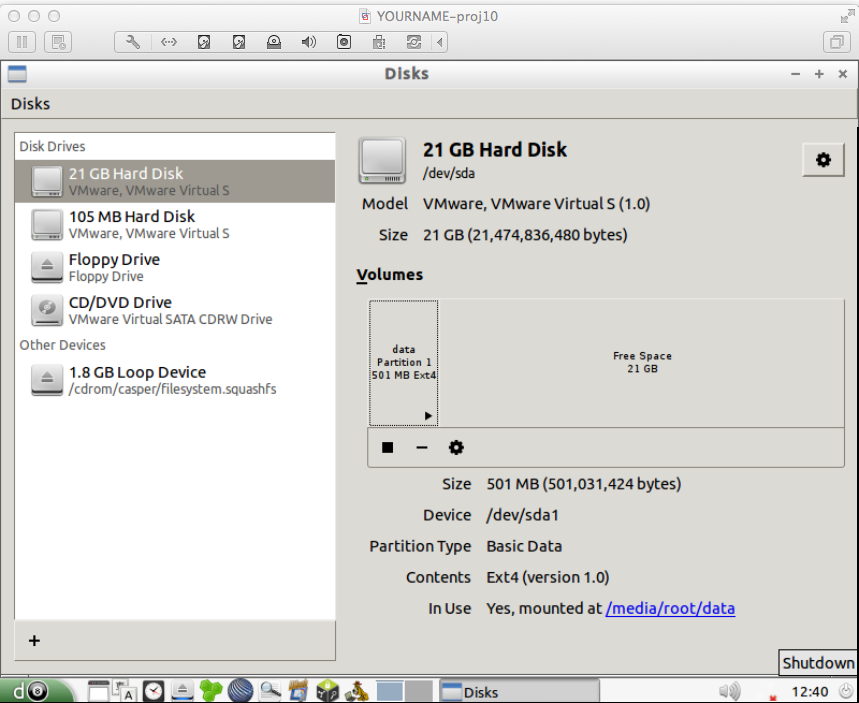
Now the lower right pane shows In Use "Yes, mounted at /media/root/data", as shown below.
Close the Disks window.
Guymager opens, with a window that doesn't fit on the desktop very well.
Resize the window and the column widths, and you will see all the attached disks, as shown below.
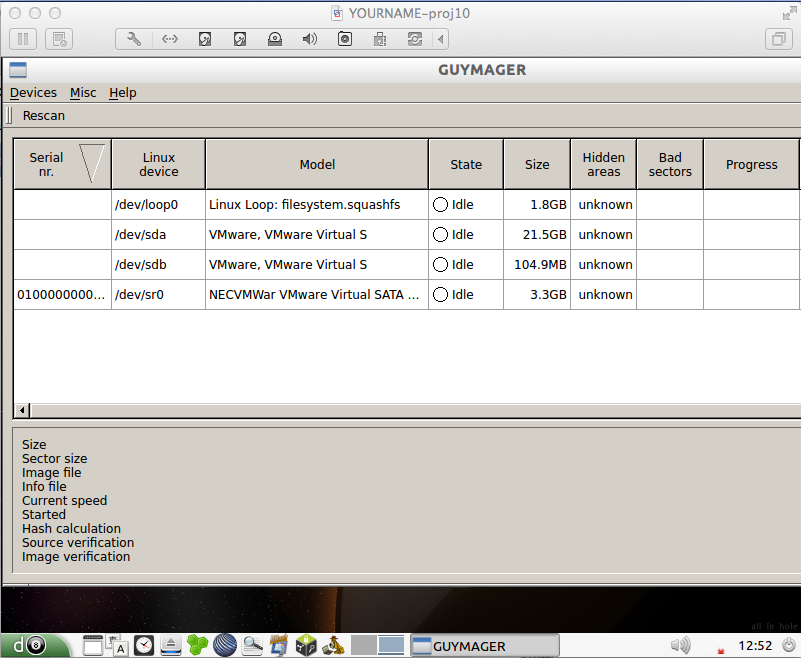
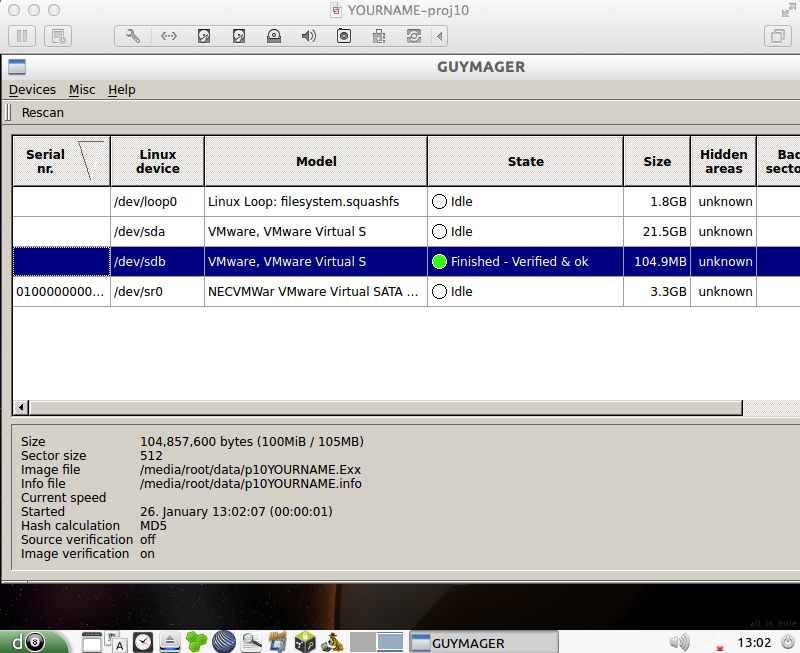
Right-click the drive with a Size of 104.9MB and click "Acquire image", as shown below.

In the "Acquire Image of /dev/sdb" window, make these entries:
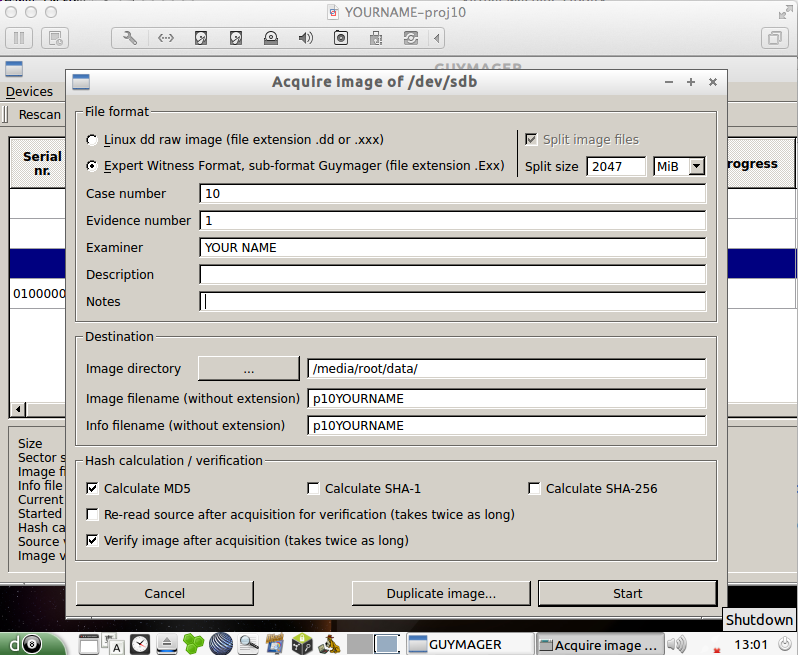
Click the Start button.
The process should only take a few seconds.
When it is done, you should see a Status of "Finished - Verified & ok" as shown below.
In the Terminal window, execute these commands:
cd /media/root/data

ls -l
You see two files with your name on them, as shown below.
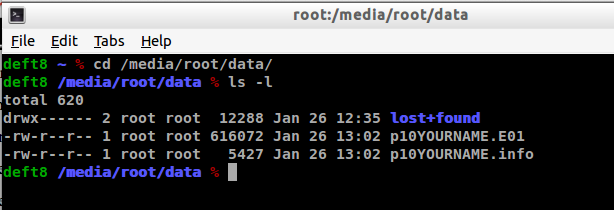
The .E01 is an image file in Expert Witness format.
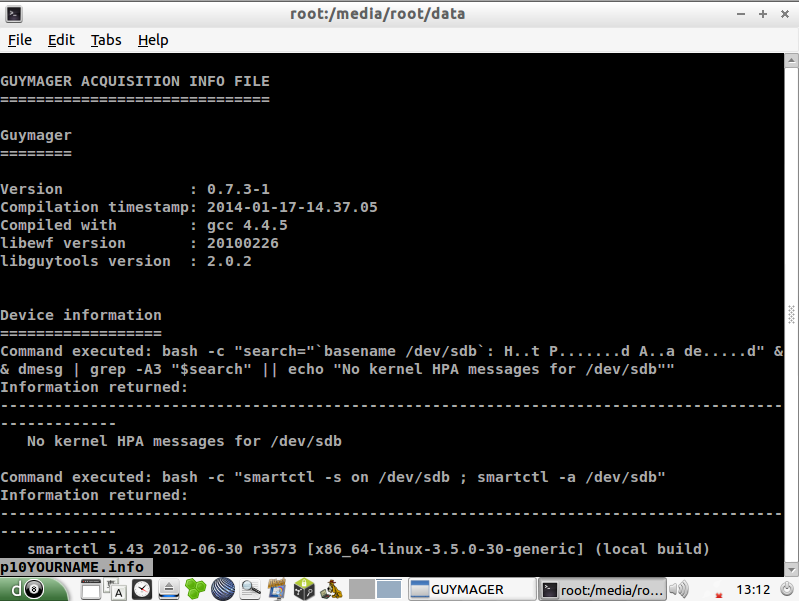
The .info file contains information about the .E01 file. In the Terminal window, execute this command:
less p10YOURNAME.info
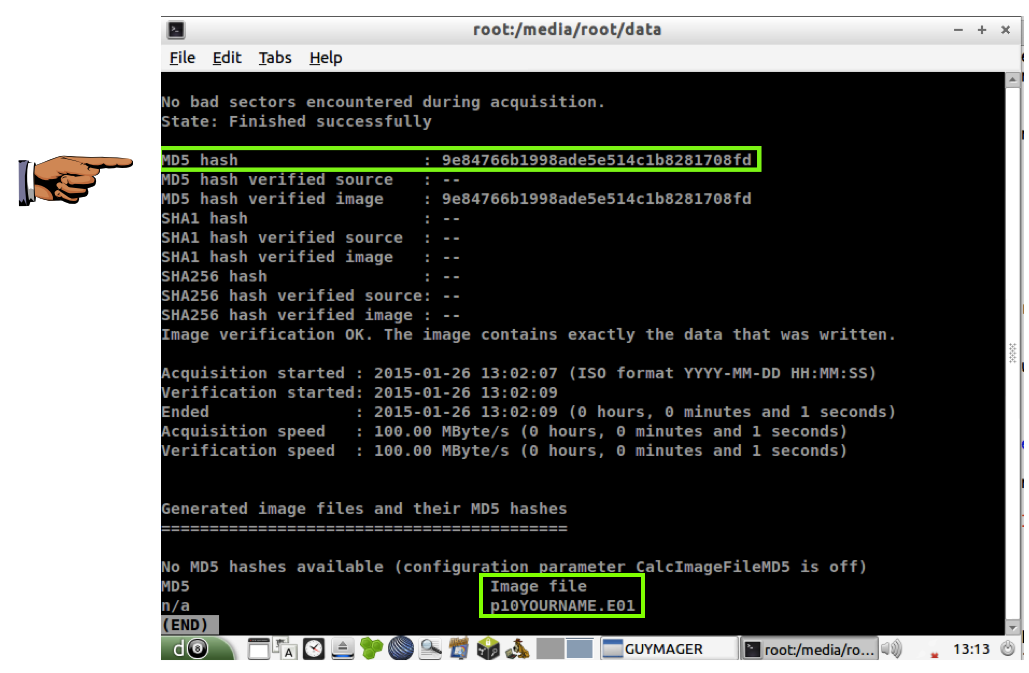
Press the down-arrow key in the keyboard and hold it until you get to the bottom of the file. You should see an MD5 hash value ending in "08fd", as shown below.
Press Ctrl+Alt to release the mouse from the Virtual Machine.
Press Shift+PrintScrn. That will copy the whole desktop to the clipboard.
Open Paint and paste in the image.
Save the image with the filename "Your Name Proj 10a". Use your real name, not the literal text "Your Name".
YOU MUST SUBMIT AN IMAGE OF THE WHOLE DESKTOP TO GET FULL CREDIT!
"less" closes, returning you to a normal Bask prompt.
In Guymager, right-click the drive with a Size of 104.9MB and click "Acquire image", as shown below.
In the "Acquire Image of /dev/sdb" window, make these entries:
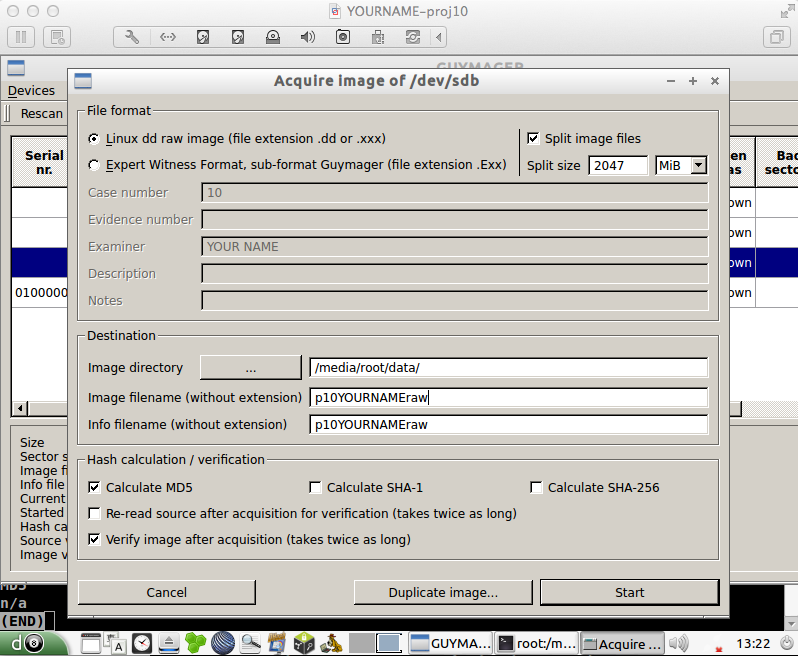
Click the Start button.
The process should only take a few seconds.
When it is done, you should see a Status of "Finished - Verified & ok" as shown below.
cd /root/media/data

ls -l
You see four files with your name on them, as shown below.
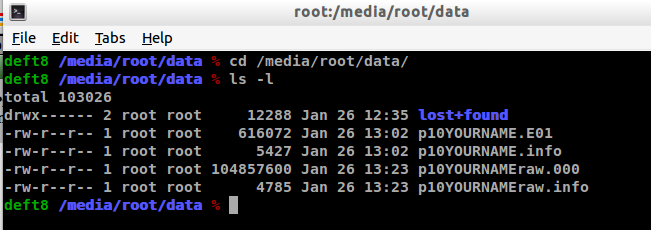
The .dd file is an exact duplicate of the original evidence disk, approximately 104 MB in size.
The .E01 file is much smaller, less than 1 MB.
In the Terminal window, execute this command:
less p10YOURNAMEraw.info

Press Ctrl+Alt to release the mouse from the Virtual Machine.
Press Shift+PrintScrn. That will copy the whole desktop to the clipboard.
Open Paint and paste in the image.
Save the image with the filename "Your Name Proj 10b". Use your real name, not the literal text "Your Name".
YOU MUST SUBMIT AN IMAGE OF THE WHOLE DESKTOP TO GET FULL CREDIT!
The .dd file is an exact duplicate of the original evidence disk, approximately 104 MB in size.
The .E01 file is much smaller, less than 1 MB.
Consider the situation, and answer these questions in the body of your email message.
- Why do the .dd and .E01 files have different sizes?
- Which file is the correct evidence image to use in court, or are they both correct?
Attach the two images to the email.
Send it to: cnit.121@gmail.com with a subject line of "Proj 10 From Your Name", replacing Your Name with your own first and last name. Send a Cc to yourself.
Last Modified: 10-5-16