http://www.backtrack-linux.org/downloads
Click Start, Computer. Open the VMs-S214 drive. Open the folder with your name on it. Make a subfolder named YOURNAME-proj10.
Right-click on the link below, and save the Evidence File on your desktop:
http://samsclass.info/121/proj/p10Evidence.zip
On your desktop, right-click the p10Evidence.zip file and click "Extract All", Extract. A window opens containing a file named "Windows 2000 Professional-sparse.vmdk". Copy that file into the your YOURNAME-proj10 folder on the VMs drive. This is a virtual hard disk containing evidence.
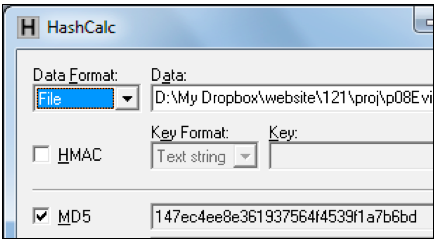
Drag the "Windows 2000 Professional-sparse.vmdk" file and drop it on the HashCalc window.
Verify that the MD5 hash value matches the image shown below. This proves that your download worked properly.
If you are using Mac OS X, use the command-line utility md5, as shown below:

Click "Create a new Virtual Machine".
In the "New Virtual Machine Wizard", click the "I will install the operating system later" button, as shown below. Click Next.

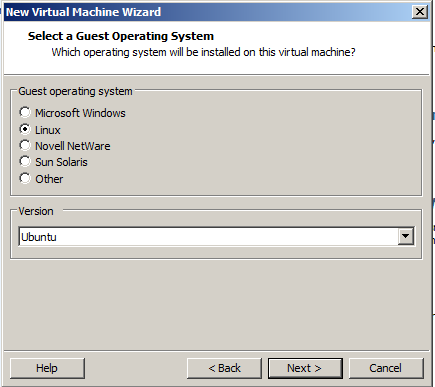
In the "Select a Guest Operating System" box, select Linux and Ubuntu, as shown below. Click Next.
Note: This is important so VMware will use the right mouse driver, especially on netbooks and systems with USB mice.
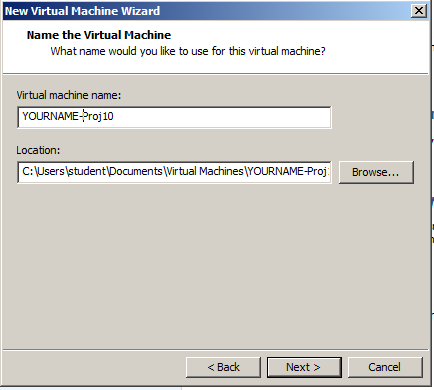
In the "Name the Virtual Machine" box, enter a Virtual machine name of YOURNAME-Proj10 as shown below.
Set the Location to the YOURNAME-proj10 folder on the VMs-S214 drive. Click Next.
In the "Specify Disk Capacity" box, accept the default options and click Next.
In the "Ready to Create Virtual Machine" box, click Finish.
In the "Virtual Machine Settings" box, click the Add... button.
In the "Hardware Type" box, click "Hard Disk". Click Next.
In the "Select a Disk" box, click "Use an existing virtual disk". Click Next.
In the "Select an Existing Disk" box, click the Browse... button. Navigate to your "Windows 2000 Professional-sparse.vmdk" file and double-click it.
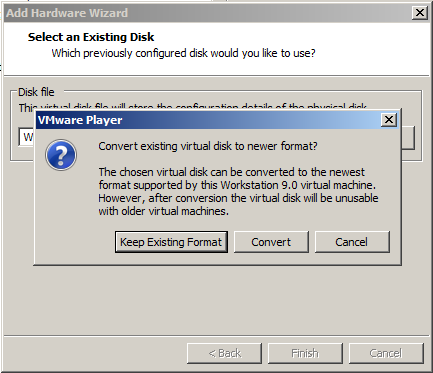
A box pops up asking if you want to 'Convert existing virtual disk to newer format?", as shown below.
This is the evidence drive, we certainly don't want to change anything, so click "Keep Existing Format".
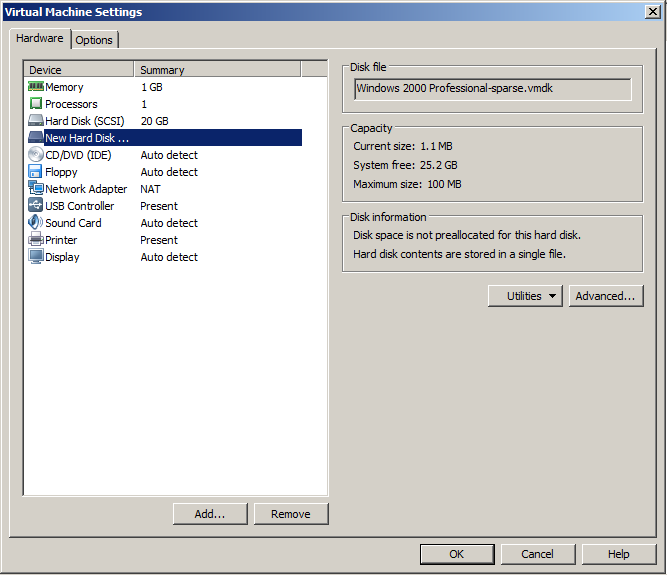
The "Virtual Machine Settings" box now shows a "New Hard Disk", as shown below.
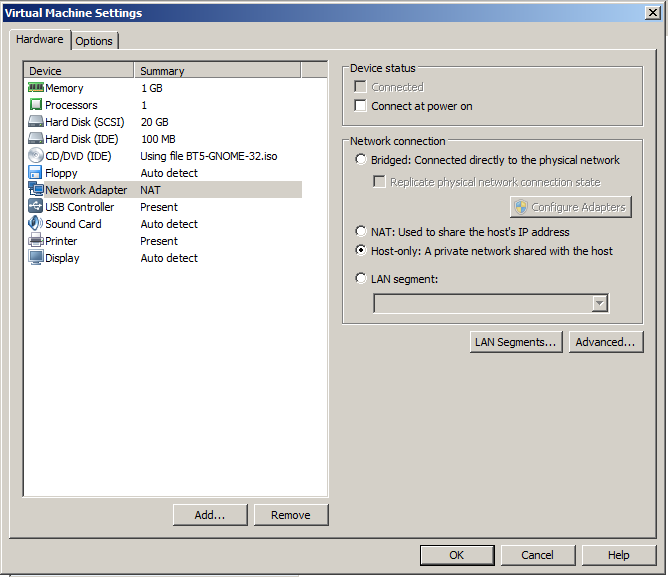
To disable networking, in the "Virtual Machine Settings" box, in the left pane, click "Network Adapter".
On the right side, in the top section, clear the "Connect at power on" box.
On the right side, in the middle section, click the "Host-only" button, as shown below.
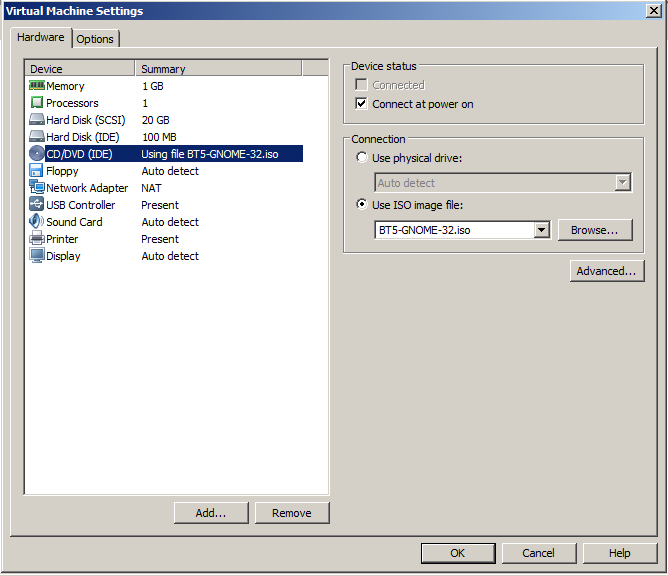
On the right side, click the "Use ISO image file" button.
Click the Browse button, navigate to your BT5R3-GNOME-32.iso file, and double-click it.
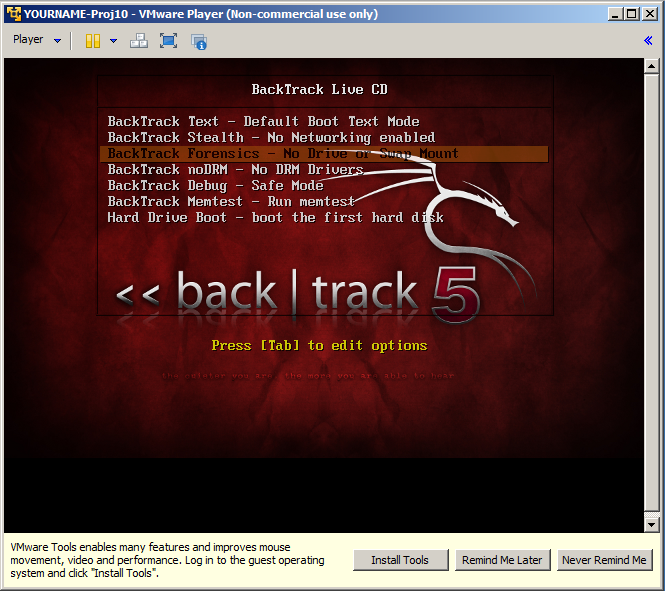
Your screen should resemble the image below, but with a later version of BackTrack.
Click OK.
In VMware Player, on the lower right, click "Play virtual machine".
Quickly click in the virtual machine window as it starts up and press the F2 key.
The BIOS opens, as shown below. If it does not, in the upper left of the VMware Player window, click Player, Power, Reset, and try again.
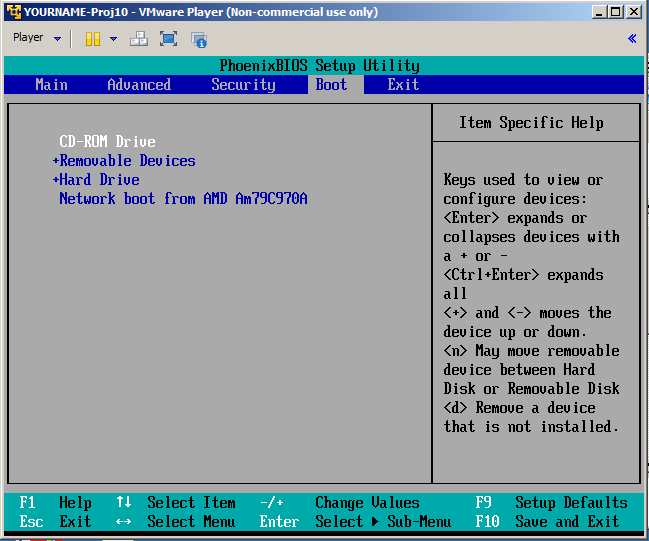
In the BIOS, use the arrow keys to adjust the boot order, moving the CD-ROM to the top, as shown above.
Press F10 and Enter to save the BIOS settings.
A prompt says boot:. Press Enter.
BackTrack starts, as shown below.
Click in the VM and use the down-arrow key to highlight the third item: "Backtrack Forensics" as shown above.
Press the Enter key to boot BackTrack.
When you see the root@bt:~# prompt, enter this command, followed by the Enter key:
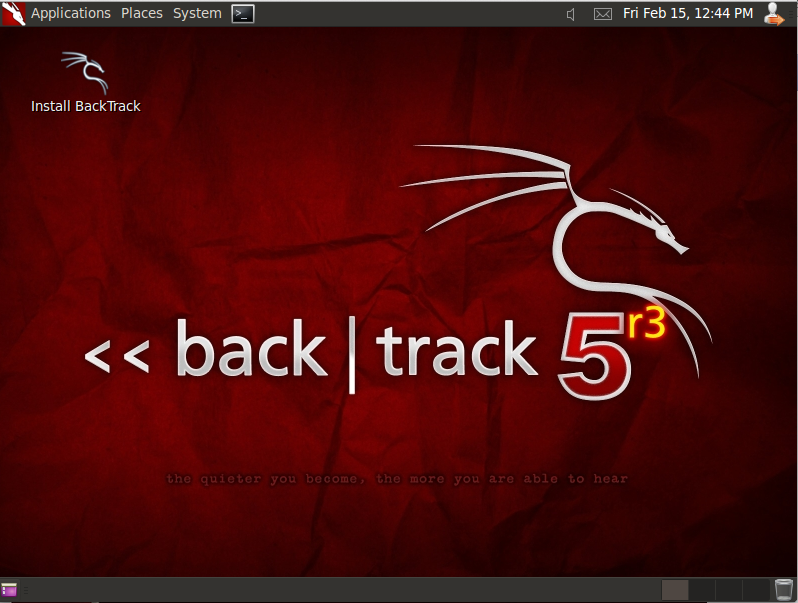
startx
In the upper left, to the right of the word "System", click the black square icon to open a Terminal window.
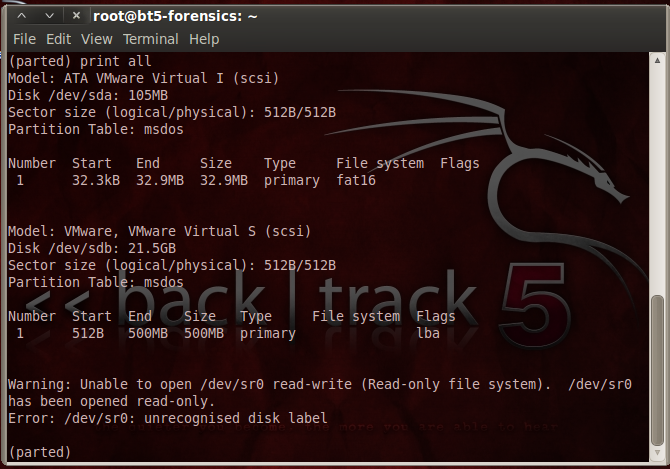
parted

print devices
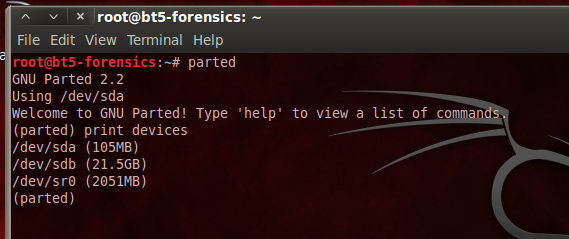
This lists the attached devices, as shown above on this page.
Find the evidence drive--it is 105 MB in size. When I did it, the evidence drive was /dev/sda.
The 21.5 GB empty hard drive available to perform collection was /dev/sdb.
In the Terminal window, at the (parted) prompt, enter these commands, pressing the Enter key after each one.
These commands make a 500 MB partition on the empty drive.
In the first command, make sure you are selecting the empty drive, not the evidence drive!
select /dev/sdb

mklabel msdos

mkpartfs primary fat32 0.0 500.0
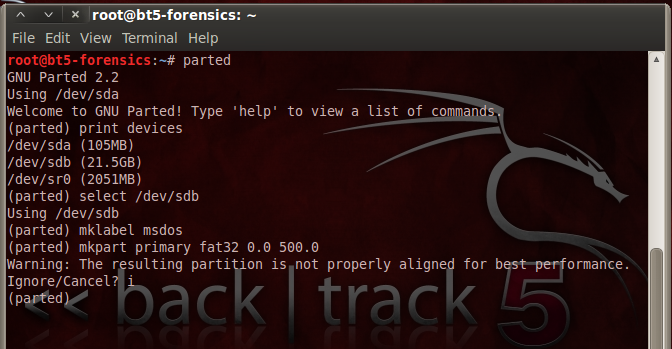
A message appears, saying: "The resulting partition is not properly aligned for best performance". Type i and press Enter, to ignore this warning.
In the Terminal window, at the (parted) prompt, enter this command, and then press Enter:
print all
You should see a 32.9 MB partition on the evidence drive (/dev/sda), and a 500 MB partition on the empty drive (/dev/sdb).
In the Terminal window, at the (parted) prompt, enter this command, and then press Enter:
quit
These are the missing steps in the classroom demo on 2-14-13. The earlier version of Backtrack I used previously automatically mounted the filesystem.
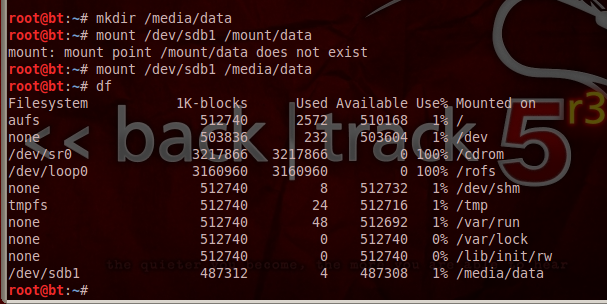
In the Terminal window, at the # prompt, enter these commands, and pressing Enter after each one:
mkdir /media/data

mount /dev/sdb1 /media/data

df
These commands change the working directory to the empty drive, create a small file on it, and display a directory of files.
Notice that the last command contains two lowercase "L" characters--they are not numeral "1" characters.
cd /media/data

echo test > foo

ls -l
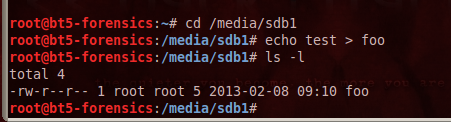
The directory shows the foo file, as shown above.
Your empty partition is ready to be used.
The dd command copies data from the evidence drive to a file named YOURNAME-dd. (Replace YOURNAME with your own name).
The md5sum command calculates the md5 hash and puts it in a file named YOURNAME-dd-hash.
The cat command prints the contents of the YOURNAME-dd-hash file.
dd if=/dev/sda of=YOURNAME-dd

md5sum YOURNAME-dd > YOURNAME-dd-hash

cat YOURNAME-dd-hash
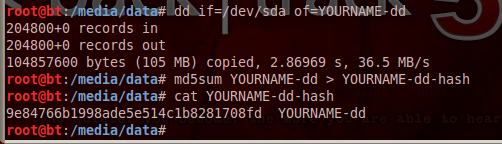
Your hash value should match the image shown above.
http://www.vmware.com/app/vmdk/?src=vmdk
In the Terminal window, type these commands, pressing Enter after each one.
dd if=/dev/sda1 of=YOURNAME-1-dd

md5sum YOURNAME-1-dd > YOURNAME-1-dd-hash

cat YOURNAME-1-dd-hash
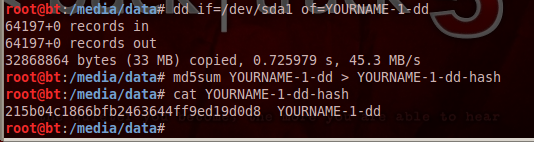
Your hash value should match the image shown above. This hash does not match the previous one, because it's an image of only one partition, not the whole drive.
In the Terminal window, type these commands, pressing Enter after each one.
dcfldd if=/dev/sda of=YOURNAME-dc hashlog=YOURNAME-dc-hash

cat YOURNAME-dc-hash

Notice that this is nicer--it shows a running count of blocks written to reassure you that it hasn't crashed.
The hash value should match the hash value you calculated earlier after the dd command.
In the Terminal window, type this command, followed by the Enter key. (The command contains two lowercase L characters, and no numerals.)
ls -l
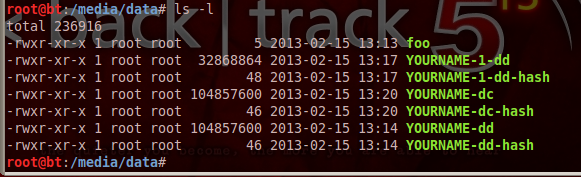
The directory shows the two acquisition files YOURNAME-dd and YOURNAME-dc. They are the same size. In fact, they are identical, because the md5 hashes match.
dcfldd if=/dev/sda vf=YOURNAME-dd
The result is "Total: Match", as shown below on this page.

Press Ctrl+Alt to release the mouse from the Virtual Machine.
Press the PrintScrn key in the upper-right portion of the keyboard. That will copy the whole desktop to the clipboard.
YOU MUST SUBMIT AN IMAGE OF THE WHOLE DESKTOP TO GET FULL CREDIT!
Open Paint and paste in the image.
Save the image with the filename "Your Name Proj 10". Use your real name, not the literal text "Your Name".
In the Terminal window, type this command, followed by the Enter key:
echo test > /dev/sda
dcfldd if=/dev/sda vf=proj10-dd
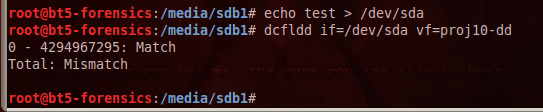
As you see, the file no longer matches the drive. The evidence has been altered! So, although this technique works, it is not as good as using a hardware write-blocker at all.
Last Modified: 2-23-13 3:51 pm