http://www.openoffice.org/download/index.html
http://www.techpathways.com/desktopdefault.aspx?tabindex=8&tabid=14
At the bottom of the page, click the "Download ProDiscover Basic Edition (Version 8.2.0.5)" link. It's a free product and 73 MB in size. I used the 32-bit version, but you can try the 64-bit version if you like.
Right-click the ProDiscoverRelease8205Basic.exe fileand click "Run as Administrator".
Click through the installer as usual to install the software.
http://samsclass.info/121/proj/p15.zip
This is an image of a 10 MB hard disk partition which contains several active files and several deleted files. The file is 418 KB in size.
Save the file on your desktop.
On your Windows desktop, right-click the p15.zip file and click "Extract All...", Extract.
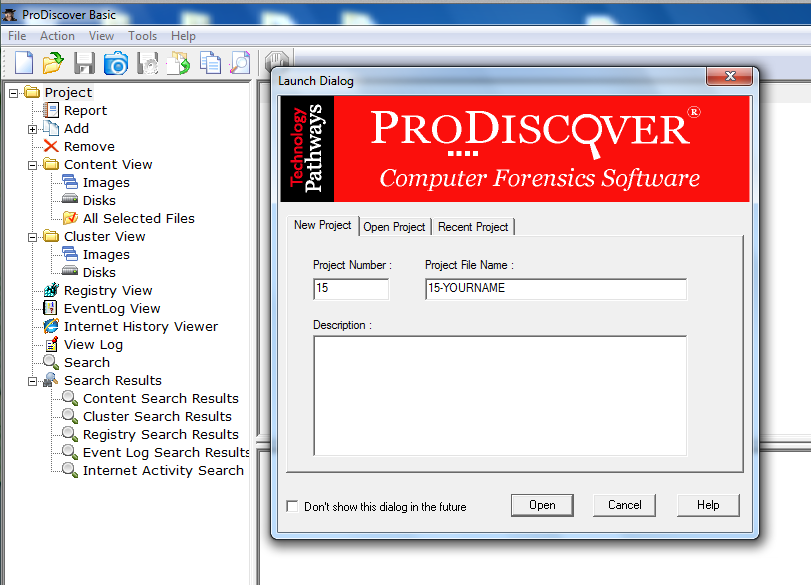
In the "Launch Dialog" box, enter a "Project Number" of 15 and a "Project File Name" of 15-YOURNAME, replacing "YOURNAME" with your own name, as shown below:
Click Open.
This creates a Project, but so far the Project has no evidence in it.
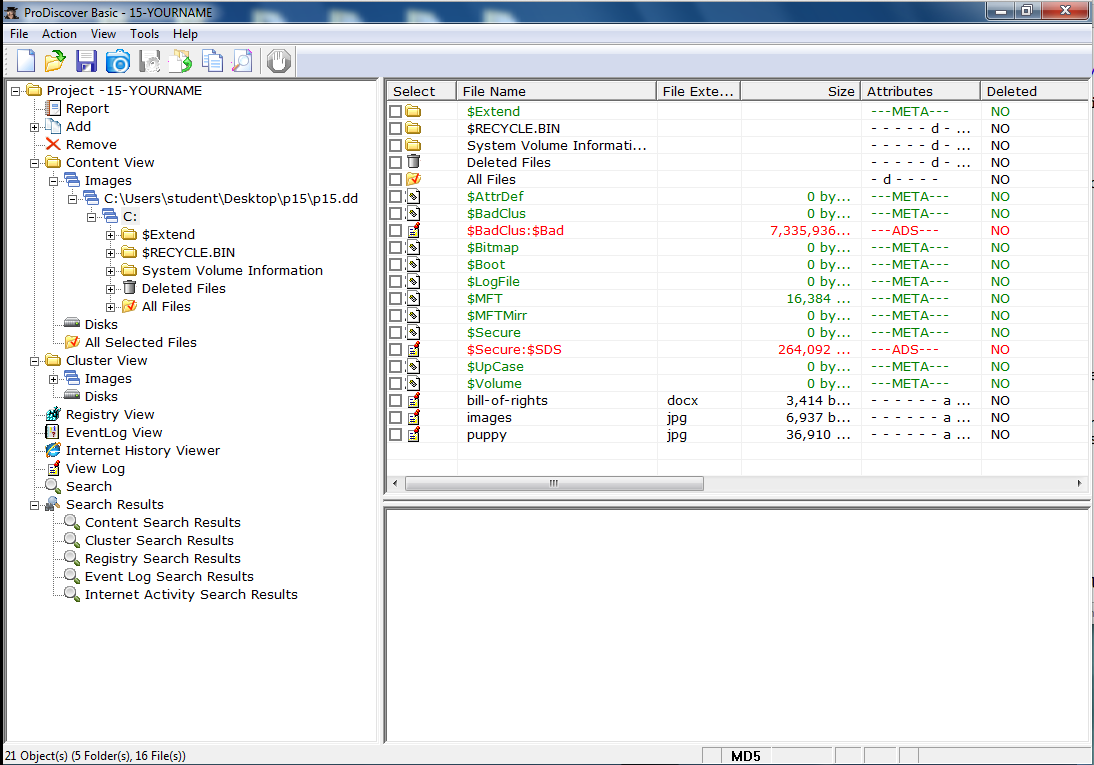
Navigate to your desktop, double-click the p15 folder, and double-click the p15.dd file.
Expand C:\Users\student\Desktop\p15\p15.dd
Double-click C:
The contents of C: are displayed, as shown below.
Notice these items:
The lower right pane displays the file contents in ASCII, as shown below. Since this is a .docx file, the contents are not easy to read in this form.
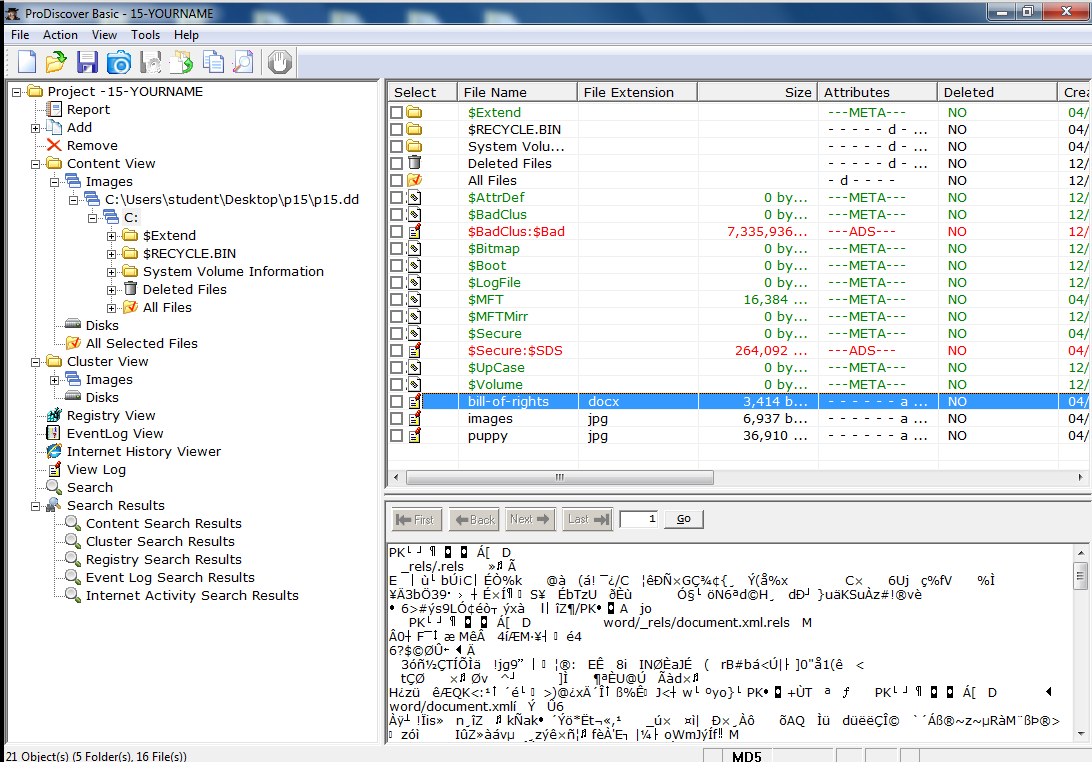
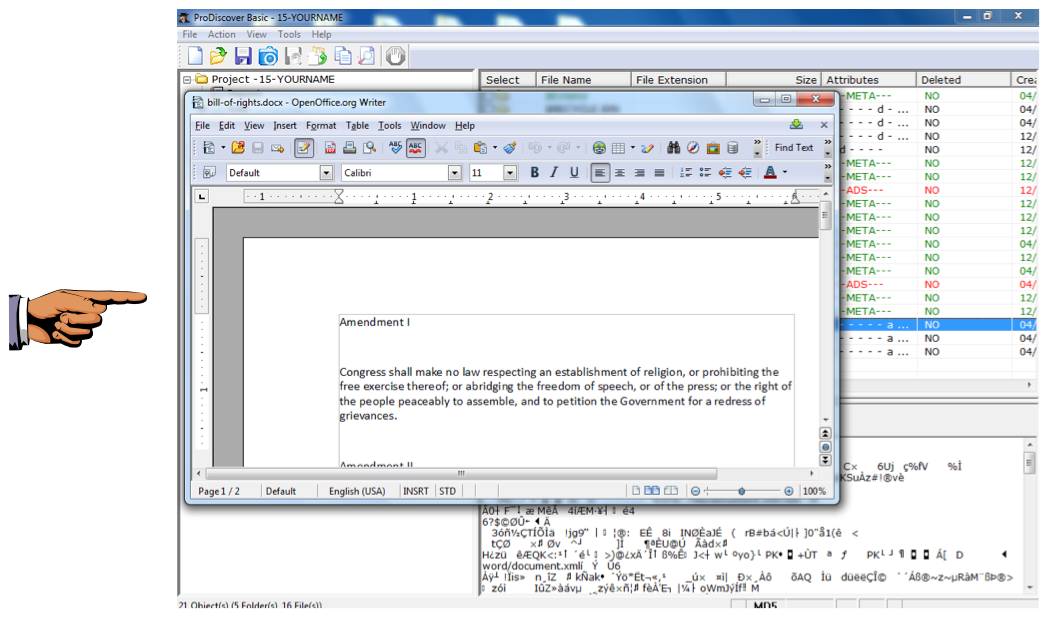
In the upper right-pane of ProDiscover, double-click bill-of-rights.
If you have Microsoft Word or Open Office installed, the file will open in the appropriate application and become readable, as shown below.
If you don't have it, get Open Office here:
http://www.openoffice.org/download/index.html
Press the PrintScrn key in the upper-right portion of the keyboard. That will copy the whole desktop to the clipboard.
YOU MUST SUBMIT A FULL-SCREEN IMAGE TO GET FULL CREDIT!
Open Paint and paste in the image.
Save the image with the filename "Your Name Proj 15a". Use your real name, not the literal text "Your Name".
Notice the ASCII view in the lower right pane of ProDiscover. This shows the image bytes. JPEG images begin with a header including the ASCII text "JFIF", as shown below.
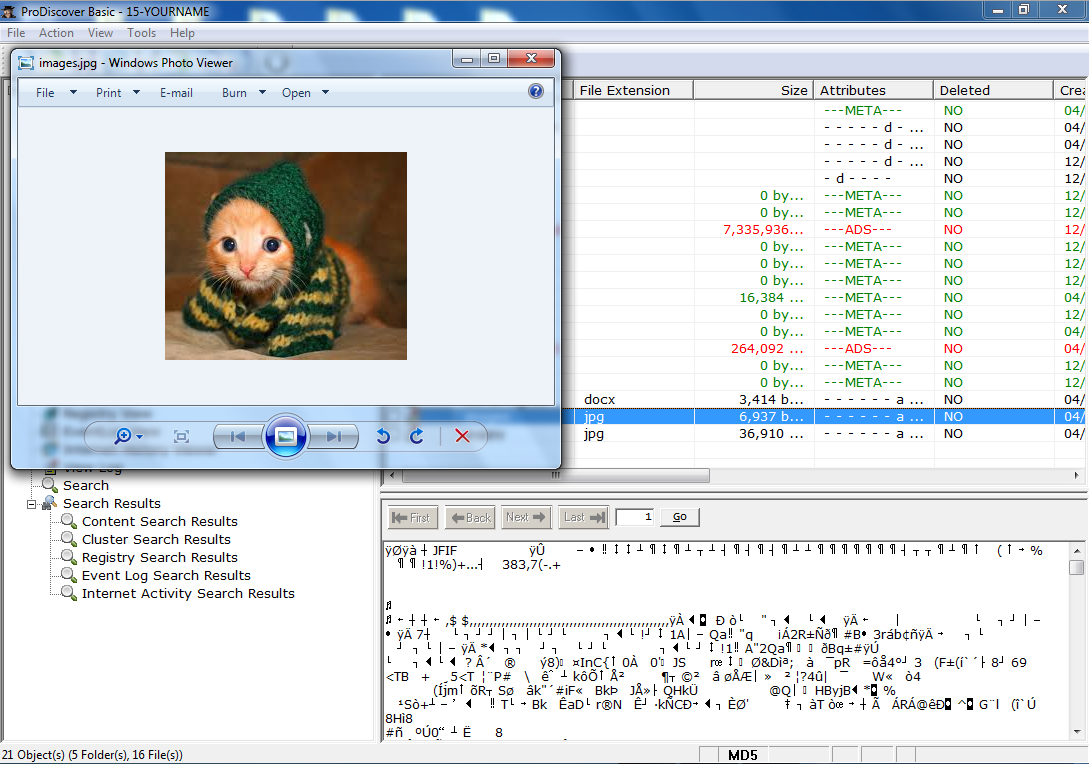
Double-click the puppy file and examine it in Photo Viewer and in ASCII view.
This is similar to the way Windows Explorer displays folder contents.
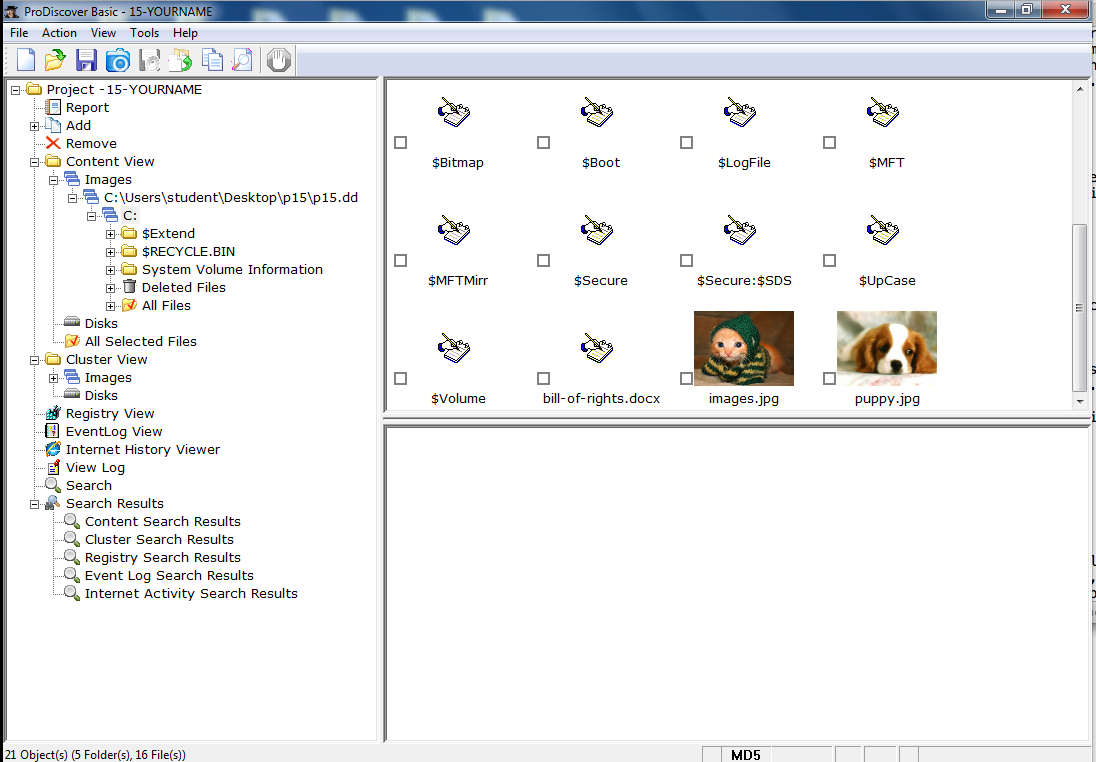
Scroll down to see the thumbnail images of the two JPG files, as shown below.
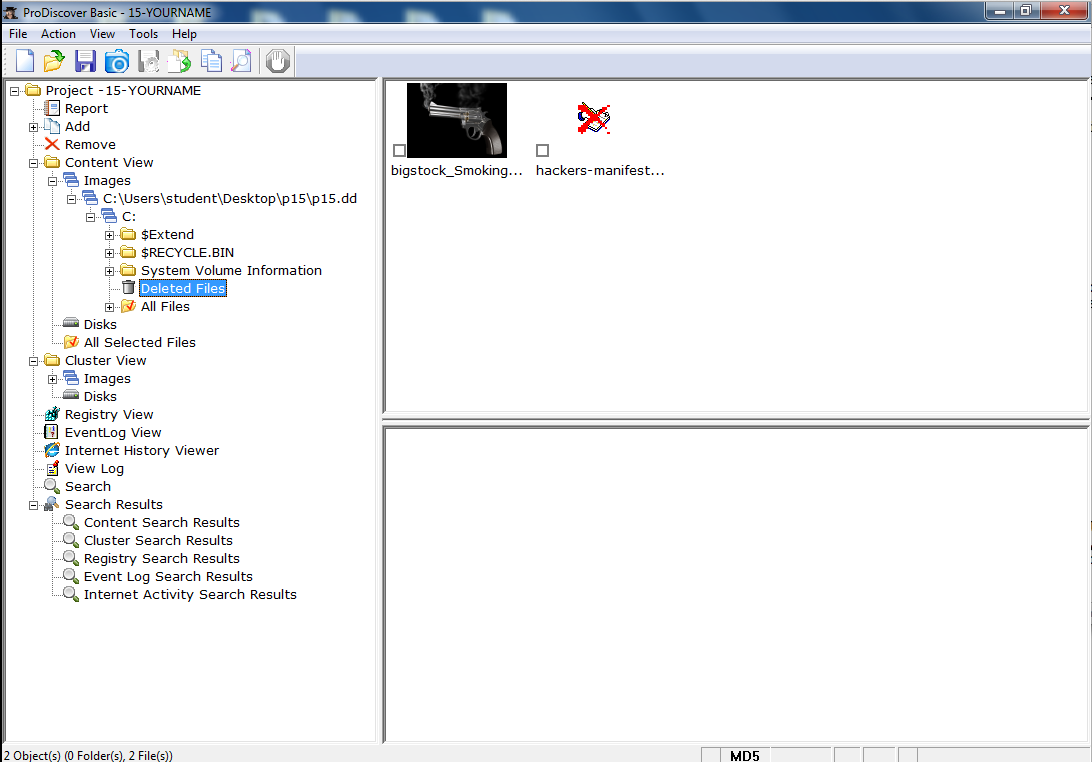
Double-click the gun image. It opens in Photo Viewer. As you can see, ProDisdcover was able to completely recover this file, including the file name.
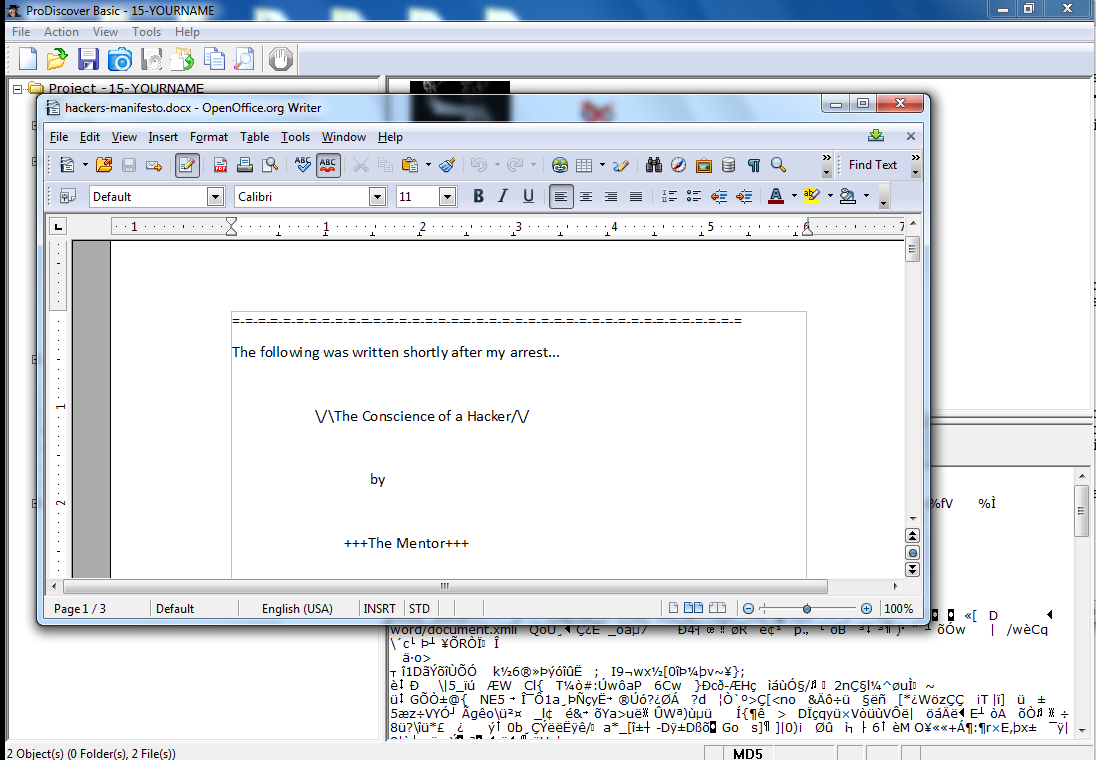
Double-click the hackers-manifesto.docx file.
It opens in your DOCX viewer, as shown below.
A box pops up saying "CAUTION:...that may take some time to complete...". Click Yes.
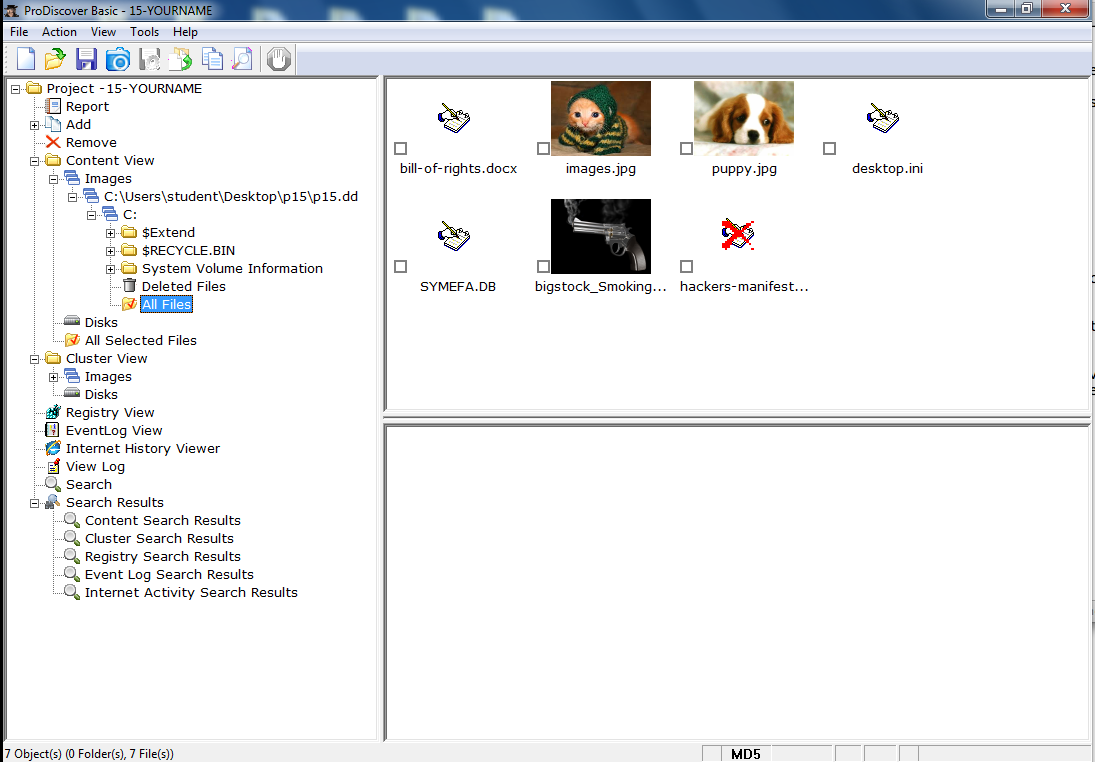
This is probably the friendliest view in ProDiscover. As shown below, both active and recovered files are shown as convenient icons, as shown below.
In the left pane of ProDiscover, in the "Cluster View" section, click the plus sign to expand Images.
Double-click C:\Users\student\Desktop\p15\p15.dd
In the top right pane, the physical drive is shown in "Cluster View"--a grid of colored rectangles, as shown below.
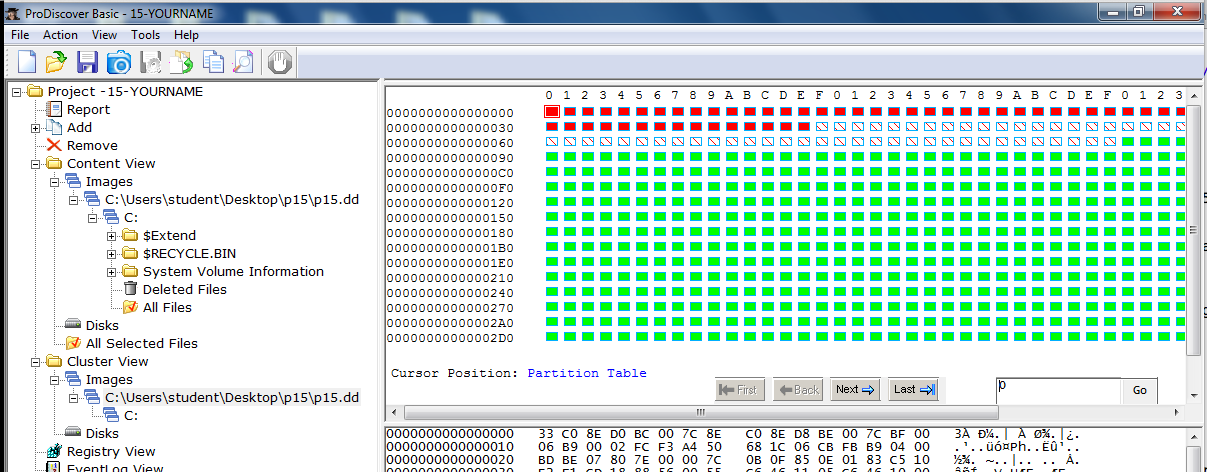
Click the first red rectangle, cluster 0. In the lower right pane, notice that it starts at address 0, as shown below.
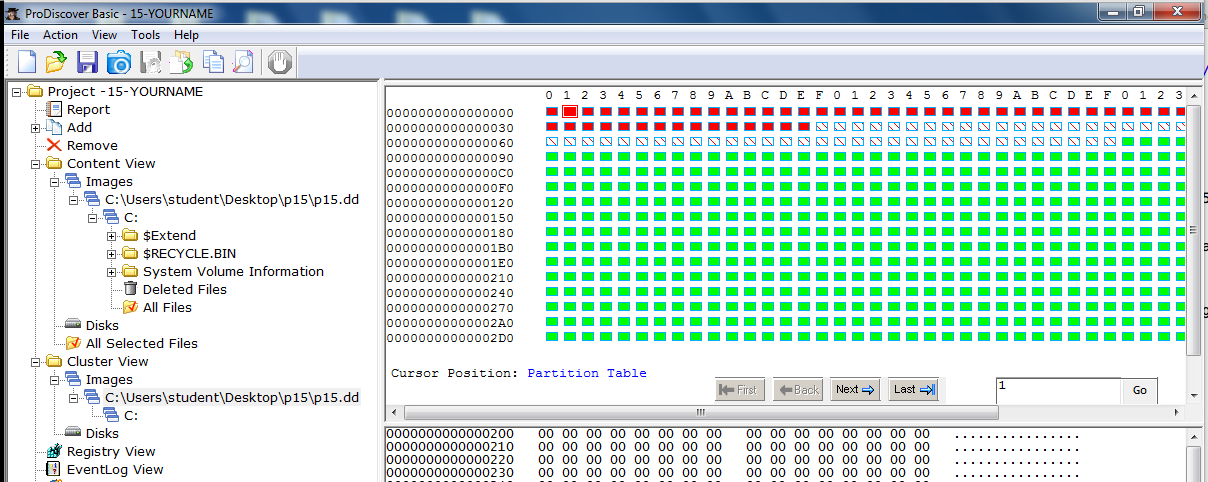
On your keyboard, press the right-arrow key to move to the next cluster, cluster 1.
Cluster 1 starts at address 200, as shown below.
Move right through the next few clusters to see the pattern. Each cluster is 200 bytes in size. The 200 is in hexadecimal, so it's 512 bytes in decimal. These so-called 'Clusters" are actually Sectors, because at the direct physical level we are using, the disk has no concept of "Clusters".
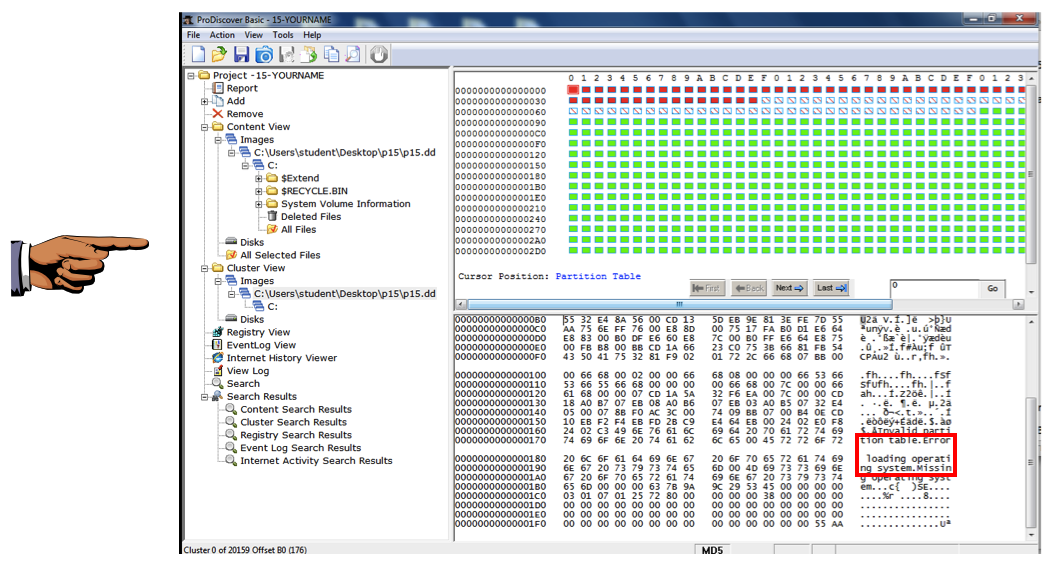
Click the first red rectangle again to select Cluster 0. This is the first cluster on the disk--the Master Boot Record.
In the lower right pane, scroll down to find the characteristic readable text always seen in the MBR: "Error loading operating system", as shown below.
Press the PrintScrn key in the upper-right portion of the keyboard. That will copy the whole desktop to the clipboard.
YOU MUST SUBMIT A FULL-SCREEN IMAGE TO GET FULL CREDIT!
Open Paint and paste in the image.
Save the image with the filename "Your Name Proj 15b". Use your real name, not the literal text "Your Name".
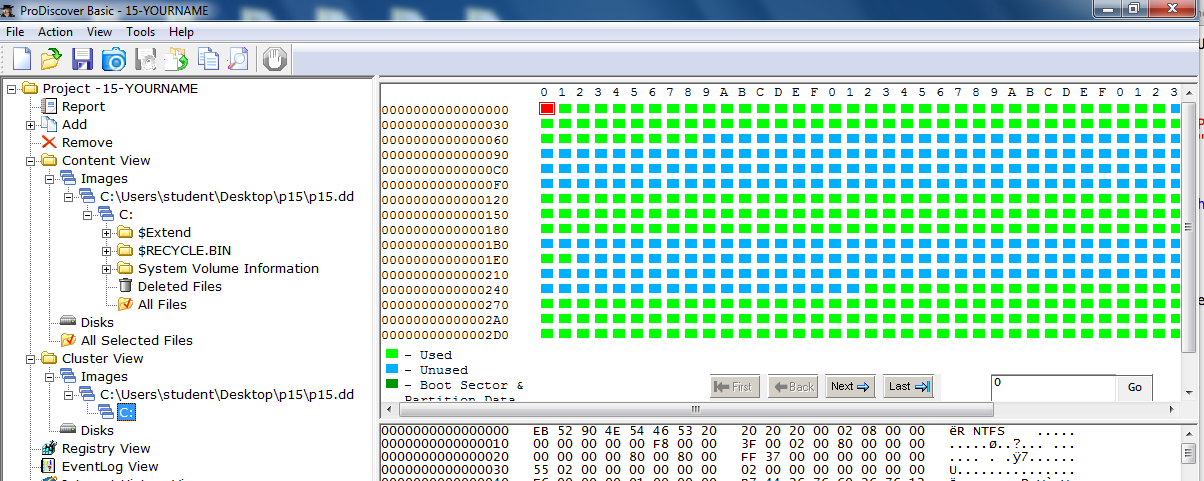
In the top right pane, click the first rectangle to select Cluster 0. Look at the lower right pane--this cluster starts at address zero, as shown below.
Notice that this address is relative to the start of the C: partition, so it is not the same as the physical sector 0 that contains the Master Boot Record.
Notice the colors: the green clusters are "Used"--that is, they contain active data. The blue clusters are "Unused" and may contain latent data.
On your keyboard, press the right-arrow key to move to the next cluster, cluster 1.
Cluster 1 starts at address 1000, as shown below.
Move to the right a few more times to see the pattern: the clusters are all 1000 bytes in size now. In Hexadecimal, that's 4 KB, the usual cluster size for an NTFS partition.
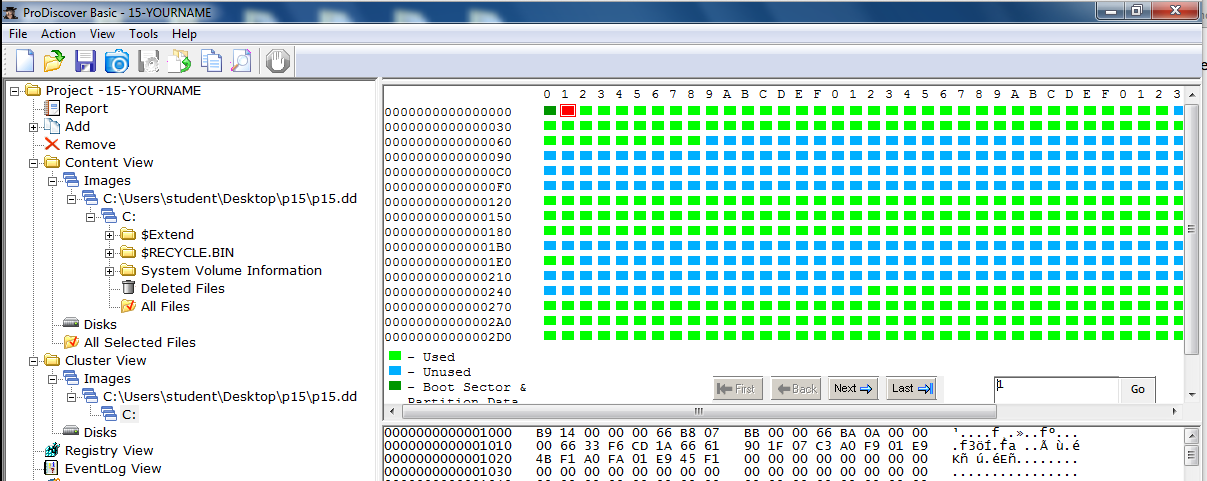
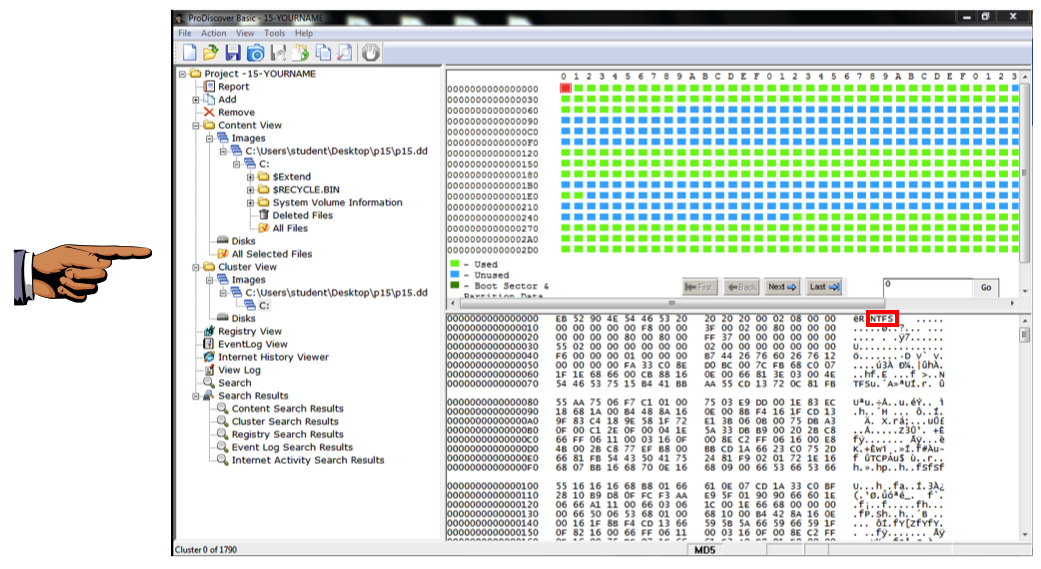
Click the first red rectangle again to select Cluster 0. This is the first cluster on the partition--the Partition Boot Sector.
In the lower right pane, in the top row, find the characters NTFS, as shown below. This, obviously, indicates that the partition is formatted with the NTFS file system.
Press the PrintScrn key in the upper-right portion of the keyboard. That will copy the whole desktop to the clipboard.
YOU MUST SUBMIT A FULL-SCREEN IMAGE TO GET FULL CREDIT!
Open Paint and paste in the image.
Save the image with the filename "Your Name Proj 15c". Use your real name, not the literal text "Your Name".
http://www.techpathways.com/webhelp/Getting_Started/Content_View.htm
Last Modified: 4-7-14 1:16 PM