If VMware Player closed, open it again.
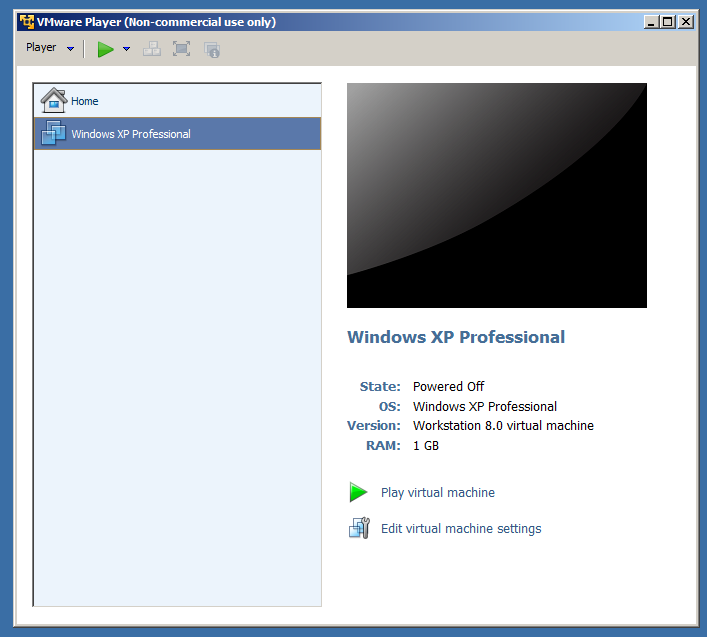
Your virtual machine should now be "Powered Off", as shown below.
On the lower right, click the "Edit virtual machine settings" link.
The "Virtual Machine Settings" opens, as shown below.
On the lower left, click the Add... button.

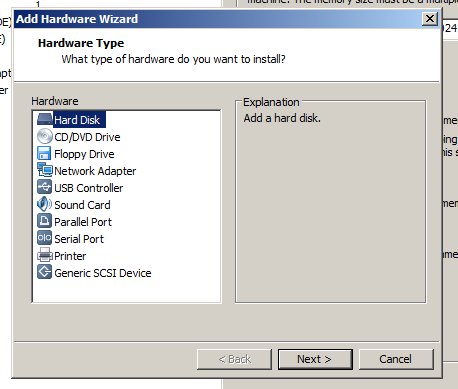
The "Add Hardware Wizard" opens, as shown below.
In the left pane, accept the default selection of "Hard Disk".
Click the Next button.
In the next box, accept the default selection of "Create a new virtual disk".
Click the Next button.
In the next screen, accept the default selection of "IDE (Recommended)".
Click the Next button.
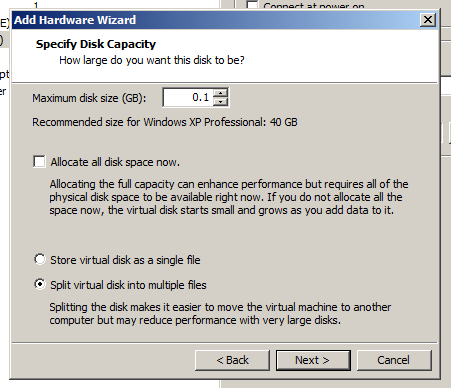
In the "Specify Disk Capacity" screen, set the Maximum disk size to 0.1 GB, as shown below.
Click the Next button.
In the "Specify Disk File" screen, accept the default selection.
Click the Finish button.
In the "Virtual Machine Settings" screen, click the OK button.
Click the "Play Virtual Machine" button.
So we'll forensically clean it, writing 00 on every byte.
In your virtual machine, click Start, Run.
In the Run box, type CMD and press Enter to open a Command Prompt.
In the Command Prompt window, type these commands, pressing Enter after each one:
DISKPART

LIST DISK
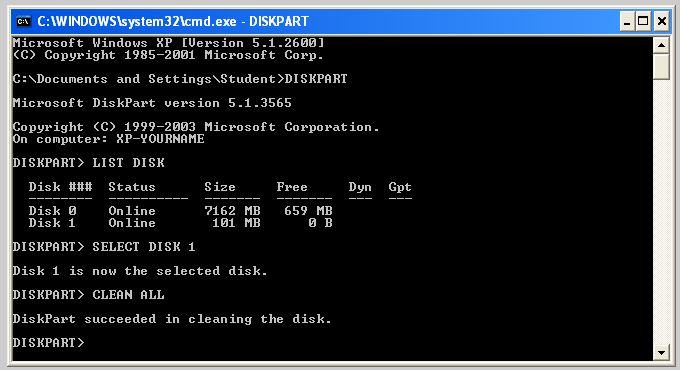
Read the output to find the new 101 MB disk you want to clean--when I did it, it was Disk 1. You don't want to erase the wrong disk by accident!
In the Command Prompt window, excute these commands, specifying the correct disk in the first command:
SELECT DISK 1

CLEAN ALL
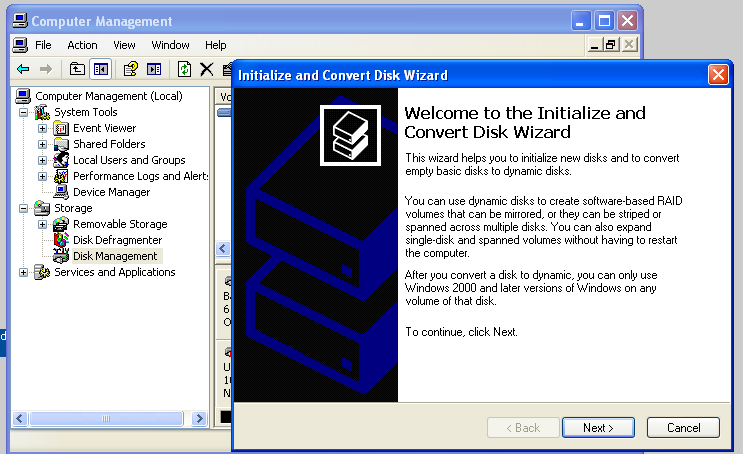
Right-click "My Computer" and click Manage.
In the left pane of Computer Management, click "Disk Management".
The "Initialize and Convert Disk Wizard opens, as shown below.
Click Next.
In the "Select Disks to Initialize" screen, click Next.
In the "Select Disks to Convert" screen, click Next.
In the "Completing the Initialize and Convert Disk Wizard" screen, click Finish.
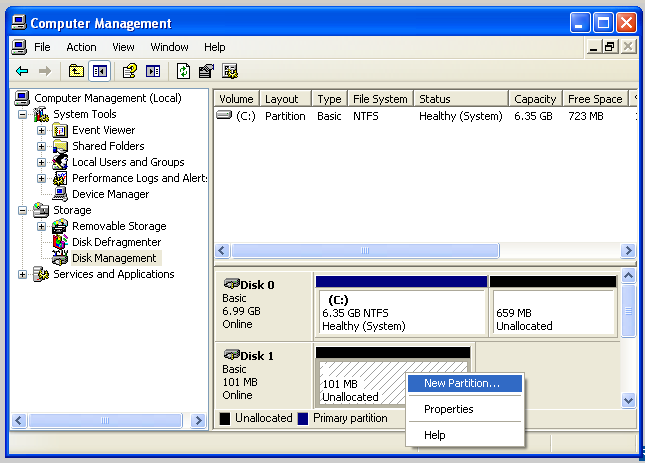
In the context menu, click "New Partition...", as shown below.
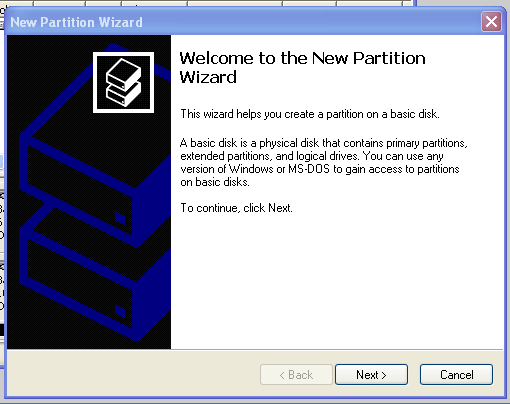
The "New Partition Wizard" opens, as shown below.
Click Next.
In the "Select Partition Type" screen, accept the default selection of "Pramary partition" and click Next.
In the "Select Partition Type" screen, accept the default selection of "Pramary partition" and click Next.
In the "Specify Partition Size" screen, accept the default selection and click Next.
In the "Assign Drive Letter or Path" screen, accept the default selection and click Next.
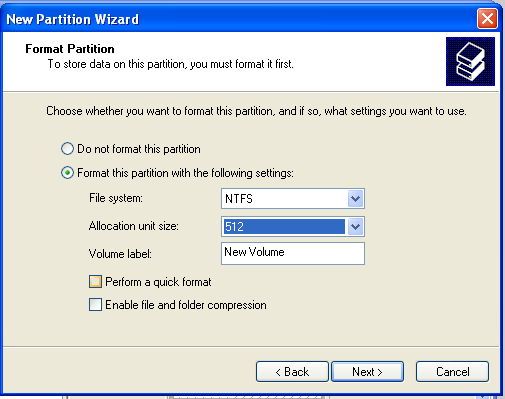
In the "Format Partition" screen, set the "Allocation unit size" to 512, as shown below, and click Next.
This size makes each cluster equal to a sector, which is how floppy disks work. It's inefficient for large disks, but OK for this small disk and it simplifies the project.
In the "Completing the New Partition Wizard" screen, click Finish.
Close Computer Management.
Repeat the process for FILE2.TXT.
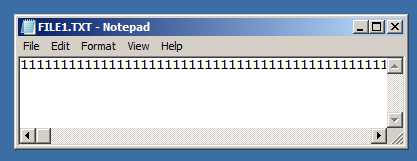
FILE1.TXTOn your desktop, double-click FILE1.TXT to open it in Notepad.
FILE2.TXT
As you can see, this file contains 1000 "1" characters on a single line.
Open FILE2.TXT to see what it contains--1000 "2" characters.
Close all Notepad windows.
Double-click the "New Volume" icon.
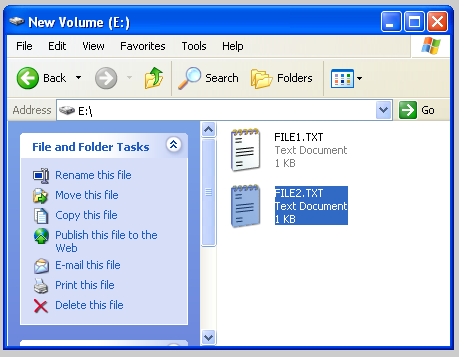
Drag the FILE1.TXT file from your desktop into the "New Volume" window and drop it there.
Drag the FILE2.TXT file from your desktop into the "New Volume" window and drop it there.
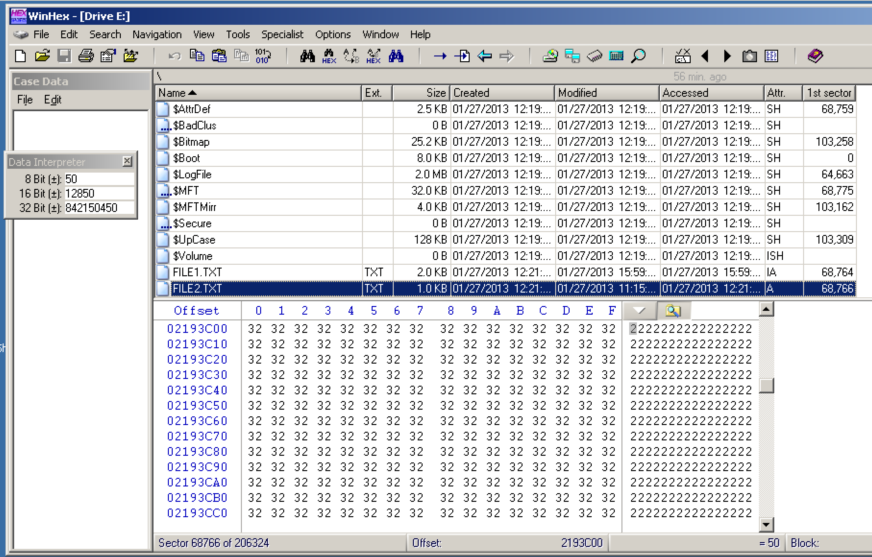
The two files should be visible on the new drive, as shown below.
In the center of the page, click WinHex
In the left center portion of the window, click Download
On your desktop, or wherever you saved the file, right-click the winhex.zip file and click "Extract All...".
In the "Welcome to the Compressed (zipped) Folders Extraction Wizard" box, click Next, Next, Finish.
A folder with several files opens. Double-click the setup.exe file.
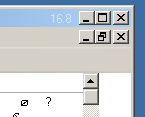
In the "WinHex 16.8" screen, in the lower right, as shown below, click the English button.
Then click the OK button.
In the "Setup" box, click Yes.
In the "WinHex" box, click Yes.
In the "WinHex" box, click Yes.
WinHex opens, as shown below.
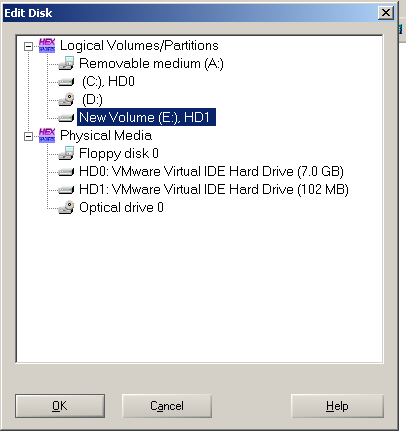
In the "Edit Disk" box, click "New Volume", as shown below, and then click the OK button.
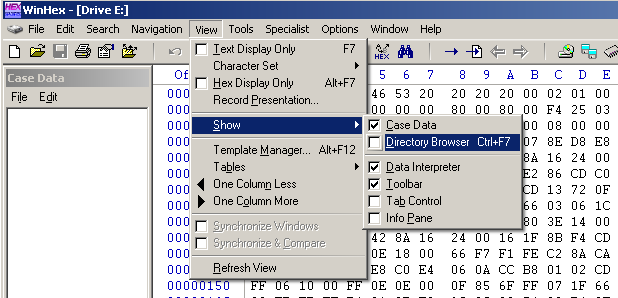
From the WinHex menu bar, click View, Show, "Directory Browser", as shown below.
The Directory Browser pane appears in the upper center of the window.
Scroll down to find FILE1.TXT and FILE2.TXT, as shown below.
In the Directory Browser, click FILE1.TXT.
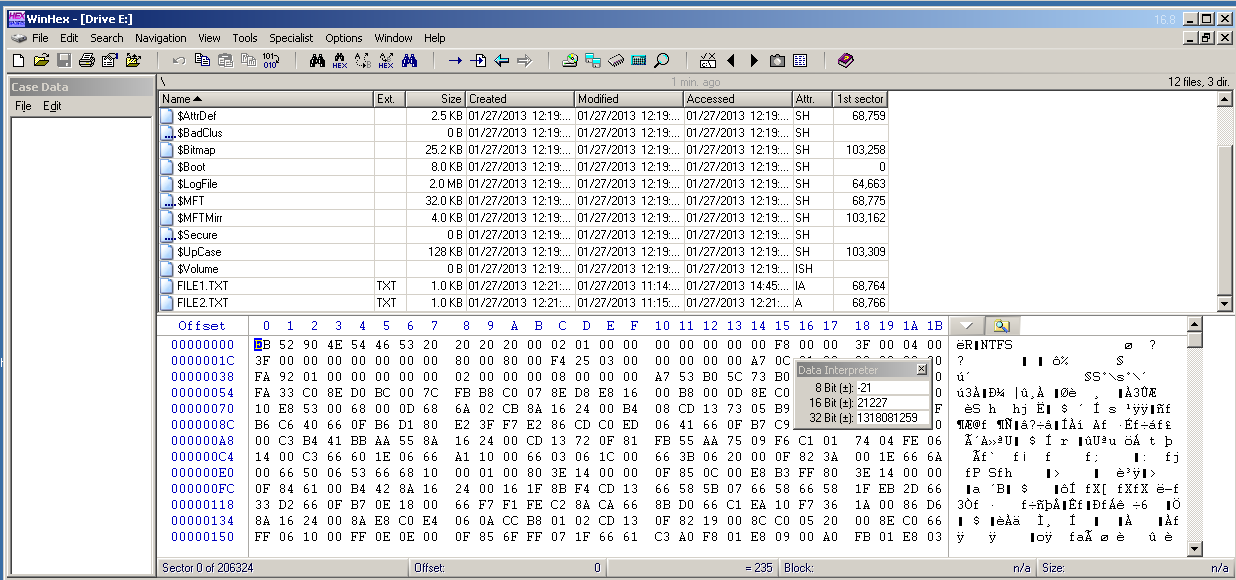
The lower pane shows the raw hex data in the first cluster containing data for FILE1.TXT, as shown below.
Notice the yellow icon marked with the green outline in the image above this text. (It's a magnifying glass on a folder). This icon toggles the display of Directory Browser. Click it now.
Directory Browser vanishes, so you can see more of the hex view, as shown below.
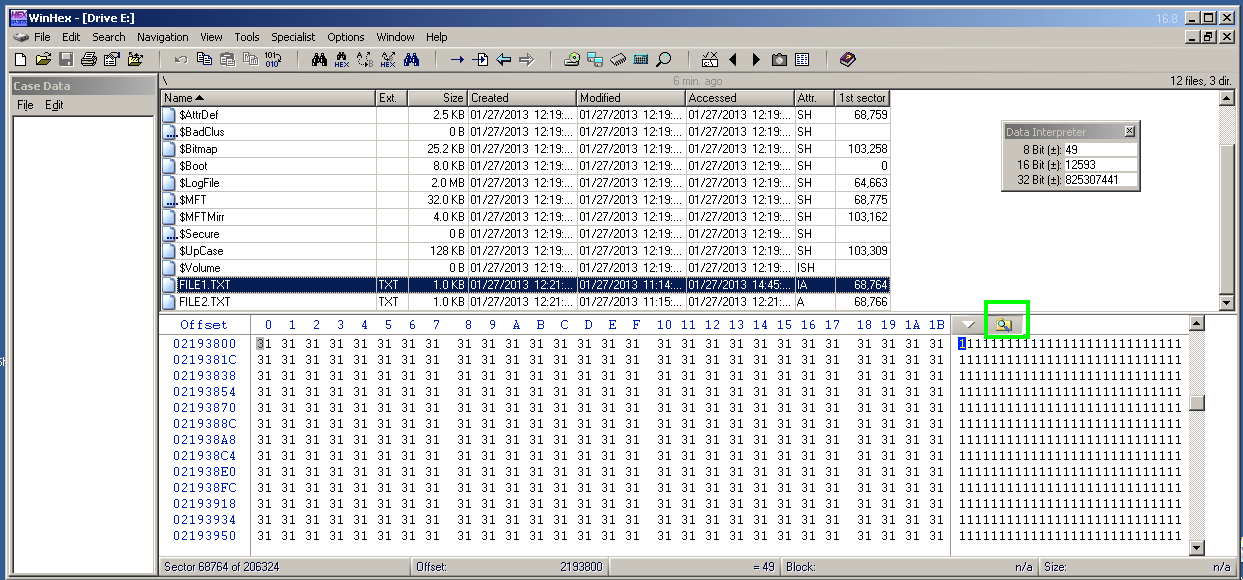
Scroll up a few rows in the hex view so you can see where the "1" characters start, as shown below.
They start at the beginning of a sector. The sector number is shown at the lower left--in my case, it was Sector 68764.
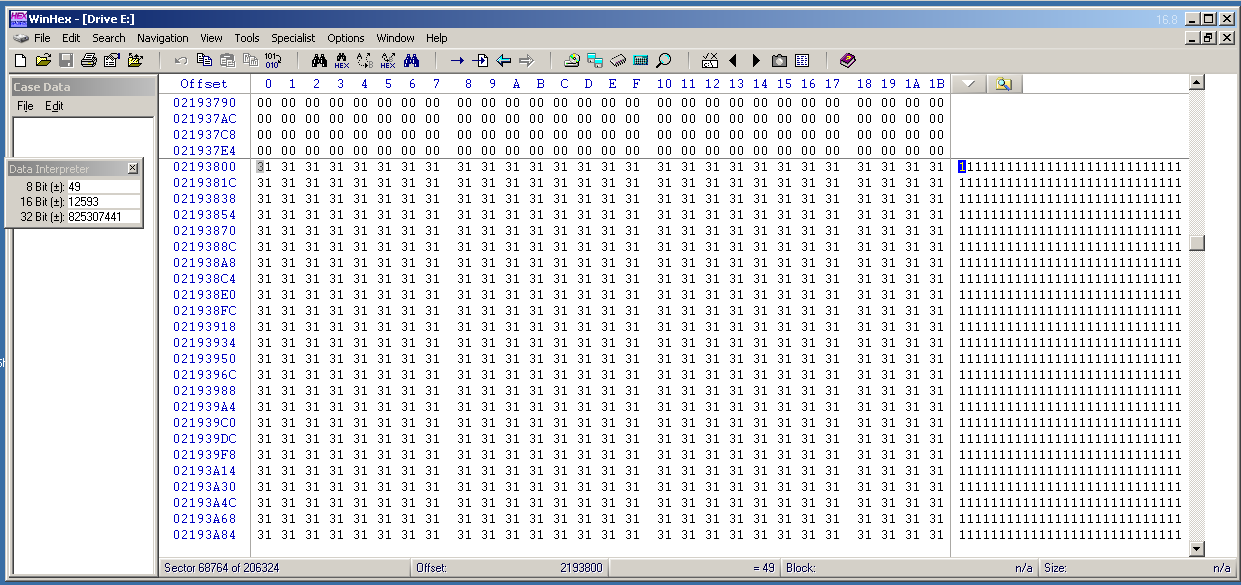
Scroll down in the Hex view until you find the end of the "1" characters.
As shown below, they fill one sector completely, and nearly fill the next sector (68765 in my case).
Press the PrintScrn key in the upper-right portion of the keyboard. That will copy the whole desktop to the clipboard.
YOU MUST SUBMIT A FULL-SCREEN IMAGE TO GET FULL CREDIT!
Open Paint and paste in the image.
Save the image with the filename "Your Name Proj 8a". Use your real name, not the literal text "Your Name".
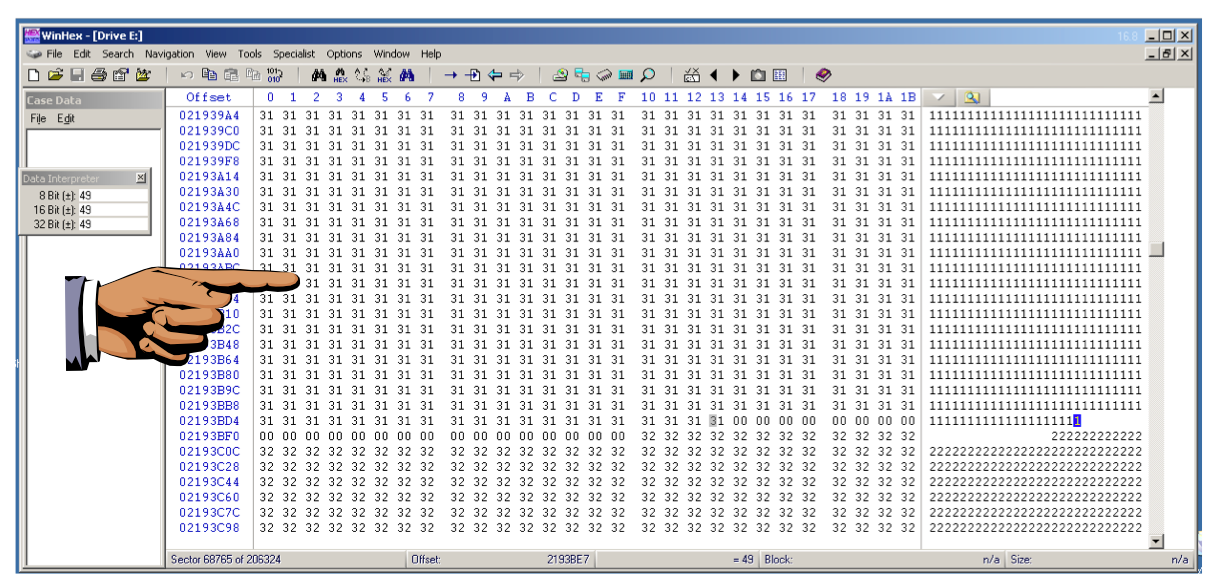
They should follow the same pattern, filling one sector completely, and nearly filling the next sector, as shown below.
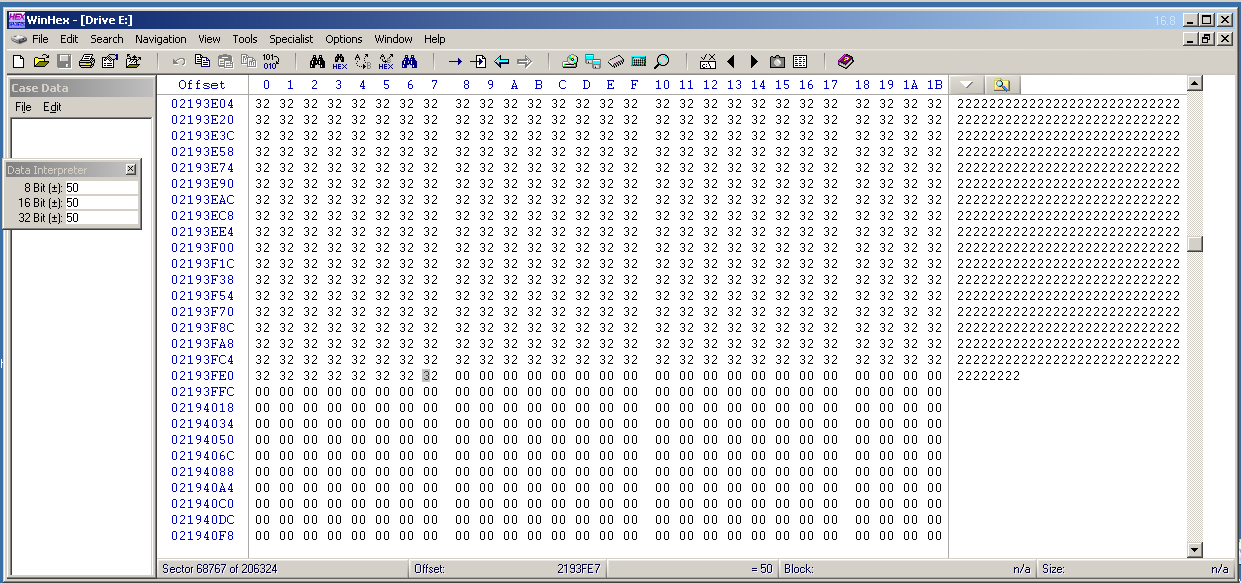
Here's a summary of the data layout:
Sector  Contents
------  --------
68764      1s
68765   1s and 0s
68766      2s
68767   2s and 0s
In the upper right corner of the
WinHex window there are two X buttons,
as shown below.
Click the lower X button. This closes the "New Volume" drive.
Click the remaining X button. This closes WinHex.
Double-click the "New Volume" icon to open the volume.
Double-click the FILE1.TXT icon to open the file in Notepad.
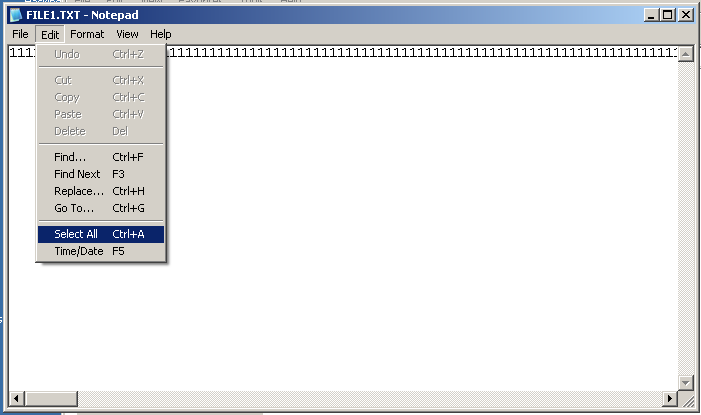
In Notepad, click Edit, "Select All", as shown below.
In Notepad, click Edit, Copy.
In Notepad, click Edit, Paste.
In Notepad, click Edit, Paste again.
In Notepad, click File, Save.
Close Notepad.
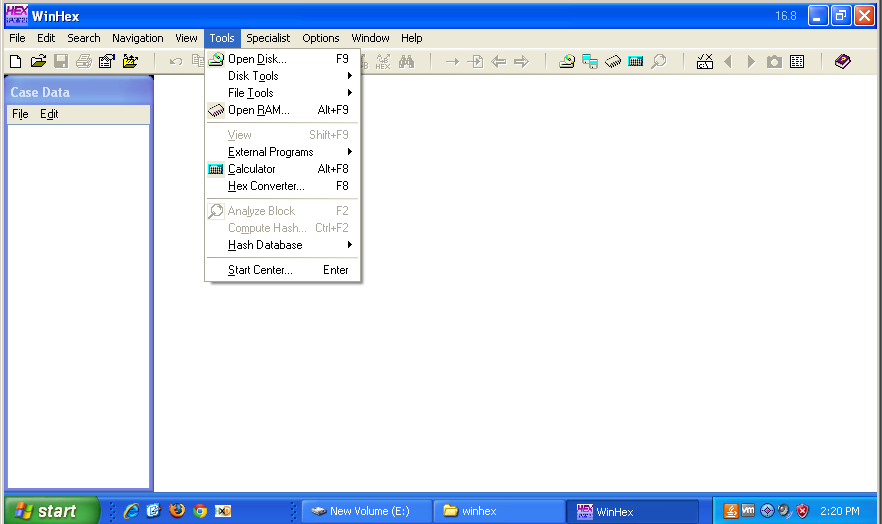
From the WinHex menu bar, click Tools, "Open Disk...".
In the "Edit Disk" box, click "New Volume", and then click the OK button.
From the WinHex menu bar, click View, Show, "Directory Browser".
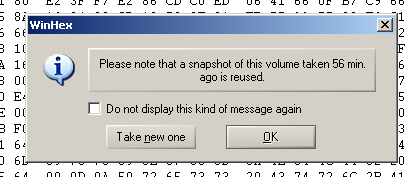
A box pops up saying that a snapshot is reused, as shown below. Directory Browser actually works from a copy of the data called a Snapshot, not from the original disk.
We just changed the disk, so an old snapshot won't be accurate.
So click "Take a new one".
The Directory Browser pane appears in the upper center of the window.
Scroll down to find FILE1.TXT and FILE2.TXT.
In the Directory Browser, click FILE1.TXT.
Notice that FILE1 now has a size of 2.0 KB, as shown below.

Click the yellow icon to hide Directory Browser, as you did before.
Scroll down through the two sectors of "1" characters.
Scroll down through the two sectors of "2" characters.
There should be another two sectors of "1" characters below the "2" characters, as shown below.
Here's a summary of the data layout:
Sector  Contents
------  --------
68764      1s
68765      1s
68766      2s
68767   2s and 0s
68768      1s
68769   1s and 0s
Scroll to the bottom.
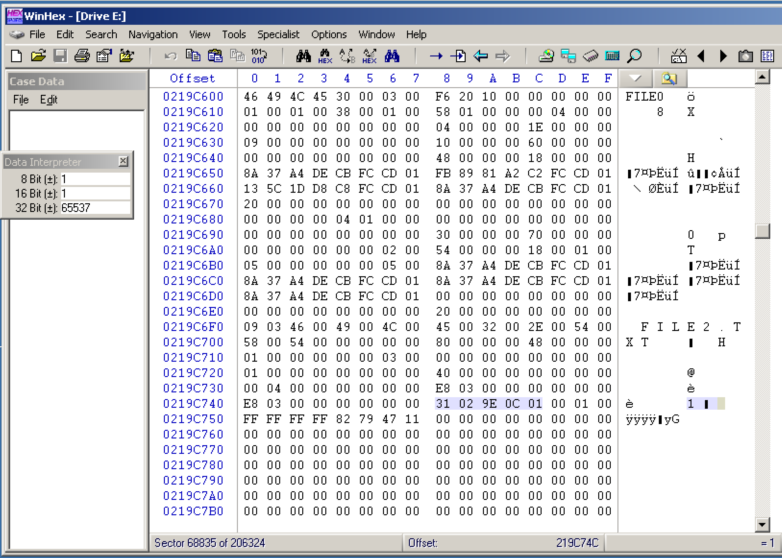
Right-click FILE2.TXT.
In the context menu, click Navigation, "Go To FILE Record", as shown below.
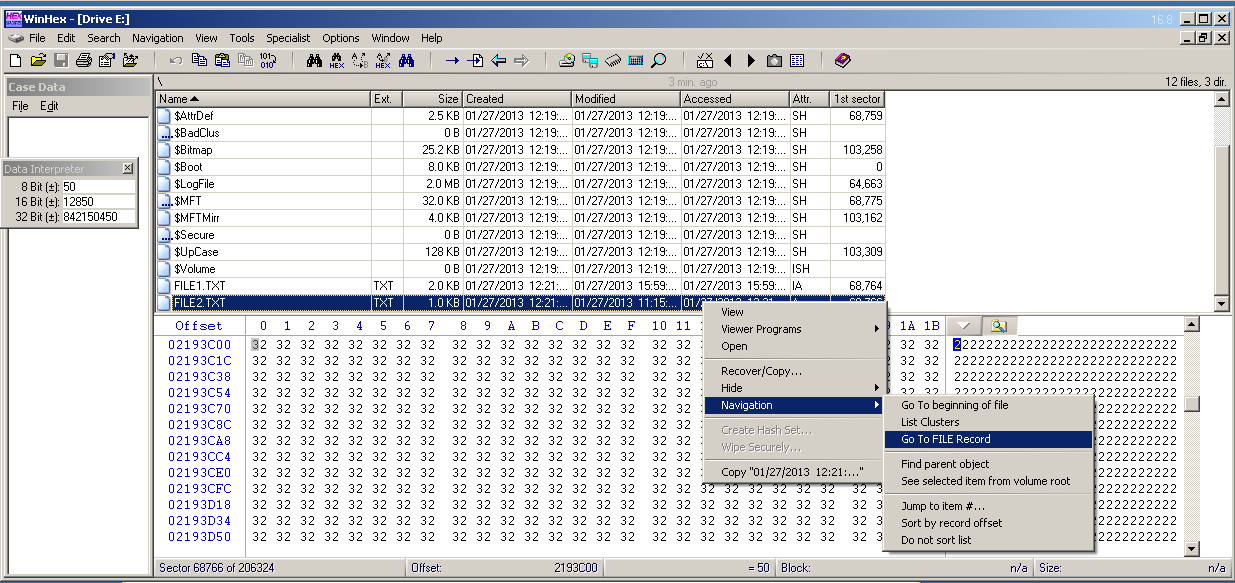
This is the Master File Table (MFT) record which contains information about FILE2.TXT.
Each MFT record begins with the ASCII text "FILE0".
Highlight that text, so your screen looks like the image below.
We need to count 56 bytes from this point. That will be a lot easier with only 16 bytes per row.
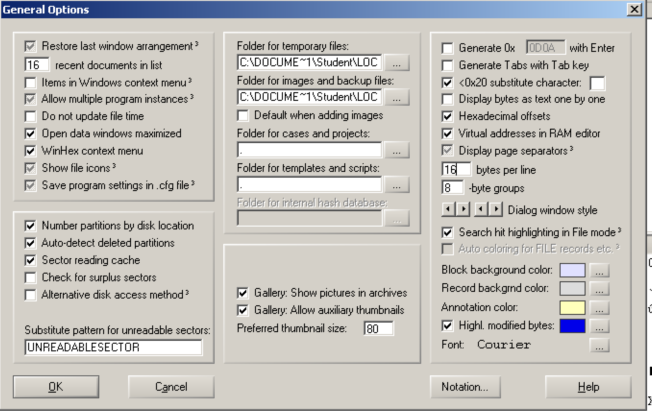
From the WinHex menu bar, click Options, General.
On the right side, in the center, enter 16 in the "bytes per line" box, as shown below.
Click OK.
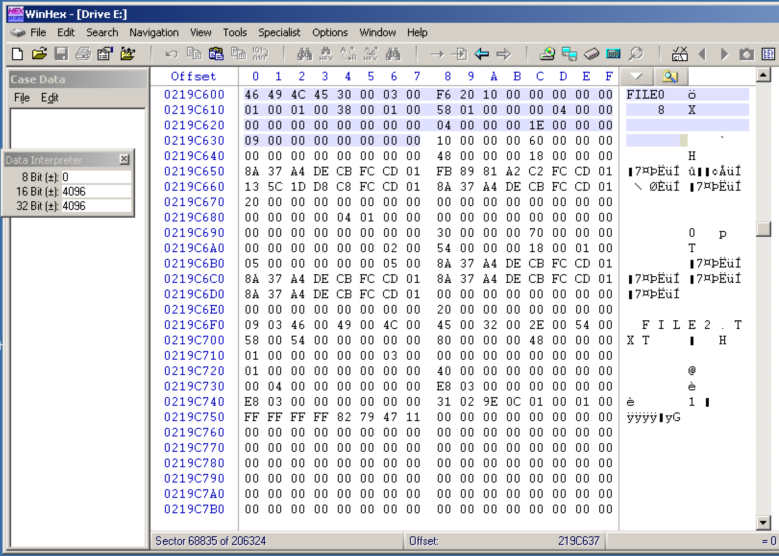
WinHex now has only 16 bytes per line, labelled 0 though F in the "Offset" line at the top of the display, as shown below.
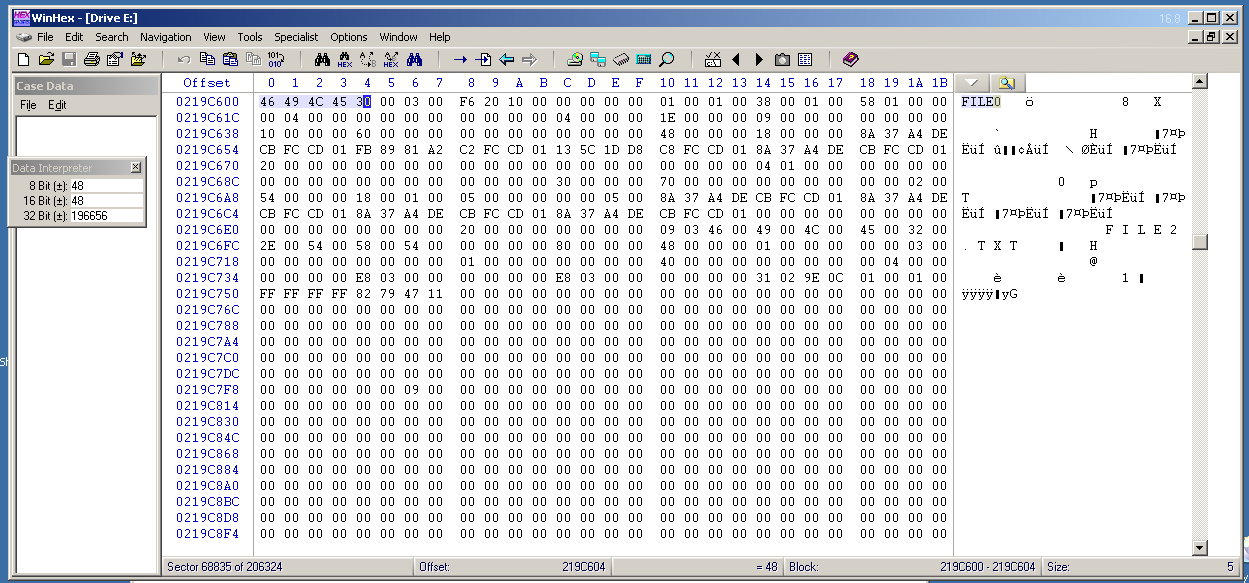
Click on the first byte: 46.
Hold down the Shift key and press the down-arrow on the keyboard three times. This selects three lines of 16 bytes for a total of 48 bytes.
Now, holding down the Shift key, press the right-arrow key until you have selected bytes 0 through 7 in that row.
This selects the entire 56 bytes of the MFT record header, as shown below.
Each section of the MFT begins with a four-byte identifier--in this case 10 00 00 00.
Here is a chart of the MFT attribute types, from http://grayscale-research.org/new/pdfs/NTFS%20forensics.pdf
The next four bytes indicate the length of the section, in hexadecimal, with the least significant byte first.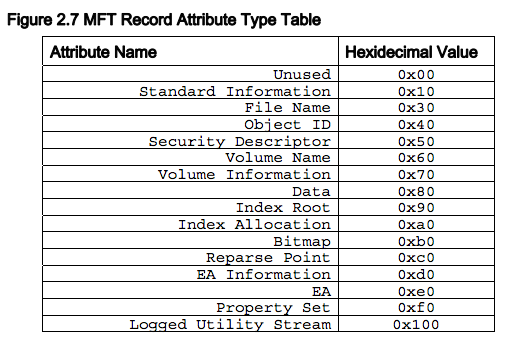
So the eight bytes highlighted below indicate that the Standard Information section is 60 bytes long.
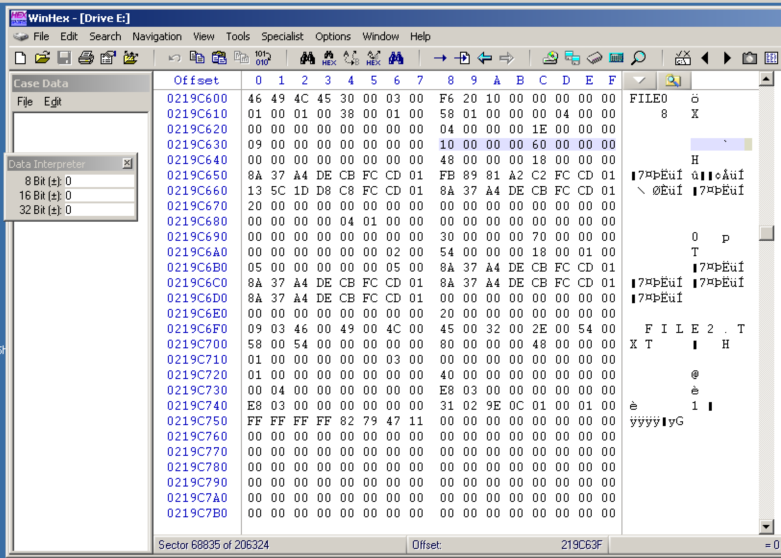
Highlight the entire Standard Information section. It will be six entire rows of 16 bytes, as shown below.
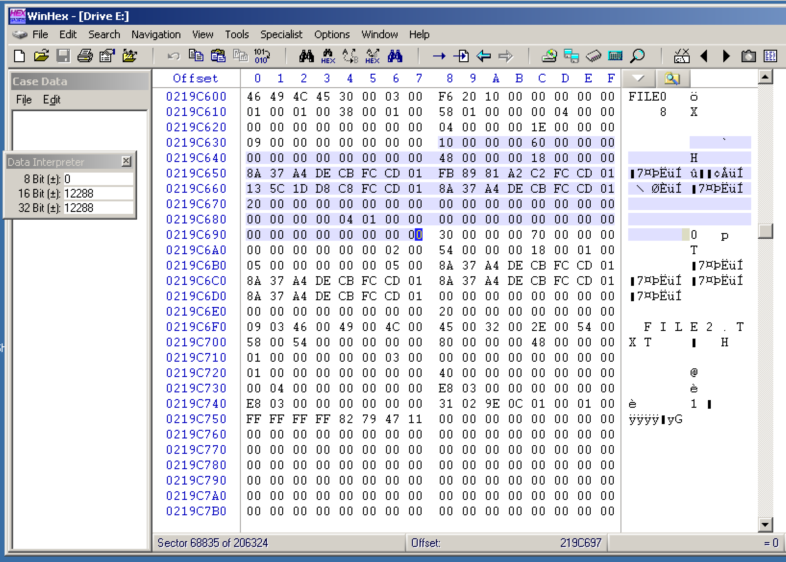
Highlight the section.
Notice the readable file name near the end of this section: FILE2.TXT.
It's in Unicode, so there's a 00 byte after each readable character.
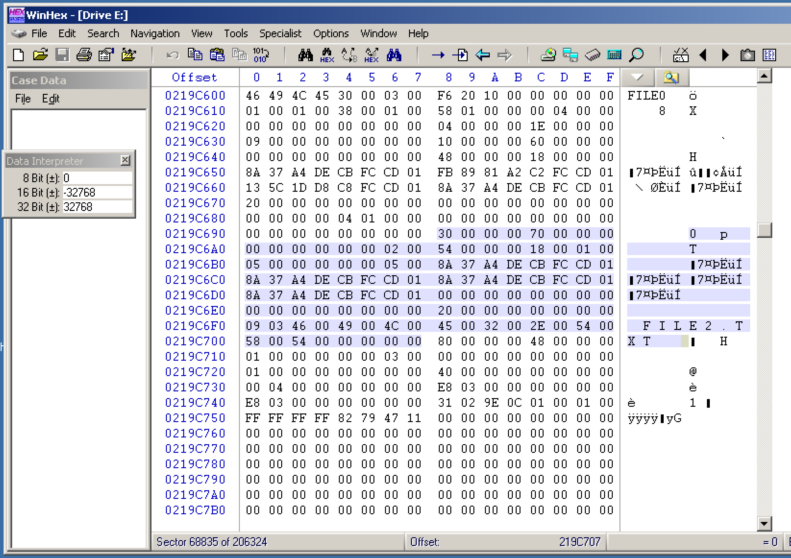
This section indicates where the data is actually stored on the disk.
Highlight the section.
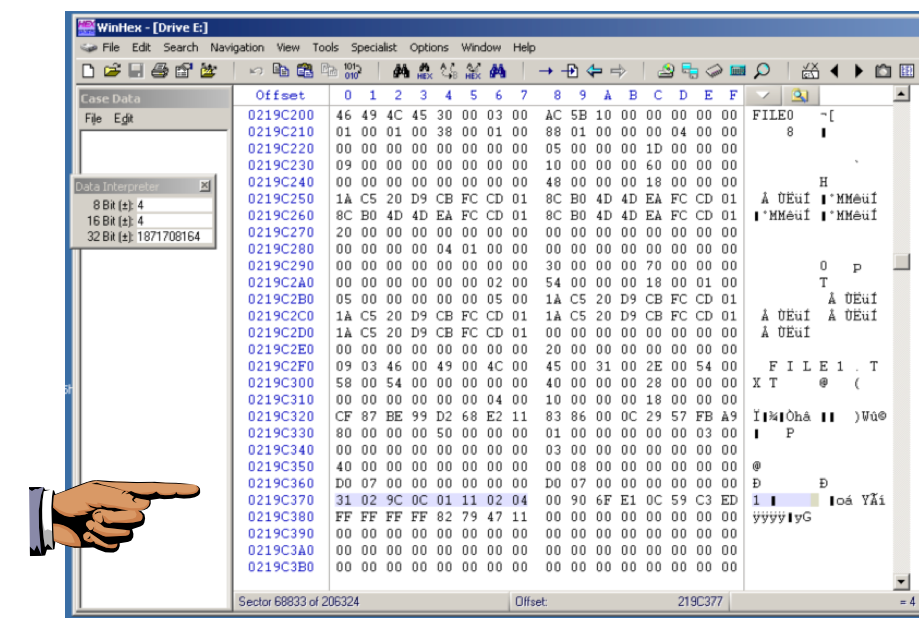
The last eight bytes of this section contain the "Data Run", as highlighted below.
In this case, the Data Run is
31 02 9E 0C 01
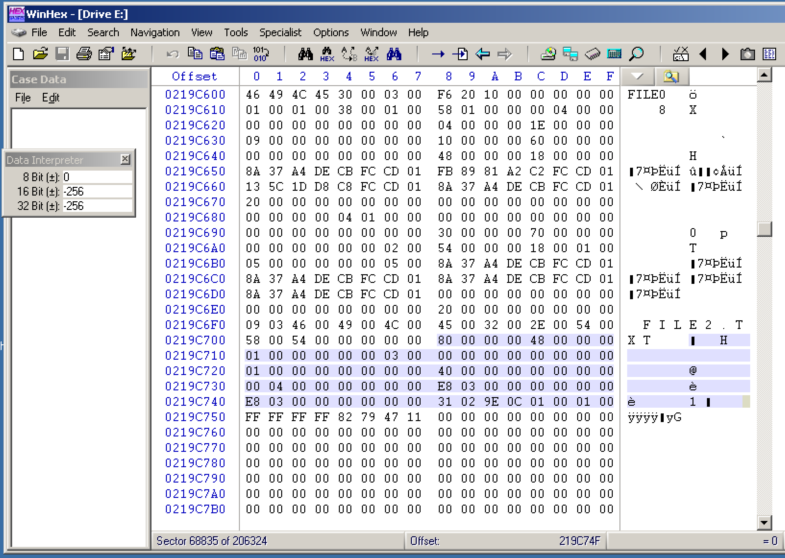
3: the last 3 bytes contain the starting cluster numberSo there are 2 clusters in a row here, at cluster # 9E 0C 01.1: The first 1 byte contains the length of this portion of the file, in clusters.
The cluster # bytes are in "Little Endian" notation, so they must be reversed in order, resulting in Cluster number 01 0c 9E.
This means 1x65536 + 12x256 + 9x16 + 14 = 68766, which you may recall is the correct sector number for the beginning of FILE2.TXT, as shown by Directory Browser below:
Right-click FILE1.TXT.
In the context menu, click Navigation, "Go To FILE Record".
Walk through the MFT record as you did before, to find the Data section and the File Run.
This time the File Run contains two sections: one starting with 31 and one starting with 11, as shown below.
The second portion is much simpler because the sector numbers are relative.
It's 11 02 04, which means "Two more sectors, starting four sectors after the previous block of data".
Highlight the Data Run, including eight bytes, as shown below.
Press the PrintScrn key in the upper-right portion of the keyboard. That will copy the whole desktop to the clipboard.
YOU MUST SUBMIT A FULL-SCREEN IMAGE TO GET FULL CREDIT!
Open Paint and paste in the image.
Save the image with the filename "Your Name Proj 8b". Use your real name, not the literal text "Your Name".
Send it to: cnit.121@gmail.com with a subject line of "Proj 8 From Your Name", replacing "Your Name" with your own first and last name.
Send a Cc to yourself.
http://stam.blogs.com/8bits/2009/10/lab-ftk-imager-file-carving-using-the-mft-.html
http://grayscale-research.org/new/pdfs/NTFS%20forensics.pdf
Last modified: 1-28-13 1:45 am