If VMware Player is closed, open it again.
Your virtual machine should now be "Powered Off".
On the lower right, click the "Edit virtual machine settings" link. The "Virtual Machine Settings" opens.
On the lower left, click the Add... button.
The "Add Hardware Wizard" opens.
In the left pane, accept the default selection of "Hard Disk".
Click the Next button.
In the next box, accept the default selection of "Create a new virtual disk".
Click the Next button.
In the next screen, accept the default selection of "IDE (Recommended)".
Click the Next button.
In the "Specify Disk Capacity" screen, set the Maximum disk size to 0.1 GB.
Click the Next button.
In the "Specify Disk File" screen, accept the default selection.
Click the Finish button.
In the "Virtual Machine Settings" screen, click the OK button.
Click the "Play Virtual Machine" button.
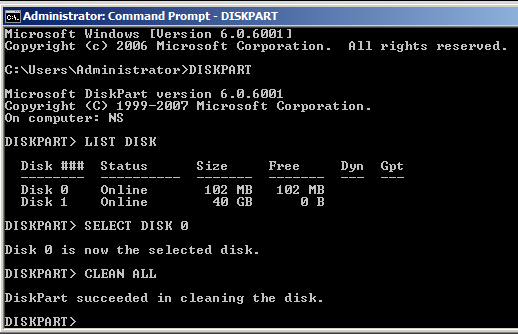
DISKPART

LIST DISK
Read the output to find the 101 MB disk you want to clean.
BE CAREFUL NOT TO SELECT THE WRONG DISK!
In the Command Prompt window, excute these commands, specifying the correct disk in the first command:
SELECT DISK 0

CLEAN ALL
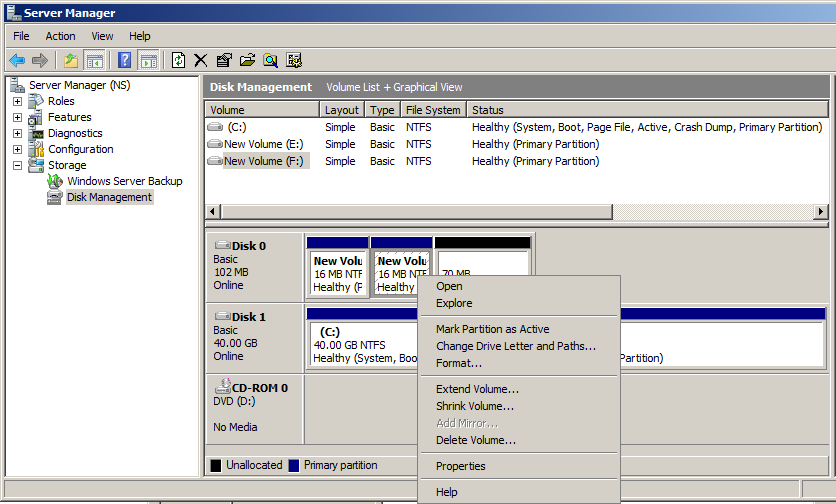
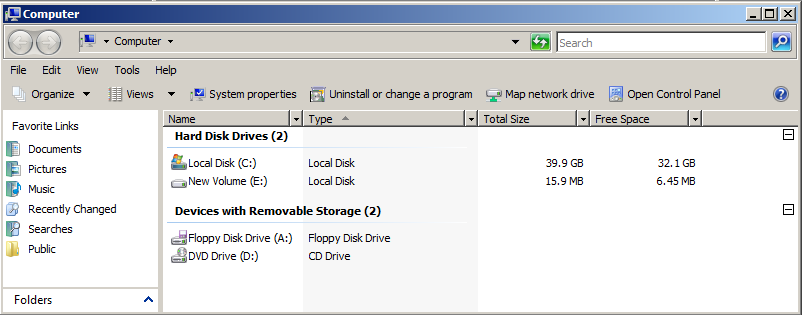
Right-click "My Computer" and click Manage.
In the left pane of Server Manager, expand Storage and click "Disk Management".
The disk appears in the lower center pane as "Not Initialized", and an "Initialize Disk" box pops up, as shown below.
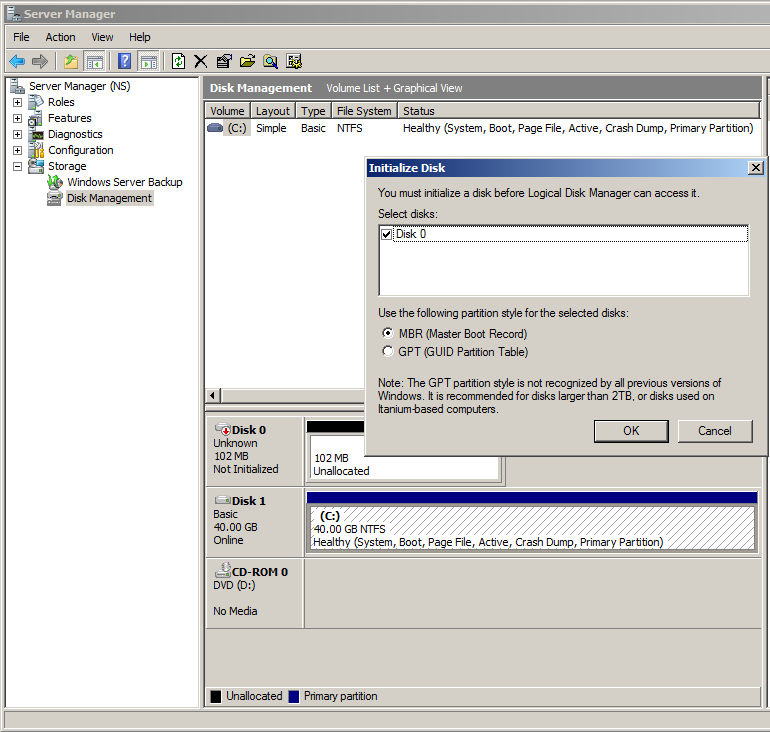
In the "Initialize Disk" box, accept the default of "MBR" and click OK.
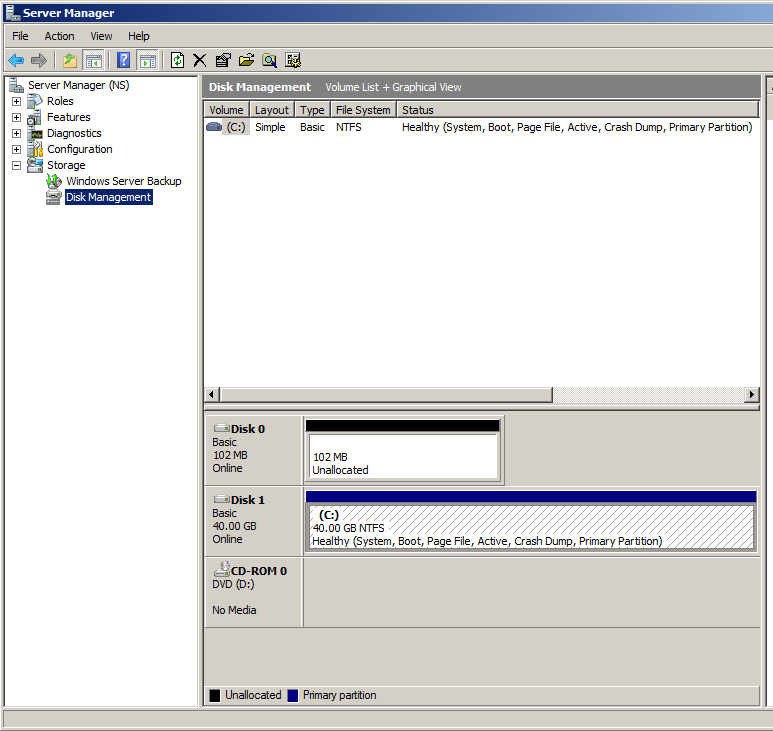
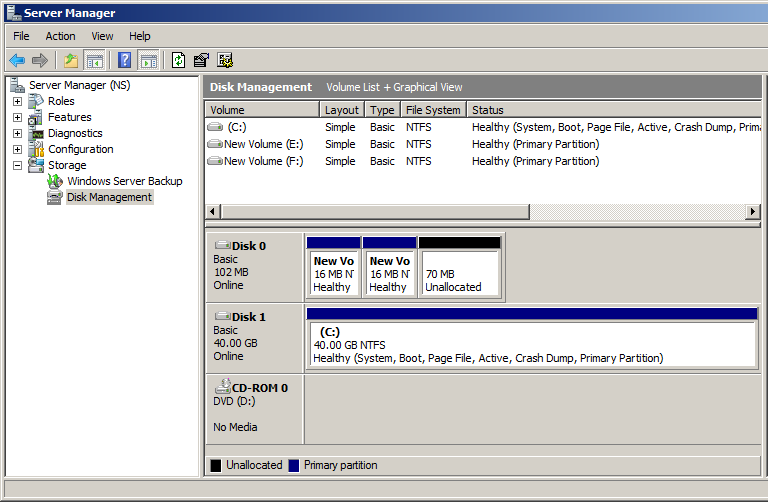
In the lower center pane of Server Manager, the disk now has a status of "Online", as shown below.
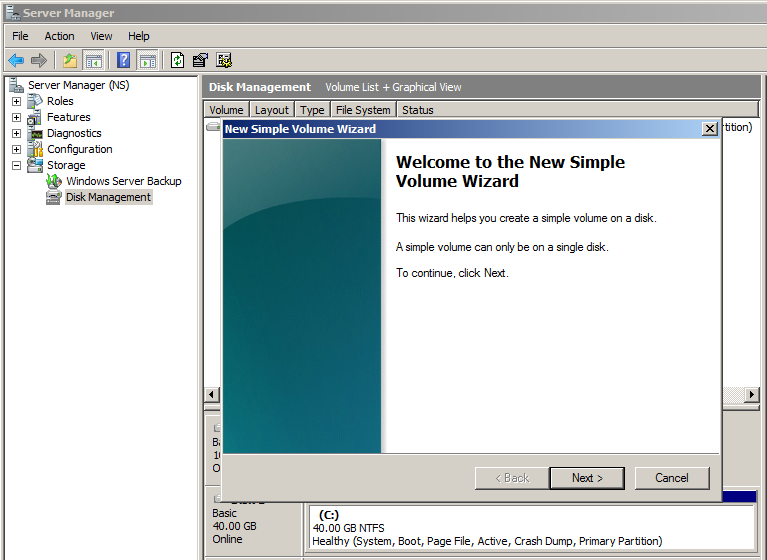
In the context menu, click "New Simple Volume...".
The "New Simple Volume Wizard" opens, as shown below.
Click Next.
In the "Specify Volume Size" screen, enter a size of 16 MB and click Next.
In the "Assign Drive Letter or Path" screen, accept the default selection and click Next.
In the "Format Partition" screen, accept the default selections and click Next.
In the "Completing the New Simple Volume Wizard" screen, click Finish.
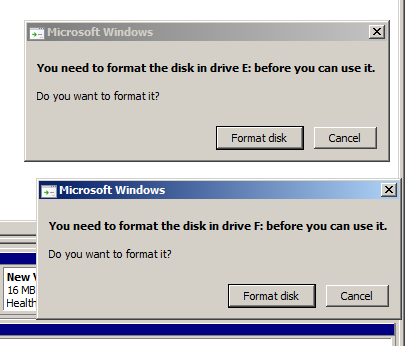
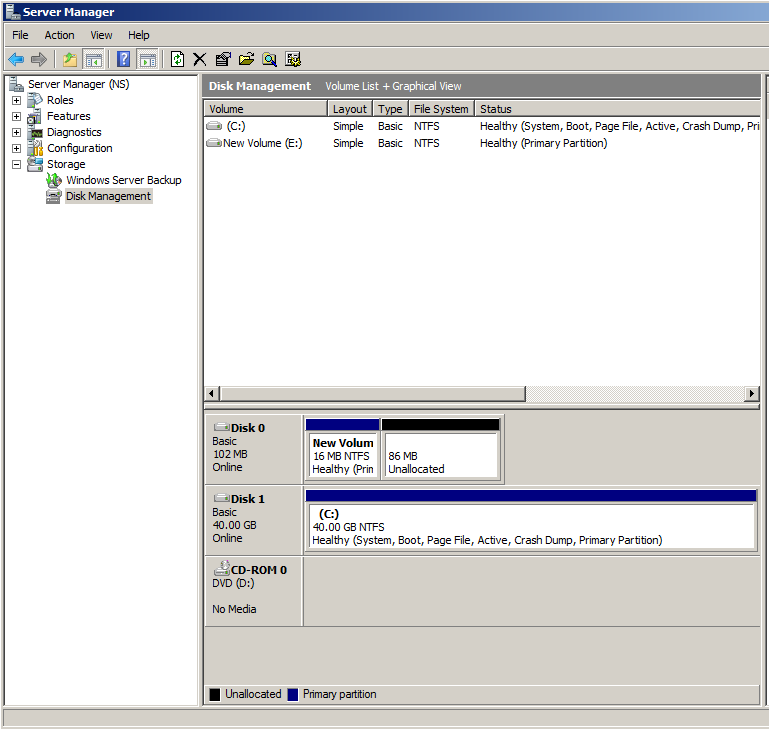
The new volume is created and formatted within a few seconds, because it is so small.
Server Manager should now show the two 16 MB partitions, like this:
Download WinHex here:
The downloaded file is a ZIP archive.
Right-click it, click "Extract All...", and click Extract.
Open the winhex folder and double-click the setup file to install it.
Install it with the default options.
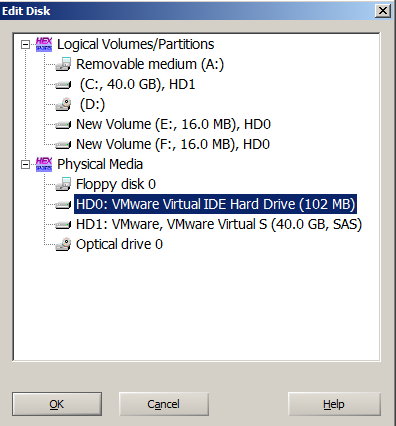
In the "Edit Disk" box, click "HD0: VMware Virtual IDE Hard Drive (102 MB)", as shown below, and then click the OK button.
The upper center pane shows the two partitions, with their sizes and "1st sector" values, as shown below.
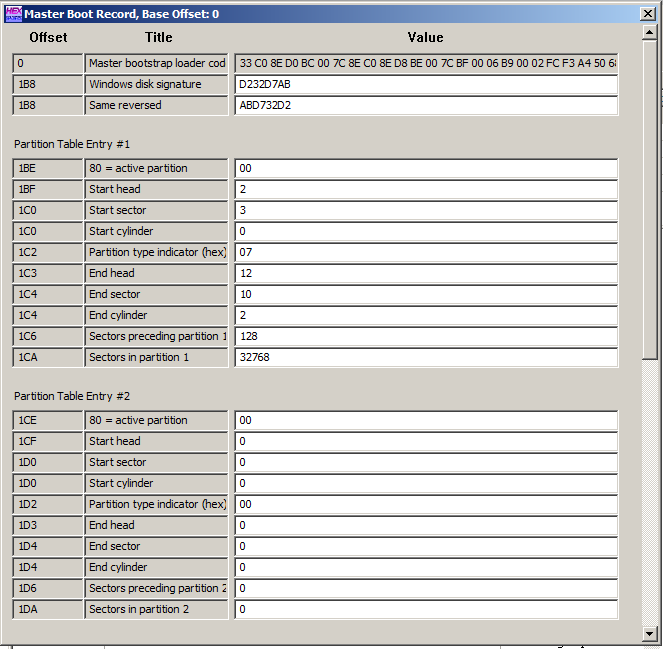
In the lower center pane, scroll down to the end of the Master Boot Record.
Highlight the 64 bytes before the "55 AA" endmark, as shown below.
This is the Partition Table.
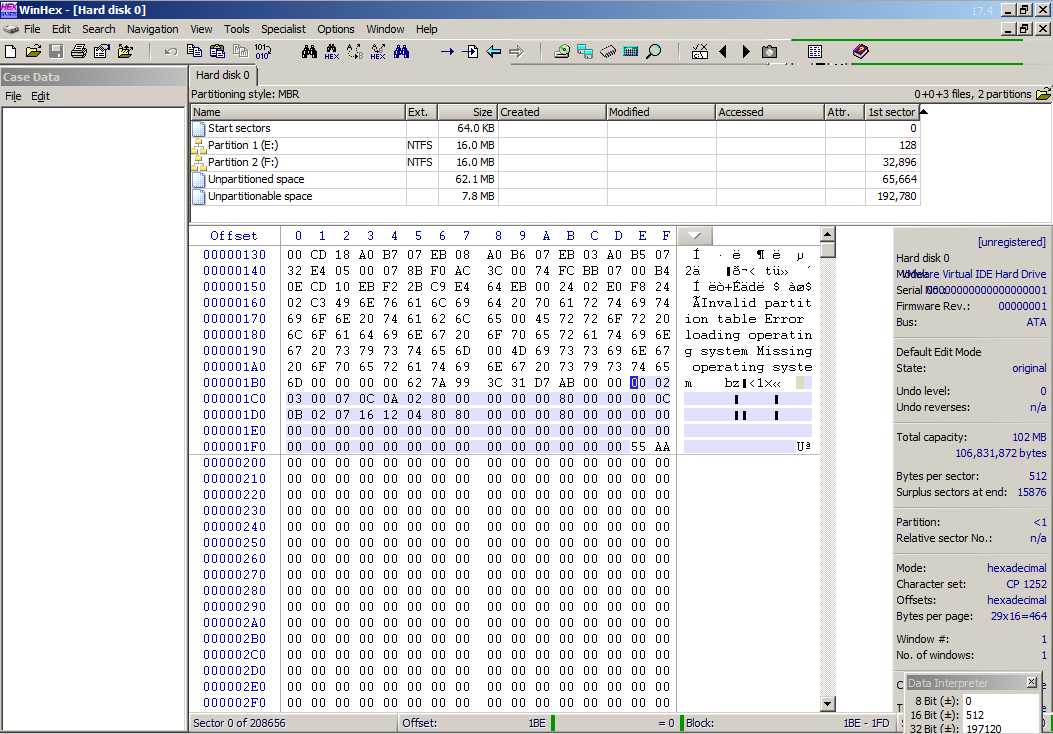
Only the first 32 bytes of the Partition Table are used, because this disk has only two partitions. The last 32 bytes contain zeroes.
The WinHex help entry for the Master Boot Record explains the Partition Table record structure well:
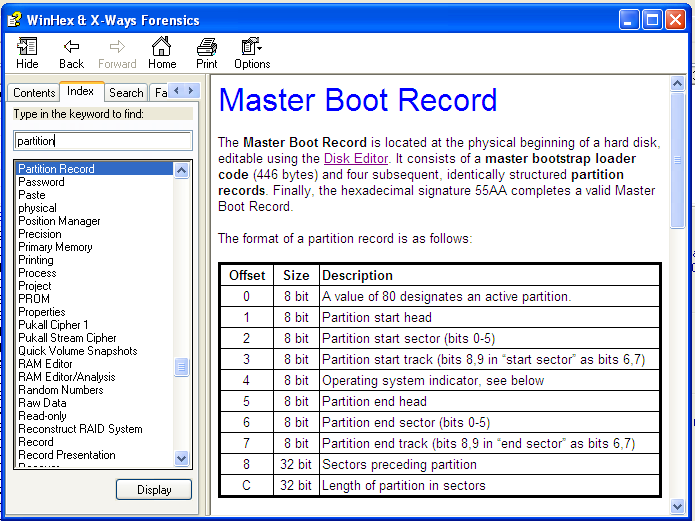
There are two indicators of the start-of-partition in the Partition Table.
The first one is in "CHS" format, containing the Cylinder, Head, and Sector (not in that order). (The Cylinder is also called the Track.)
This is convenient for the hard disk controller, but not simple for humans to figure out.
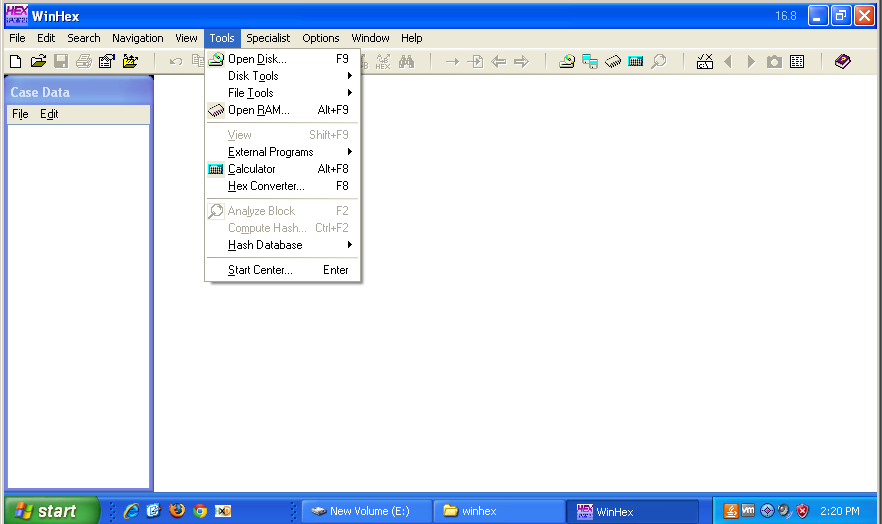
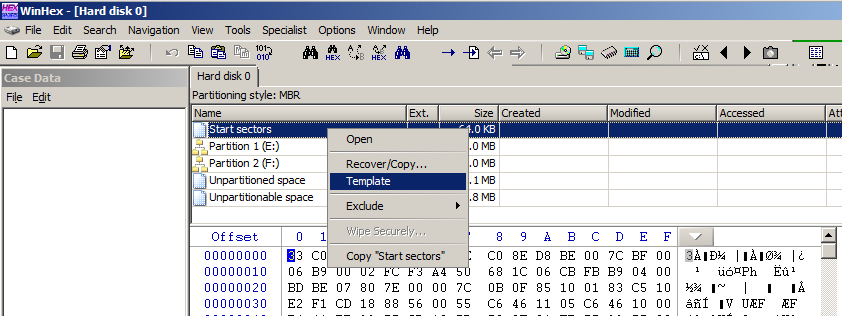
To make it easier, in the top center pane, right-click "Start sectors" and click Template, as shown below:
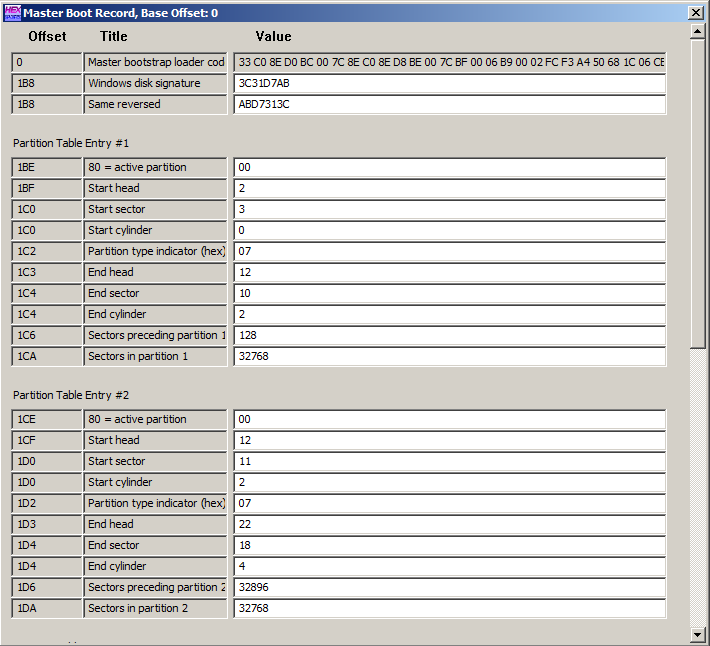
The Master Boot Record and the Partition Table are shown in a much friendlier format, as shown below. As you can see, there are two partitions on this physical disk, with nonzero entries in both the "Partition Table Entry #1" and "Partition Table Entry #2" sections.
Close the "Master Boot Record, Base Offset: 0" window.
A Volume Boot Record appears, which ends with a 55 AA Signature, as shown below:
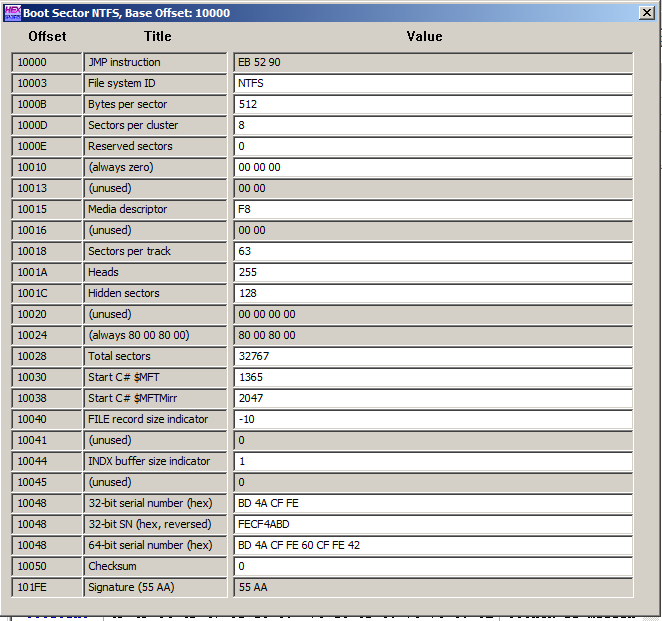
Close the "Boot Sector NTFS, Base OFfset: 10000" window.
In the top center pane, right-click "Partition 2 (F:)" and click Template.
A Volume Boot Record appears, which ends with a 55 AA Signature, as shown below:

Close the "Boot Sector NTFS, Base OFfset: 1010000" window.
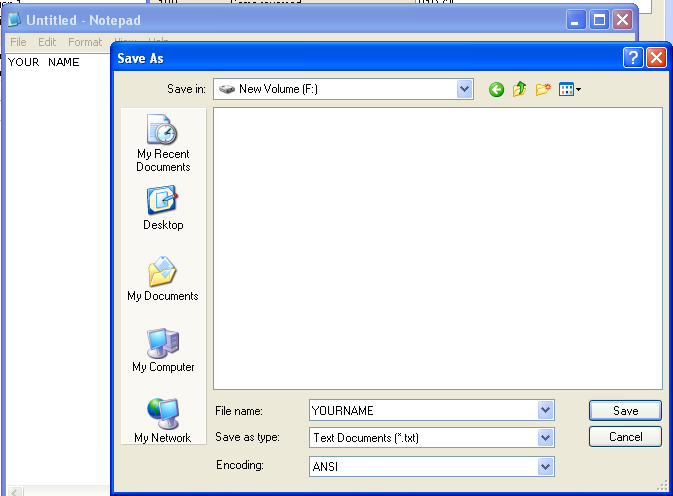
Save the file on drive F:, which is the second 16 MB NTFS partition you just created.
Use a filename of YOURNAME.txt, as shown below. Don't use the literal text "YOUR NAME"--use your own name.
Close Notepad.
A box pops up warning you "Deleting this volume will erase all data on it...". As you will see, this statement is completely false if you are a forensic examiner.
Click Yes.
Disk Management now shows only one volume on your 102 MB hard disk, as shown below:
The F: drive is gone, as shown below, and the file with your name on it is lost.
This is what the Windows warning meant--there is no built-in Windows utility that can recover the file now, but it's still on the disk.
In the top center pane, right-click "Start sectors" and click Template.
The Master Boot Record and the Partition Table appear, as shown below.
As you can see, "Partition Table Entry #1" still contains nonzero entries, but "Partition Table Entry #2" has been filled with zeroes. This is what the "Delete Partition" process did.
Close the "Master Boot Record, Base Offset: 0" window.
Next, let's examine the Volume Boot Records.
In the top center pane, right-click "Partition 1 (E:)" and click Template.
The Volume Boot Record is the same as it was before, as shown below. This is to be expected, because you did not delete this volume.
Close the "Boot Sector NTFS, Base OFfset: 10000" window.
In the top center pane, right-click "Partition 2 (F:)" and click Template.
The Volume Boot Record is still intact, as shown below!
This is the primary reason computer forensics is so powerful--deleting files and partitions doesn't actually erase data. It just changes partition table and directory data to make the partitions and files inaccessible to Windows.
This is the most efficient way to write an operating system for normal users, but it creates forensic artifacts for us to recover.
Close the "Boot Sector NTFS, Base OFfset: 1010000" window.
In the "Find Text" box, enter your name, the same way you entered it into the Notepad file you saved previously, as shown below.
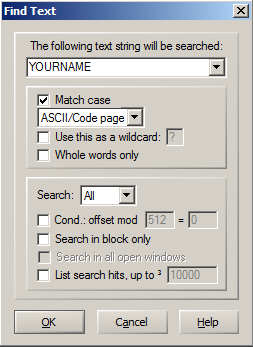
In the "Find Text" box, click OK.
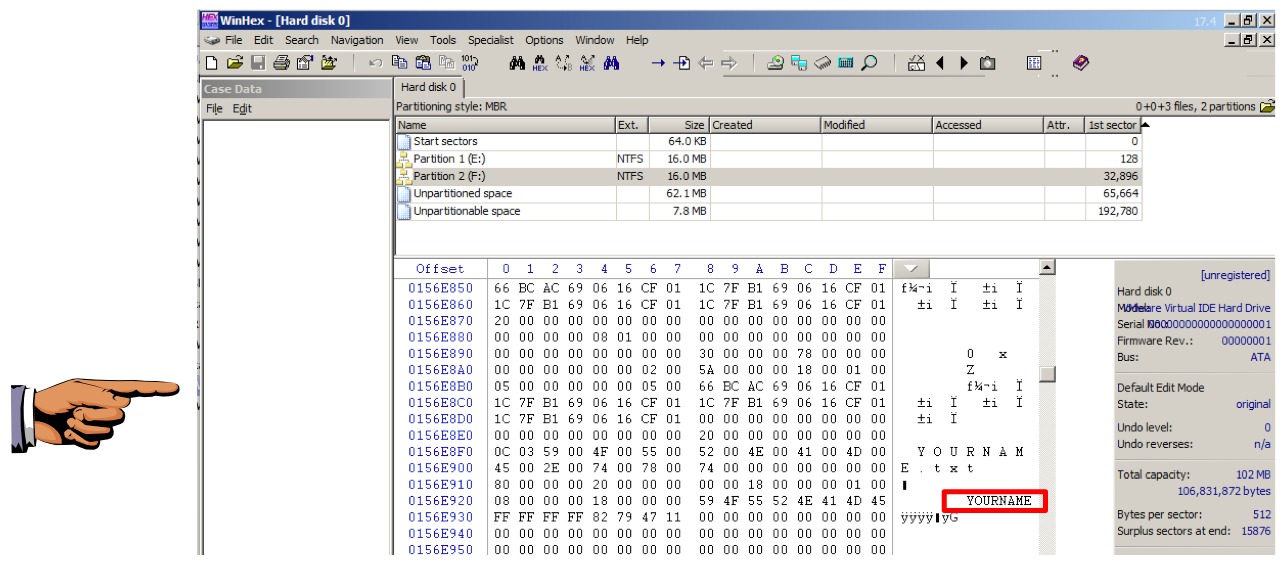
You should see your name on the right side, as shown below. The file you saved is still present on the disk, even after deleting the volume it was stored in.
Press the PrintScrn key in the upper-right portion of the keyboard. That will copy the whole desktop to the clipboard.
YOU MUST SUBMIT THE WHOLE DESKTOP TO GET FULL CREDIT!
Open Paint and paste in the image.
Save the image with the filename "Your Name Proj 9a". Use your real name, not the literal text "Your Name".
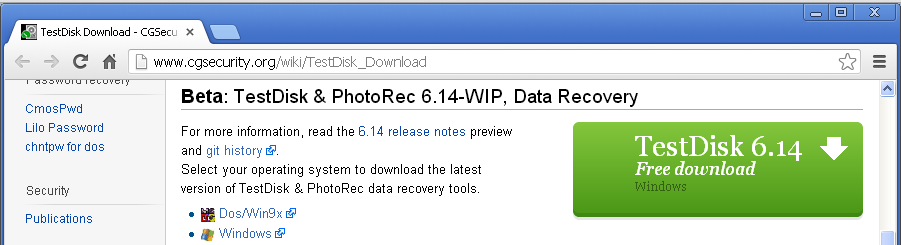
Open a Web browser and to to
http://www.cgsecurity.org/wiki/TestDisk_Download
Click the big green button to download TestDisk, as shown below:
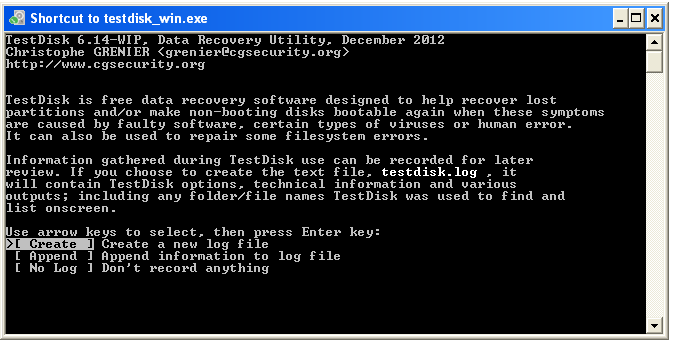
Unzip TestDisk, open the testdisk-6.14.win folder, open the testdisk-6.14.win folder, and double-click the testdisk_win file.
Click Run.
The first screen asks if you want to create a log file.
Press Enter to accept the default option of Create.
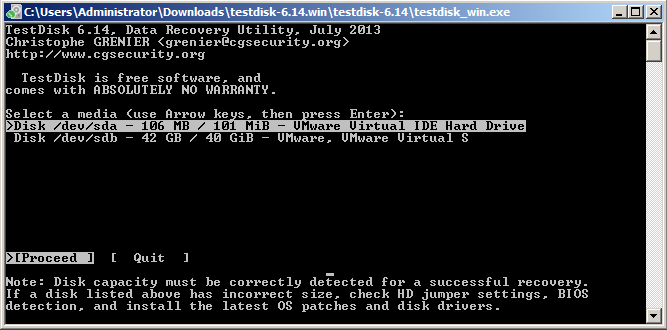
At the next screen, make sure the the 106 MB disk you are repairing is highlighted, as shown below, and press Enter.
Then press Enter.
At the next screen, press Enter to accept the default option of Intel.
At the next screen, press Enter to accept the default option of Analyze.
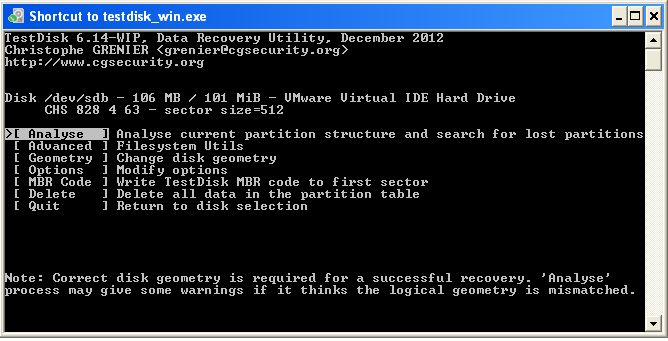
At the next screen, press Enter to accept the default option of "Quick Search".

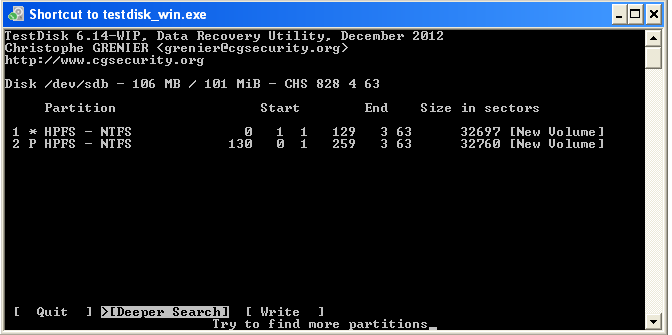
The next screen shows the recovered partitions in green, as shown below:
Press the PrintScrn key in the upper-right portion of the keyboard. That will copy the whole desktop to the clipboard.
YOU MUST SUBMIT THE WHOLE DESKTOP TO GET FULL CREDIT!
Open Paint and paste in the image.
Save the image with the filename "Your Name Proj 9b". Use your real name, not the literal text "Your Name".
The next screen shows the details of the new partition table.
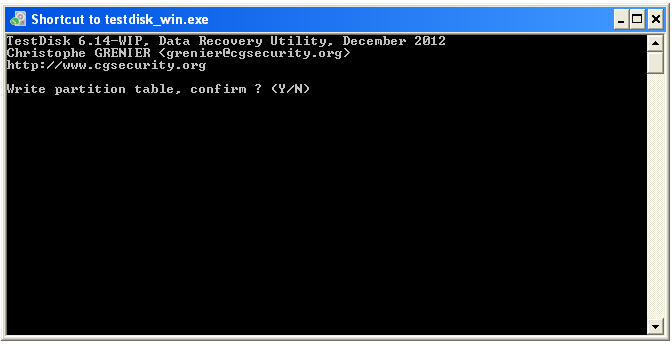
Press W to Write the new table.
At the next screen, press Y to Write the new partition table.
At the next screen, press Enter.
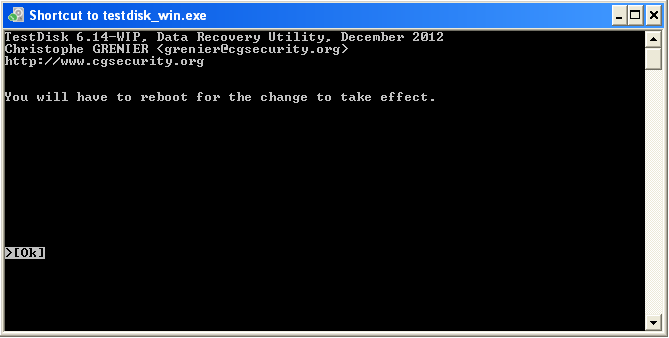
Close all windows and restart your virtual machine.
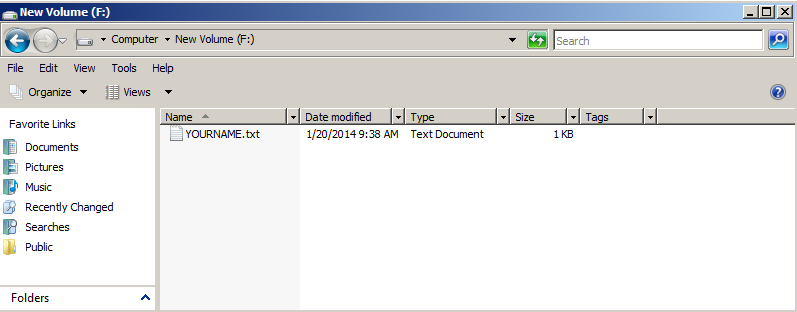
Open the F: drive. Your recovered file is visible, as shown below:
Send it to: cnit.121@gmail.com with a subject line of "Proj 9 From Your Name", replacing "Your Name" with your own first and last name.
Send a Cc to yourself.
Last modified: 1-20-14 10:17 am