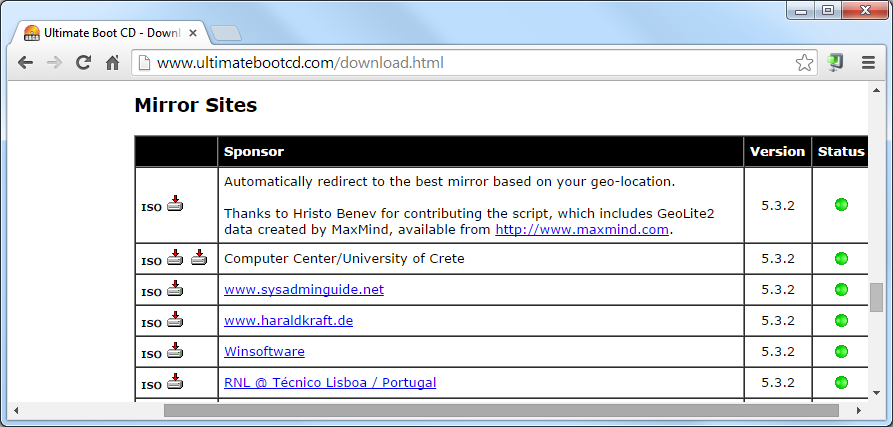
Scroll down to the "Mirror Sites" section. Click any of the little icons labelled "ISO" on the left side, as shown below:
The file will download to your Downloads folder.
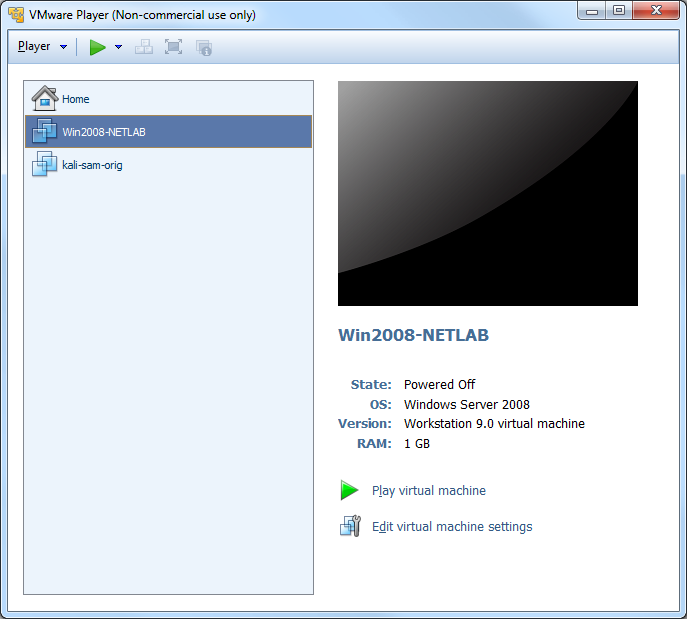
If your virtual machine's State is "Powered Off", as shown below, that's good.
If not, start the VM, click the Start button, and shut it down normally.
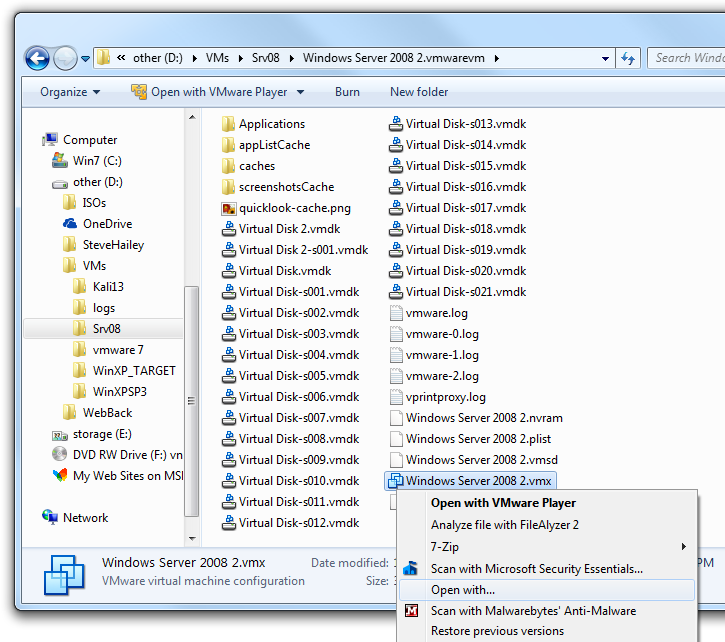
Click Start, Computer. Open the drive and folder containing your Windows Server 2008 virtual machine.
Open the "Windows Server 2008 2.vmwarevm" folder.
Right-click the "Windows Server 2008 2.vmx" file and click "Open with...", as shown below.
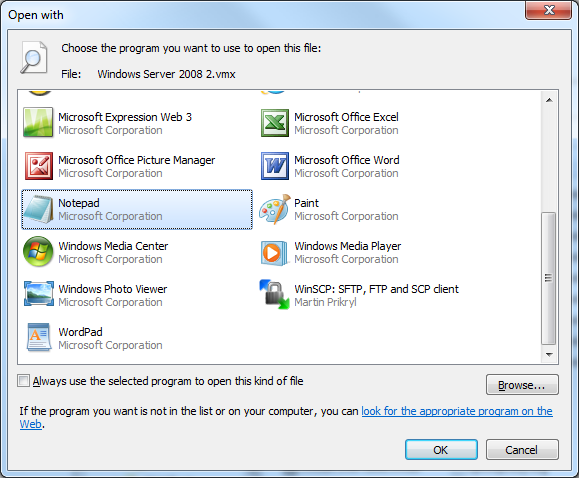
In the "Open with" box, in the right center, click the down-arrow to show the Other Programs.
Find Notepad, as shown below, and click it.
Clear the "Always use the selected program to open this kind of file box, as shown above.
Click OK.
The "Windows Server 2008 2.vmx" file opens in Notepad. Scroll to the bottom and carefully type in this line, ensuring that is is exactly correc, including capitalization:
bios.bootDelay = "5000"
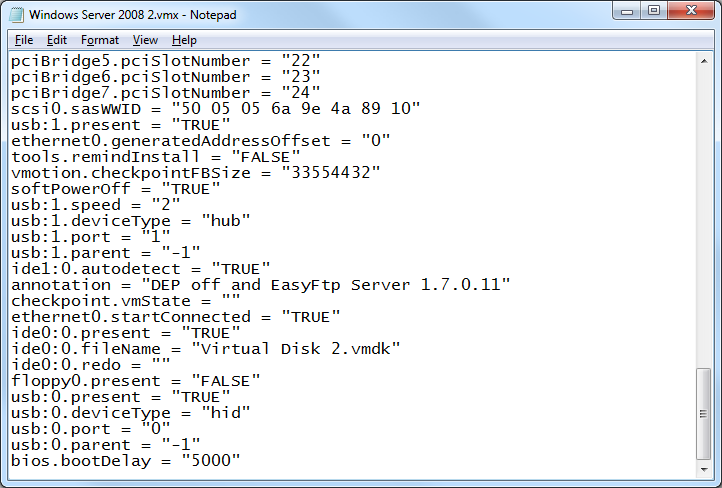
In Notepad, click File, Save. Close Notepad.
You should see a black screen with a message at the bottom, saying "Press F2 to enter SETUP", as shown below.
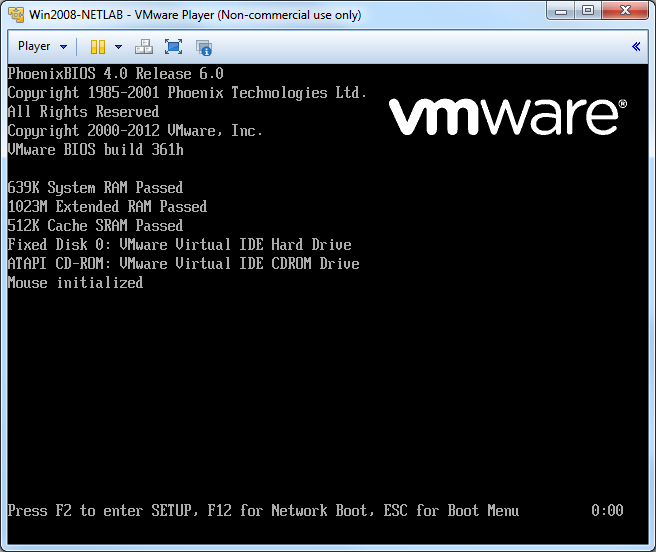
Click in the black VMware Player window and press the F2 key on the keyboard. If you are too slow doing this, Windows will start. If that happens, log in and shut Windows down again normally.
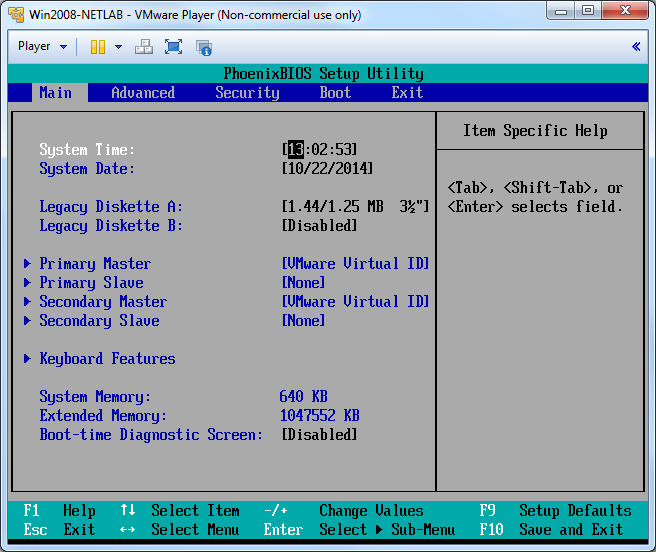
When you succeed, you will see the BIOS, as shown below.
In the BIOS, press the right-arrow key on the keyboard three times to select "Boot Menu".
Press the down-arrow key on the keyboard enough times to select "CD-ROM Drive", as shown below.
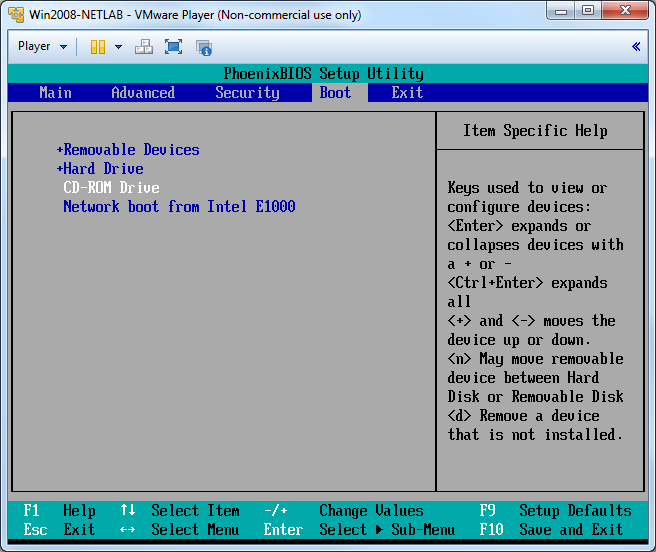
Press the + key on the keyboard (using the Shift key) several times, to "CD-ROM Drive" to the top of the list, as shown below.
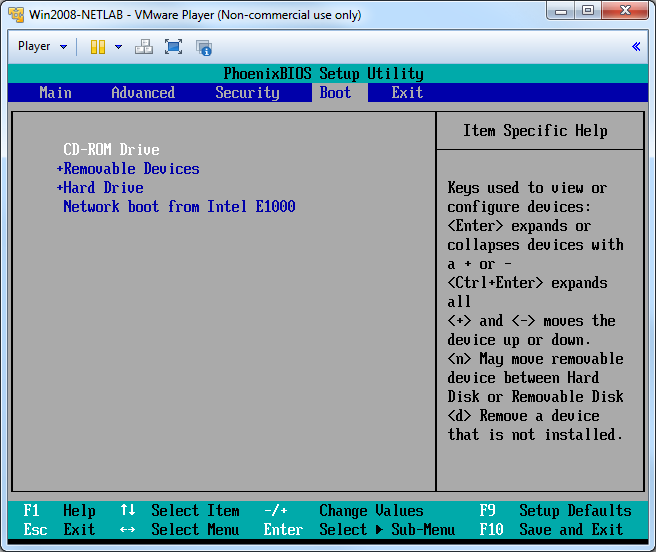
Press the F10 key on the keyboard to save changes.
Press the Enter key to confirm.
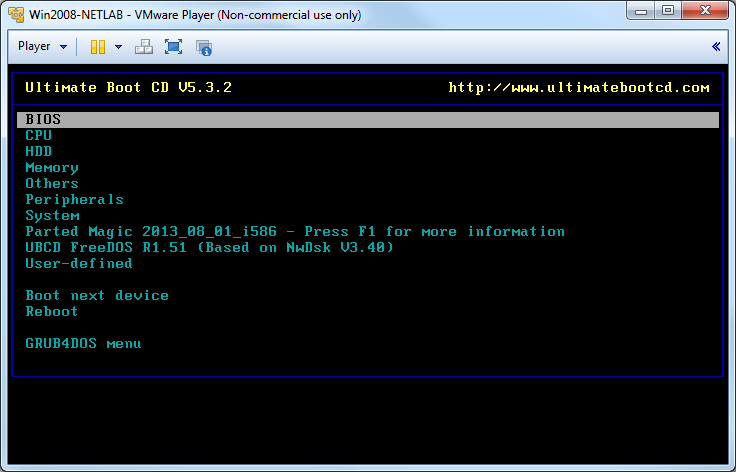
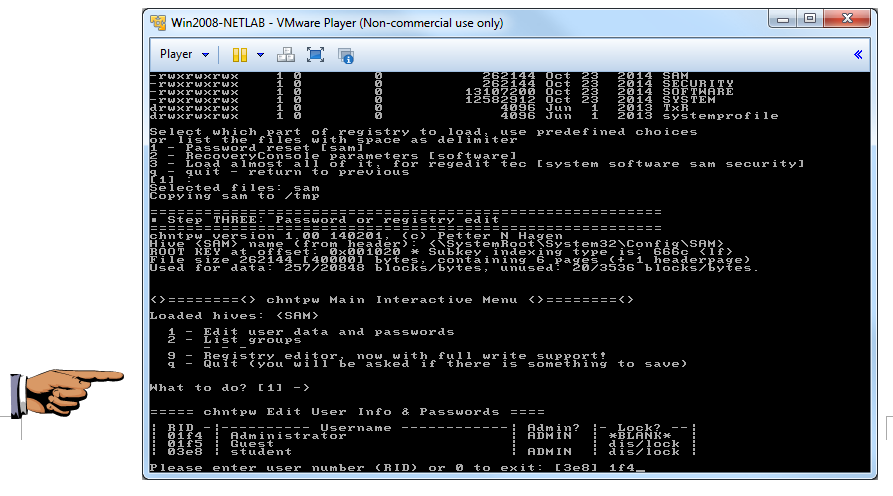
In the next screen, highlight "Data Recovery" and press Enter.
In the next screen, highlight "Offline NT Password & Registry Editor 140201" and press Enter.
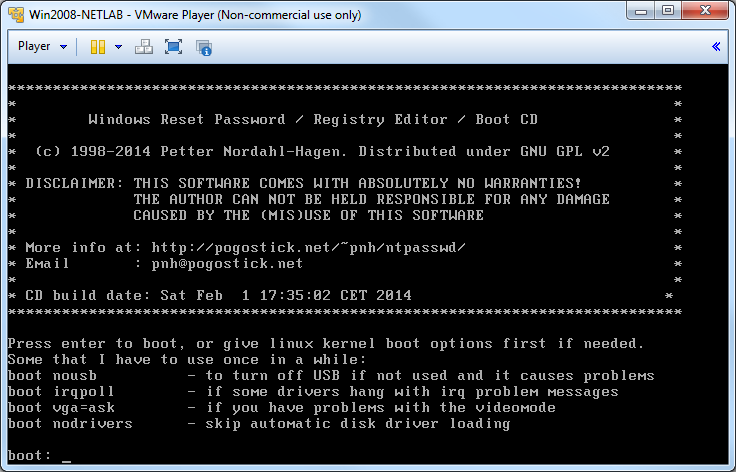
Text scrolls by, ending with a line saying "boot:", as shown below. Press Enter.
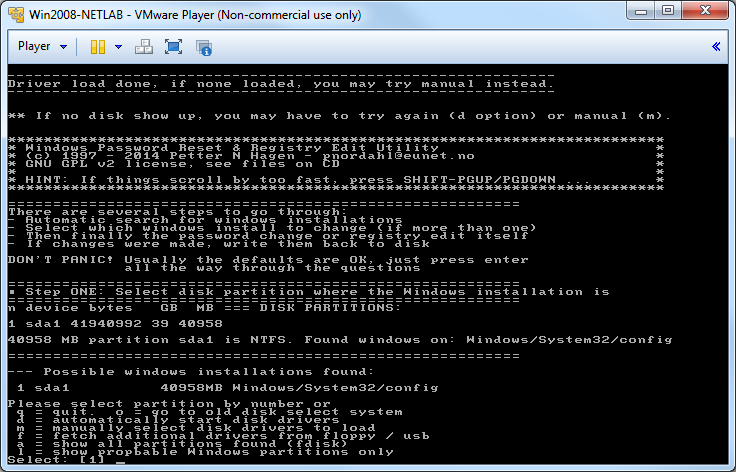
The password utility launches. It has letters that are crunched vertically and hard to read, but it works!
In the "Please select partition" section, accept the default of 1, and press Enter, as shown below.
In the next section, accept the default of 1, for "Password reset" and press Enter.
In the next section, accept the default of 1, for "Edit user data and passwords" and press Enter.
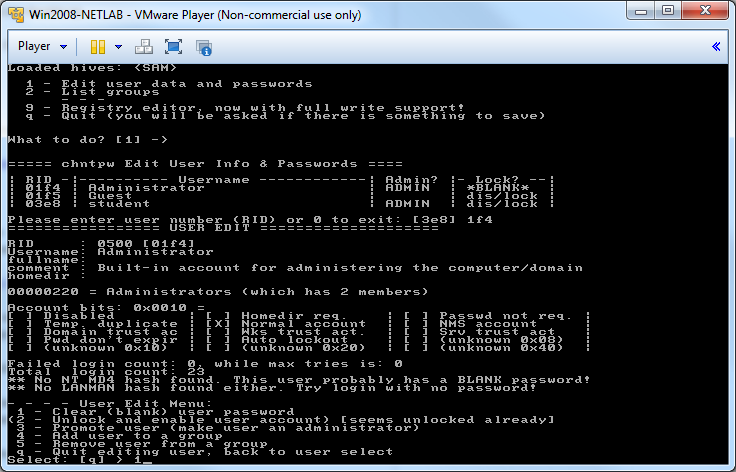
The next screen asks which account to edit, as shown below.
Press the PrntScn key.
Open Paint and paste in the whole-desktop image. Use a filename of "Proj X7 from YOUR NAME".
In the next screen, press 1 to clear the password, as shown below, and press Enter.
In the next section, accept the default of q for quit, and press Enter.
In the next section, type q for quit, and press Enter.
The next question is "About to write file(s) back! Do it? [n] :". Type y and press Enter.
Press Ctrl+Alt to move the keyboard out of VMware.
In the VMware menu, click Player, Power, "Shut down guest".
A box pops up asking "Are you sure...". Click Yes.
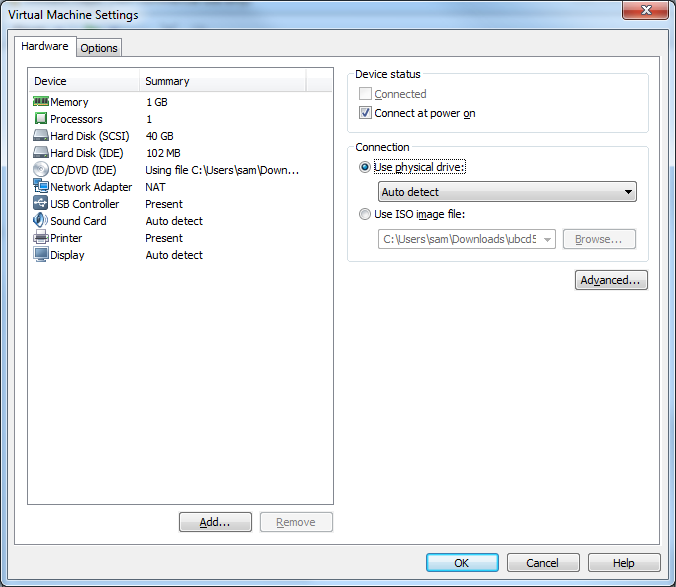
On the lower right portion of the window, click "Edit virtual machine settings", as shown below.
In the "Virtual Machine Settings" window,
on the left side, click
On the right side, click the
"Use physical drive" button,
as shown below. Then click OK.
In VMware Player, on the right side, click
"Play virtual machine".
Windows should launch and automatically log in,
because there is only one Administrator account
and that account has no password.
Email the image to cnit.123@gmail.com with a subject of
"Project X7 from YOUR NAME".
Turning In Your Project
Last modified: 10-23-14 8:25 am