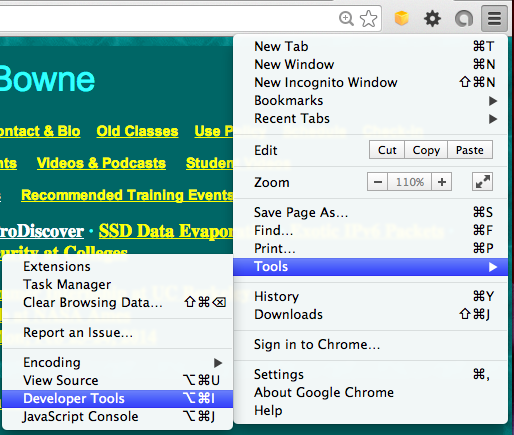
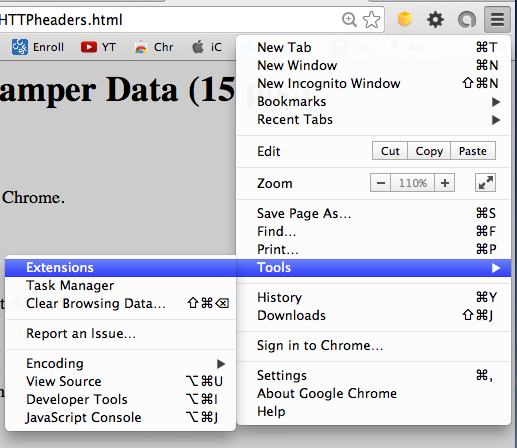
In the Chrome window on the upper right, click the button with three horizontal lines, and then click Tools, "Developer Tools", as shown below:
A section opens at the bottom of the window showing the Developer tools, as shown below.
In the Developer Tools section, click the Network tab.
In the Chrome address bar, enter samsclass.info and press the Enter key.
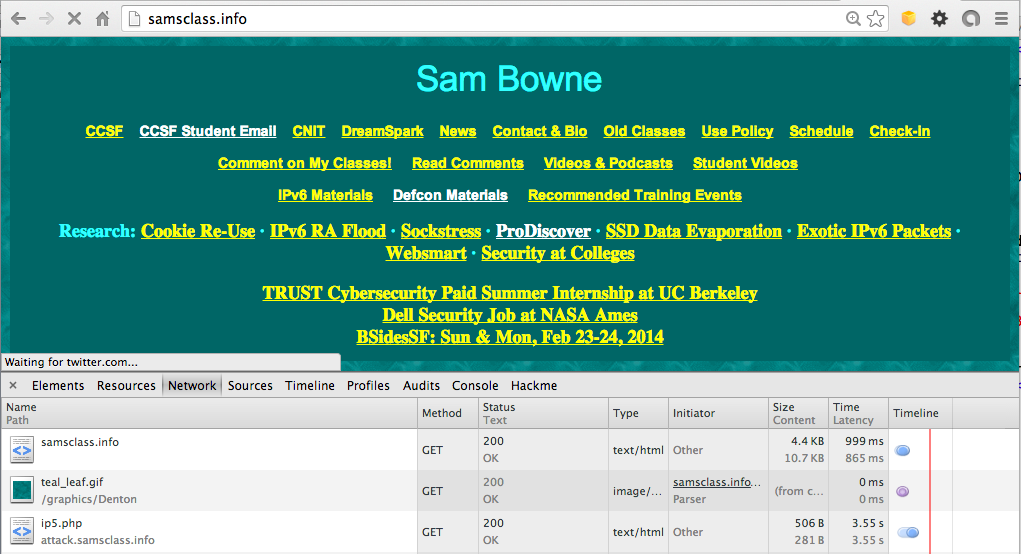
Requests scroll by in the Developer Tools section. Scroll that section to the top to find the first request, which loaded "samsclass.info", as shown below:
In the Developer Tools section, click "samsclass.info".
On the Headers tab, you should see the "Request Headers", including the "User-Agent", and "Response Headers", as shown below:
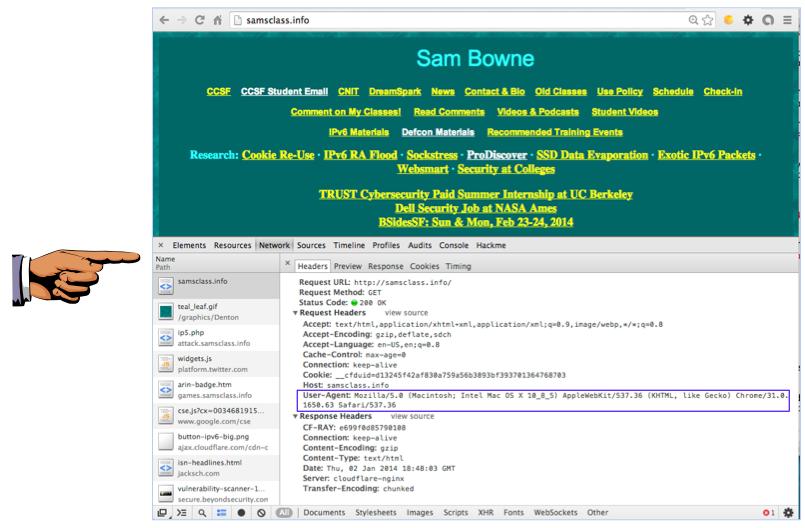
Make sure you can see the "User-Agent", as shown above. Save a full-desktop image with the filename Proj 1a from Your Name. If you need instructions, they are below:
Saving an Image on a PC
Press the PrintScrn key in the upper-right portion of the keyboard. Open Paint and press Ctrl+V to paste in the image. Click the blue floppy disk icon to save the file.
Saving an Image on a Mac
Press Shift+Command+3 on the keyboard. The image appears on your desktop with a name beginning with "Screen Shot". Click on the image file's icon and press the Enter key to rename it.
In the Chrome window on the upper right, click the button with three horizontal lines, and then click Tools, "Developer Tools".In Chrome, go to http://samsclass.info/header.php
In the Developer Tools section, click the Network tab and then click "header.php".
You should see the User-Agent that your browser sent to the server, as shown below:
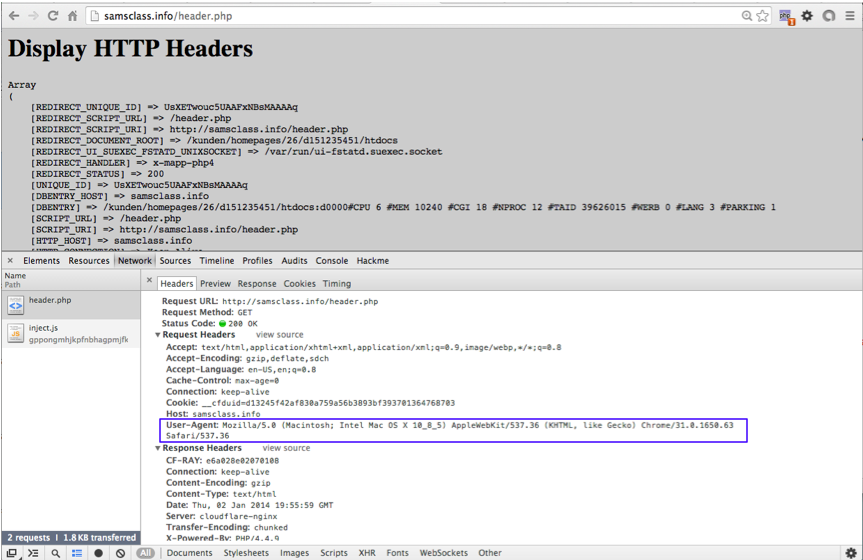
In the upper section of the Chrome window, scroll down to show the "HTTP_USER_AGENT" line. The "User Agent" received by the server is shown above, and the User-Agent sent by your browser is shown below, in the Developer Tools section. The two values match, as shown below:

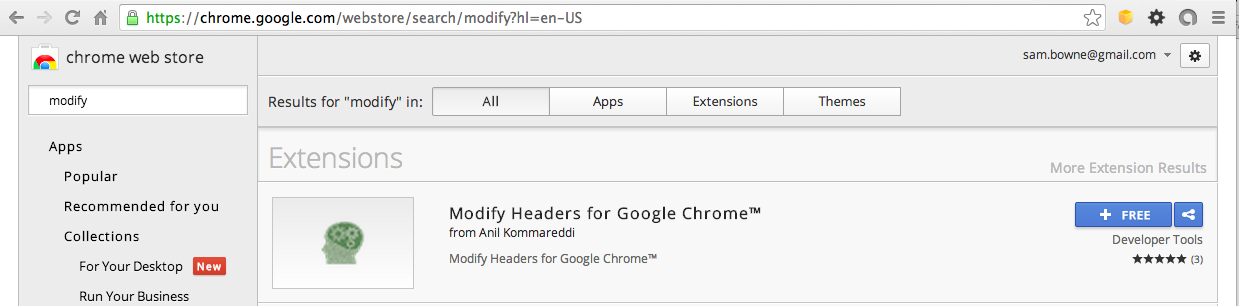
In the "Extensions" window, scroll to the bottom and click "Get more extensions.
At the upper left, in the search box, enter Modify.
Find the "Modify Headers for Google Chrome" extension, as shown below:
In the "Modify Headers for Google Chrome" section, click the blue "+ FREE" button.
In the 'Add "Modify Headers for Google Chrome?"' box, click the Add button.
When the extension is added, a new green button will appear at the top right of the Chrome window.
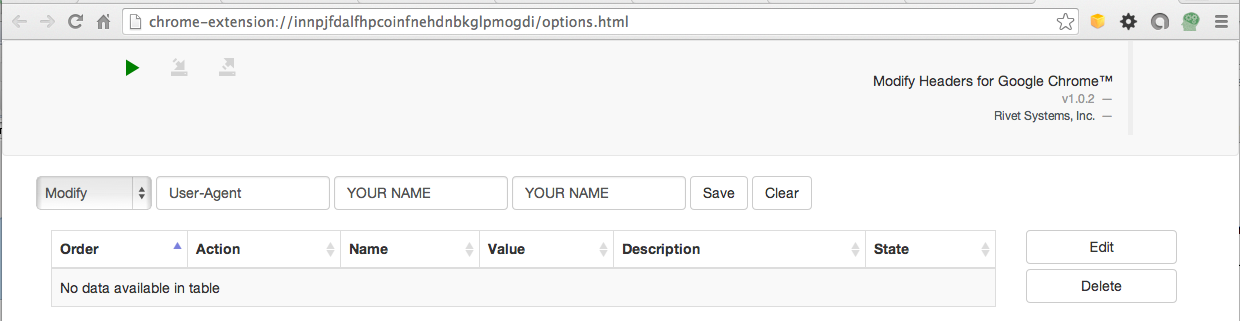
Click Options.
A window opens, as shown below. In the top row, make these selections:
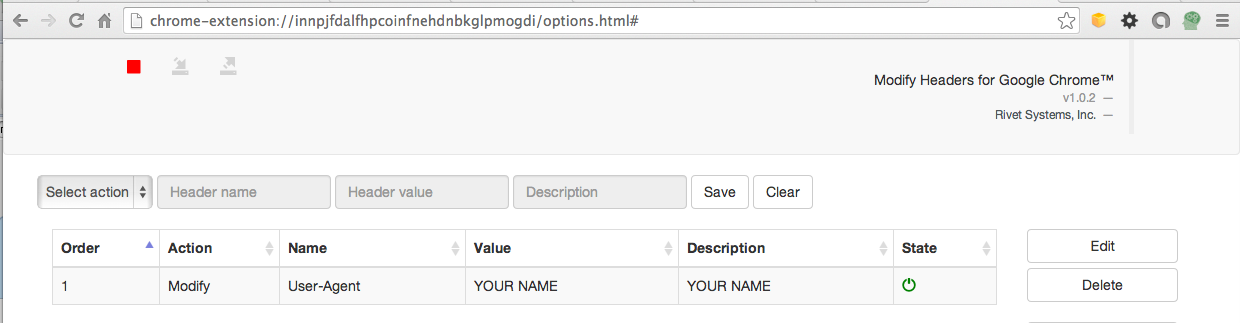
On the right side, click the Save button.
On the upper left, click the green triangular Start button. Your window should resemble the image below.
At the top of the Chrome window, type this address:
http://samsclass.info/header.php
Press the Enter key.
You should see a HTTP_USER_AGENT of YOUR NAME, as shown below.
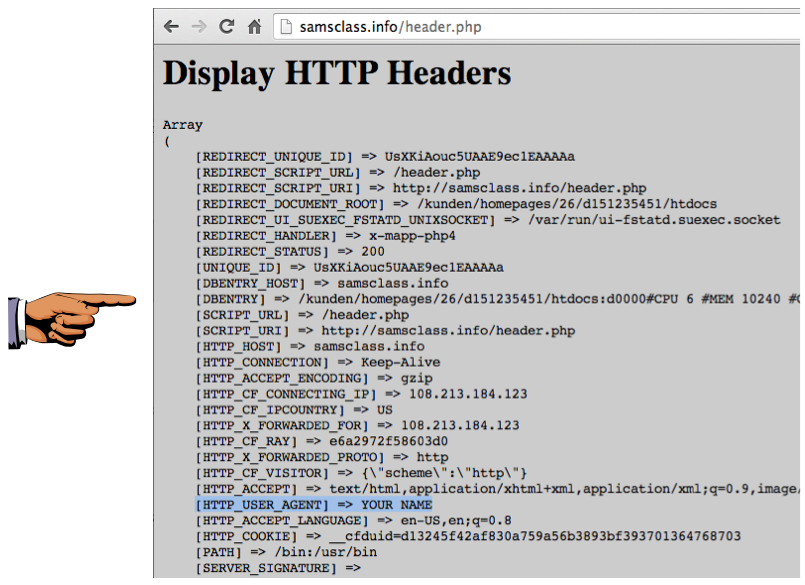
Make sure you can see YOUR NAME on the HTTP_USER_AGENT line.
Save a whole-desktop image with the filename Proj 1b from Your Name.
Mozilla/5.0 (iPhone; U; CPU iPhone OS 4_0 like Mac OS X; en-us) AppleWebKit/532.9 (KHTML, like Gecko) Version/4.0.5 Mobile/8A293 Safari/6531.22.7
Googlebot/2.1 (+http://www.google.com/bot.html)
Email the images to cnit.124@gmail.com with a Subject line of Proj 1 from Your Name.