XOR operates on one bit at a time, with these results:
0 XOR 0 = 0

0 XOR 1 = 1

1 XOR 0 = 1

1 XOR 1 = 0
Characters are ASCII-encoded, like this:
A is 01000001

B is 01000010

C is 01000011

...
Consider A^B:
A is 01000001

B is 01000010

A^B= 00000011
However, A^s is printable:
A is 01000001

s is 01110011

A^B= 00110010
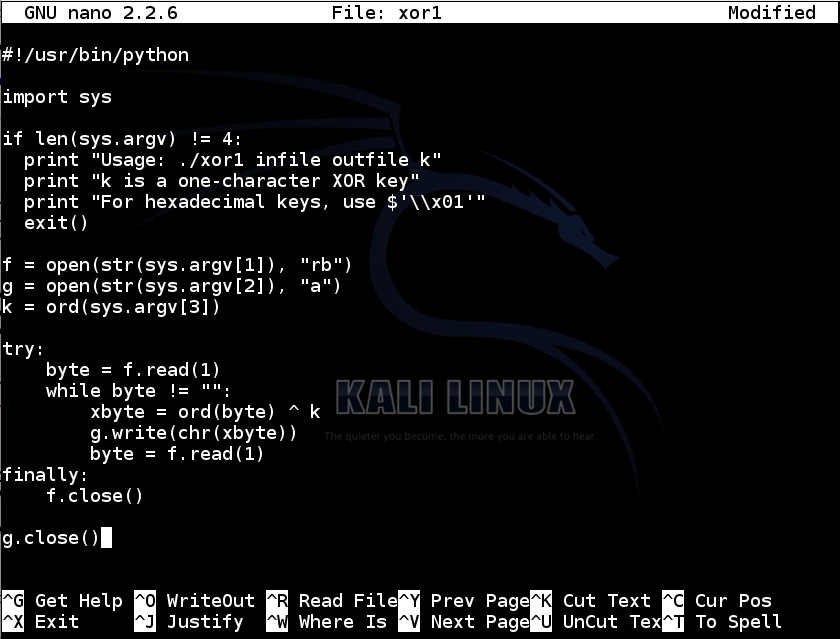
nano xor1
#!/usr/bin/python

import sys

if len(sys.argv) != 4:
  print "Usage: ./xor1 infile outfile k"
  print "k is a one-character XOR key"
  print "For hexadecimal keys, use $'\\x01'"
  exit()

f = open(str(sys.argv[1]), "rb")
g = open(str(sys.argv[2]), "a")
k = ord(sys.argv[3])

try:
    byte = f.read(1)
    while byte != "":
        xbyte = ord(byte) ^ k
        g.write(chr(xbyte))
        byte = f.read(1)
finally:
    f.close()

g.close()
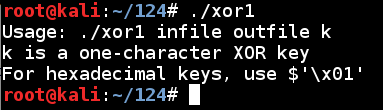
Save the file with Ctrl+X, Y, Enter. Next, we need to make the file executable.
In a Terminal window, execute this command:
chmod a+x xor1
./xor1
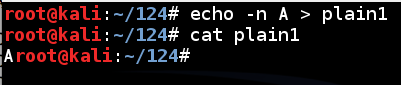
To create a file named plain1 with the letter A in it, execute these commands :
echo -n A > plain1

cat plain1
The "cat plain1" command printed out the file, which appeared as a single A at the start of the next line, as shown below:
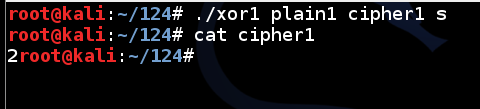
To encode the plain1 file with a key of s, execute these commands:
./xor1 plain1 cipher1 s

cat cipher1
nano plain2
Normal English text; written by YOUR NAME
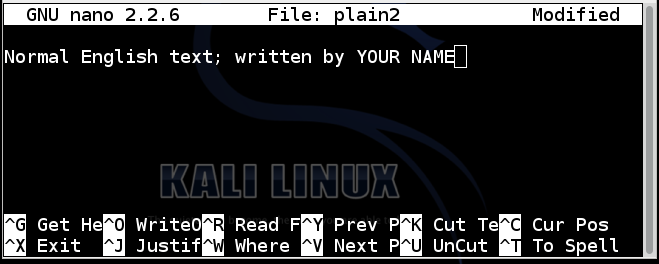
Save the file with Ctrl+X, Y, Enter. To encrypt the file using a key of x, execute these commands:
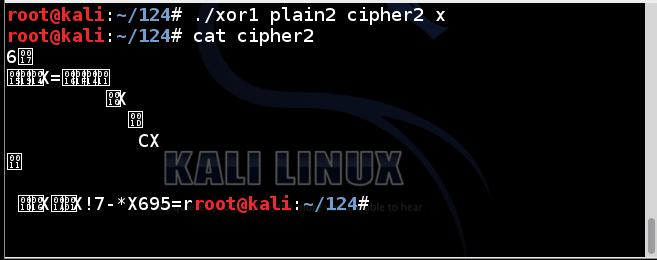
./xor1 plain2 cipher2 x

cat cipher2
Execute these commands:
./xor1 cipher2 plain2r x

cat plain2r

Click on the host system's taskbar, at the bottom of the screen.
Press the PrntScrn key to capture the whole desktop. Open Paint and paste in the image.
Save the image as "Proj 13a from YOUR NAME".
YOU MUST SEND IN A WHOLE-DESKTOP IMAGE FOR FULL CREDIT
To get the ciphertext, execute this command:
wget https://samsclass.info/124/proj14/xorchal1-cipher --no-check-certificate
https://samsclass.info/124/proj14/xorchal1-cipher
Decrypt the file. When you get it, capture a whole-desktop image showing the contents, which begin with "Congratulations", as shown below:

Save the image as "Proj 13b from YOUR NAME".
To get the ciphertext, execute this command:
wget https://samsclass.info/124/proj14/xorchal2-cipher --no-check-certificate
https://samsclass.info/124/proj14/xorchal2-cipher
Decrypt the file. When you get it, capture a whole-desktop image showing the contents, which begin with "Congratulations", as shown below:

Save the image as "Proj 13c from YOUR NAME".
To get the ciphertext, execute this command:
wget https://samsclass.info/124/proj14/xorchal3-cipher --no-check-certificate
https://samsclass.info/124/proj14/xorchal3-cipher
This is an image file. When decrypted, it starts with a PNG file header, as shown below:
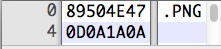
Notice that the first 4 bytes are 89, 50, 4E, 47; the 2nd through 4th byte spell out PNG in ASCII.
Decrypt the file. When you get it, change its filename extension to PNG and open it in an image viewer or Web browser.
Capture a whole-desktop image showing the visible image.
Save the image as "Proj 13d from YOUR NAME".
To get the ciphertext, execute this command:
wget https://samsclass.info/124/proj14/xorchal4-cipher --no-check-certificate
https://samsclass.info/124/proj14/xorchal4-cipher
This is an image file. When decrypted, it starts with a JPEG file header, as shown below:

Notice that the first 2 bytes are FFD8, and some later bytes contain the ASCII characters JFIF.
Decrypt the file. When you get it, change its filename extension to JPG and open it in an image viewer or Web browser.
Capture a whole-desktop image showing the visible image.
Save the image as "Proj 13e from YOUR NAME".