https://www.offensive-security.com/kali-linux-vmware-arm-image-download/
I used the "Kali Linux 32 bit VM PAE"" version, but the other versions should work too.
Here are links for those products:
The default password is toor
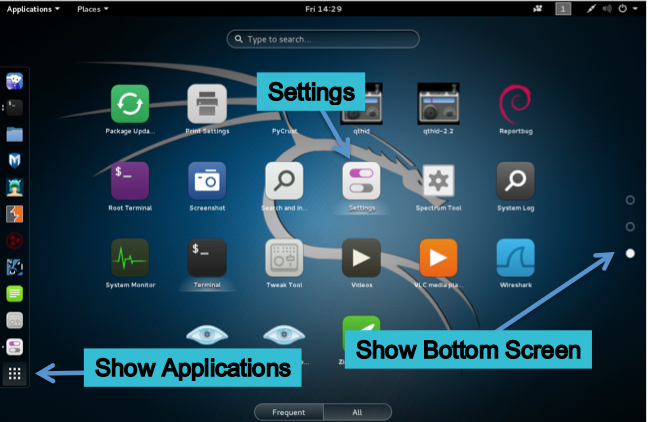
On the right side of the Kali 2.0 desktop, click the lowest circle to show the bottom screen.
Then click Settings, as shown below.
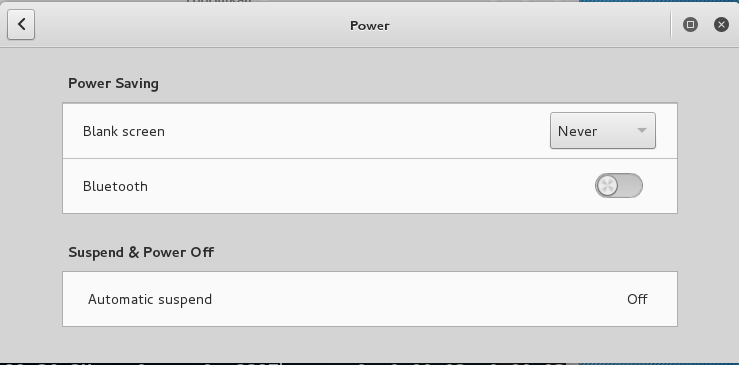
In the "All Settings" window, click Power.
Set "Blank screen" to Never, as shown below.
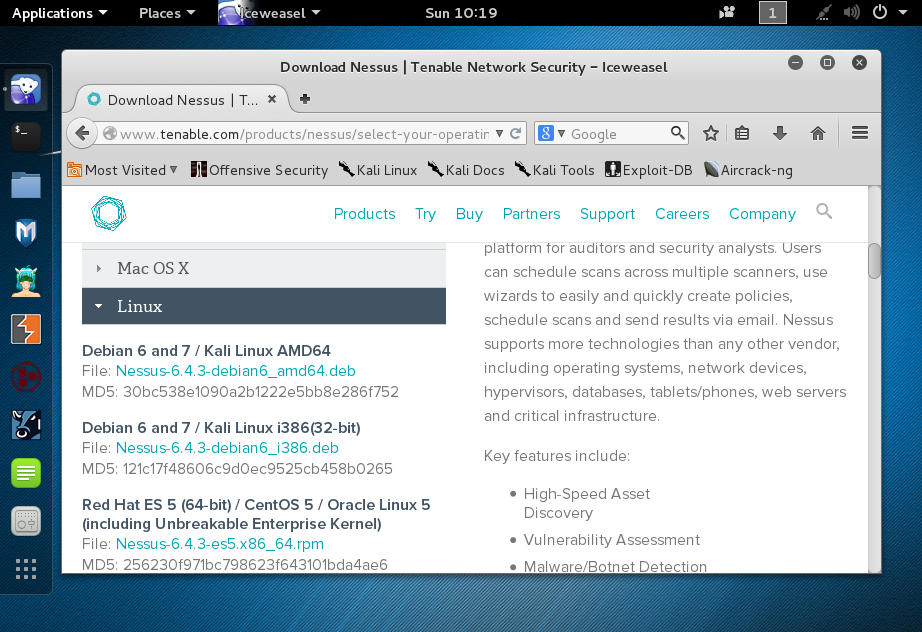
If you are using the Kali 2.0 from the DVD handed out in class, it's a 32-bit VM, so download the Nessus version labelled "Debian 6 and 7 / Kali Linux i386(32-bit)", as shown below.
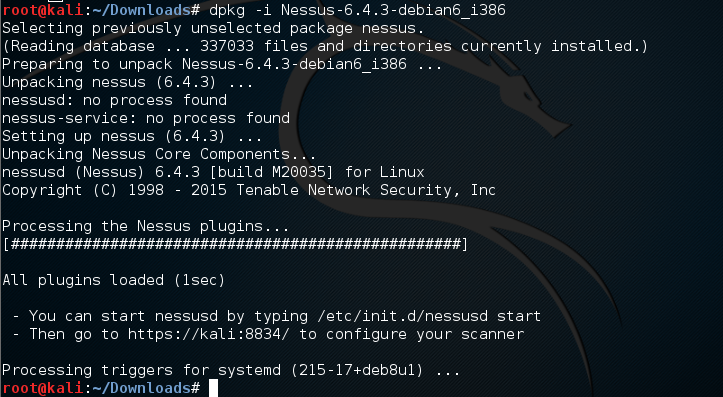
In Step 5, the file is in the Downloads directory, and tab completion of the filename doesn't work, probably because Tenable omitted the ".deb" file extension. However, the "dpkg" command works, as shown below.
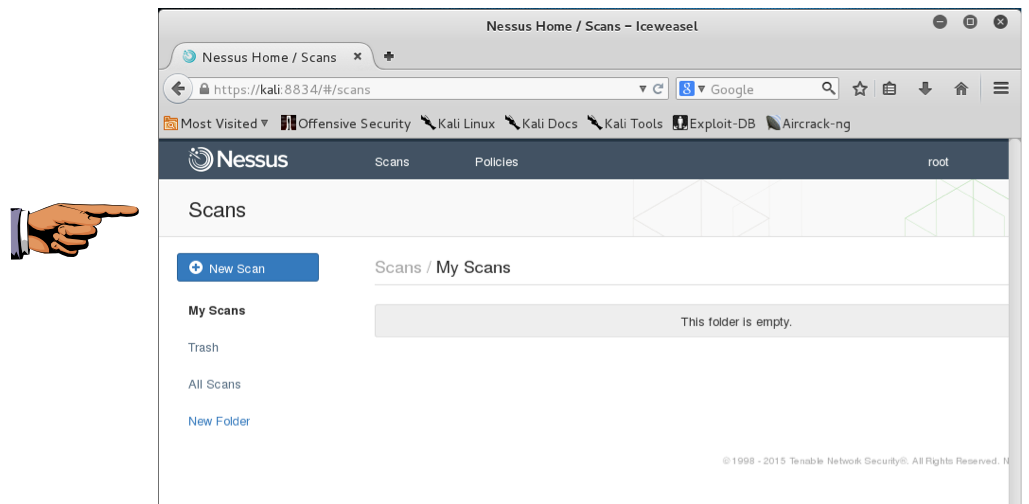
Once Nessus is installed, log in with the username and password you chose during installation, to get to the "Scans" page shown below.
Troubleshooting
If you see a "Download Failed" message, as shown below, you can fix this at the command line.
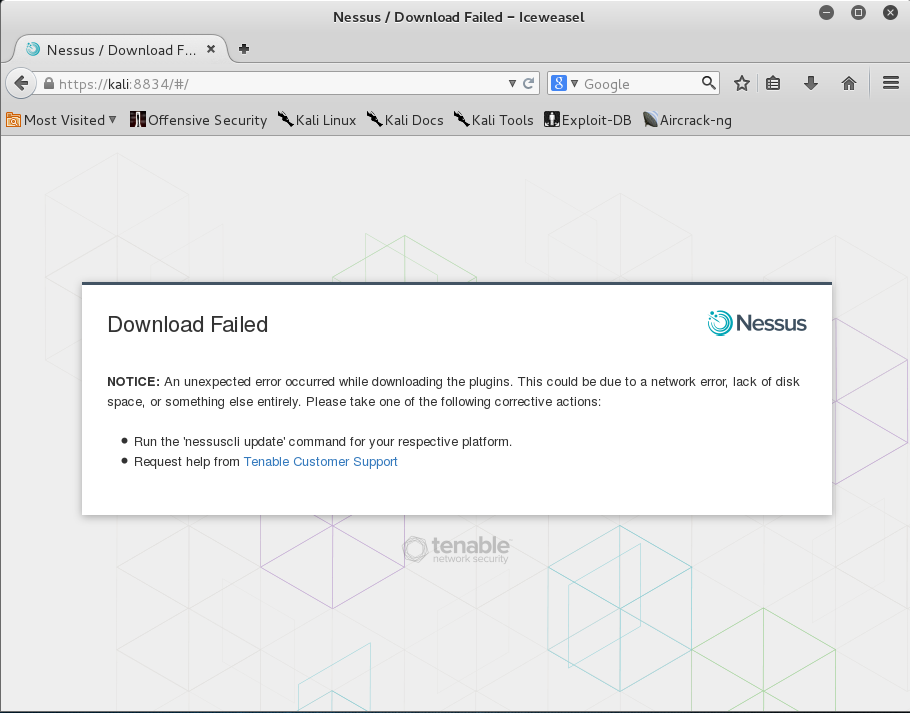
In a Terminal window, execute this command:
If it still fails, move to a faster, more stable network connection, such as Ethernet in S214, and try again./opt/nessus/sbin/nessuscli update
Capture a whole-desktop image and save it as "Proj 3a".
YOU MUST SEND IN A WHOLE-DESKTOP IMAGE FOR FULL CREDIT
apt-get install mingw32

curl https://raw.githubusercontent.com/nullsecuritynet/tools/master/binary/hyperion/release/Hyperion-1.2.zip > Hyperion-1.2.zip

unzip Hyperion-1.2.zip

i586-mingw32msvc-c++ Hyperion-1.2/Src/Crypter/*.cpp -o hyperion.exe

curl https://codeload.github.com/Veil-Framework/Veil-Evasion/zip/master > master.zip

unzip master.zip

cd Veil-Evasion-master/setup

./setup.sh
Veil will take some time to install, with many messages scrolling by; perhaps 15 minutes.
When a "Wine Mono Installer" box pops up, click Install.
When a "Python 2.7.5 Setup" box appears, click Next, Next, Yes, Next, Finish.
When a "Setup pywin" box appears, click Next, Next, Next, Finish. When a "Setup" box appears (for pycrypto), click Next, Next, Next, Finish. When a "Select Setup Language" box appears, click OK, When a "Setup Ruby" box appears, accept the agreement and click Next, Install, Yes, Finish.
The default username is Administrator
The default password is P@ssw0rd
If you are preparing your own Windows Server 2008 machine, use a default installation, turn off automatic updates, turn off the firewall, and don't put any updates on it.
Rather than downloading the files one by one, you may prefer to download all the required executables as a single 7-zip archive here:
https://samsclass.info/124/proj14/124-Win2008-apps.7z
The archive is password-protected with the password:
malwareThat will prevent antivirus applications from blocking the download.
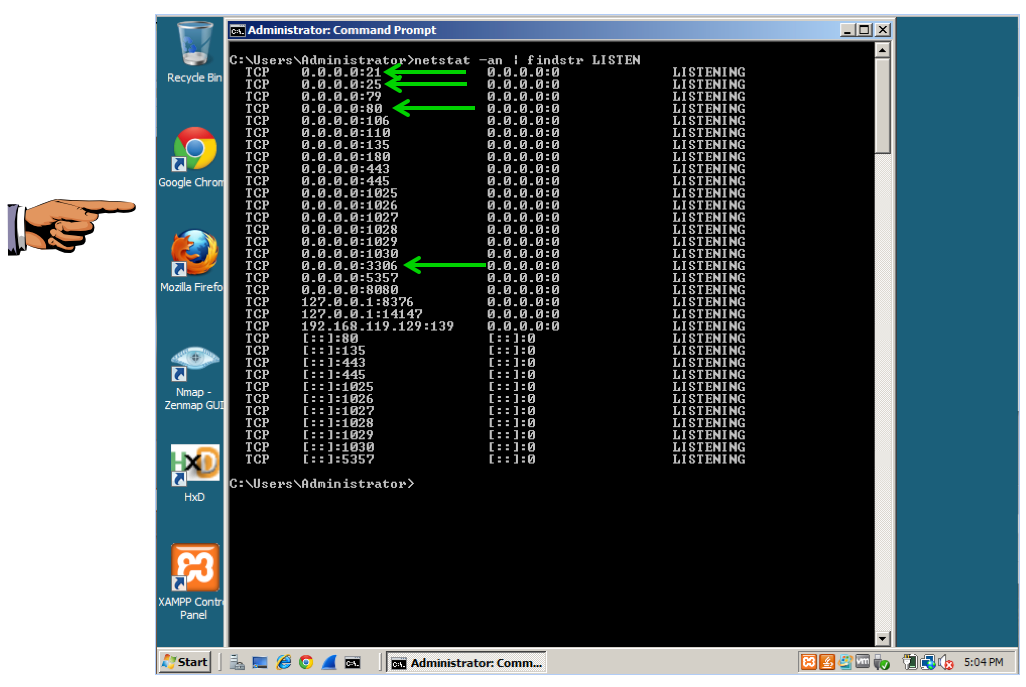
netstat -an | findstr LISTEN
Capture a whole-desktop image and save it as "Proj 3b".
YOU MUST SEND IN A WHOLE-DESKTOP IMAGE FOR FULL CREDIT
Run it the same way you did with Kali.
The default username is georgia
The default password is password
If you don't have the DVD, you can download it as a password-protected torrent from here:
http://www.mininova.org/tor/13274076
The password is at location 602 (page 48) in the Kindle version of the textbook.
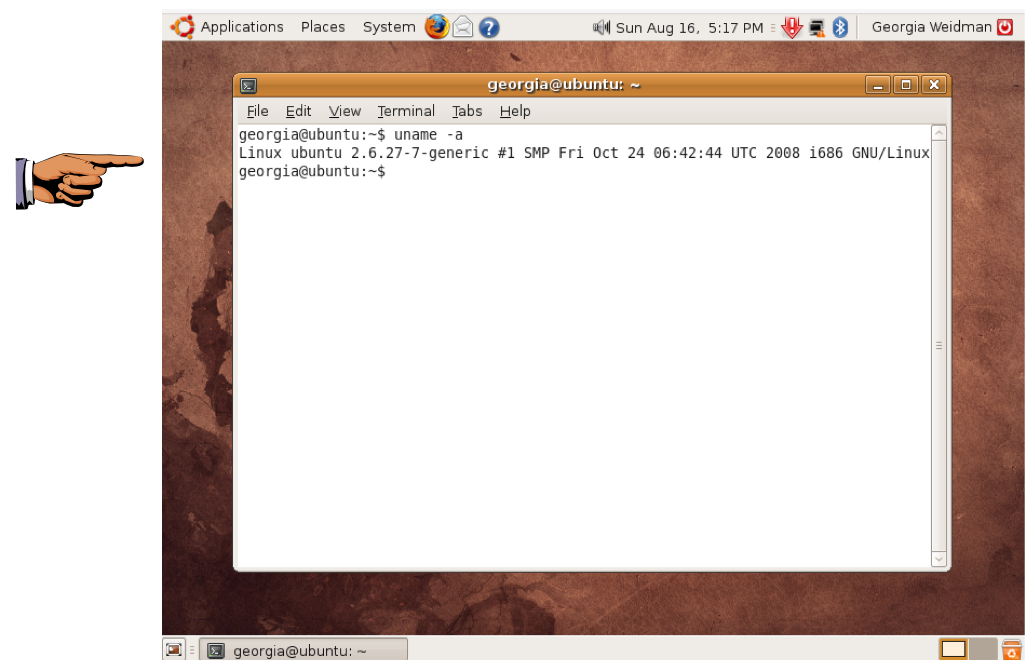
In the Terminal window, execute this command:
uname -a
Capture a whole-desktop image and save it as "Proj 3c".
YOU MUST SEND IN A WHOLE-DESKTOP IMAGE FOR FULL CREDIT
It will automatically log in.
The default username is sam
The default password is blank (no password)
If you are preparing your own Windows 7 machine, use a default installation, turn off automatic updates, turn off the firewall, and don't put any updates on it.
You should see the "Books Forever" page, as shown below.

Capture a whole-desktop image and save it as "Proj 3d".
YOU MUST SEND IN A WHOLE-DESKTOP IMAGE FOR FULL CREDIT
Send a Cc to yourself.
Last Modified: 9-24-15