VMware Fusion for Mac OS X: https://www.vmware.com/products/fusion/
Download metasploitable
Size: 865,084,584
SHA-256: 2ae8788e95273eee87bd379a250d86ec52f286fa7fe84773a3a8f6524085a1ff
Download Win2008-124
Size: 2,180,234,212
SHA-256: dc496623ef74fe1dac1dfb3053acea312350f02d83189bd15d2b48d6eb49be22
Download Kali Linux 32 bit VM PAE
7-Zip for Windows: http://www.7-zip.org/
Ez7z for Mac OS X: https://samsclass.info/124/proj14/ez7z214.dmg
Using VirtualBox
Some students prefer to use VirtualBox. If you want to do that, these links should help:
The default password is toor
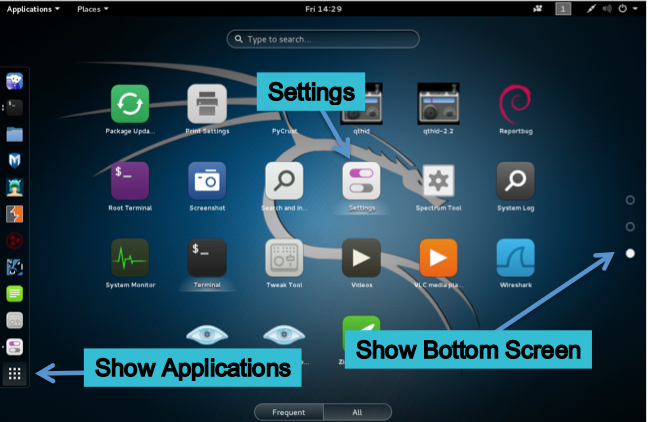
On the right side of the Kali 2.0 desktop, click the lowest circle to show the bottom screen.
Then click Settings, as shown below.
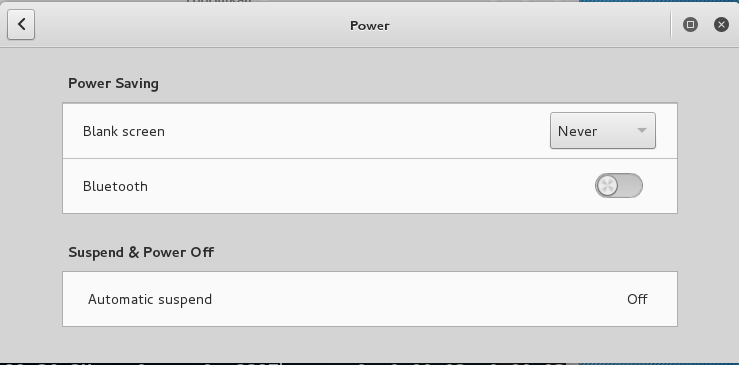
In the "All Settings" window, click Power.
Set "Blank screen" to Never, as shown below.
Click in the host system, capture a whole-desktop image, and save it as "Proj 3a".
YOU MUST SEND IN A WHOLE-DESKTOP IMAGE FOR FULL CREDIT
VirtualBox Instructions
If you prefer to use VirtualBox, download this file:Win2008-124-ovf.7z Size: 3,839,642,200
SHA-256: b4ac58beba22561845ab09153d7fa5c22600561a3b61c9626020c1138a6c5c77Unzip it. Then open VirtualBox and click File, "Import Appliance". Navigate to the Win2008-124.ovf file, and click Continue.
In the "Appliance settings" box, make these adjustments:
Click Import.
- Name: Win2008-124
- Guest OS Type: Windows 2008 (32-bit)
- Video Memory: 128 MB
- Storage: Remove the 102 MB disk
The new VM appears in the list, and you can start it normally.
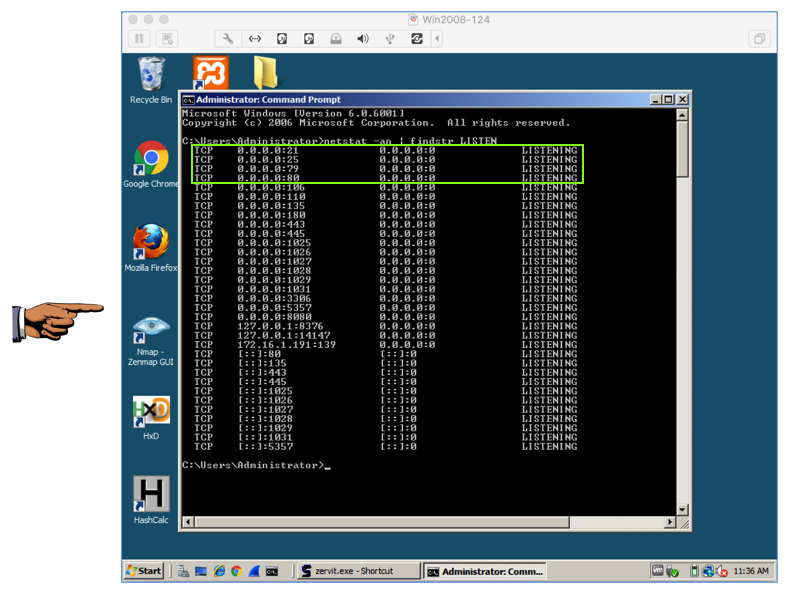
netstat -an | findstr LISTEN
Capture a whole-desktop image and save it as "Proj 3b".
YOU MUST SEND IN A WHOLE-DESKTOP IMAGE FOR FULL CREDIT
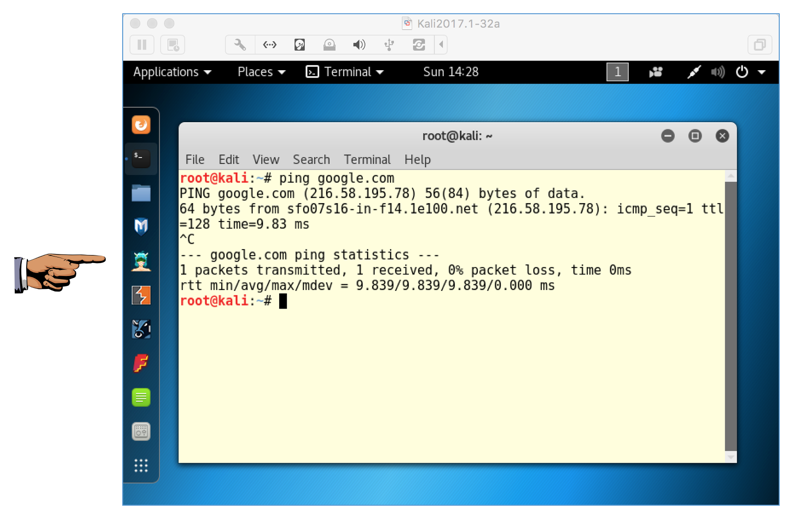
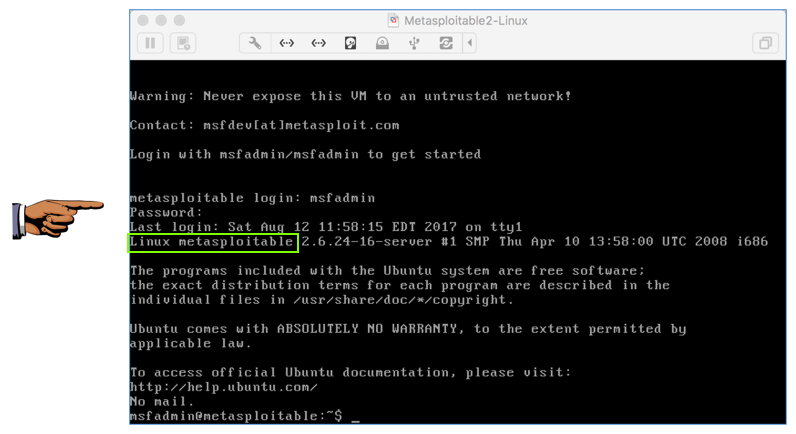
A text-only console is visible, as shown below.
VirtualBox Instructions
If you prefer to use VirtualBox, download this file:Metasploitable2-vbox.7z Size: 692,100,274
SHA-256: 02b128198cb9db2304f0cf45061f186abf326350e6d3dc6da1cebae66027d59dUnzip it to create a Metasploitable2-Linux.vdi file.
Then open VirtualBox and click Machine, New.
In the "Name and operating system" box, make these entries:
Click Continue.
- Name: Metasploitable2
- Type: Linux
- Version: Ubuntu (32-bit)
In the "Memory size" box, accept the default selection and click Continue.
In the "Hard disk" box, click the "Use an existing virtual hard disk file" button, click the little folder icon, and navigate to the Metasploitable2-Linux.vdi file. Click Open. Click Create.
The new VM appears in the list, and you can start it normally.
Capture a whole-desktop image and save it as "Proj 3c".
YOU MUST SEND IN A WHOLE-DESKTOP IMAGE FOR FULL CREDIT
Send a Cc to yourself.
Last Modified: 8-28-17 5 pm