A Windows machine, preferably the "Windows 10 with Analysis Tools" VM
Purpose
To examine how EXE files work,
and how the UPX packer modifies them.
Use the "Windows 10 with Analysis Tools" VM
You can use any Windows system, but it's easiest
to use the
"Windows 10 with Analysis Tools" machine from an
earlier project.
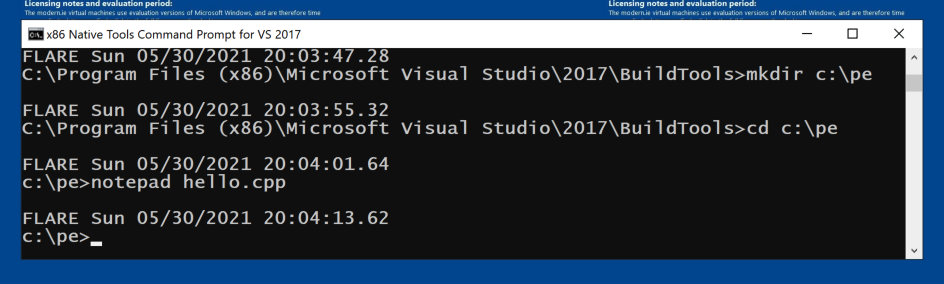
Making a Hello Program
Click Start. Scroll down to the
V section,
click
"Visual Studio 2017",
and click
"x86 Native Tools Command Prompt for VS 2017".
In the "x86 Native Tools Command Prompt for VS 2017"
window,
execute these commands,
as shown below:
mkdir c:\pe
cd c:\pe
notepad hello.cpp
Notepad asks if you want to create a
new file. Click Yes.
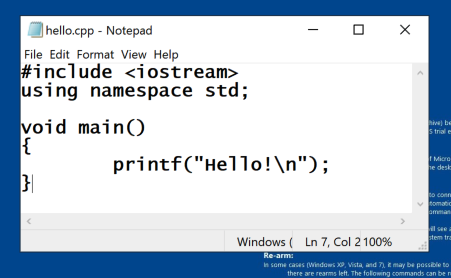
Enter this source code,
as shown below:
#include <iostream>
using namespace std;

void main()
{
        printf("Hello!\n");
}
Save the file.
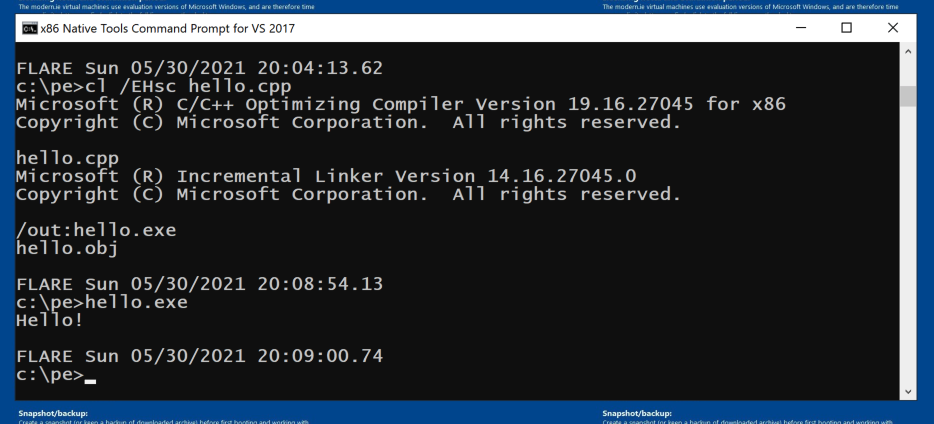
In the "x86 Native Tools Command Prompt for VS 2017"
window,
execute these commands,
as shown below:
cl /EHsc hello.cpp
hello.exe
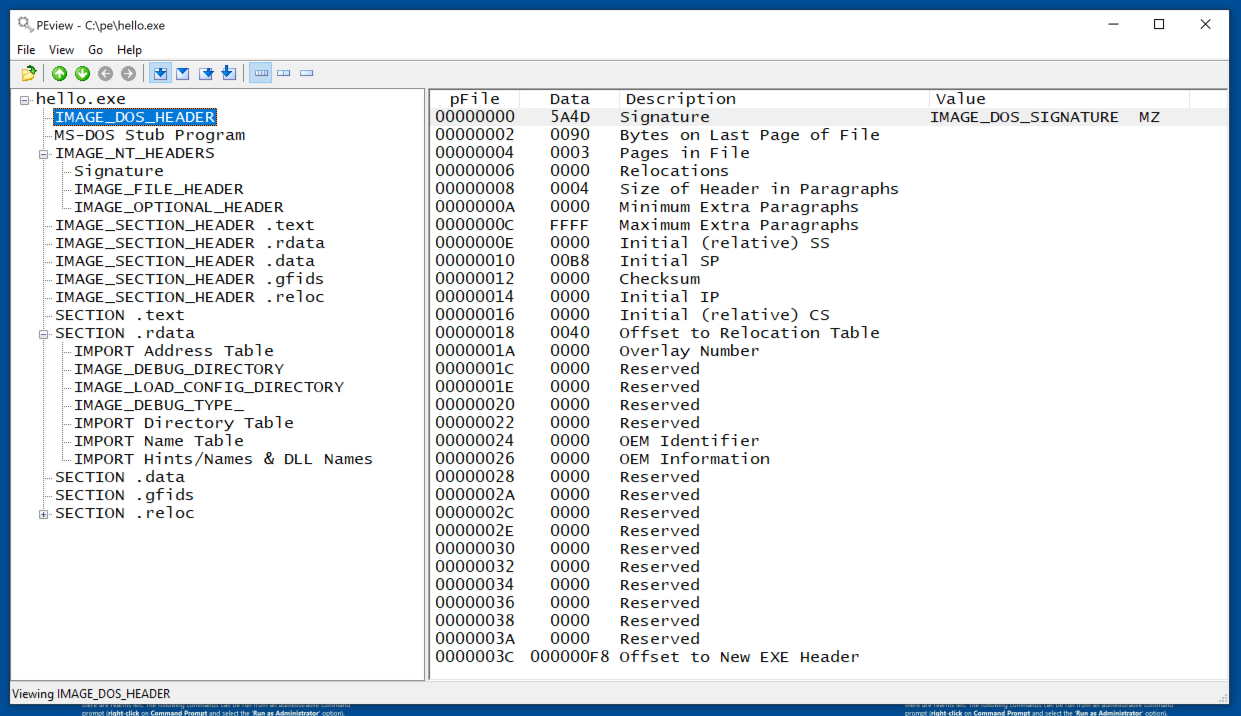
MS-DOS Header
Click Start and type PEview. Launch PEview.
Open the C:\pe\hello.exe file in
PEview.
In the left pane, click
IMAGE_DOS_HEADER.
This header is now unused. The
only important features are the
first and last item,
as shown below.
Signature: 5A4D or MZ -- the start of every PE file
Offset to new EXE Header: value varies
MS-DOS Stub Program
This program merely prints a message
on obsolete MS-DOS systems and is unimportant
to us.
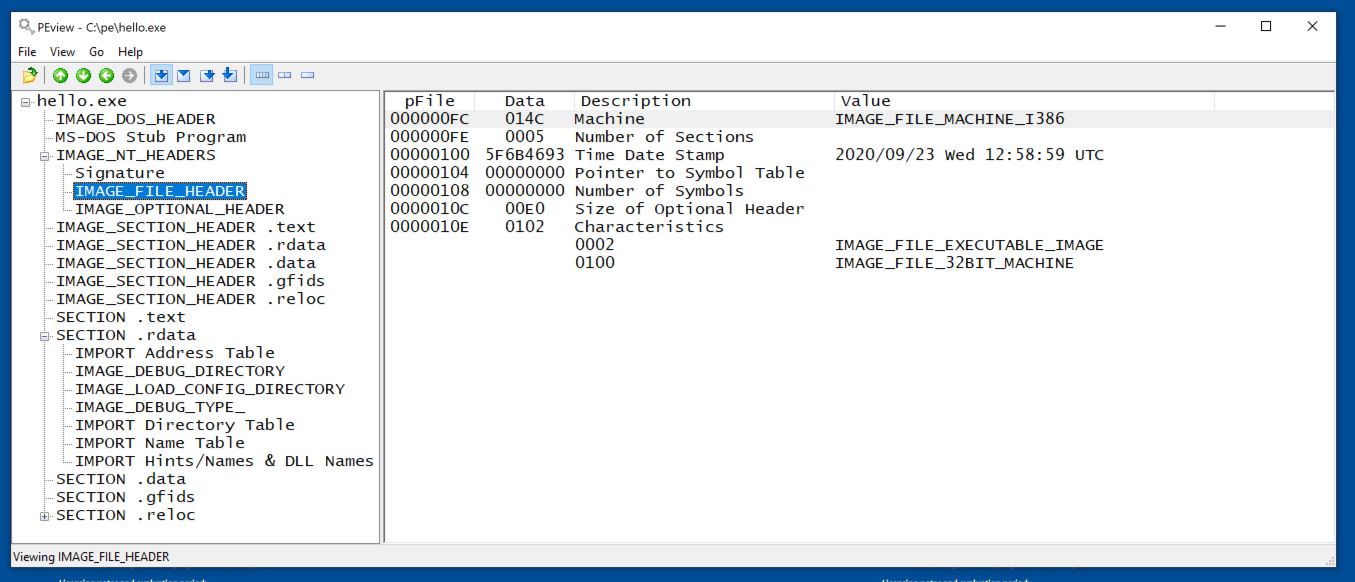
IMAGE_NT_HEADERS
This header is important.
Note these features,
as shown below.
Signature: PE
IMAGE_FILE_HEADER: The Time Date Stamp here is useful for attribution
IMAGE_OPTIONAL_HEADER: this is very important, as detailed below.
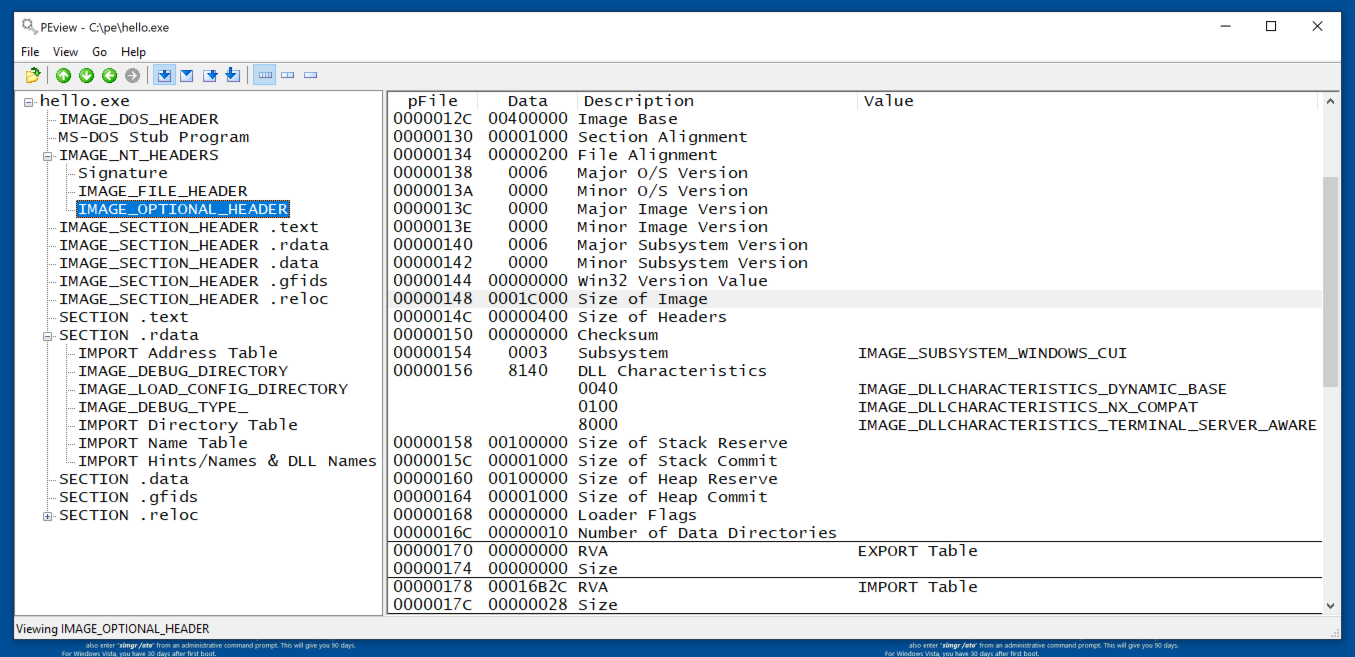
IMAGE_OPTIONAL_HEADER
Note these features,
as shown below.
Image Base: The preferred RAM location the program will load into, often 400000
Size of Image: the total size of all sections when loaded into memory
IMPORT Table: RVA is the Relative Virtual Address, the location of the IMPORT Table relative to the base address of the image. In the image below, the value is 16B2C, which, added to the start of the image 400, results in an address of 16F2C in this file.
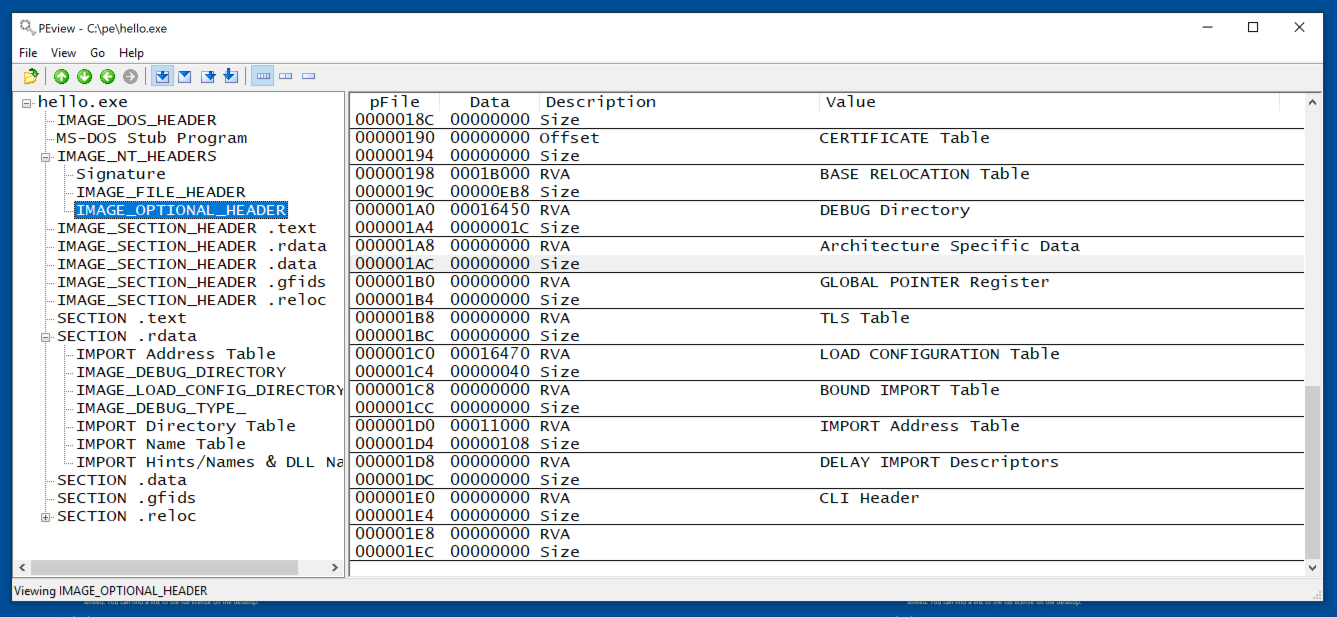
Scrolling down, we see the
Import Address Table, at RVA
11000. As we'll see below, that
matches the start of the .rdata
section.
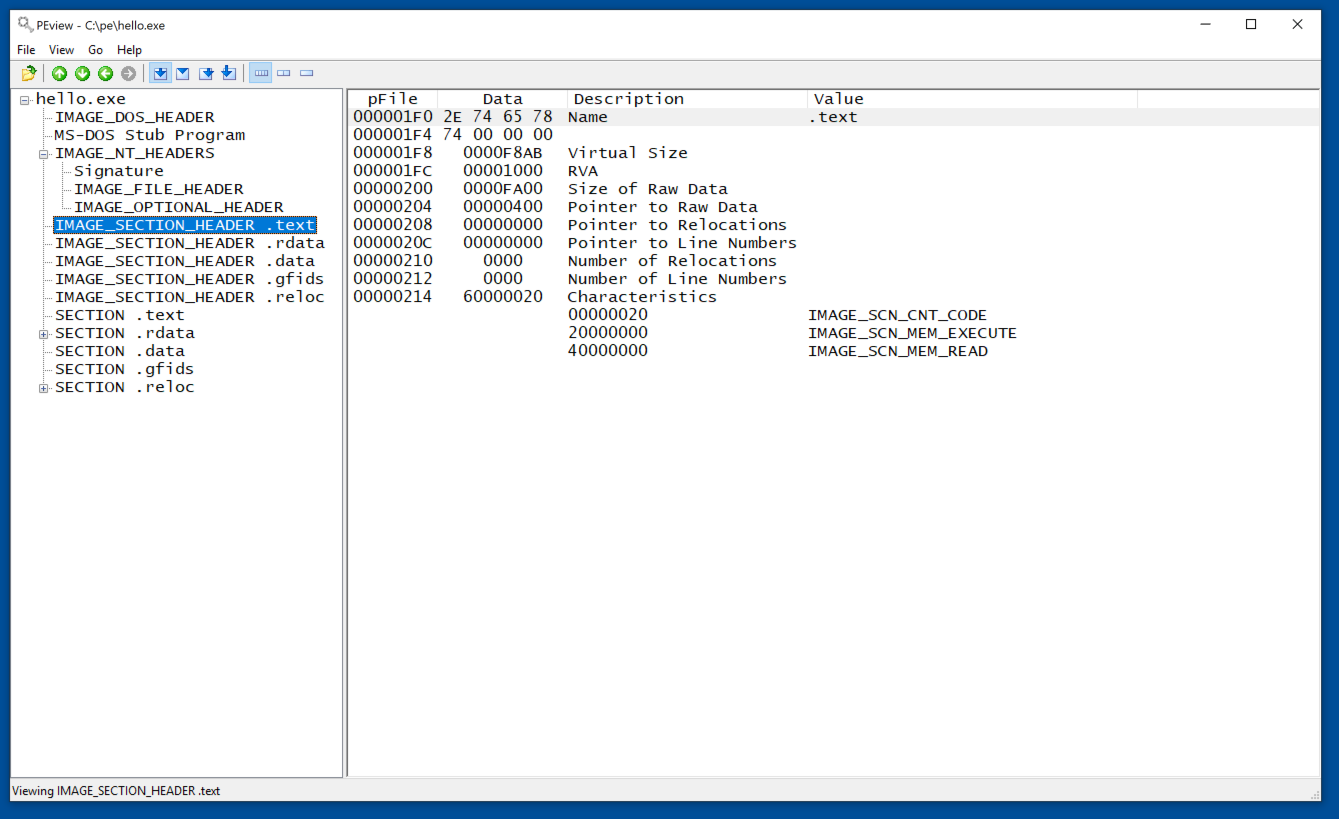
Section Headers
Depending on your Windows version, your file
may have four or five sections.
For each section, note these
features,
as shown below.
Name: Limited to 8 bytes
Virtual Size: the total size of the section when loaded into memory
RVA: where the section is loaded into memory, relative to the base address of the image
Size of Raw Data: size of the section on disk
Pointer to Raw Data: location of the section within the EXE file
Calculating Memory Layout
Examine each secton in turn and find the RVA
and "Virtual Size" values of each one.
Then you can calculate the actual memory layout
of the program,
by adding the RVA to the Image Base,
as shown below.
(The Image Base is in the IMAGE_OPTIONAL_HEADER.)
Section
RVA
Memory Address
Image Base
400000
.text
1000
401000
.rdata
12000
412000
.data
19000
419000
.reloc
1B000
41B000
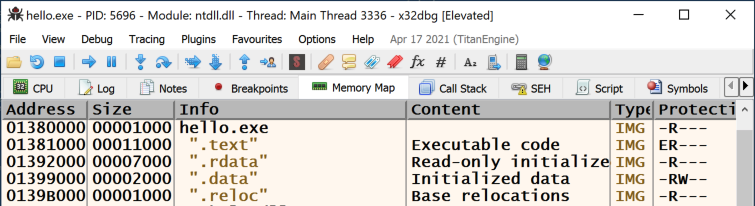
Memory Map
To verify the addresses,
open hello.exe in x32dbg or OllyDbg
and click View,
Memory Map.
As shown below, the
layout matches the pattern,
although the base address was
not 400000 on my system.
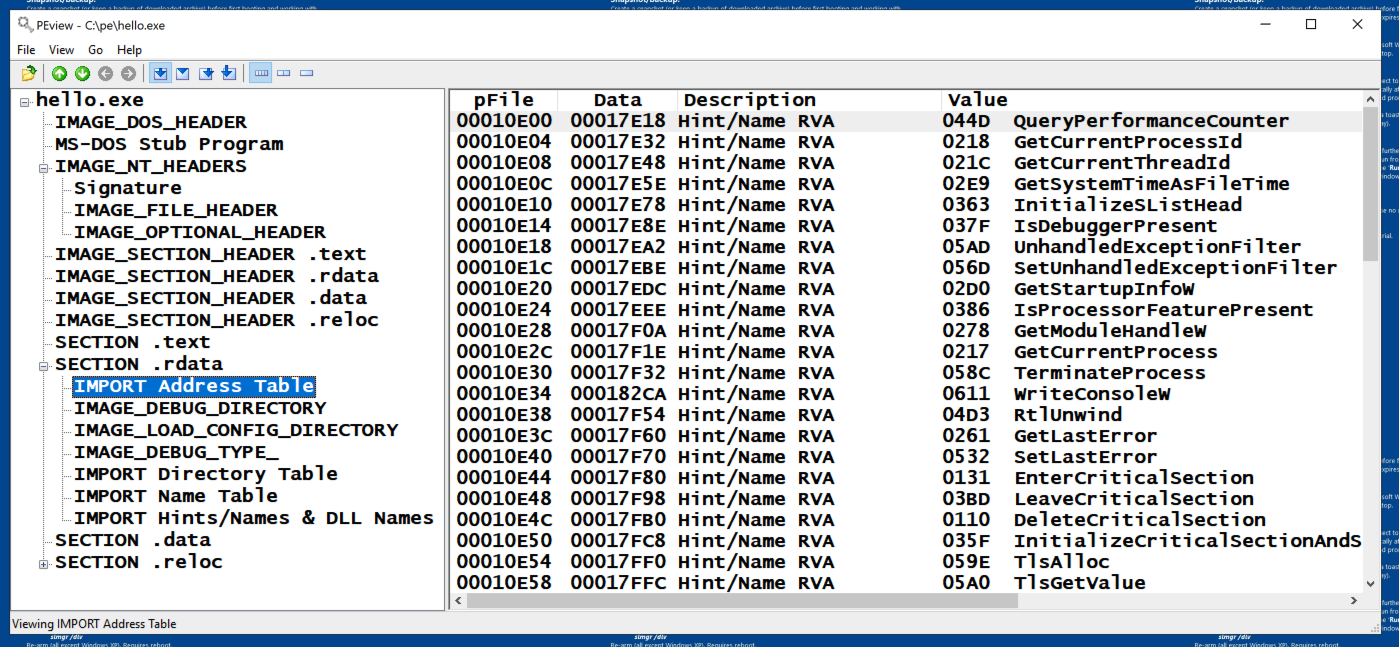
IMPORT Address Table
In the .rdata section,
the first item is the IMPORT
Address Table, starting at
address 10E00, as shown below.
Posted 9-23-2020
SmartScreen hint added 9-29-20
brackets around iostream HTML-encoded 9-30-20
Updated 5-30-2021
Extra points enumerated 8-31-2021
FLARE-VM reference removed 9-7-2021
122.1 explanation expanded 9-19-22
122.2 hint added 10-12-22
122.3 hint added 10-14-22
For flag 1, note added that number of sections in hello.exe varies added 3-4-25
Video added 3-26-25