https://visualstudio.microsoft.com/vs/community/
Click the Download button.
In your Downloads folder, double-click the VisualStudioSetup.exe file.
Approve escalation to Administrator and click Continue.
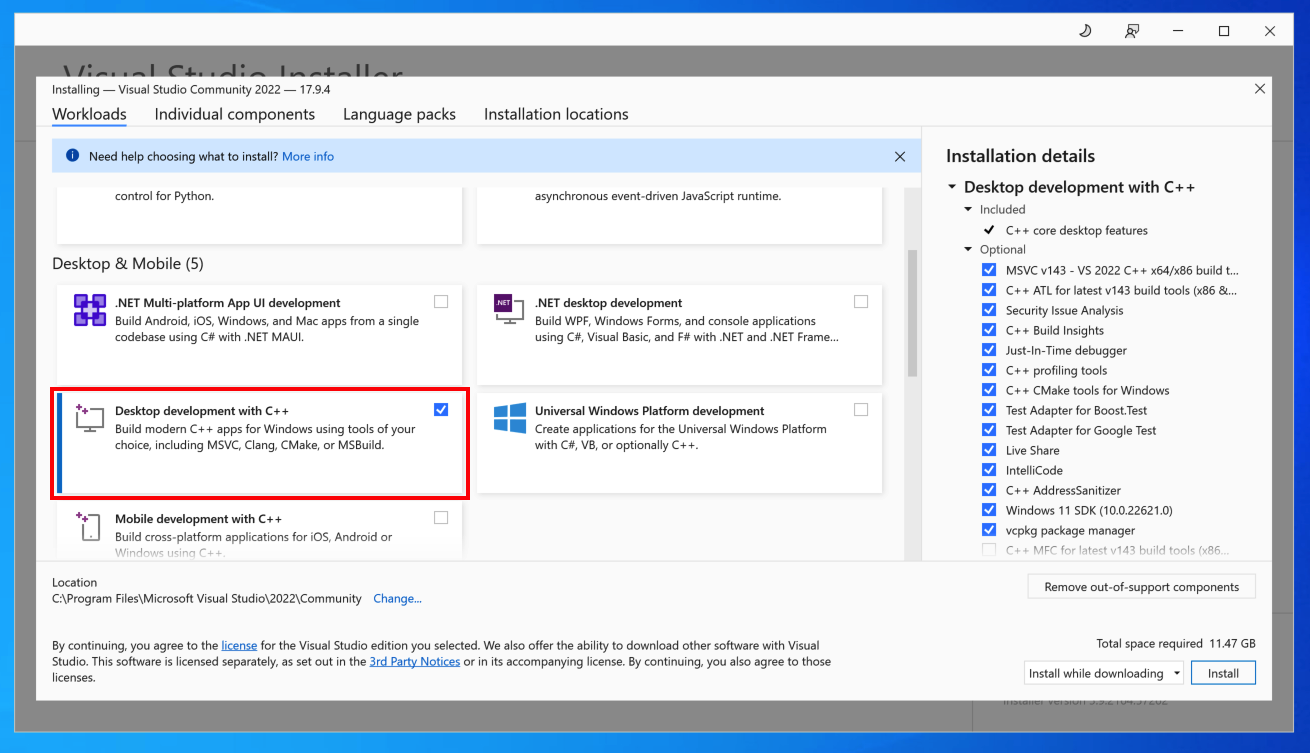
When the large "Installing" window appears, scroll down a bit and check "Desktop development with C++", as shown below.
At the lower right, click the Install button.
If a box asks about workloads, click Continue.
At the "Sign in to Visual Studio" box, click "Skip and add accounts later".
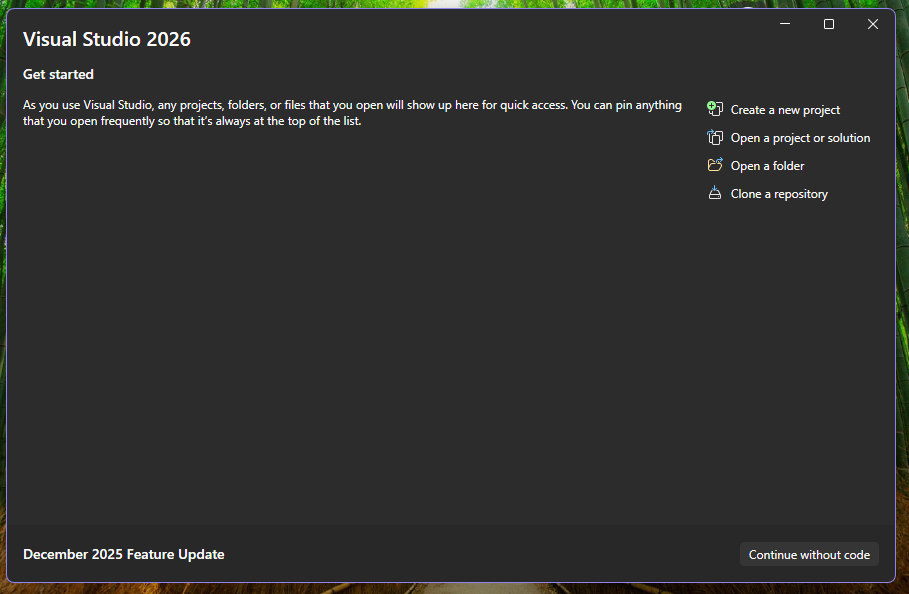
At the "Personalize your Visual Studio experience" box, click "Start Visual Studio".
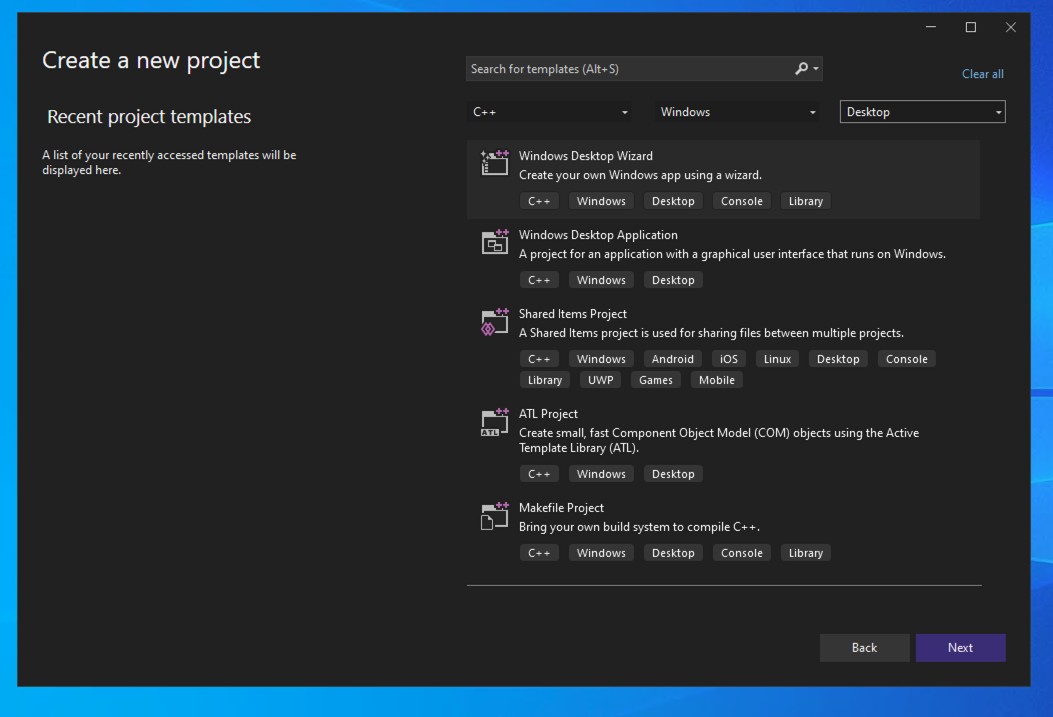
In the "Create a new project" page, at the top, make these selections:
At the bottom right, click the Next button.
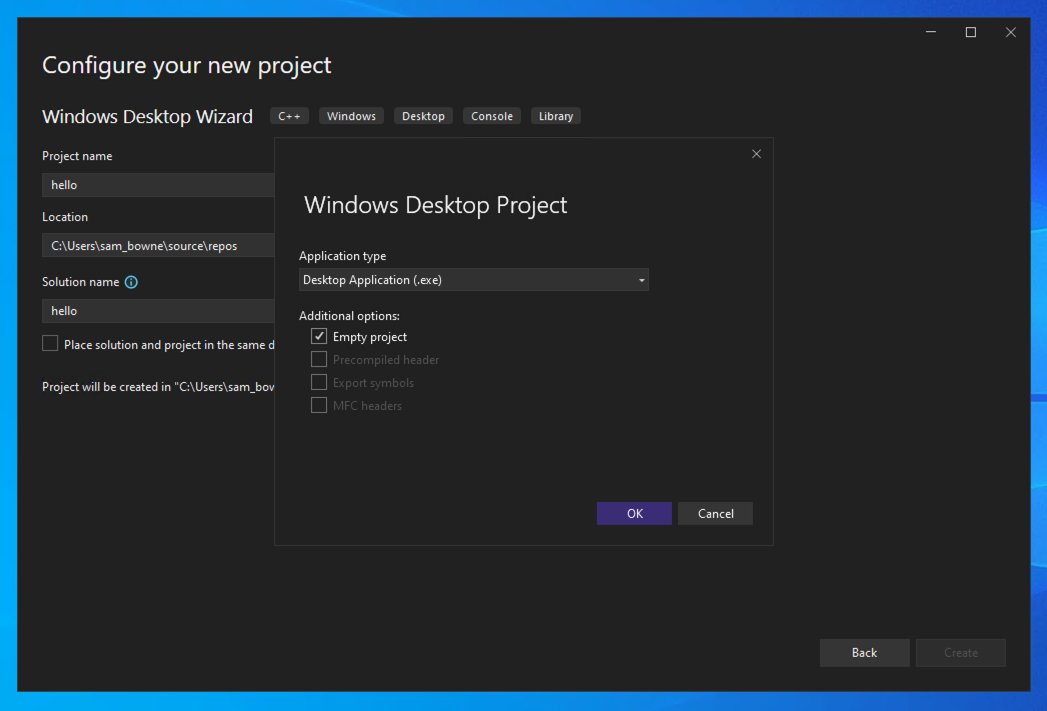
In the "Configure your new project" page, give your project a name of hello. At the bottom right, click the Create button.
In the "Windows Desktop Project" box, make these selections, as shown below.
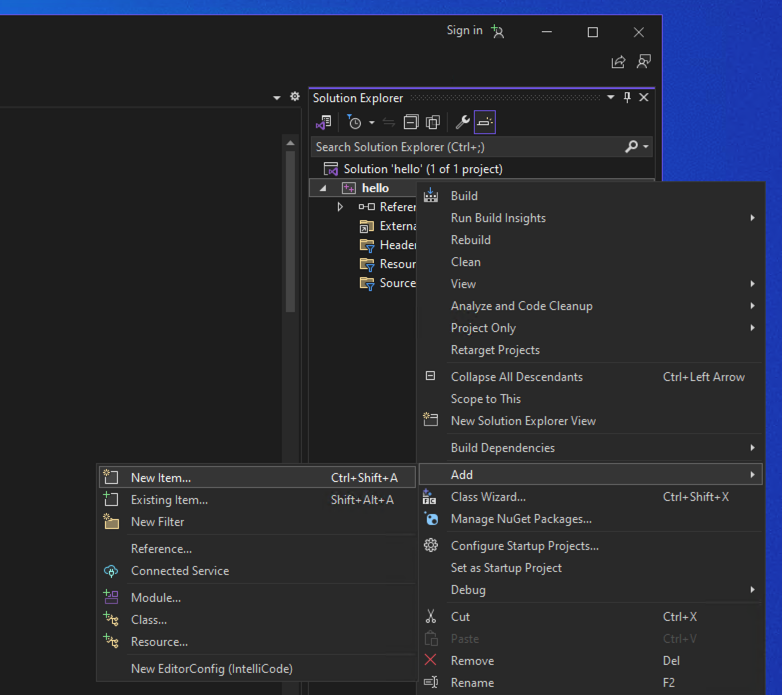
In the "Solution Explorer" pane, right-click hello and click Add, "New Item", as shown below.
In the Add New Item dialog box, enter a file name of hello, as shown below.
Click the Add button.
// HelloWindowsDesktop.cpp
// compile with: /D_UNICODE /DUNICODE /DWIN32 /D_WINDOWS /c

#include <windows.h>
#include <stdlib.h>
#include <string.h>
#include <tchar.h>

// Global variables

// The main window class name.
static TCHAR szWindowClass[] = _T("DesktopApp");

// The string that appears in the application's title bar.
static TCHAR szTitle[] = _T("Windows Desktop Guided Tour Application");

HINSTANCE hInst;

// Forward declarations of functions included in this code module:
LRESULT CALLBACK WndProc(HWND, UINT, WPARAM, LPARAM);

int CALLBACK WinMain(
   _In_ HINSTANCE hInstance,
   _In_opt_ HINSTANCE hPrevInstance,
   _In_ LPSTR     lpCmdLine,
   _In_ int       nCmdShow
)
{
   WNDCLASSEX wcex;

   wcex.cbSize = sizeof(WNDCLASSEX);
   wcex.style          = CS_HREDRAW | CS_VREDRAW;
   wcex.lpfnWndProc    = WndProc;
   wcex.cbClsExtra     = 0;
   wcex.cbWndExtra     = 0;
   wcex.hInstance      = hInstance;
   wcex.hIcon          = LoadIcon(hInstance, IDI_APPLICATION);
   wcex.hCursor        = LoadCursor(NULL, IDC_ARROW);
   wcex.hbrBackground  = (HBRUSH)(COLOR_WINDOW+1);
   wcex.lpszMenuName   = NULL;
   wcex.lpszClassName  = szWindowClass;
   wcex.hIconSm        = LoadIcon(wcex.hInstance, IDI_APPLICATION);

   if (!RegisterClassEx(&wcex))
   {
      MessageBox(NULL,
         _T("Call to RegisterClassEx failed!"),
         _T("Windows Desktop Guided Tour"),
         NULL);

      return 1;
   }

   // Store instance handle in our global variable
   hInst = hInstance;

   // The parameters to CreateWindow explained:
   // szWindowClass: the name of the application
   // szTitle: the text that appears in the title bar
   // WS_OVERLAPPEDWINDOW: the type of window to create
   // CW_USEDEFAULT, CW_USEDEFAULT: initial position (x, y)
   // 500, 100: initial size (width, length)
   // NULL: the parent of this window
   // NULL: this application does not have a menu bar
   // hInstance: the first parameter from WinMain
   // NULL: not used in this application
   HWND hWnd = CreateWindow(
      szWindowClass,
      szTitle,
      WS_OVERLAPPEDWINDOW,
      CW_USEDEFAULT, CW_USEDEFAULT,
      500, 100,
      NULL,
      NULL,
      hInstance,
      NULL
   );

   if (!hWnd)
   {
      MessageBox(NULL,
         _T("Call to CreateWindow failed!"),
         _T("Windows Desktop Guided Tour"),
         NULL);

      return 1;
   }

   // The parameters to ShowWindow explained:
   // hWnd: the value returned from CreateWindow
   // nCmdShow: the fourth parameter from WinMain
   ShowWindow(hWnd,
      nCmdShow);
   UpdateWindow(hWnd);

   // Main message loop:
   MSG msg;
   while (GetMessage(&msg, NULL, 0, 0))
   {
      TranslateMessage(&msg);
      DispatchMessage(&msg);
   }

   return (int) msg.wParam;
}

//  FUNCTION: WndProc(HWND, UINT, WPARAM, LPARAM)
//
//  PURPOSE:  Processes messages for the main window.
//
//  WM_PAINT    - Paint the main window
//  WM_DESTROY  - post a quit message and return
LRESULT CALLBACK WndProc(HWND hWnd, UINT message, WPARAM wParam, LPARAM lParam)
{
   PAINTSTRUCT ps;
   HDC hdc;
   TCHAR greeting[] = _T("Hello, Windows desktop!");

   switch (message)
   {
   case WM_PAINT:
      hdc = BeginPaint(hWnd, &ps);

      // Here your application is laid out.
      // For this introduction, we just print out "Hello, Windows desktop!"
      // in the top left corner.
      TextOut(hdc,
         5, 5,
         greeting, _tcslen(greeting));
      // End application-specific layout section.

      EndPaint(hWnd, &ps);
      break;
   case WM_DESTROY:
      PostQuitMessage(0);
      break;
   default:
      return DefWindowProc(hWnd, message, wParam, lParam);
      break;
   }

   return 0;
}
At the bottom, in the Output window, a message appears saying "Build: 1 succeeded", as shown below.

Flag PMA 125.1: Running the Application (10 pts)
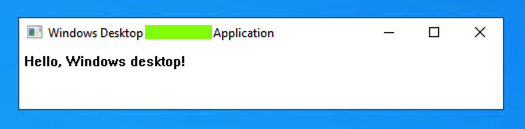
From the menu, click Debug, "Start Debugging".After a few seconds, a box appears with a message saying saying "Hello, Windows desktop!", as shown below.
The flag is in covered by a green rectangle in the image below.
Posted 10-8-2020
Updated to Visual Studio 2022 on 3-19-24
Minor updates 3-20-24
Minor text improvements 1-23-25
Minor text improvement 6-10-25
Updated to refer to Visual Studio 2026 12-19-25