I checked the Microsoft list of supported adapters, and that said we should use the Intel NIC, not the Realtek NIC:
Supported Ethernet NICs for Network Kernel Debugging in Windows 8.1
However, in practice, the Realtek NIC seems to work better, so I recommend ignoring the Microsoft list and just trying the card(s) you have.
Plug in a NIC of your choice.
In Network Connections, disable all NICs you aren't using.
http://msdn.microsoft.com/en-US/windows/desktop/bg162891
Click the blue Download button.
Run the setup file.
Accept the agreement and click the "Accept & Install" button.
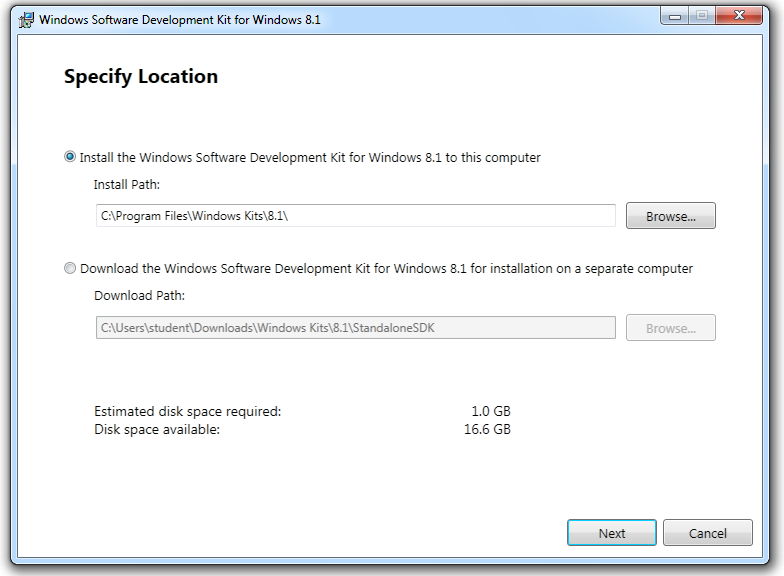
In the "Specify Location" box, accept the default options, as shown below.
Click Next.
In the "Join the Customer Experience Improvement Program (CEIP)" box, accept the default selection of No and click Next.
In the "License Agreement" box, click Accept.
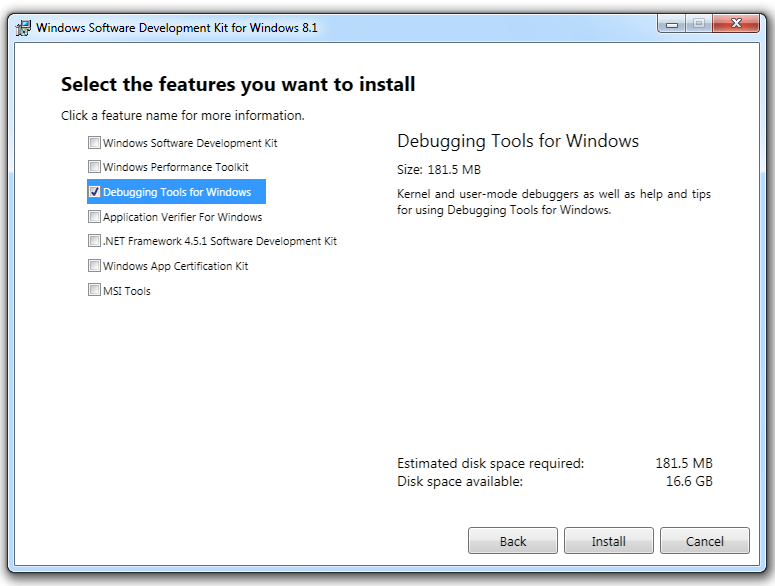
In the "Select the features you want to install" box, clear all the check boxes except "Debugging Tools for Windows", as shown below.
Click Install.
When the process is complete, you see a message saying "Welcome to the Windows Software Deveopment Kit for Windows 8.1!".
Click Close.
Execute this command:
IPCONFIG
Right-click "Command Prompt" and cick "Run as Administrator".
In the User Account Control box, click Yes.
In the Administrator Command Prompt window, execute these commands, replacing the IP address with the IP address of your Host Windows 8 machine:
bcdedit /debug on

bcdedit /dbgsettings net hostip:192.168.1.170 port:50000 key:1.2.3.4
Then restart the Target computer. The boot menu will show "Windows 8 [debugger enabled]", if it is a multiboot system like the ones in S214.
Right-click "WinDbg (X64)" and click "Run as Administrator".
In the User Account Control box, click Yes.
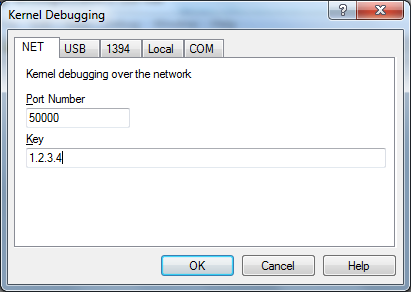
Click File, "Kernel Debug".
On the NET tab, enter a key of
1.2.3.4
as shown below. Then click OK.
If a box pops up saying "Windows Firewall has blocked some features of this app", click "Allow access".
WinDbg shows a message: "Waiting to reconnect...".
If the message doesn't change in a few seconds, restart the Target computer again.
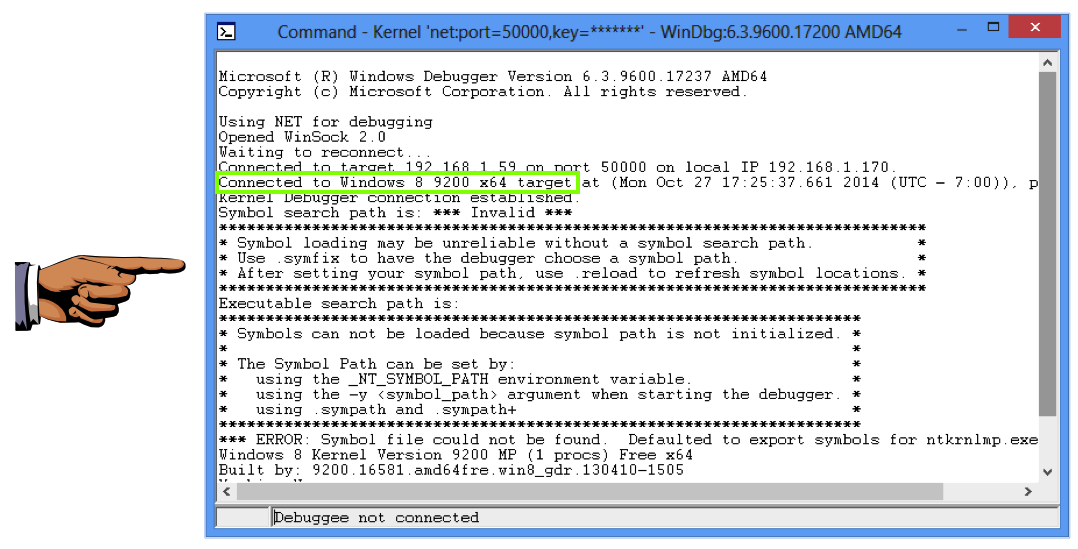
Make sure you can see the "Connected to Windows" message.
Save a FULL DESKTOP image with the filename Proj 11x from Your Name.