Launch the Lab13-01.exe file.
Use either method, and capture a beacon with Wireshark.
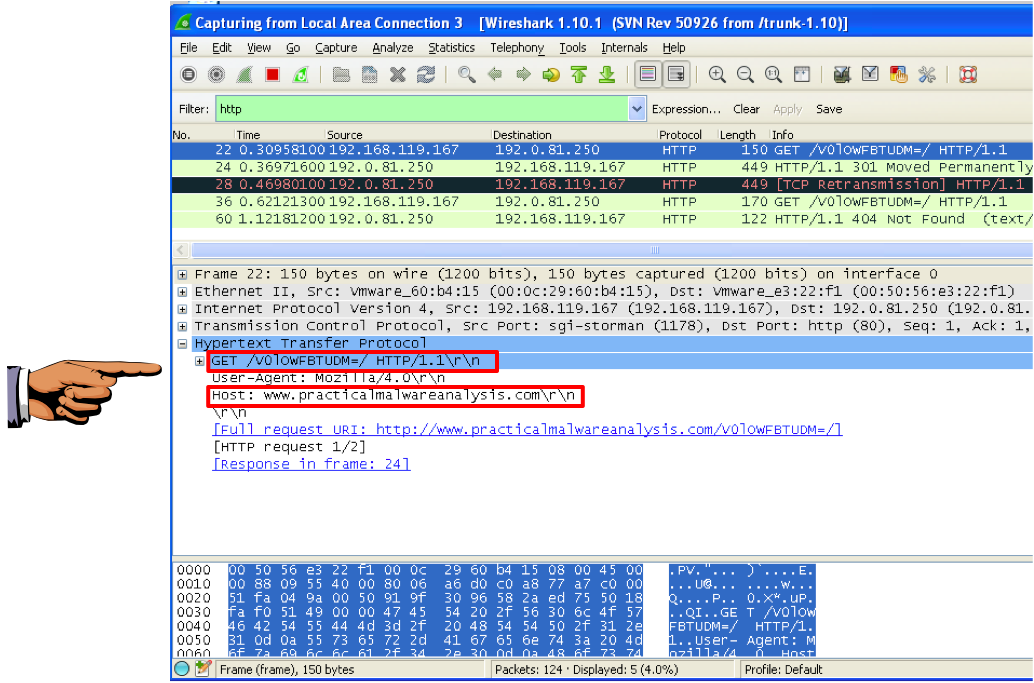
Adjust the wireshark window to show these two features, highlighted below:
Save this image with the filename "Proj 16a from YOUR NAME".
YOU MUST SUBMIT WHOLE-DESKTOP IMAGES TO GET FULL CREDIT!
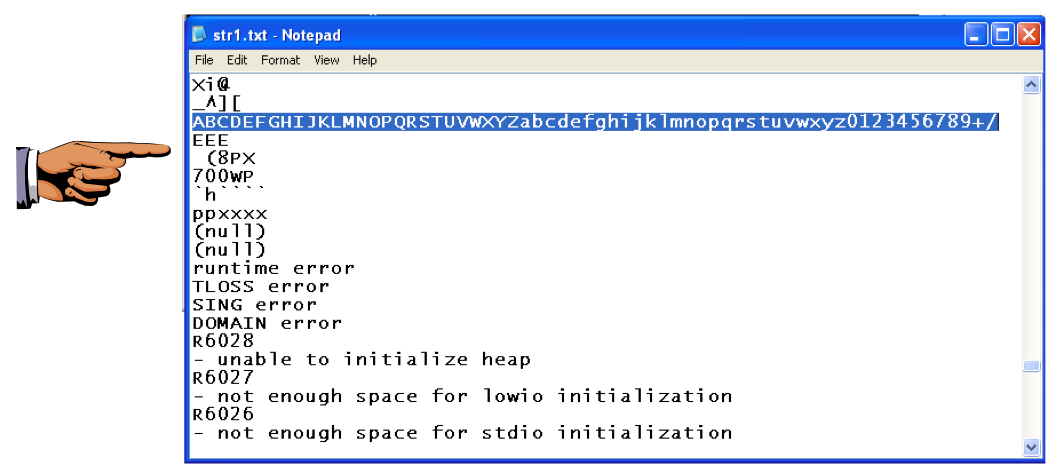
Examine the strings in the Lab13-01.exe file.
Save an image showing the string highlighted below, with the filename "Proj 16b from YOUR NAME".
Click Options, General. Check "Line Prefixes" and click OK.
Click in the "IDA View-A" window to make it active.
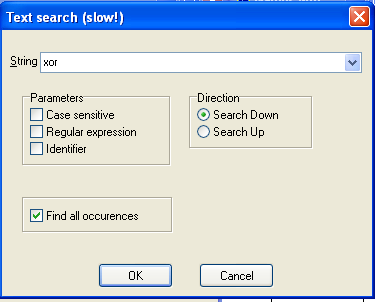
From the menu bar, click Search, text....
In the Text Search dialog, enter xor and check "Find all occurrences", as shown below:
A list of locations using the XOR command appears, as shown below.

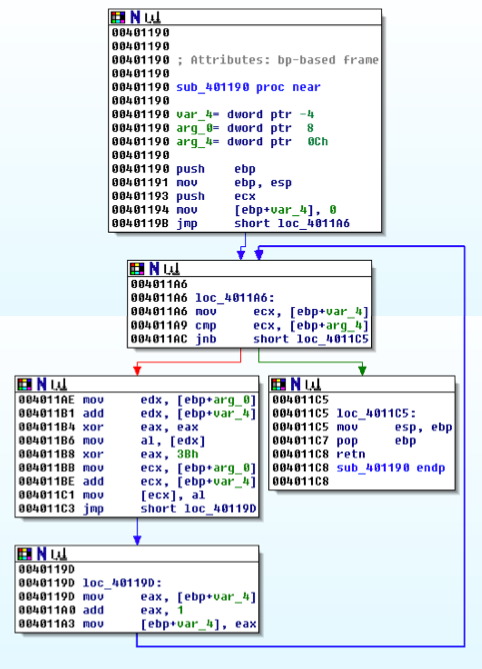
Double-click the xor eax, 3Bh instruction.
You should see the function shown below.
As explained in the book, this function performs xor encoding.
In the top box of the function, right-click sub_401190 and click Rename, as shown below.
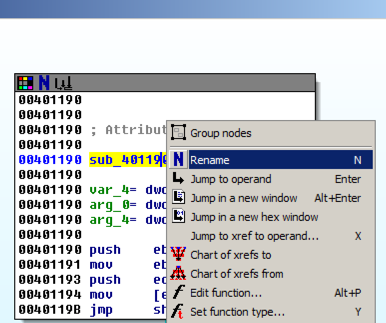
Enter a new name of xorEncode_YOURNAME, as shown below, replacing "YOURNAME" with your own name.
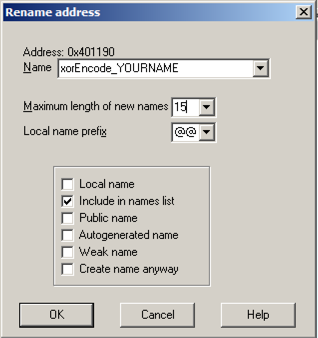
Click OK. If you are prompted to, increase the name length limit.
Right-click xorEncode_YOURNAME and click "Chart of xrefs to".
A chart showing four boxes appears, ending with one containing your name, as shown below.
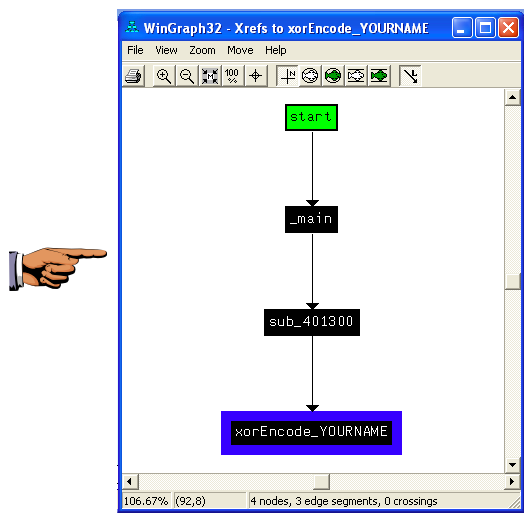
Save an image showing the four boxes with Your name in the bottom one, "Proj 16c from YOUR NAME". Close the "WinGraph32 - Xrefs to xorEncode..." box.
Right-click xorEncode_YOURNAME and click "Jump to xref to operand...".
A box pops up showing the address of the xref. Click OK.
This function, as shown below, calls these functions (shown in pink letters):
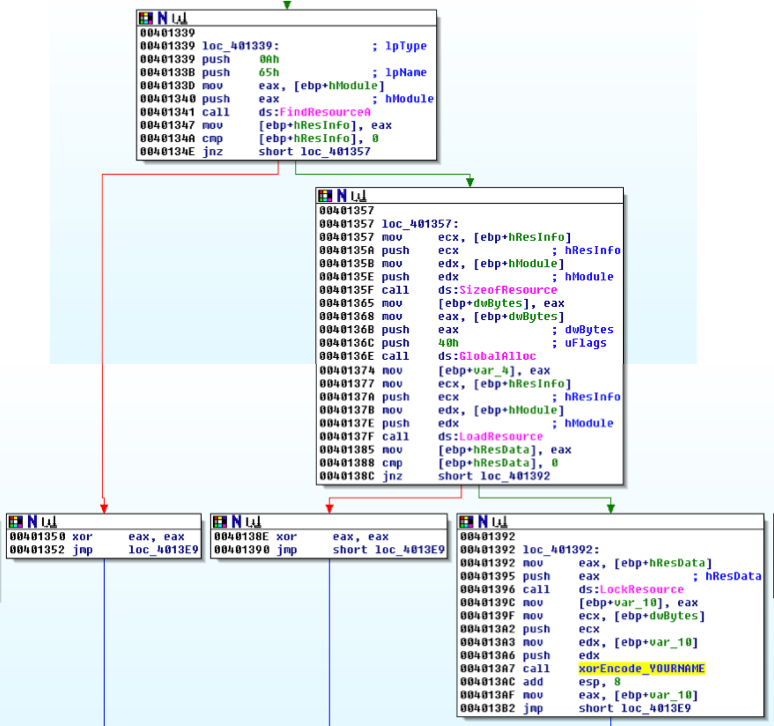
As explained in the book, this code loads a resource and then encodes it.
The resource is identified by its index of 65h, specified in the code at location 401338.
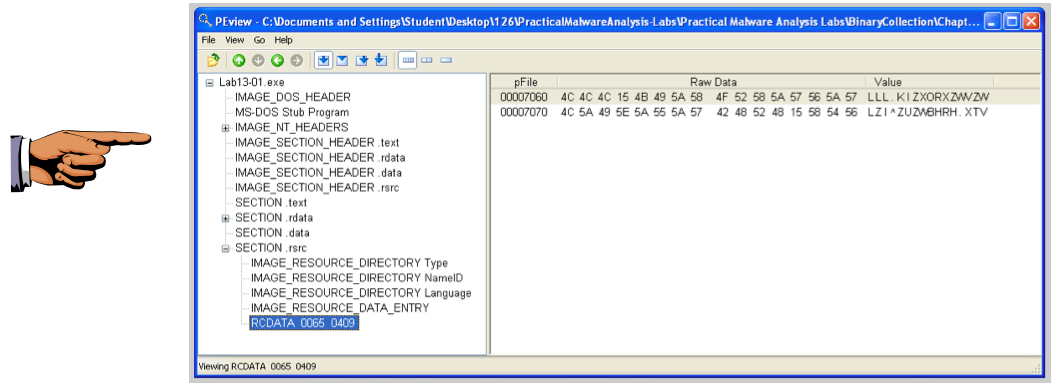
In the left pane, click the RCDATA 0065 0409 resource.
In the right pane, find the starting address 00007060, as shown below.
Save an image showing RCDATA 0065 0409 and 00007060 with the filename "Proj 16d from YOUR NAME".
On the left side, click the Download button, as shown below.
Right-click the winhex.zip file, click "Extract All", and click Extract.
A window appears showing the files contained in the winhex archive. Double-click setup.exe. Accept the default options to install WinHex. When the installation is complete, WinHex runs.
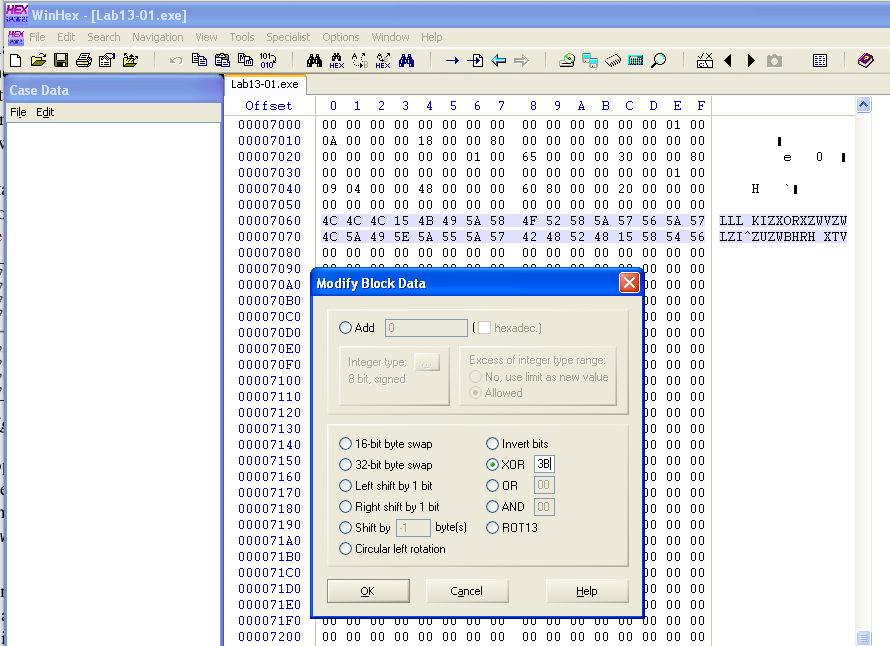
In WinHex, click File, Open. Open the Lab13-01.exe file in WinHex. Highlight bytes 7060 through 707F, as shown below.
Troubleshooting
If double-clicking setup.exe does nothing, open a Command Prompt and launch it from there.
Click Edit, "Modify Data".
In the "Modify Block Data" box, check the XOR radio button and enter a key of 3B, as shown below:
Click OK.
The decoded string appears on the right side: "www.practicalmalwareanalysis.com", as shown below:

Save an image showing www.practicalmalwareanalysis.com with the filename "Proj 16e from YOUR NAME".