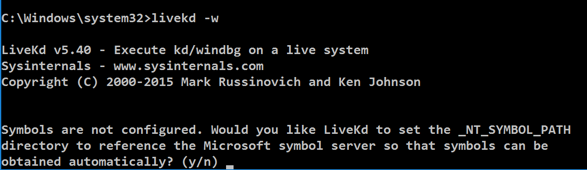
livekd -w livekd -w
Type y and press Enter . 输入 y并按Enter键 。
Livekd asks "Enter the folder to which symbols download". Livekd询问“输入符号下载的文件夹”。 Press Enter to accept the default option.按Enter接受默认选项。
Windbg launches, as shown below. Windbg启动,如下所示。
Changing SSDT values is called hooking and is commonly used by antivirus products and rootkits to modify system behavior.更改SSDT值称为挂钩 ,通常由防病毒产品和rootkit用于修改系统行为。
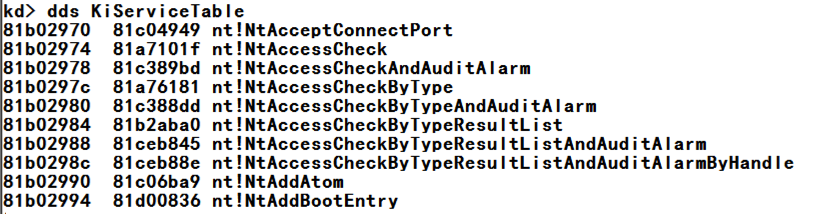
dds KiServiceTable dds KiServiceTable
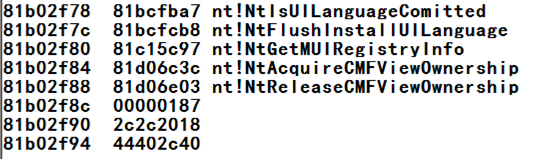
Execute this command to display the first 18a (hexadecimal) pointers in the SSDT:执行此命令以显示SSDT中的第一个18a(十六进制)指针:
dds KiServiceTable L 18a dds KiServiceTable L 18a
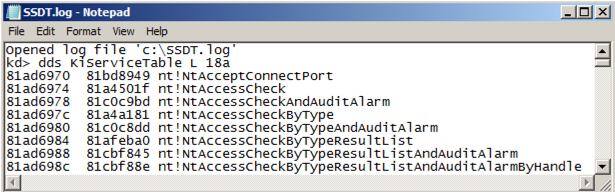
At the bottom of the Command window, in the command bar, execute these commands:在命令窗口的底部,在命令栏中,执行以下命令:
In Windows Explorer, navigate to the C:\SSDT.log file and open it.在Windows资源管理器中,导航到C:\ SSDT.log文件并将其打开。 It should contain all the SSDT pointers, as shown below.它应该包含所有的SSDT指针,如下所示。.logopen c:\SSDT.log .logopen c:\ SSDT.log dds KiServiceTable L 18a dds KiServiceTable L 18a .logclose .logclose
SHA-256: b7ac23d93c0d57a2683ba9391a62987fa363be0b1c9f079349fb90cca7555d77 SHA-256:b7ac23d93c0d57a2683ba9391a62987fa363be0b1c9f079349fb90cca7555d77
Unzip it and navigate to the release folder, as shown below.解压缩并导航到发布文件夹,如下所示。
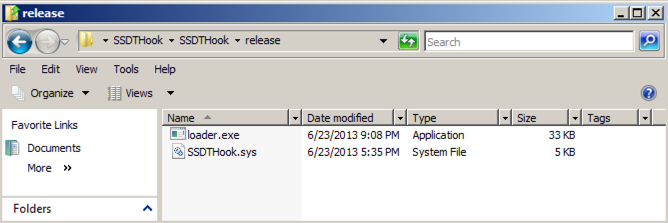
Double-click the loader.exe file.双击loader.exe文件。 A black command prompt box opens and immediately closes.一个黑色的命令提示框打开并立即关闭。 This has installed the SSDT hooks.这已经安装了SSDT挂钩。
Launch livekd again, and examine the SSDT again.再次启动livekd,然后再次检查SSDT。 Now there is an obvious change at address 81af6b68 as shown below.现在在地址81af6b68处有一个明显的变化,如下所示。

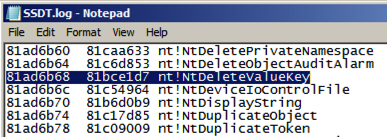
Look in your saved SSDT.log file.查看已保存的SSDT.log文件。 The addresses have changed, but the order of functions is the same, so you can see that the hooked function is nt!NtDeleteValueKey as shown below.地址已经改变,但函数的顺序是相同的,所以你可以看到挂钩函数是nt!NtDeleteValueKey ,如下所示。
Find the other hooks to answer the question below.找到其他钩子来回答下面的问题。
Challenge 16a: Function Name (5 pts)挑战16a:功能名称(5分)
The first function hooked isNtDeleteValueKey第一个挂钩的函数是NtDeleteValueKeyFind the name of the fourth hooked function.找到第四个挂钩函数的名称。
Use the form below to get your points.使用下面的表格来获得你的观点。
Challenge 15b: Zone Alarm (10 pts)挑战15b:防区报警(10分)
Installing Zone Alarm安装Zone Alarm
Download zaSuiteSetup_80_298_035_en.exe下载zaSuiteSetup_80_298_035_en.exeSHA-256: 93fb6afaa7961950caa08c89a188b2f37321772821941692a7928f7c796f083a SHA-256:93fb6afaa7961950caa08c89a188b2f37321772821941692a7928f7c796f083a
Install it, with these selections:使用以下选项安装它:
Find the name of the fourth hooked function.找到第四个挂钩函数的名称。
- "Install on Unsupported OS?" “在不支持的操作系统上安装?” Yes 是
- "Installation" Next “安装” 下一步
- "ZoneAlarm Registration" Uncheck both boxes, Next “ZoneAlarm注册”取消选中两个框, 下一步
- "License Agreement" Check the box, Install “许可协议”选中“ 安装 ”框
- If a box warns you that this installation will replace MailFrontier Anti-spam software, click OK如果一个方块警告您此安装将取代MailFrontier反垃圾邮件软件,请单击确定
- "Please choose your program control security setting" -- accept the default option of "Auto-learn" and click Next “请选择您的程序控制安全设置” - 接受默认选项“自动学习”,然后单击下一步
- Click " Do not participate in DefenseNet " and click Next点击“ 不参与防御网络 ”并点击下一步
- Accept the default selection of " Yes - Enable Anti-virus protection " and click Next接受默认选择“ 是 - 启用防病毒保护 ”并单击下一步
- Accept the default selections of " Set up my programs (default) " and " Automatically configure my network settings " and click Next接受默认选择“ 设置我的程序(默认) ”和“ 自动配置我的网络设置 ”,然后单击下一步
- Wait for the scan to complete, click Next等待扫描完成,单击下一步
- Click " Restart Computer "点击“ 重新启动计算机 ”
Use the form below to get your points.使用下面的表格来获得你的观点。


