If you don't have an expendable machine, use the S214 lab machines.
If there is any version of the gogoCLIENT installed, remove it first. This bug only works on a fresh install.
Download and install the gogoCLIENT Utility version 1.0-RELEASEHACCESSwin32 from this link:
gogoc1.0RELEASEHACCESSwin32.exe
This utility allows you to make IPv6 connections through Freenet6, but that's not important for this project.
The useful thing for this project is that it has a serious bug (it was fixed in later versions).
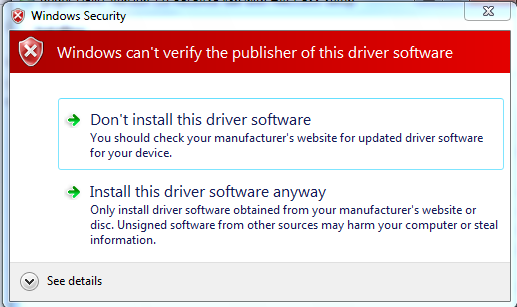
During the installation, you will see this scary warning box, suggesting that this driver is unsafe, which is correct.
Click "Install this driver anyway".
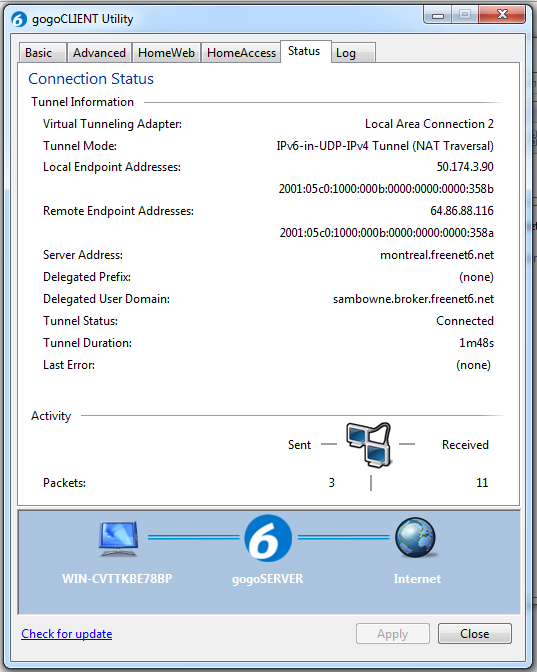
In the "gogoCLIENT Utility" box, on the Basic tab, click the Connect button.
Click the Status tab and wait until it connects. as shown below.
NOTE: this is not possible on the CCSF wireless network, because the port is blocked. You can use the wired network in S214, however.
Type in CONNECTIONS
Click "View network connections".
In the Network Connections window, find the "gogo6 Virtual Multi-Tunnel Adapter", as shown below.

Right-click the the "gogo6 Virtual Multi-Tunnel Adapter" and click Disable.
In the gogoCLIENT window, on the Basic tab, click Disconnect.
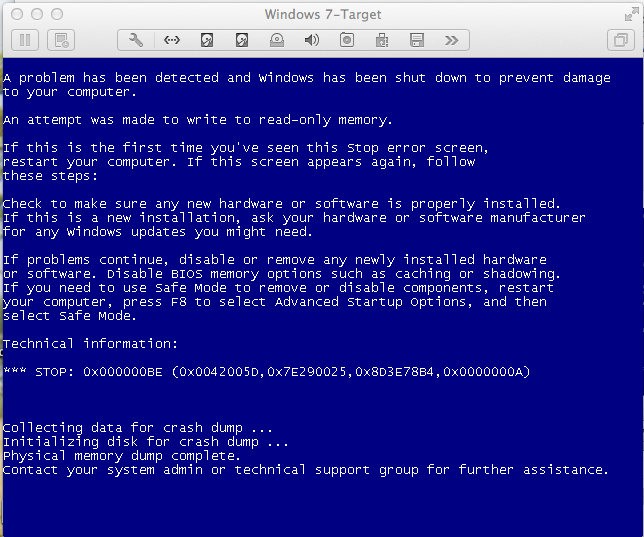
You should see the Blue Screen of Death, as shown below:
Wait till you see the message "Physical memory dump complete", as shown above. Power the machine off.
If you are using a virtual machine, click "Virtual Machine, "Shut Down", "Force Shut Down", "Force Shut Down".
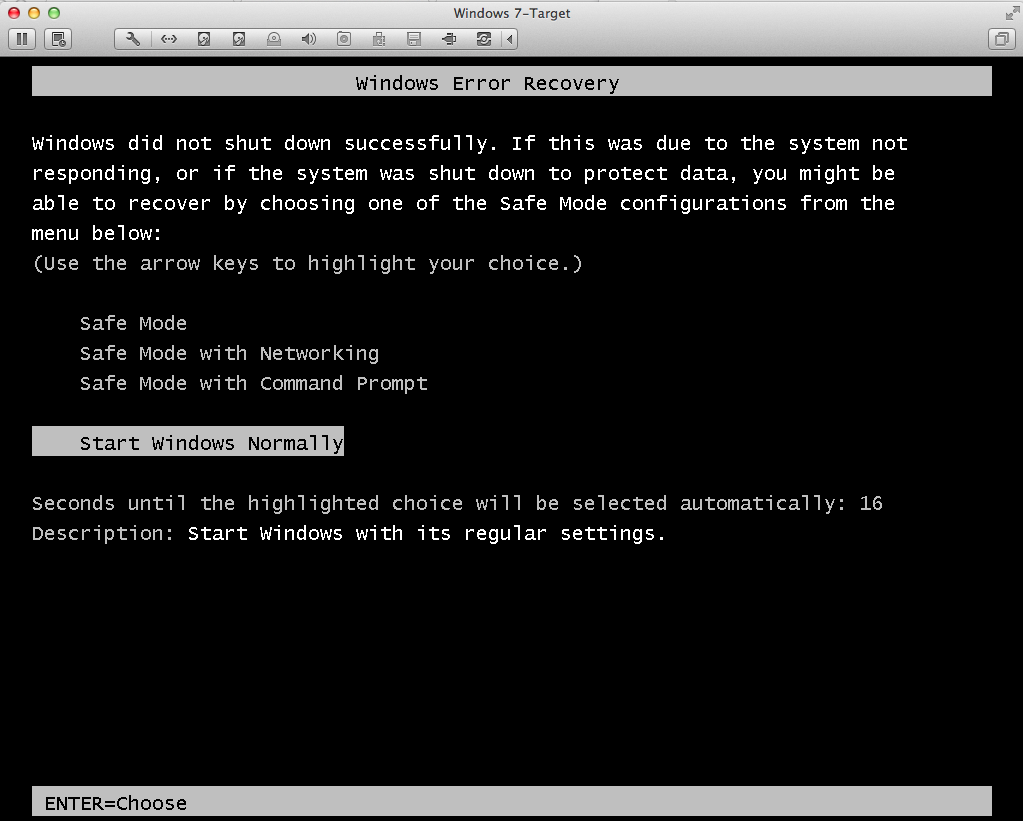
The "Windows Error Recovery" screen appears, as shown below.
Highlight "Start Windows Normally" and press Enter.
Note: Sometimes I was unable to restart Windows this way, and I had to run "Startup Repair" twice.
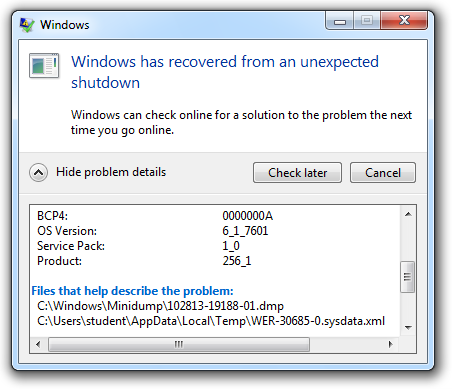
When the machine starts again, you see a box saying "Windows has recovered from an unexpected shutdown", as shown below.
Click the "View problem details" arrow and scroll down to find the filename of the crash dump file.
In the example below, the crash dump file is "C:\Windows\Minidump\102813-19188-01.dmp".
Configure the symbol path, as you did before.
Open the dump file.
At the bottom, you see the message "Probably caused by gogotun.sys", as shown below.

Save a whole-desktop image with a filename of "Proj 9x from YOUR NAME".
YOU MUST SUBMIT WHOLE-DESKTOP IMAGES TO GET FULL CREDIT.
Last Modified: 10-28-13 3:26 pm