Using AltStore and Unc0ver
The instructions below are for the Checkra1n jailbreak.Another option is given in the video below:
I bought my phones from https://swappa.com, paying about $60 for a 5S or 6.
If your phone has important data on it, at least back it up first with iCloud or some other method.
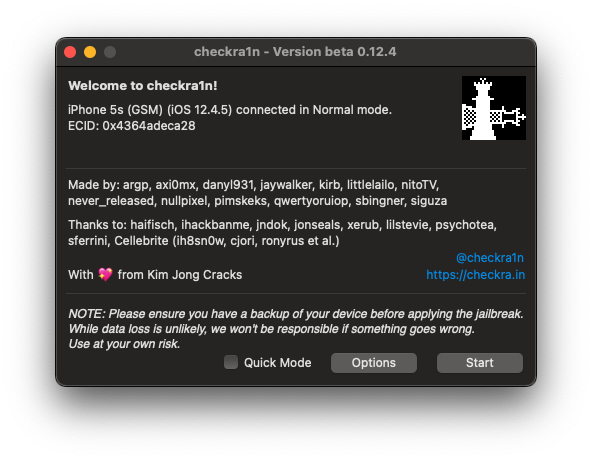
Download, install, and launch the latest version of Checkra1n, as shown below.
Checkra1n detects your phone, as shown below.
If it fails, try the old version 0.9.7-beta.
If Checkra1n says your phone has too old an OS, as shown below, do the steps in the blue box below. If not, proceed to the next section.

Restoring and Updating your iPhone
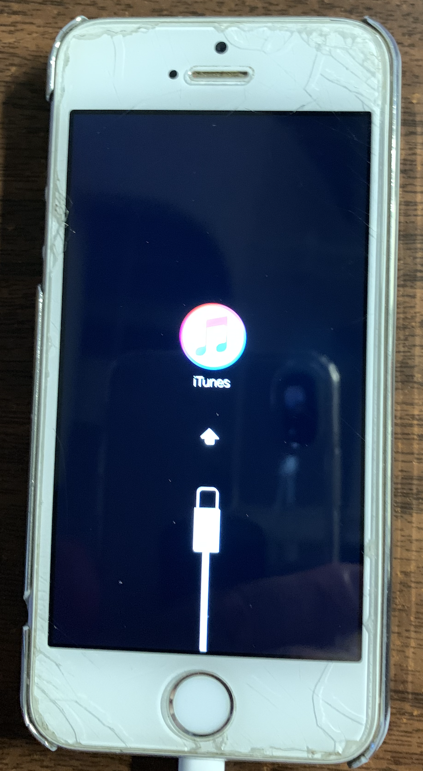
Reboot your phone into recovery mode and restore it using Finder.To do this on the iPhone 5S, hold down the Home button and the top button together and hold until the phone reboots.
Keep holding both buttons down while the Apple logo displays, until you see the screen below.
Connect the phone to your Mac using an iPhone cable. On the Mac, open Finder. On the left side, click iPhone.
Agree to any prompts that appear so the devices trust one another.
On your computer, a message will appear in Finder asking if you want to Update or Restore the device.
Click Restore.
Follow any messages that appear to restore the iPhone to factory default settings. This will erase all data on the device.
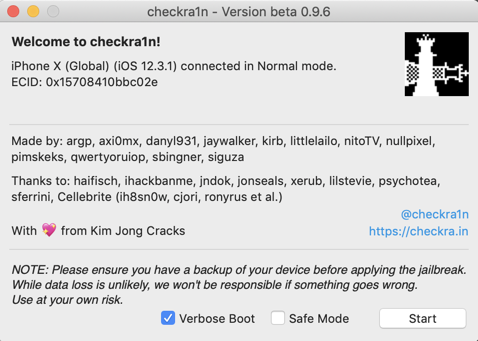
Checkra1n detects your phone, as shown below.
Check the "Verbose Boot" box and click Start.
The next screen explains DFU mode. Read it and click Next.
The phone shows a picture of a cable.
Now you need to press some buttons, guided by the Checkra1n screens. The first screen is shown below.
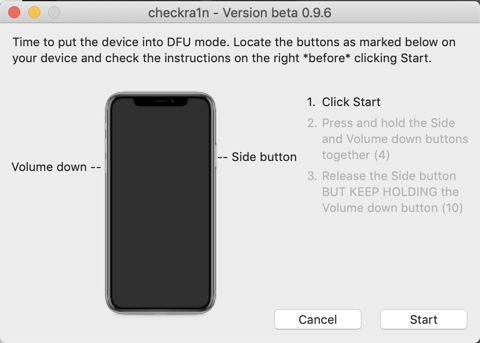
Follow the instructions, pressing buttons. When you get it right, the phone will reboot, with a lot of text scrolling by.
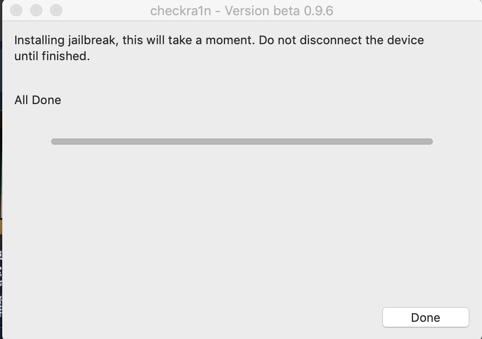
Checkra1n tells you it's done, as shown below.
Click the Done button.
Close Checkra1n.
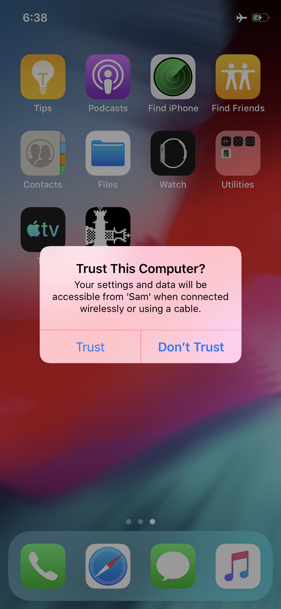
Your home screen shows a "Trust This Computer?" box, as shown below.
Click Trust.
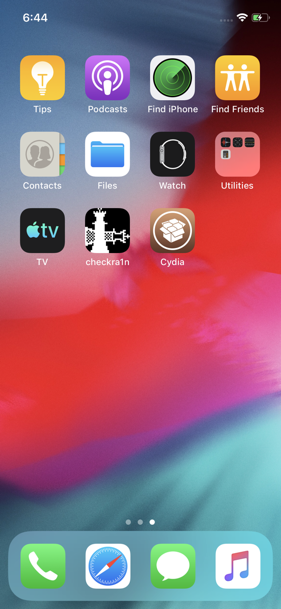
Your iPhone now has a checkra1n icon, as shown below.
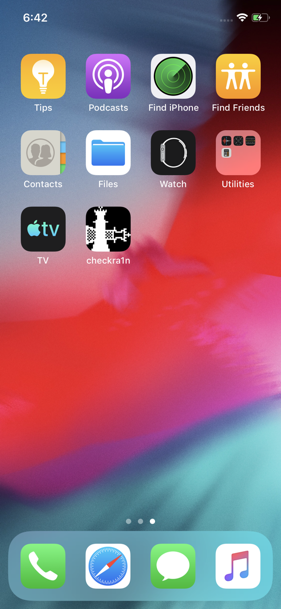
Tap the checkra1n icon.
If your iPhone is offline, connect to a Wi-Fi network and relaunch checkra1n.
If the date on your phone is wrong, you may have to correct it in Settings.
In the "Loader" screen, click Cydia, as shown below.
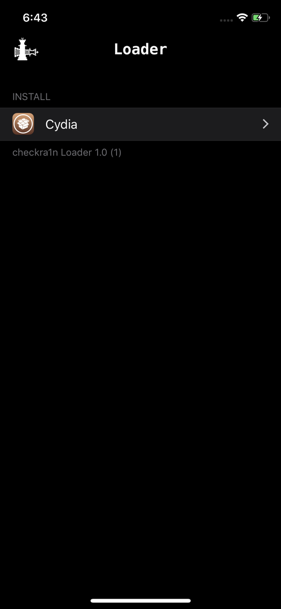
Click "Install Cydia".
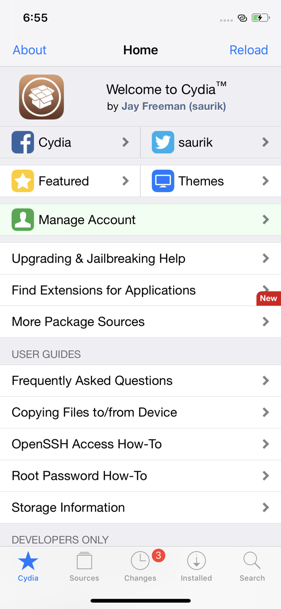
Cydia now appears on your iPhone, as shown below.
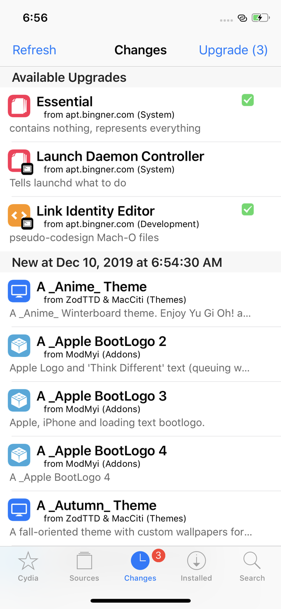
At the bottom, click Changes, as shown below.
Install the essential upgrades.
Click "Restart SpringBoard".
/usr/bin/ruby -e "$(curl -fsSL https://raw.githubusercontent.com/Homebrew/install/master/install)"
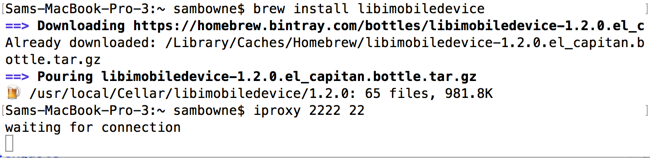
On the Mac, in a Terminal window, execute these commands to install "libmobiledevice" and start a proxy listening on port 2222, which connects to port 44 via the USB cable.
This works because the Checkra.in jailbreak adds a service listening on port 44 for this purpose.
brew install libimobiledevice
iproxy 2222 44
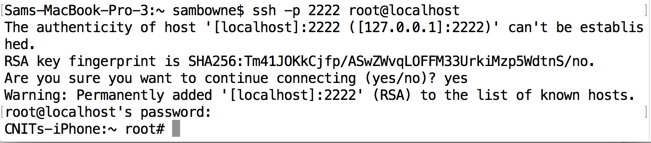
In a new Terminal window, execute this command:
ssh -p 2222 root@localhost
You should see a root command prompt, as shown below.
Troubleshooting
If you see a message sayingthat probably means that a previous iPhone has been connected to this Mac. To proceed, execute this command:
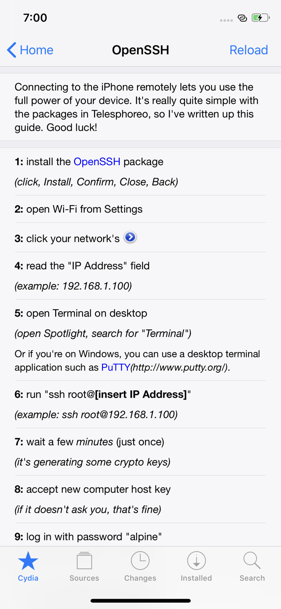
Installing OpenSSH (Optional)
This allows you to connect over Wi-Fi, which is riskier than using a USB cable, but may be more convenient.Launch Cydia again.
In the lower portion of your screen, click "OpenSSH Access How-To".
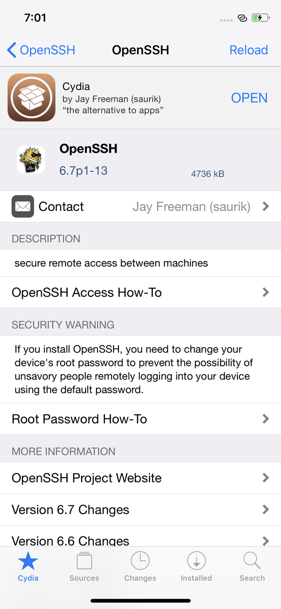
In the next screen, in step 1, click the blue OpenSSH link, as shown below.
On the next screen, at the top right, click OPEN, as shown below.
On the next screen, at the top right, click Install.
Click Confirm.
Click "Return to Cydia".
Finding your iPhone's IP Address
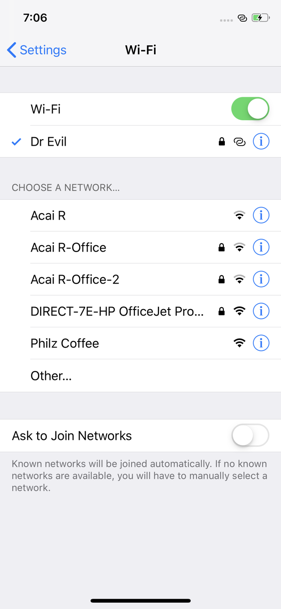
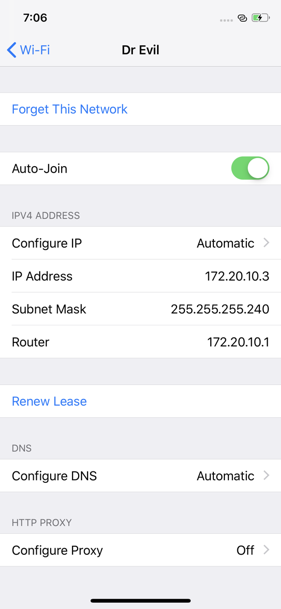
On your iPhone, open Settings.Click Wi-Fi. On the line showing your Wi-Fi network's name and a check mark, click the blue circled i, as shown below.
Your IP address appears, as shown below.
Connecting with SSH
On your Mac, open a Terminal and execute this command, replacing the IP address with the IP address of your iPhone.It asks "Are you sure you want to continue connecting (yes/no)? ". Answer:Changing the Root Password
Execute these commands to change the password. If you are using one of our in-class iPhones, please use the exact password shown below. Otherwise, choose any strong password you like.
Flag ED 420.1: uname (15 pts)
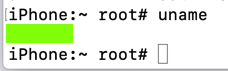
In your SSH session, execute this command.The flag is covered by a green rectangle in the image below.
apt install network-cmds
apt install curl nano
Posted 12-10-19
Updated for SSH over USB 12-15-19
Updated to use older checkra1n version 2-11-2020
Checkrain url fixed 2-12-2020
Updated 1-2-21
Swappa link added 2-20-21
Many obsolete references to iTunes launching removed 3-7-21
Video about AltStore added 2-24-2021
Updated 11-27-25