In this project, we'll use a two-stage virtual environment from Azeria Lab, which consists of an Ubuntu Linux virtual machine which uses the QEMU virtualization software to run a virtual Raspberry Pi on ARM inside it.
It emulates a 32-bit ARMv6 processor, as shown below.
http://azeria-labs.com/arm-lab-vm/ Download, unzip, and double-click the Azeria-Lab-v1.vmx fine to run the VM in VMware.
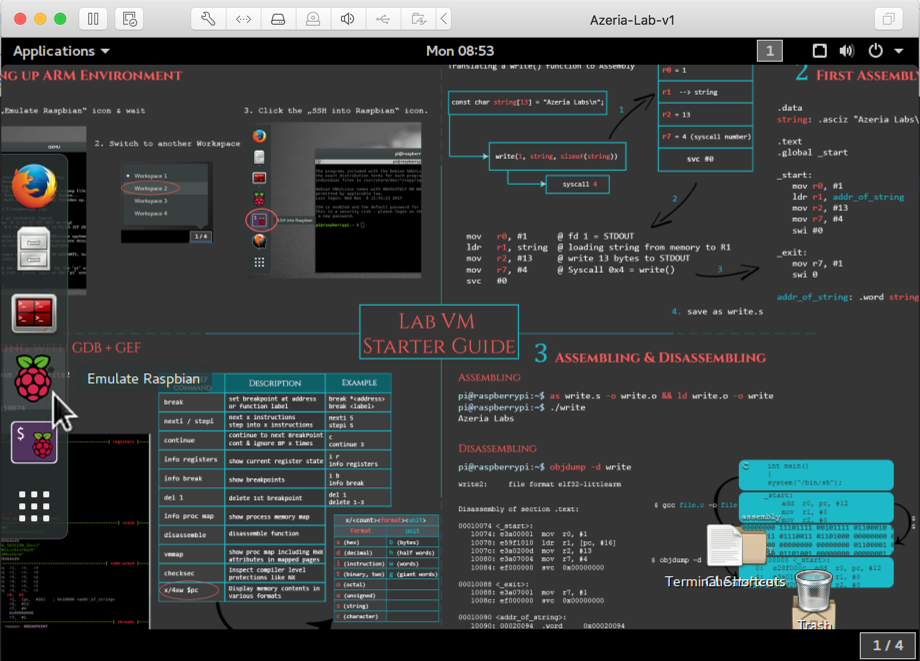
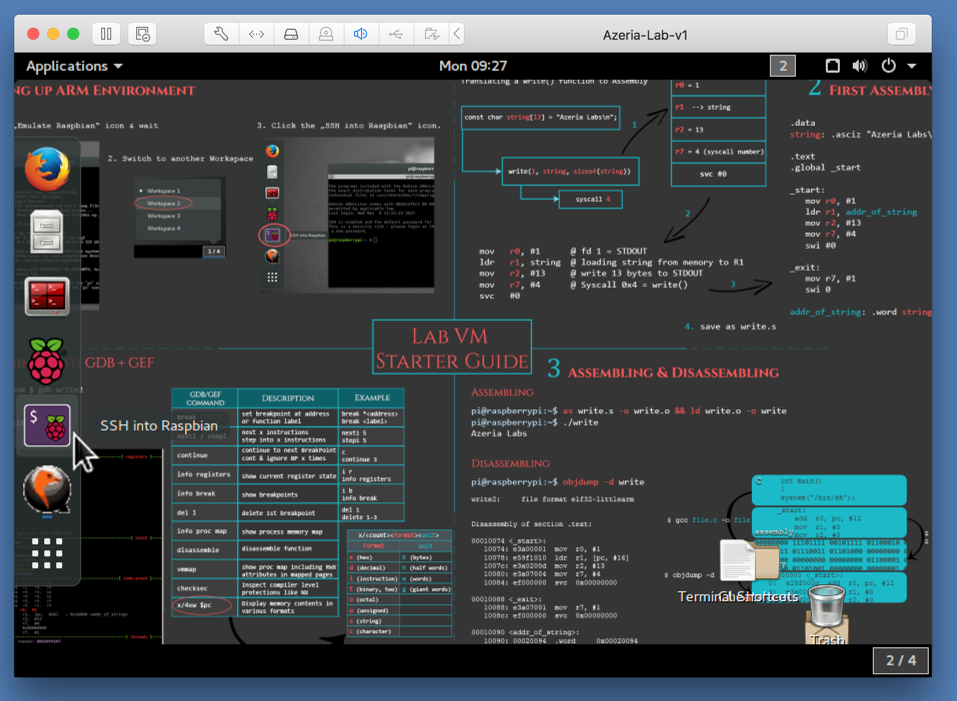
You see a desktop, as shown below.
Note: if the machine times out due to inactivity, you'll need to enter the password azerialabs to wake it up.
On the left side, click the "Emulate Raspbian" icon, as shown in the image above.
The Raspberry Pi boots into its "Raspbian" OS, as shown below.
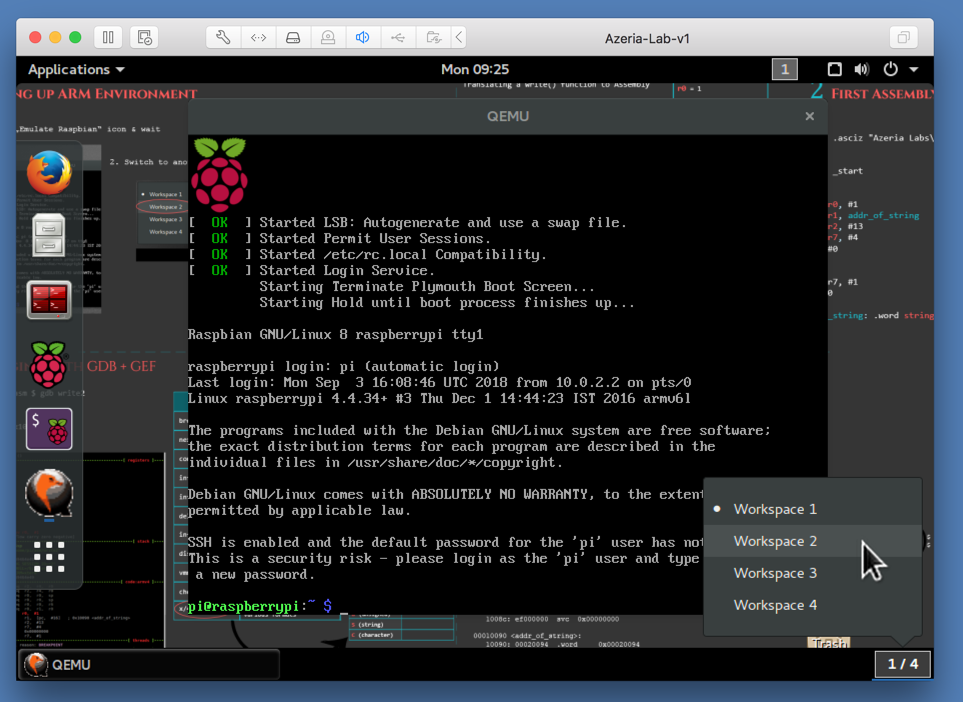
On the bottom right, click the 1/4 box. In the list that pops up, click "Workspace 2", as shown in the image above.
A new workspace appears.
On the left side, click the "SSH into Raspbian" icon, as shown in the image below.
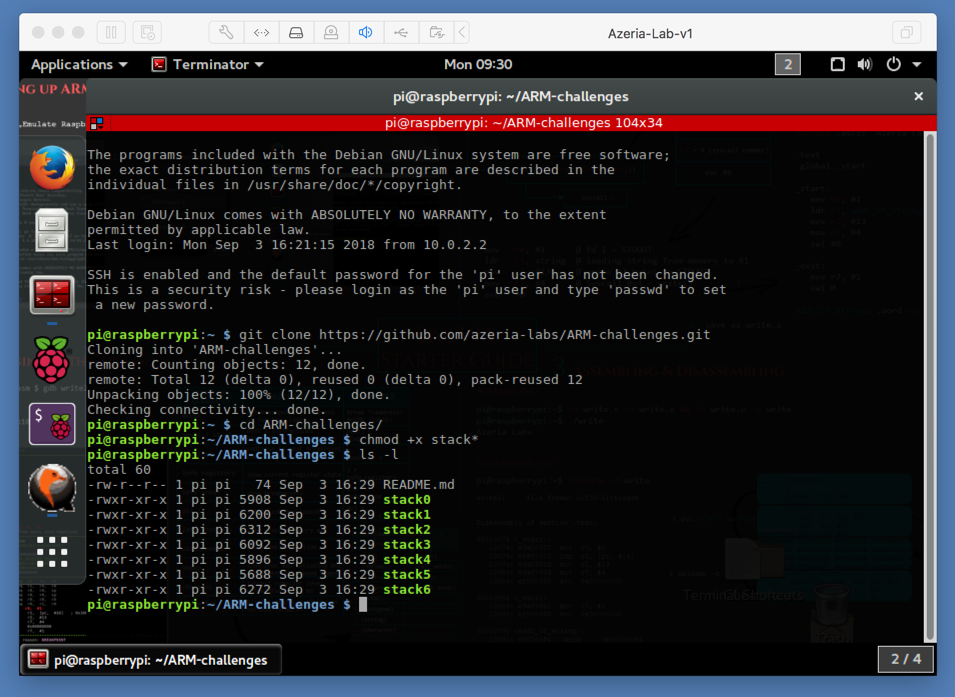
At the "pi@raspberrypi:~ $" prompt, execute these commands:
git clone https://github.com/azeria-labs/ARM-challenges.git
cd ARM-challenges/
chmod +x stack*
ls -l
Troubleshooting Internet Access
If Raspbian cannot connect to the Internet, at the top left of the Azeria-Lab desktop, click Applications, Terminator, and test the internet with these commands:If the Azeria-Lab machine is not connected to the Internet, try disconnecting and reconnecting the network adapter from the VMware settings.Once the Azeria-Lab machine is connected, close and restart the Raspberry Pi emulator. Note that "ping" does not work inside QEMU, which allows only TCP and UDP.
Screen Blanking
To stop the screen going blank, I recommend this:Click the icon at the bottom on the left side, that consists of nine dots.
On the right side, click the lower of the two dots to see the second page of icons.
Click the Settings icon.
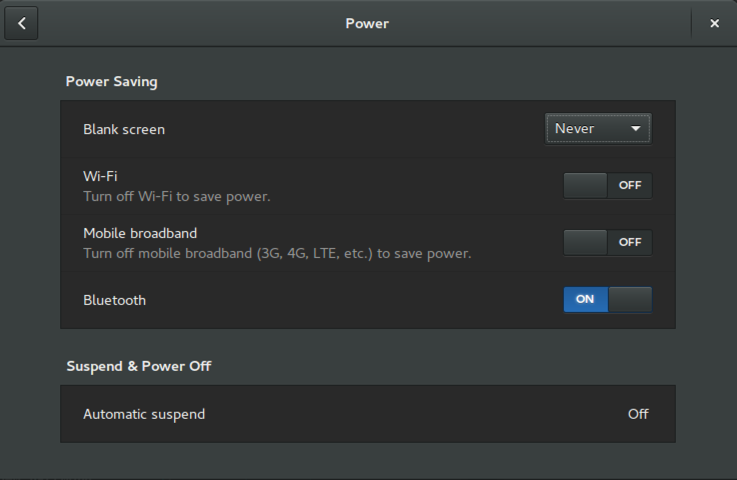
Click the Power icon.
Set "Blank screen" to Never, as shown below.
cat README.md

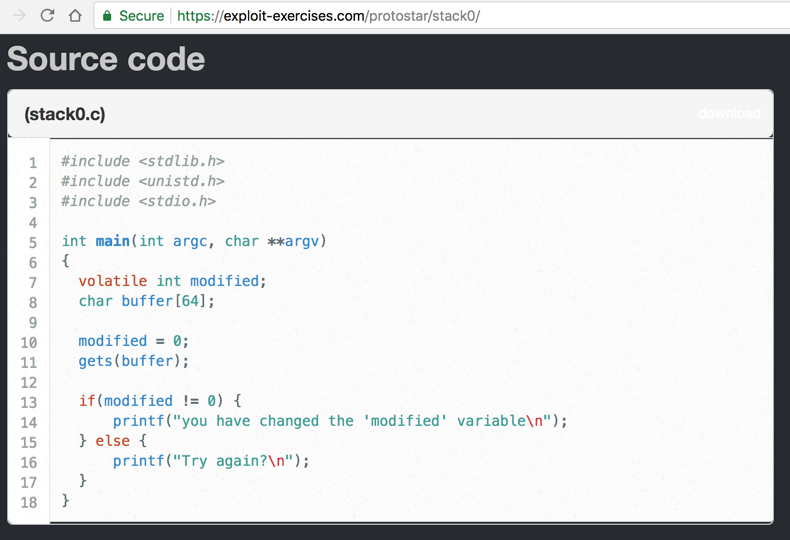
It defines an integer variable named modified and sets it to zero in line 10, as shown below.
It then calls gets() to read user input into a buffer that is 64 bytes long, and checks to see if the modified variable has been changed.
In your emulated Raspberry Pi, at the "pi@raspberrypi:~ $" prompt, execute this command:
./stack0
A "Try again?" message appears, as shown below.
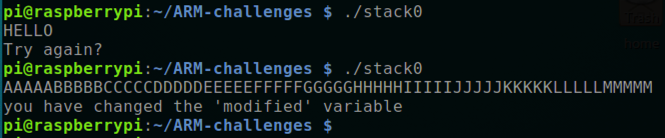
Run the program again and enter this long string. The program prints "you have changed the 'modified' variable", as shown above.
AAAAABBBBBCCCCCDDDDDEEEEEFFFFFGGGGGHHHHHIIIIIJJJJJKKKKKLLLLLMMMMM
In your emulated Raspberry Pi, at the "pi@raspberrypi:~ $" prompt, execute this command:
gdb -q stack0

In the debugger, at the gef> prompt, execute these commands to load "start0", breaking at the start of main():
break main
run
The first section shows the registers.
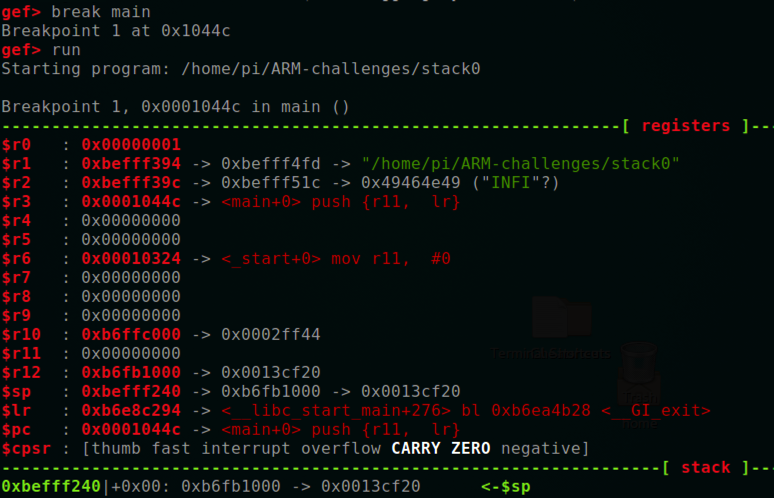
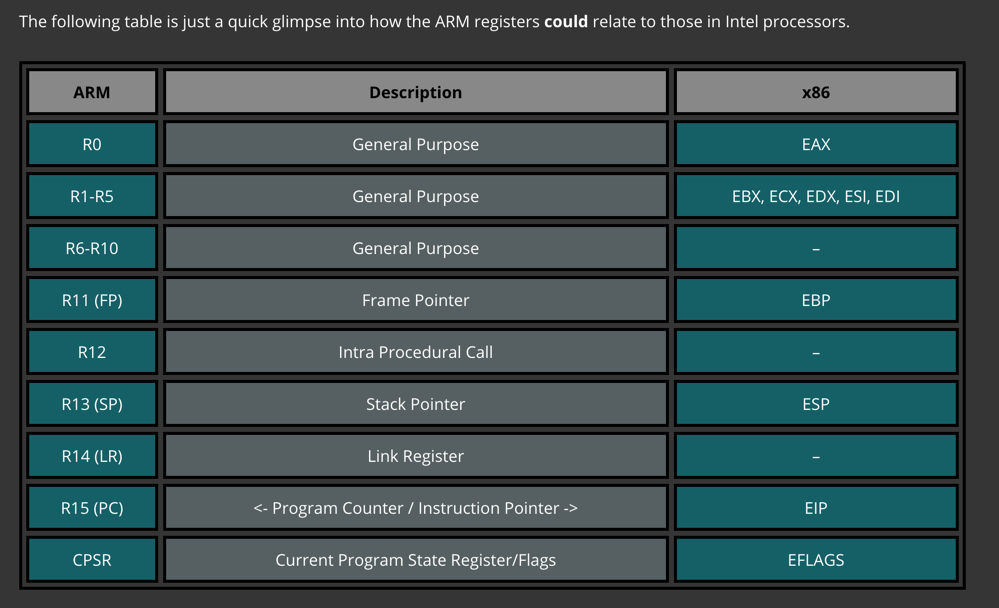
As shown below, the registers are similar to x86 registers.
The most important registers for us are:
After the registers, gdb shows these sections, as shown below.
disassemble main
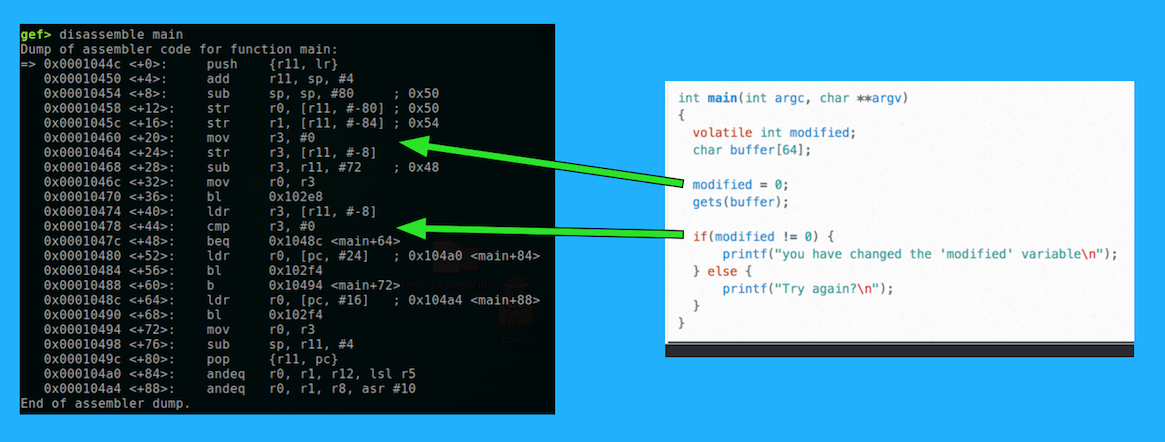
From context, it's apparent that 0x102e8 is gets() and 0x102f4 is printf().
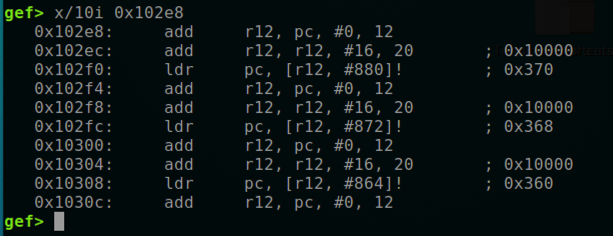
You can use x to see the code at those addresses, but it's not very helpful, as shown below.
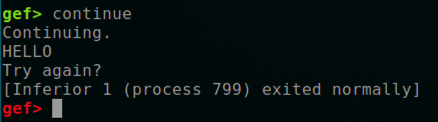
continue
The program says "Try again?", and exits normally, as shown below.
run
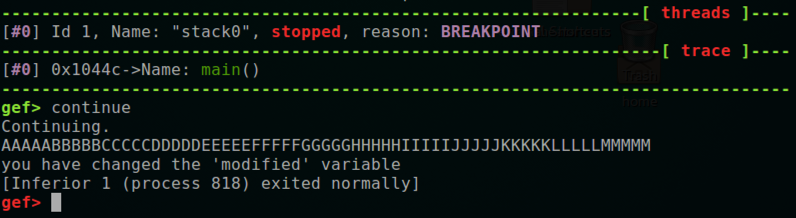
continue
AAAAABBBBBCCCCCDDDDDEEEEEFFFFFGGGGGHHHHHIIIIIJJJJJKKKKKLLLLLMMMMM
The input overflowed the buffer and changed the integer variable after it, but did not corrupt the stored registers required for the program to exit.
In gdb, execute these commands:
run
continue
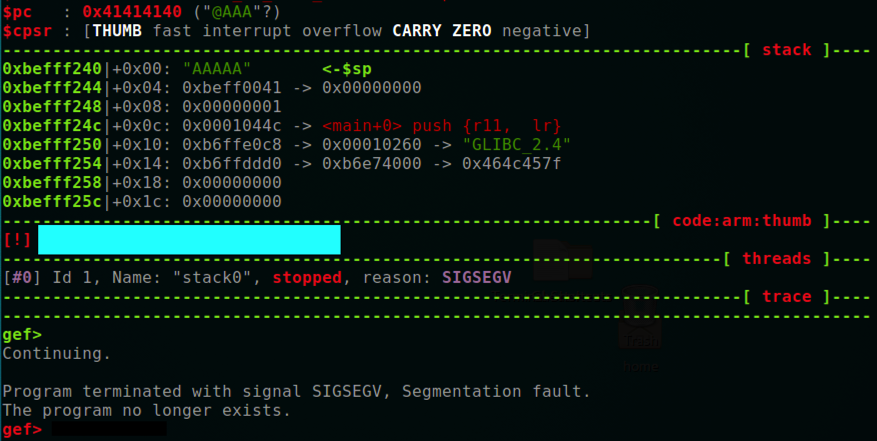
AAAAABBBBBCCCCCDDDDDEEEEEFFFFFGGGGGHHHHHIIIIIJJJJJKKKKKLLLLLMMMMMAAAAAAAAAAAAAAAA
Notice that $r11 contains 0x41414141, as it does when overflowing the stack on a x86 processor, but $pc contains 0x41414140, as shown below.
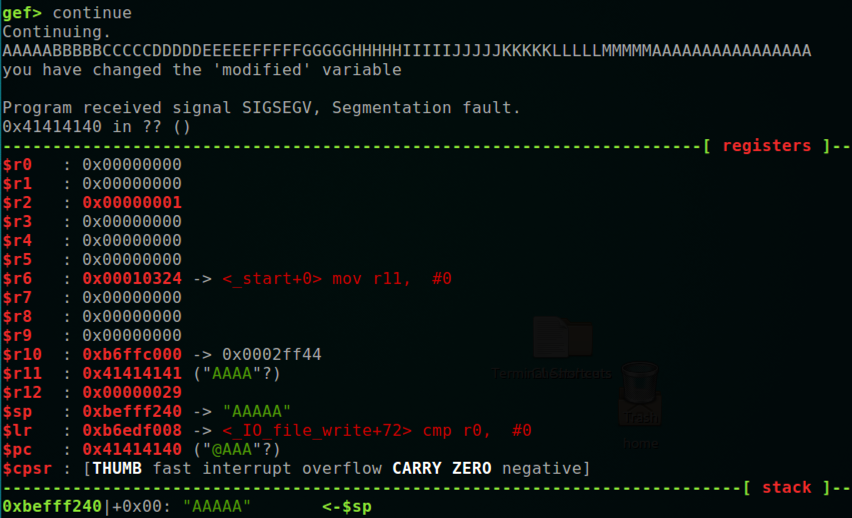
The last bit of the address controls the processing mode, as explained here. This is one reason it's confusing to exploit buffer overflows in main(), and we generally use code with overflows in other "leaf" functions.
Find the text that is covered by the blue box in the image below.
Enter that text into the form below.