http://sites.google.com/site/lupingreycorner/vulnserver.zip
If that link doesn't work, try this alterative download link.
Save the "vulnserver.zip" file on your desktop.
On your desktop, right-click vulnserver.zip.
Click "Extract All...", Extract.
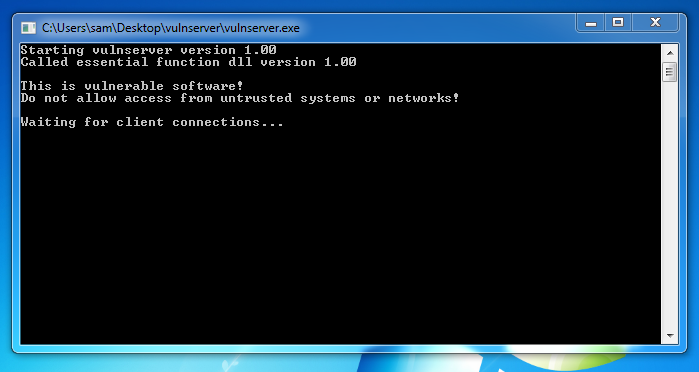
A "vulnserver" window opens. Double-click vulnserver. The Vulnserver application opens, as shown below.
https://technet.microsoft.com/en-us/sysinternals/bb896653.aspx
Download Process Explorer.
Double-click the ZIP file to open it.
Double-click procexp.exe to run it.
Click Run, Run, Agree.
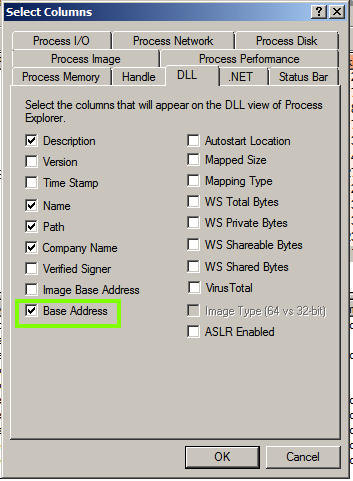
In Process Explorer, click View, "Select Columns".
In the "Select Columns" box, click the DLL tab.
Check "Base Address", as shown below. Click OK.
In the top pane of Process Explorer, scroll down and click vulnserver.exe.
The lower pane shows the DLL files used by vulnserver, along with their Base Address, as shown below.
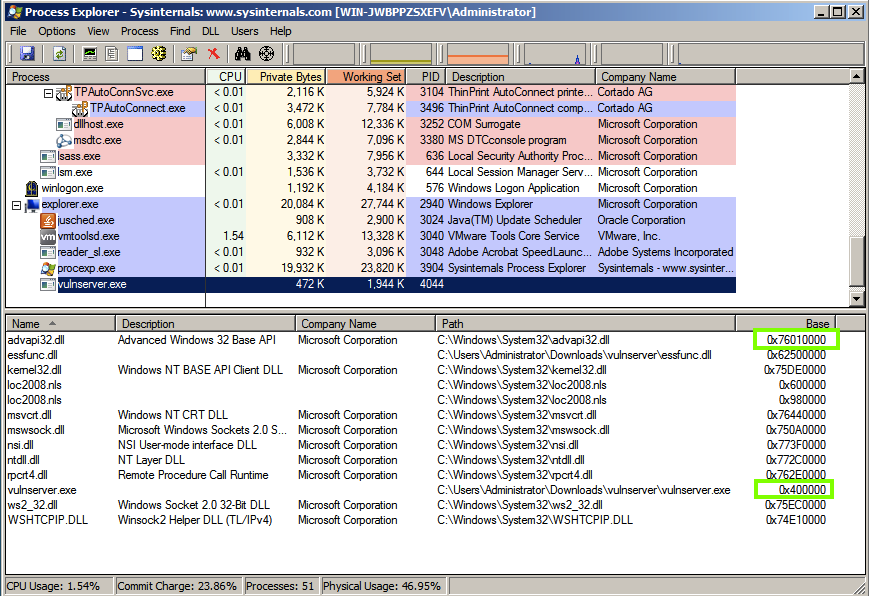
The Base Address of vulnserver.exe should be 0x400000, just as shown above.
Pick a DLL, such as advapi (or some other DLL if advapi is not visible), and note its address.
Allow the machine to shut down and restart normally.
Log in.
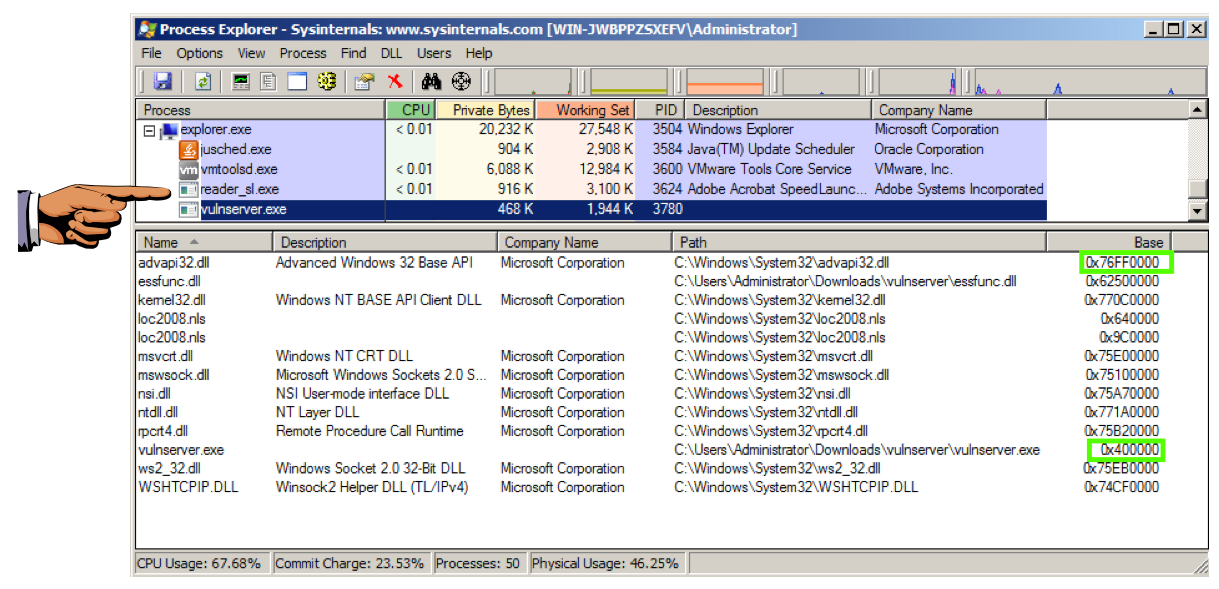
Launch vulnserver and Process Explorer again.
Examine the DLL files for vulnserver again.
You should see the same address for vulnserver.exe, as shown below, but the DLL file should have a different address.
This is the effect of Address Space Layout Randomization--the processes that have it enabled move each time the machine reboots.
Press the PrintScrn key to copy the whole desktop to the clipboard.
YOU MUST SUBMIT A FULL-SCREEN IMAGE FOR FULL CREDIT!
Paste the image into Paint.
Save the document with the filename "YOUR NAME Proj 9xa", replacing "YOUR NAME" with your real name.
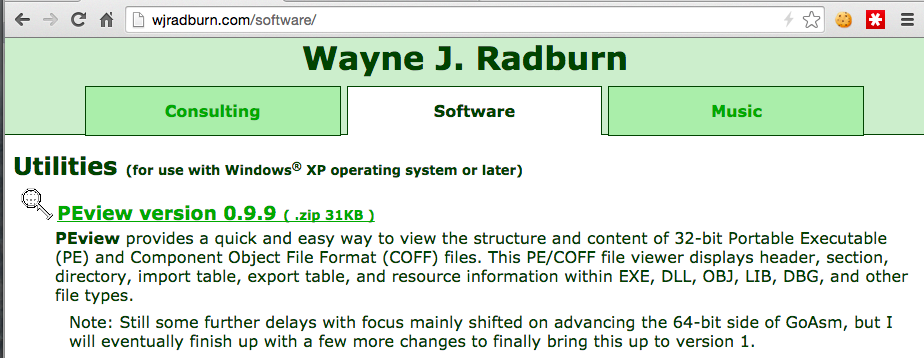
http://wjradburn.com/software/
Click the "PEview version 0.9.9" link, as shown below.
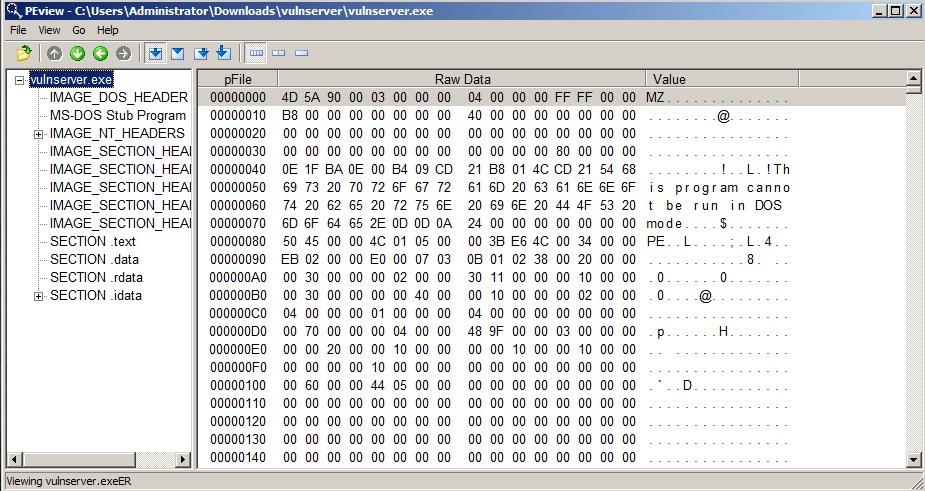
Double-click the ZIP file to open it.
Double-click PEview.exe to run it.
Click Run, Accept.
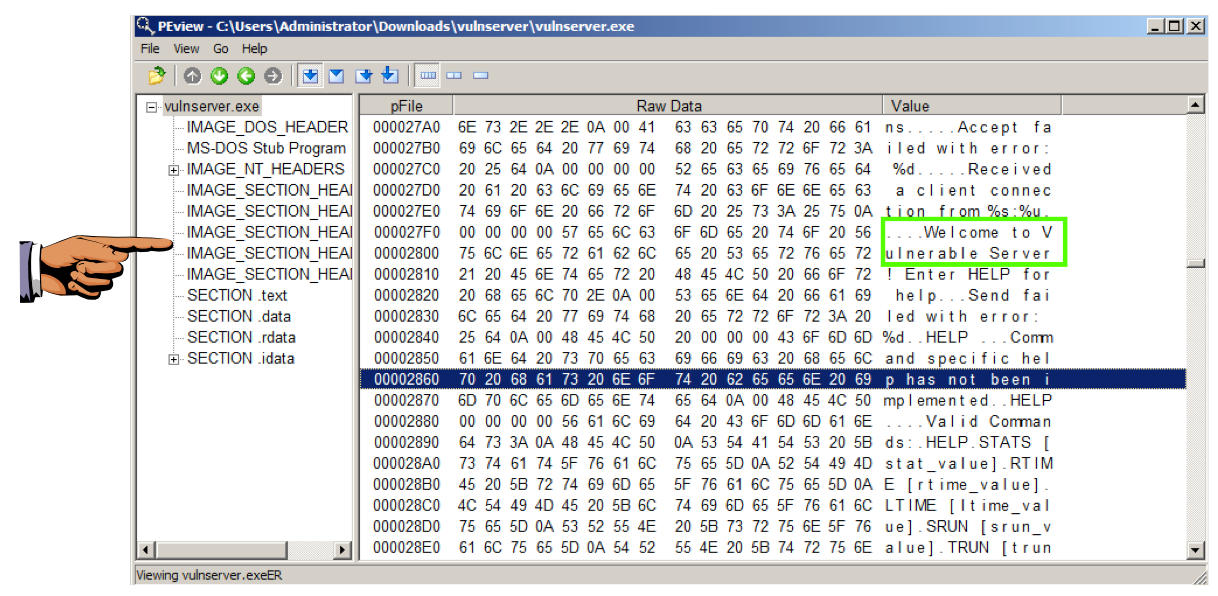
Scroll down in the rignt pane to find the program's greeting text, "Welcome to Vulnerable Server", as shown below.
Press the PrintScrn key to copy the whole desktop to the clipboard.
YOU MUST SUBMIT A FULL-SCREEN IMAGE FOR FULL CREDIT!
Paste the image into Paint.
Save the document with the filename "YOUR NAME Proj 9xb", replacing "YOUR NAME" with your real name.
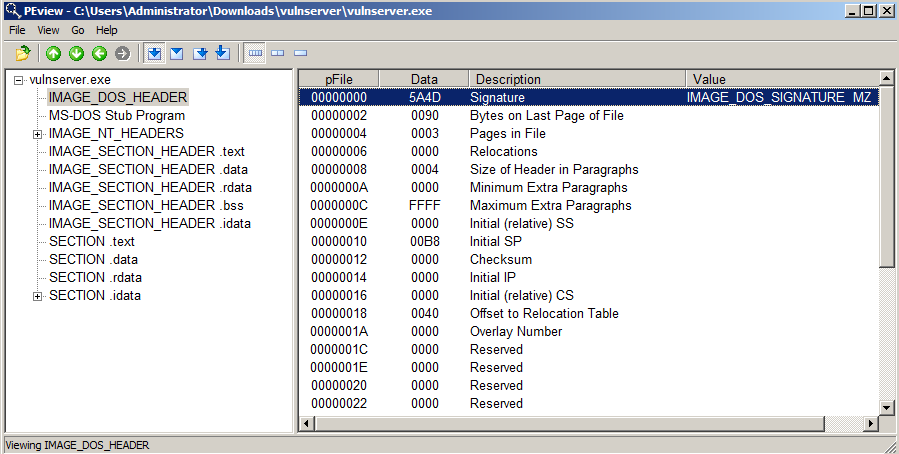
In the left pane, click IMAGE_DOS_HEADER.
The right pane shows details of the first file section, which is a very old part of the file, only present for backwards compatibility, as shown below.
In the left pane, click "MS-DOS Stub Program". This is where the message you saw before lives, and it's also unused now, only present for backwards compatibility.
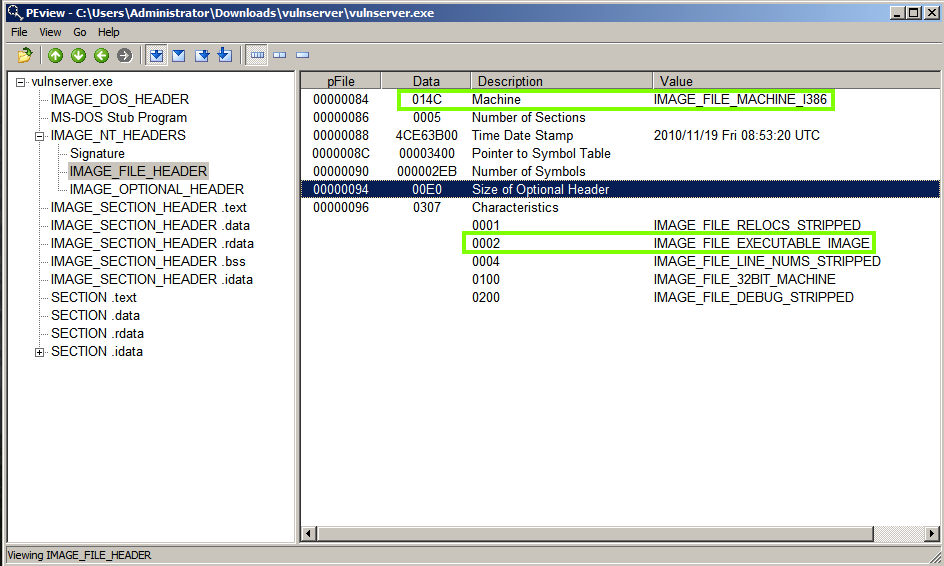
In the left pane, expand IMAGE_NT_HEADERS and click IMAGE_FILE_HEADER.
The most important items here are Machine of type I386 (that is, 32-bit, not 64-bit) and IMAGE_FILE_EXECUTABLE_IMAGE (which makes the file executable), as shown below.
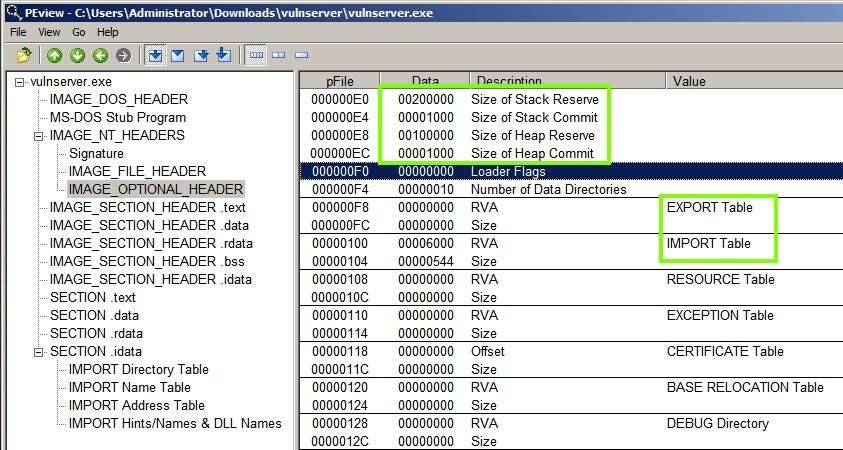
In the left pane, click IMAGE_OPTIONAL_HEADER.
The first screen shows the "Base of Code", which is 00400000, as shown below.

In the right pane, scroll down to find these items, as shown below.
"Size of Stack" and "Size of Heap", as we saw them in Linux.
"EXPORT Table" and "IMPORT Table".
Examine the five IMAGE_SECTION_HEADER items--they contain information about the size and location of the five program sections:
The right pane shows gibberish--these are hexadecimal machine language instructions, which appear random when viewed without using a disassembler, as shown below.

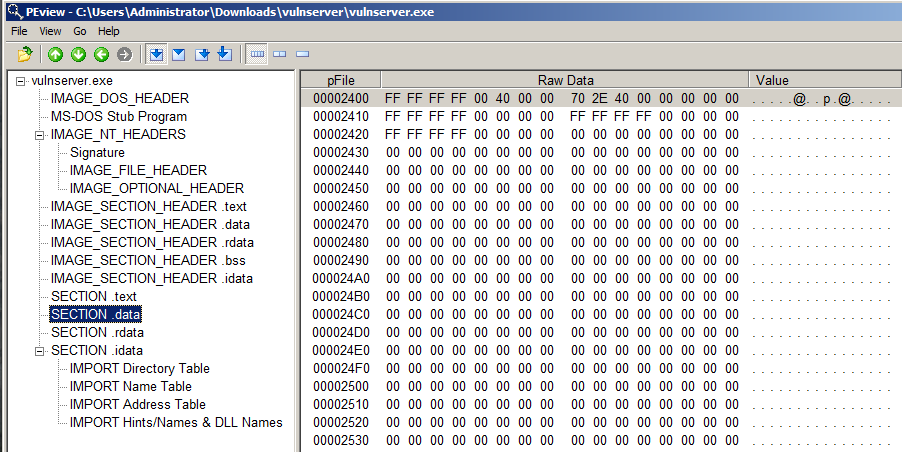
In the left pane, click "Section .data".
The right pane shows that this section contains mostly null bytes. This portion of memory is reserved for variables that aren't initialized, so it's mostly sitting empty now, as shown below.
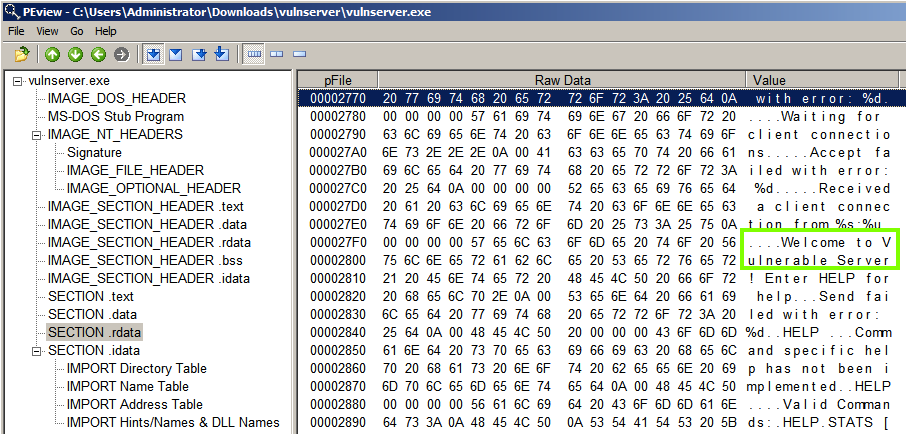
In the left pane, click "Section .rdata".
The right pane shows the contents--fixed strings used by the program. Scrolling down, you can find the "Welcome to Vulnerable Server" message you saw earlier in Hexadecimal view, as shown below.
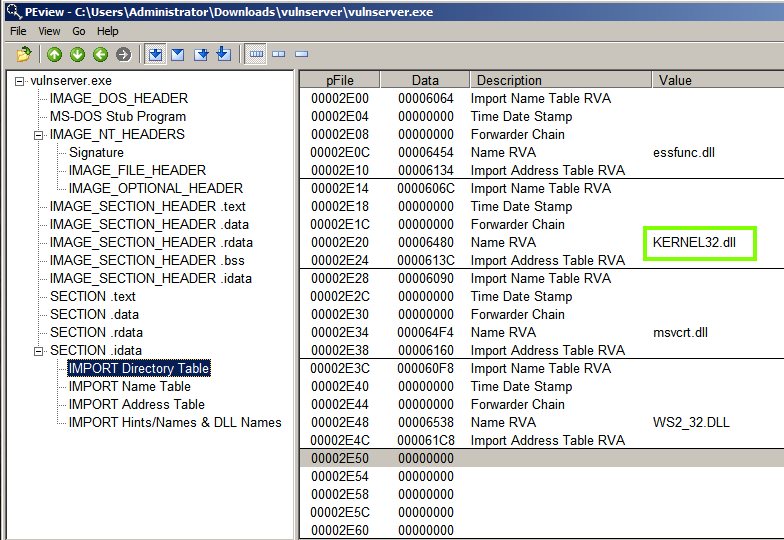
In the left pane, expand "Section .idata" and click "IMPORT Directory Table".
The right pane shows the four DLLs (Dynamic Link Libraries) this program loads, including KERNEL_32.dll, as shown below.
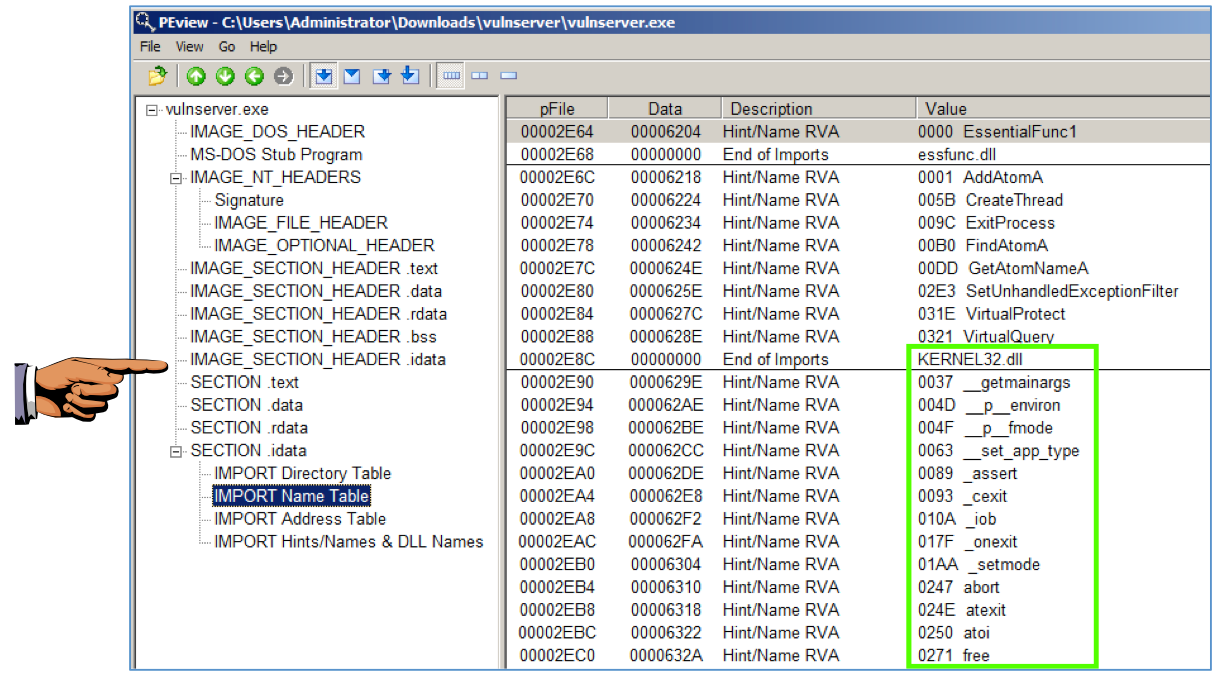
In the left pane, click "IMPORT Name Table".
The right pane shows the functions used from each library. As shown below, there are many functions imported from the KERNEL_32.dll library.
Press the PrintScrn key to copy the whole desktop to the clipboard.
YOU MUST SUBMIT A FULL-SCREEN IMAGE FOR FULL CREDIT!
Paste the image into Paint.
Save the document with the filename "YOUR NAME Proj 9xc", replacing "YOUR NAME" with your real name.
Operating Systems Development - Portable Executable (PE)