git clone https://github.com/prateek147/DVIA-v2
cd DVIA-v2/DVIA-v2
sudo gem install cocoapods
pod install
At the top left of your desktop, click File, Open.
Open the DVIA-v2.xcworkspace file you just created.
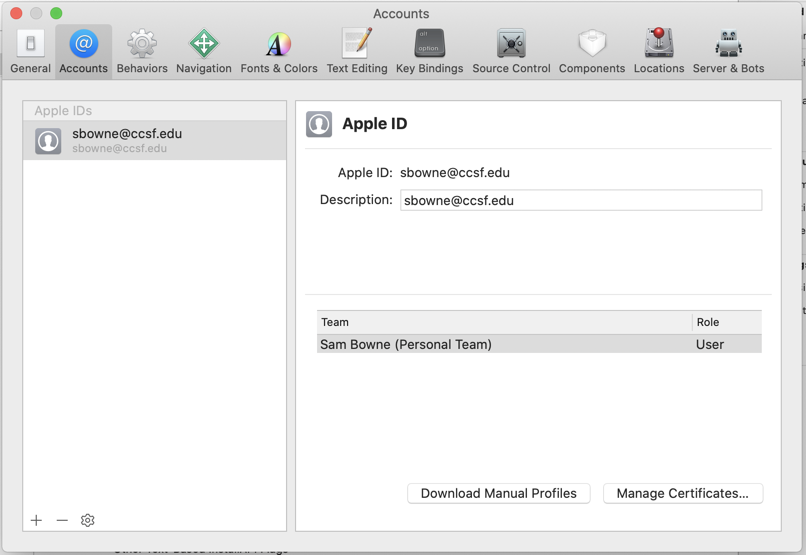
Click the + sign and add your Apple ID, as shown below.
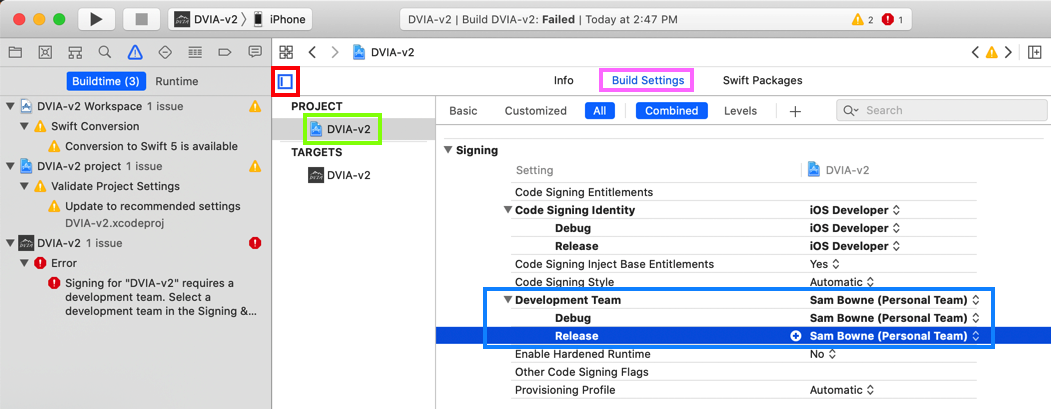
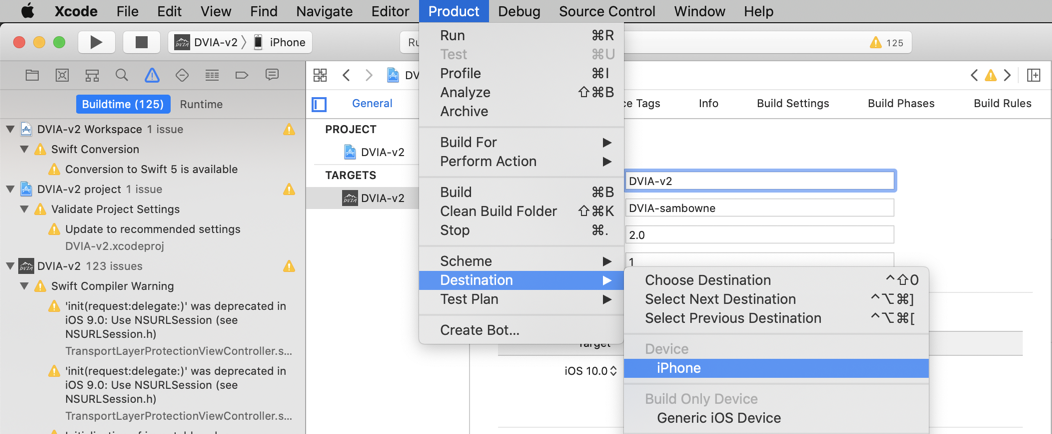
In the PROJECT section, click the DVIA-v2 icon, as outlined in green in the image below.
In the top center, click "Build Settings", outlined in purple in the image below.
In the center pane, scroll down to the Signing section, choose yourself as the "Development Team", outlined in blue in the image below.
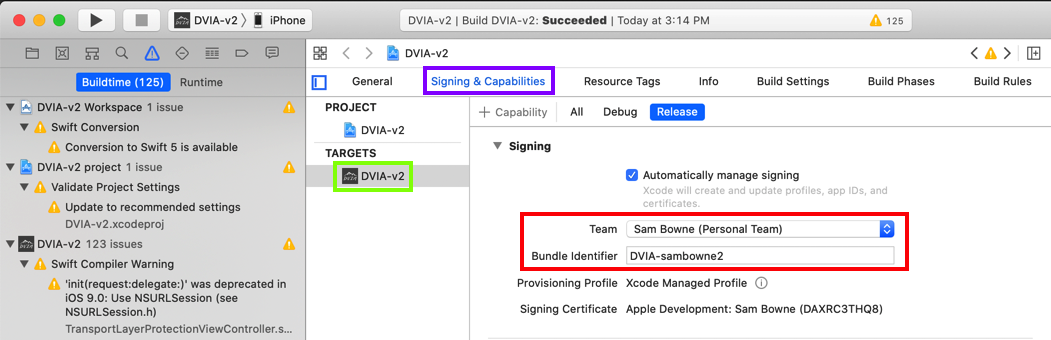
In Xcode, in the top left, in the TARGETS section, click the DVIA-v2 icon, as outlined in green in the image below.
In the top center, click "Signing & Capabilities", outlined in purple in the image below.
In the center pane, in the Signing section, choose yourself as the Team.
Change the "Bundle Identifier" to something unique, outlined in red in the image below.
A series of messages appear at the top of the XCode window, as shown below, showing the app building and installing onto the iPhone.


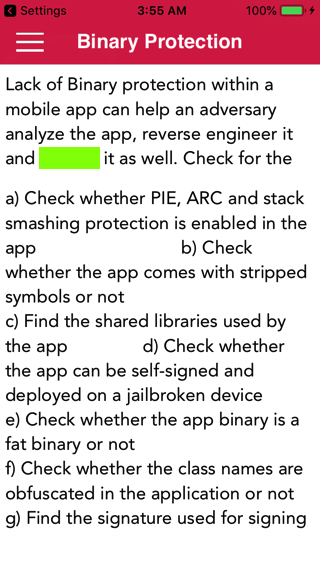
Flag M 701.1: Binary Protections (10 pts)
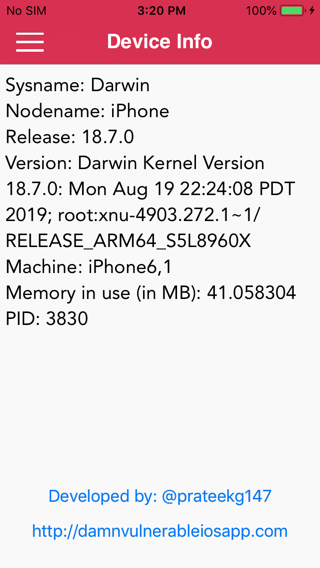
On your iPhone, in the DVIA app, at the top left, tap the three-bar icon.Tap "Binary Protections".
The flag is covered by a green rectangle in the image below.
prateek147/DVIA-v2
Step 14: Build Loop app
idb: iOS App Security Assessment Tool
Basic iOS Apps Security Testing lab — 1
iOS Application Security Part 47 — Inspecting Apps with Frida
frida-workaround-ios12
Failed to attach - iOS 12.0.1 #792
ios-command-line-tool
The missing guide to debug third party apps on iOS 12
iOS Application Security Part 41 – Debugging applications using LLDB
lldb Tutorial