This will give us practice using apktool and Jadx.
This tutorial follows a tweetstream by @fs0c131y.
https://www.apkmonk.com/app/in.gov.uidai.mAadhaarPlus/
You should get this file: in.gov.uidai.mAadhaarPlus_2018-09-26.apk
If you are doing this project after Jan. 2019, the app may have been updated. If you want the APK file I used, you can get it here.
On Kali, execute this command:
adb install in.gov.uidai.mAadhaarPlus_2018-09-26/dist/in.gov.uidai.mAadhaarPlus_2018-09-26.apk

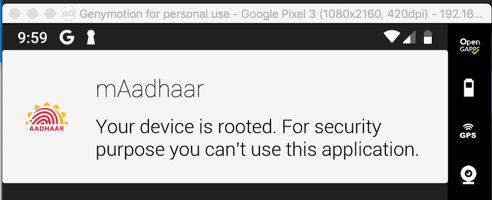
A message appears on your phone telling you that you cannot use this app, as shown below.
Using 64-Bit Windows
Launch your Windows machine. (Jadx is Java-based, so it should run on other platforms also, but I wrote these instructions using Windows.) Copy the in.gov.uidai.mAadhaarPlus_2018-09-26.apk file into your Windows machine.Installing Java
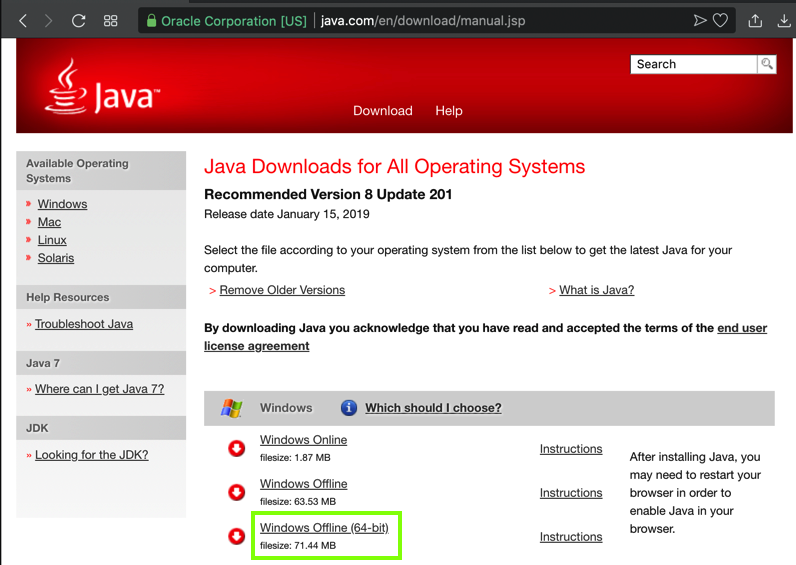
First open Control Panal and uninstall all old Java versions.Then open a Web browser and go here:
https://java.com/en/download/manual.jsp
Download "Windows Offline (64-bit)" version and install it. as shown below.
Installing Jadx on Windows
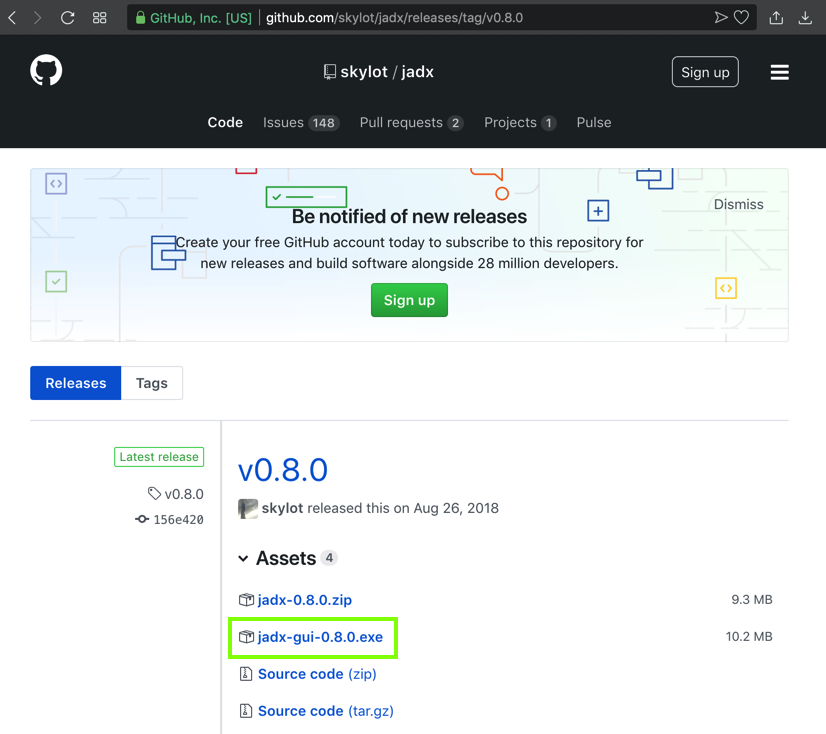
Go here:https://github.com/skylot/jadx/releases/tag/v0.8.0
Download jadx-gui, as shown below.
Launch Jadx.
Using Kali
In Kali, execute these commands:
In the left pane, at the bottom expand Resources.
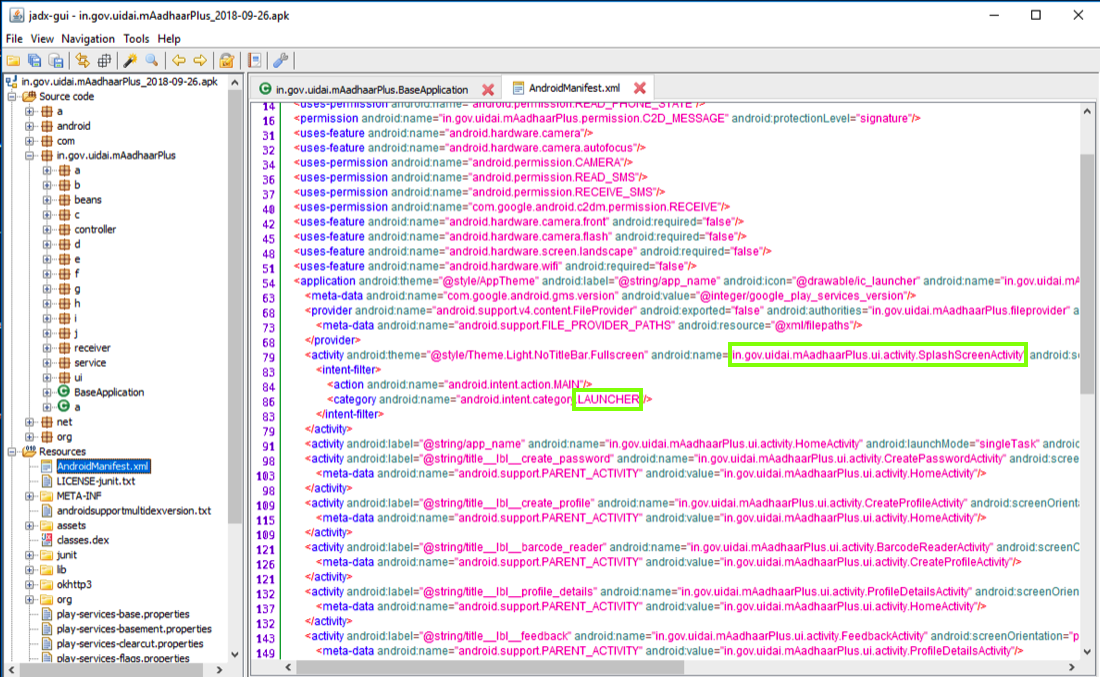
Click AndroidManifest.xml.
The contents appear on the right side, as shown below.
Notice that the LAUNCHER activity, which runs when the app launches, is
in.gov.uidai.mAadhaarPlus.ui.activity.SplashScreenActivity
as outlined in green in the imager below.
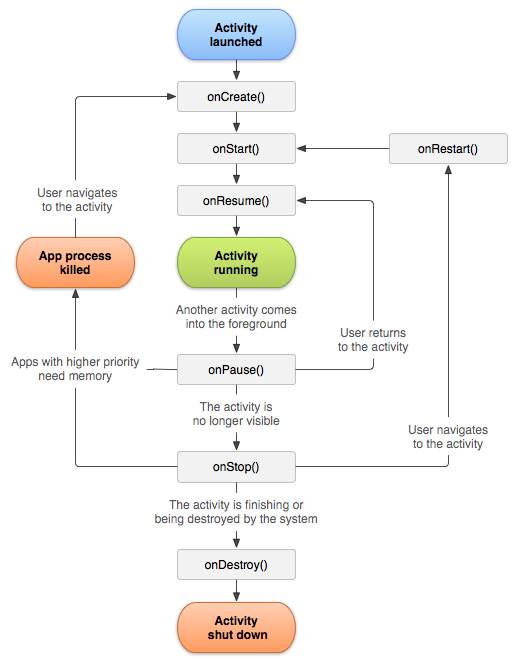
According to the official Android documentation , the first method called when an activity is launched is the "onCreate" method, as shown at the top of the diagram below.
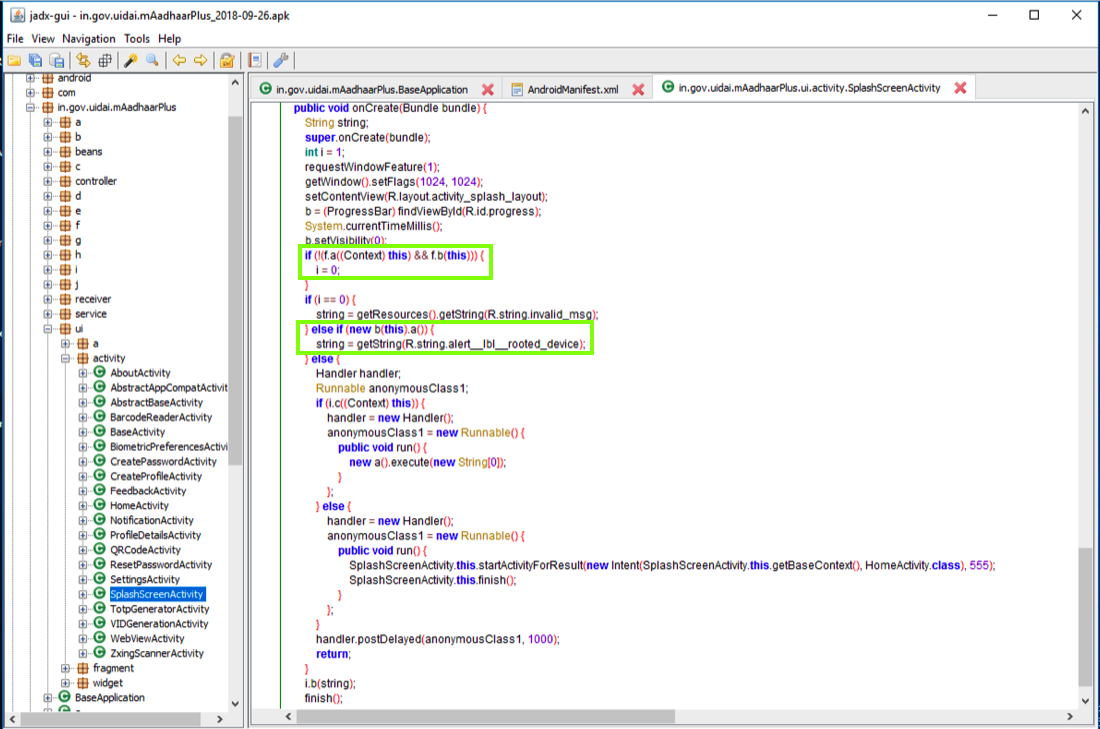
In the right pane, scroll down to the OnCreate() method.
Notice the two code sections outlined in green in the image below.
The first section is Integrity Verfication, using methods named f.a and f.b to detect app modification.
The second section uses a method named b to detect rooted devices.
We want to disable both these operations.
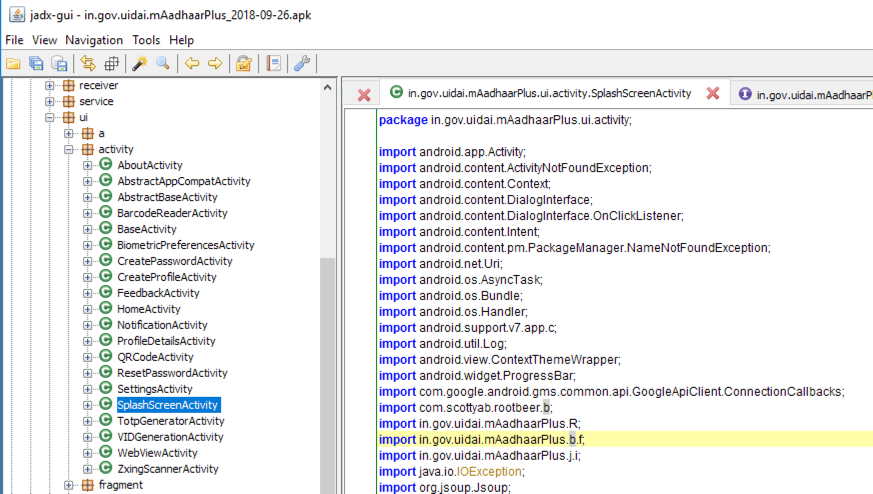
in.gov.uidai.mAadhaarPlus.ui.activity.b.f
as shown below.
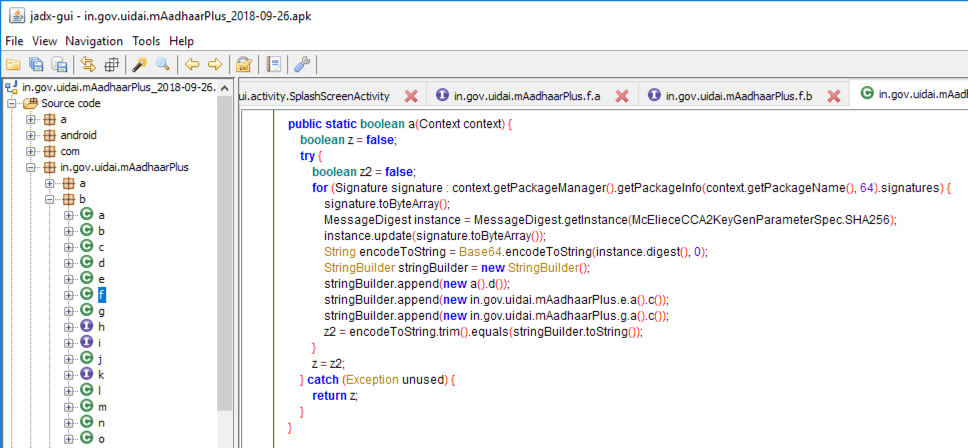
In the left pane, scroll up and navigate to that module. Here you can find the a() method, as shown below.
This module compares a SHA-256 hash with a hard-coded value to see if the app has been modified.
On Kali, execute this command:
apktool d -f -r in.gov.uidai.mAadhaarPlus_2018-09-26.apk
On Kali, execute this command:
grep SplashScreenActivity -r . | less -S
The main smali file path appears,
highlighted in the image below.

Press Q to exit "less".
Execute this command to edit the file:
nano ./in.gov.uidai.mAadhaarPlus_2018-09-26/smali/in/gov/uidai/mAadhaarPlus/ui/activity/SplashScreenActivity.smali
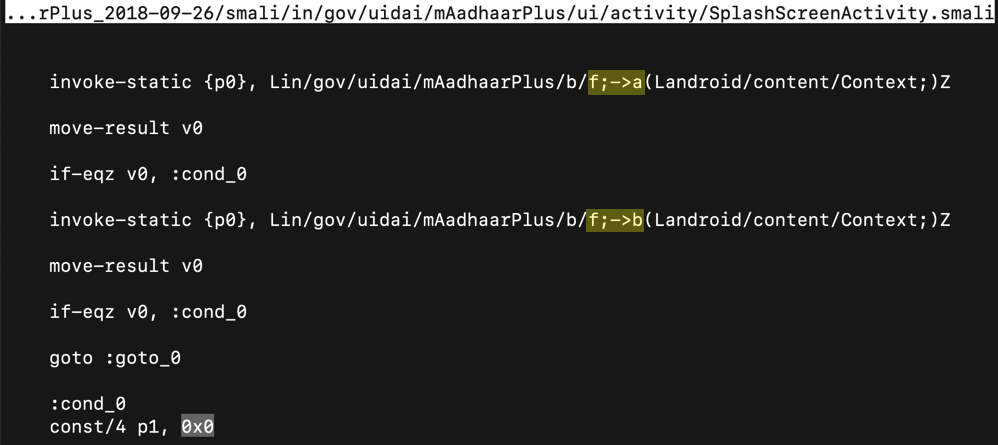
Scroll down and find the code shown below.
This code calls the f->a and f->b methods, highlighted in yellow in the image below.
If the app is modified, the code sets the parameter "p1" to zero, as highlighted in light gray in the image below.
Change the 0x0 value to 0x1, outlined in green in the image below.
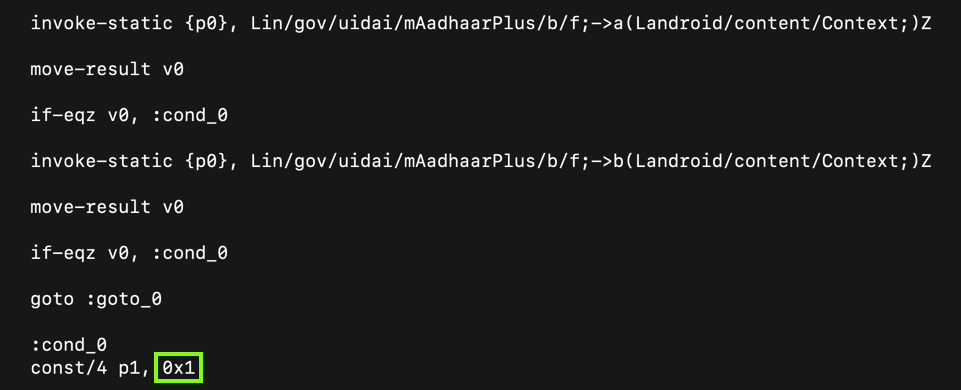
This modification allows us to change the app without being detected.
This code calls a scottyab RootBeer function to detect a rooted phone. If the phone is rooted, it kills the app.
To prevent that, add # characters to comment out the nine lines colored blue in the image below.
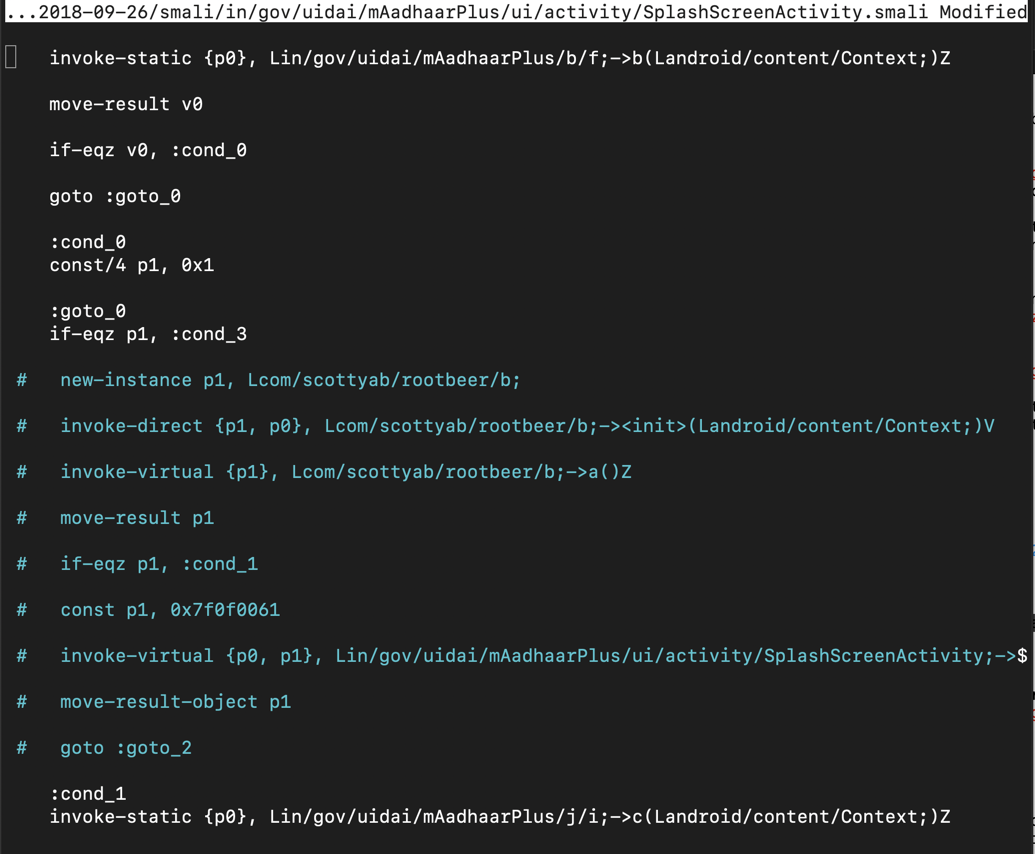
Now the app will run on a rooted phone.
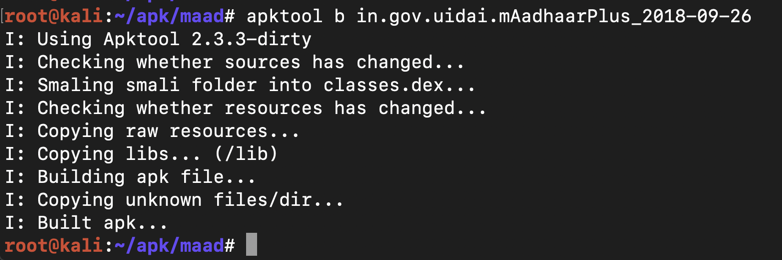
apktool b in.gov.uidai.mAadhaarPlus_2018-09-26
The file builds without errors, as shown below.
Execute this command:
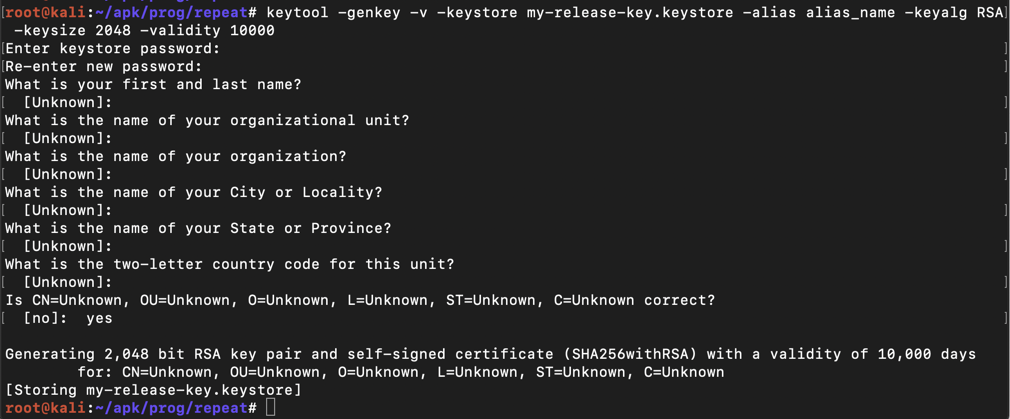
keytool -genkey -v -keystore my-release-key.keystore -alias alias_name -keyalg RSA -keysize 2048 -validity 10000
Then a series of question asks for your name, etc. You can press Enter for each question except the last one, which you must answer yes to, as shown below.
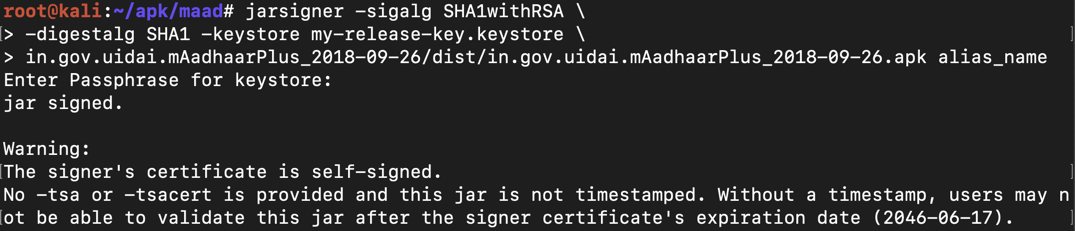
jarsigner -sigalg SHA1withRSA \
-digestalg SHA1 -keystore my-release-key.keystore \
in.gov.uidai.mAadhaarPlus_2018-09-26/dist/in.gov.uidai.mAadhaarPlus_2018-09-26.apk alias_name
The app is signed, as shown below.
adb install in.gov.uidai.mAadhaarPlus_2018-09-26/dist/in.gov.uidai.mAadhaarPlus_2018-09-26.apk
It asks whether it can make phone calls. Click ALLOW.
In the "mAadhaar Consent" page, click OK.
In the "Usage Guidelines" page, at the top left, click the leftware-pointing arrow.
You see the app's starting screen, as shown below.
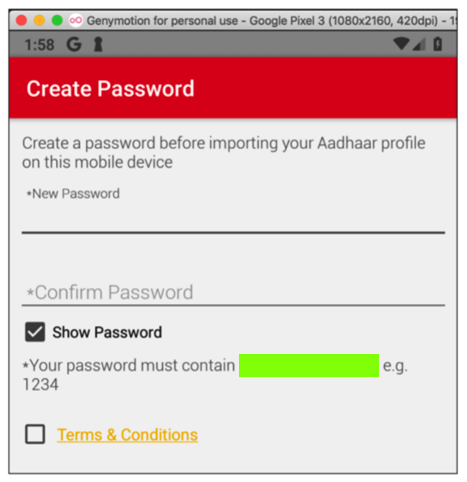
Find the text covered by a green box in the image above. Enter it into the form below to record your success.