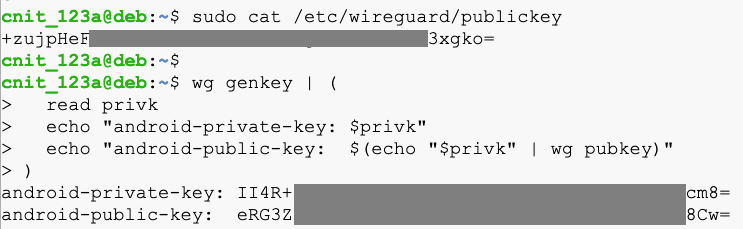
sudo cat /etc/wireguard/publickey

wg genkey | (
  read privk
  echo "android-private-key: $privk"
  echo "android-public-key:  $(echo "$privk" | wg pubkey)"
)
The first one is the server's public key, and the other two will be used to identify the Android client.
sudo systemctl stop wg-quick@wg0
sudo nano /etc/wireguard/wg0.conf
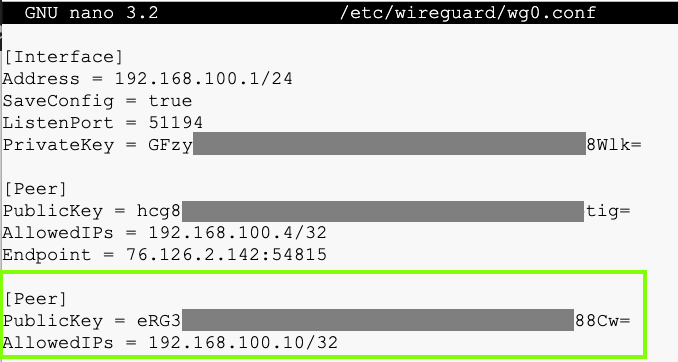
On your Debian server, execute these commands:
sudo systemctl enable wg-quick@wg0
sudo systemctl start wg-quick@wg0
Click the blue + button to add a tunnel.
Click "CREATE FROM SCRATCH".
Fill in the keys and addresses, as shown below.
To paste into Android, click and hold down the mouse button for several seconds.
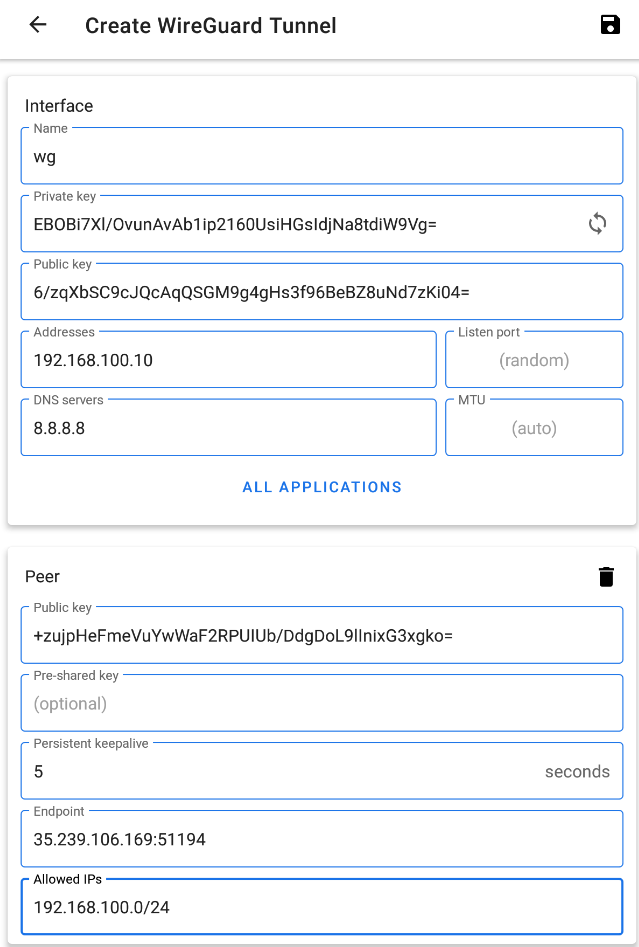
At the top right, click the floppy-disk icon to save your configuration.
At the top left, click the slider to activate your VPN interface.
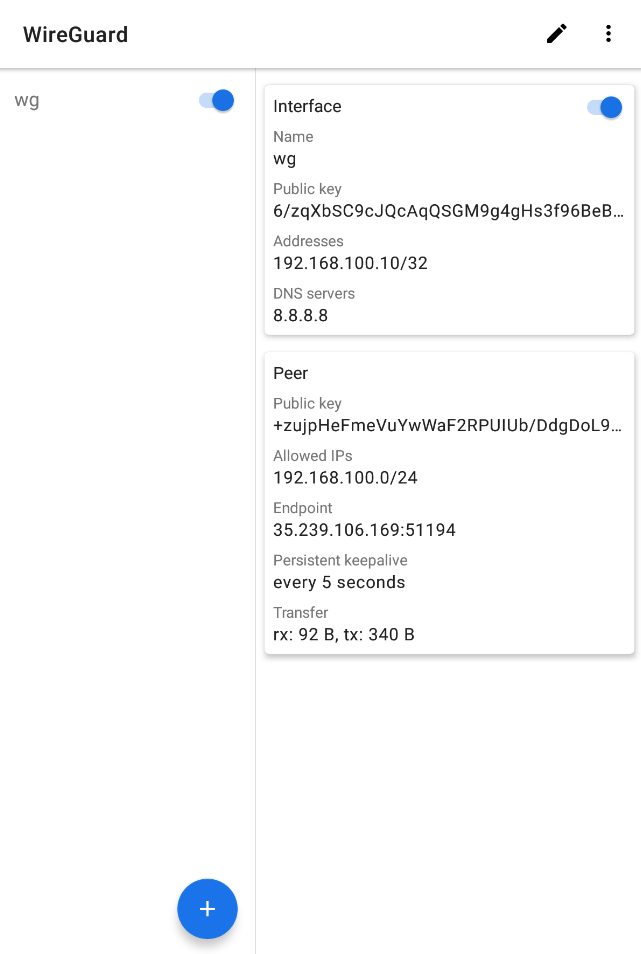
Click wg to show the interface details.
At the bottom right, you should see some bytes received (rx) and transmitted (tx), as shown below.
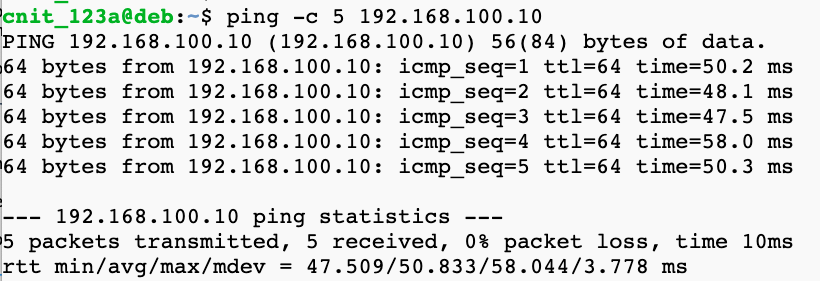
ping -c 5 192.168.100.10
sudo apt update
sudo apt install android-tools-adb -y
adb connect 192.168.100.10
adb devices -l
If it fails, check your Android device settings and make sure USB debugging is enabled.

M 208.1: Process (10 pts)
On your Debian server, execute this command:The flag appears, covered by a green rectangle in the image below.
