It's essential for creating, debugging, and testing Android apps.
A "System Settings" window opens. Click "Brightness & Lock".
Adjust "Turn screen off when inactive for" to Never.
Adjust "Lock" to OFF.
Clear the "Require my password when waking from suspend" box.
Once a Terminal window opens, right-click its icon on the Launcher bar and click "Lock to Launcher".
Troubleshooting
If you are unable to launch a Terminal window, this is a known bug in Ubuntu 15.04.To fix it, search for "xterm" and run it. In xterm, execute these commands:
sudo apt install -y gcc-multilib g++-multilib libc6-dev-i386 qemu-kvm mesa-utils
https://developer.android.com/studio/index.html
Click the "DOWNLOAD ANDROID STUDIO" button.
Check the "I have read and agree..." box.
Click the "DOWNLOAD ANDROID STUDIO FOR LINUX" button.
A box pops up titles "Opening android-studio...".
Click "Save File" and click OK.
When the download finishes, tn the Terminal, execute these commands:
cd ~/Downloads

ls
android-studio-ide-145.3537739-linux.zipExecute these commands, correcting the name in the first command if necessary:
unzip android-studio-ide-145.3537739-linux.zip -d ~/bin

~/bin/android-studio/bin/studio.sh
If a yellow message appears saying "Your system is using the iBus daemon...", click outside the yellow box to make it go away.
Click Next.
Click Next.
Click Next.
Accept the license and click Finish.
Wait while it is "Downloading Components".
Troubleshooting
If you see a "The following sdk component was not installed: tools" message, click Retry.
Click Finish.
Lock Android Studio to the Launcher bar.
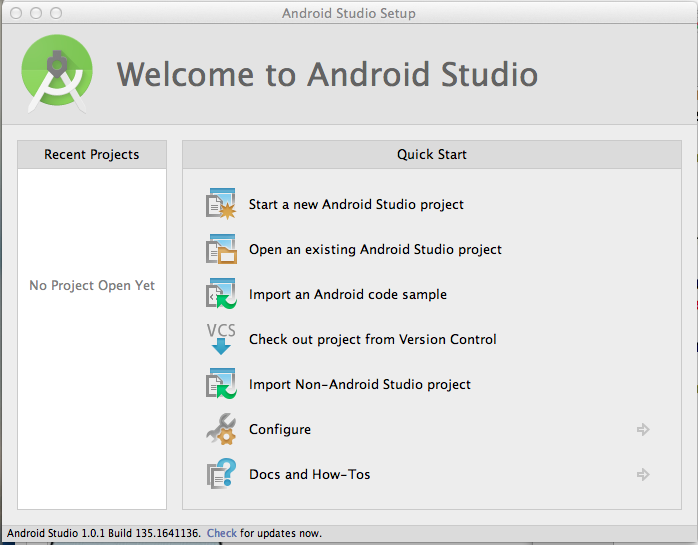
You should see the "Welcome to Android Studio" screen, as shown below.
On the right side, click "Start a new Android Studio project", as shown below.
In the "New Project" screen, enter an Application name of YOURNAME-hello, as shown below.
Don't use the literal text "YOURNAME" -- replace that with your own name.

Click Next.
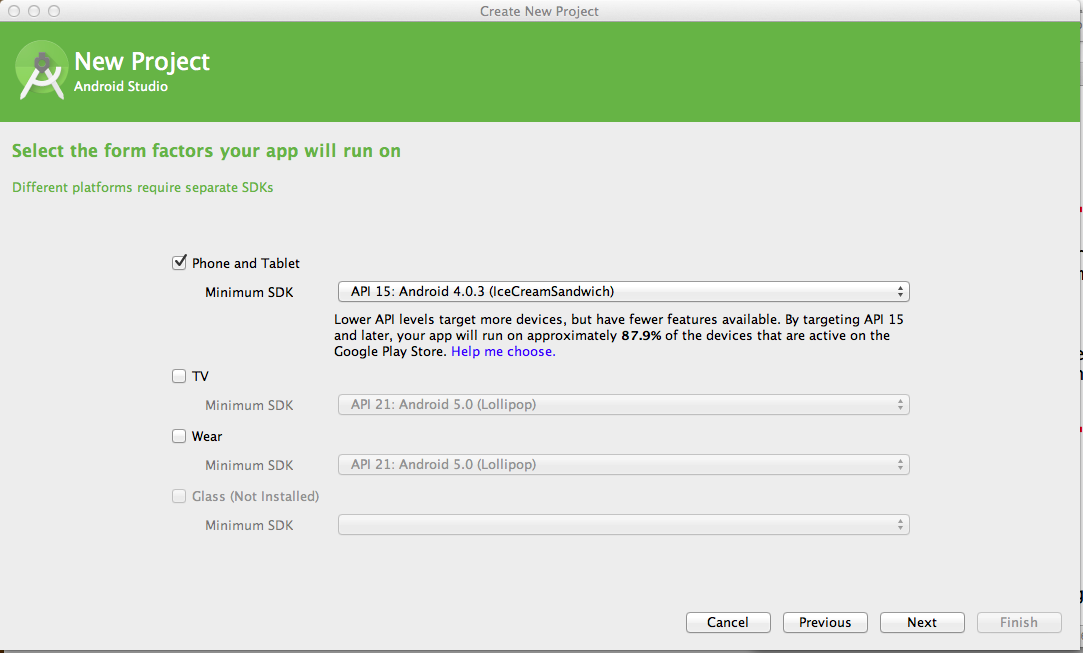
The next screen asks which versions of Android you are targeting, as shown below.
Accept the default selection and click Next.
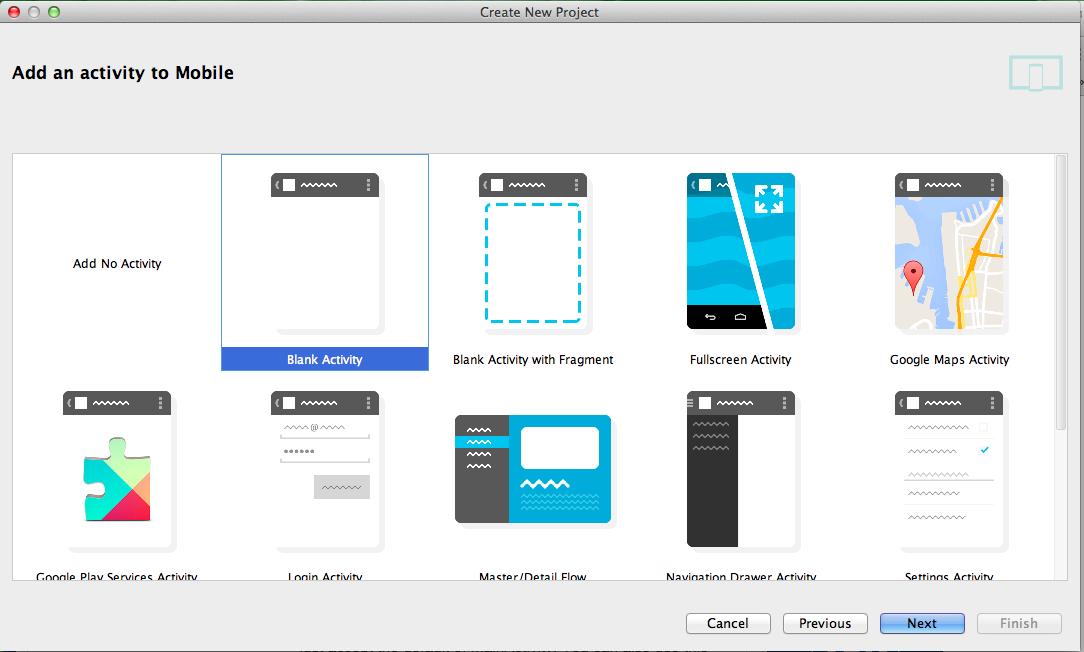
In the "Add an activity to Mobile" screen, accept the default selection of "Blank Activity" as shown below, and click Next.
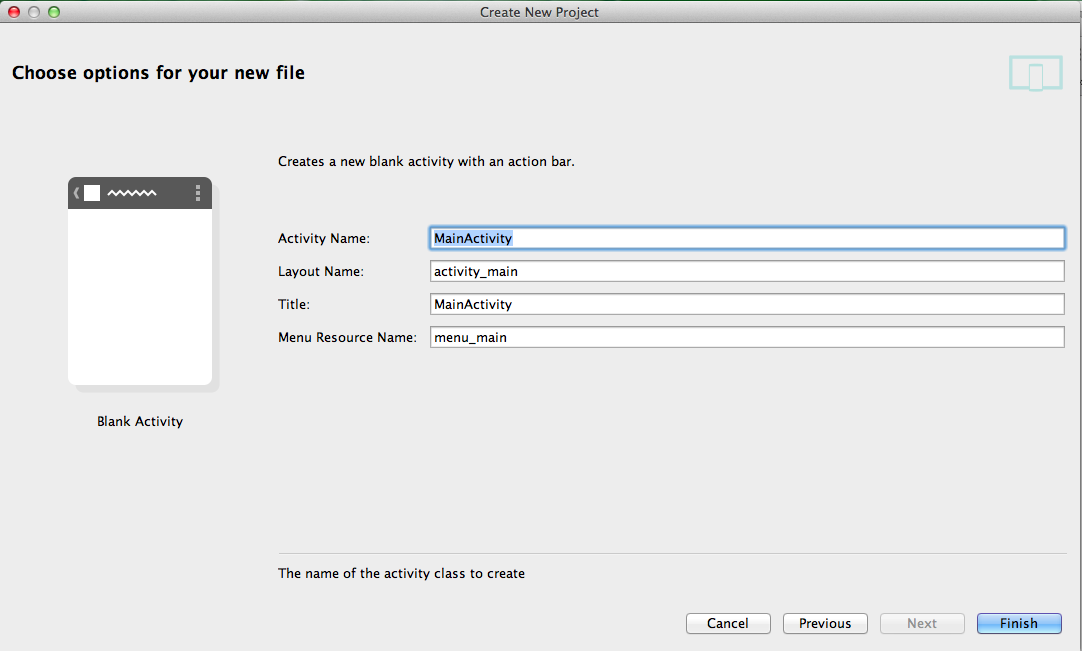
In the "Choose options for your new file" screen, accept the default selections as shown below, and click Finish.
If you are using Windows, it will spend several minutes "Indexing".
Other messages go by, initializing things and "Building".
When all that stuff is done, a project page appears, as shown below.
If a "Tip of the day" pops up, close it.
If a "Rendering problems" box appears, close it.
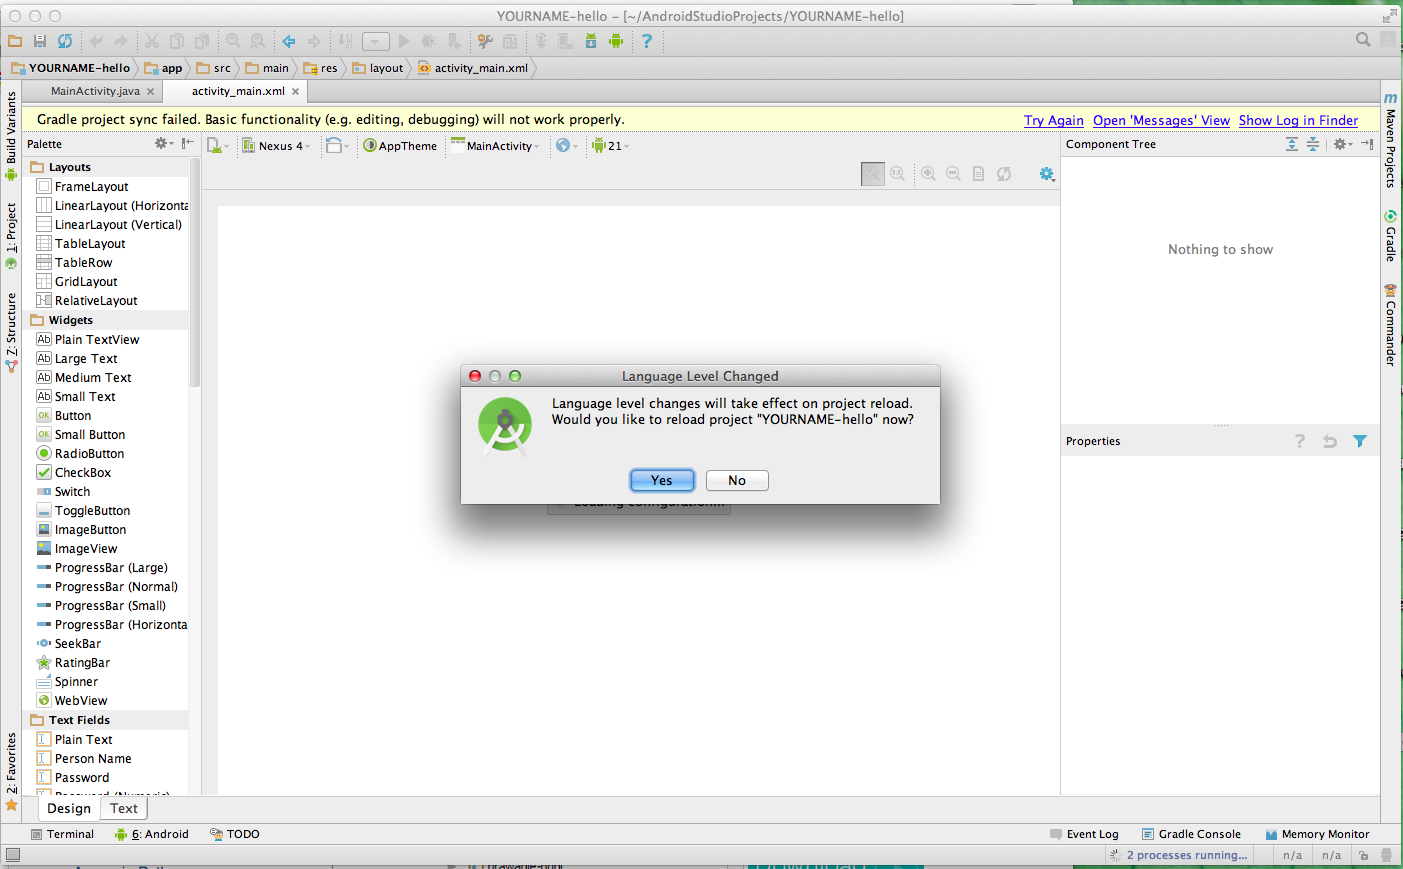
However, if a "Gradle project sync failed" message appears, as shown above, that means you have errors that matter, probably Java errors.
The left pane shows the files in your app.
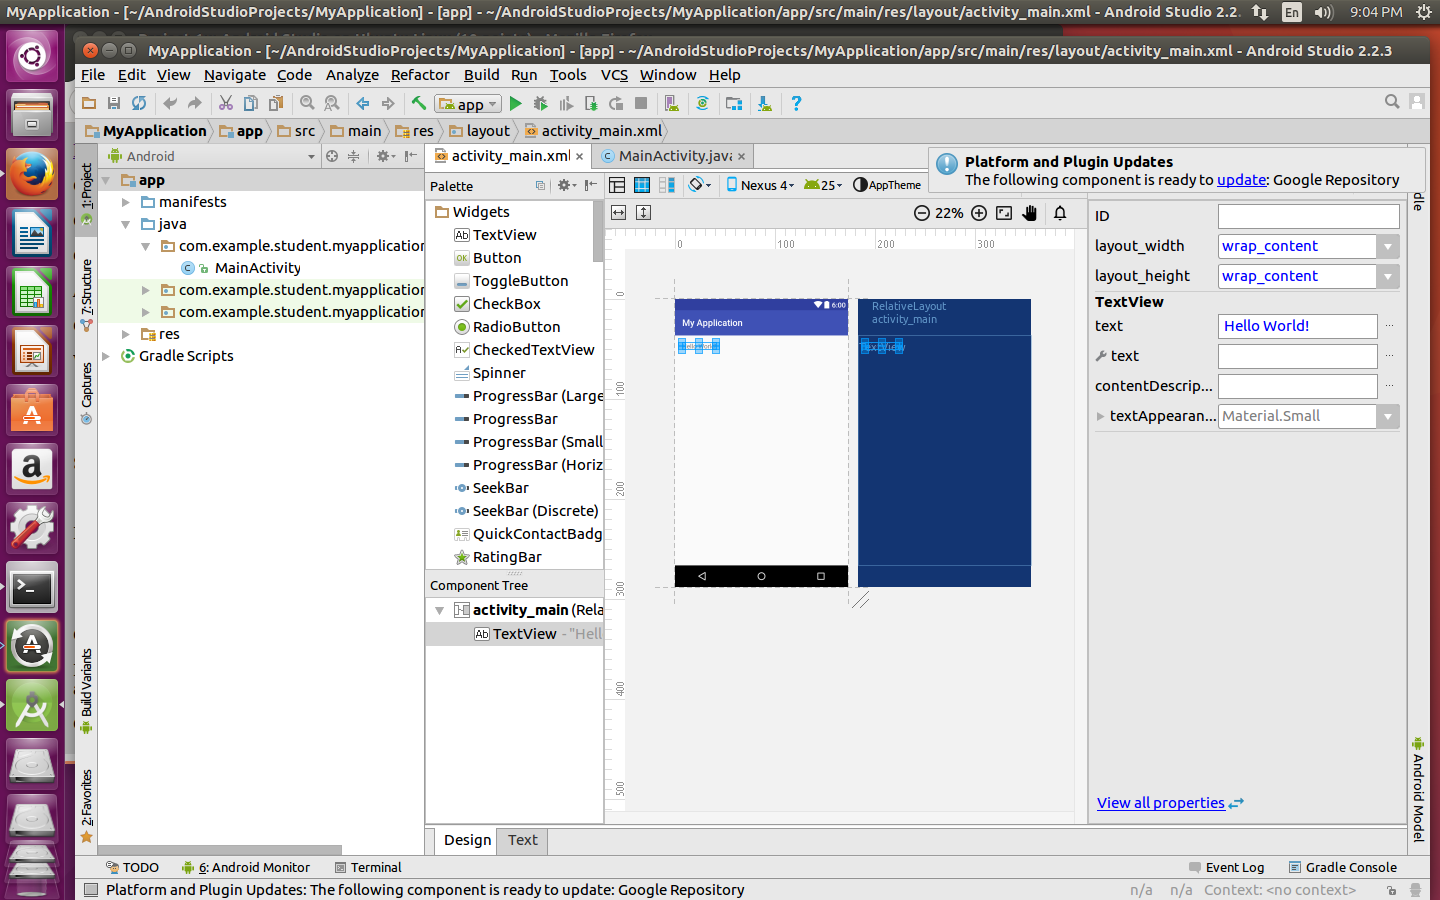
A much easier way to control your app is to use the right pane. Click the activity_main.xml tab.
The center now shows the screen of a phone, showing "Hello world!" in tiny letters, as shown above. This is a graphical view of how your app will look on a phone.
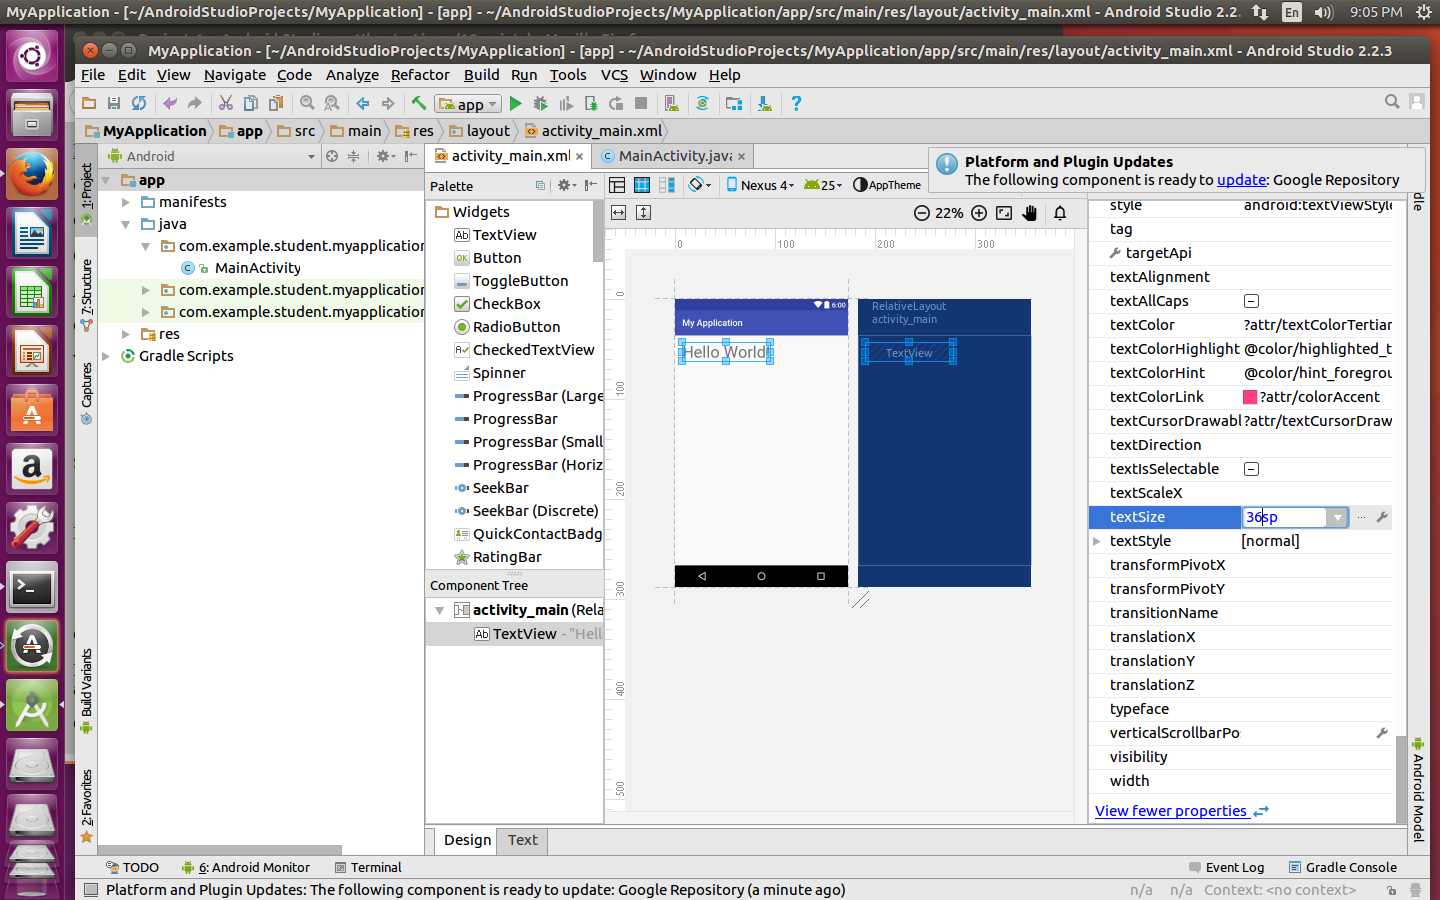
In the lower right of the Android Studio window, in the Properties section, scroll down to textSize and change the size to 36dp. Press Enter. The "Hello world" text gets larger, as shown below.
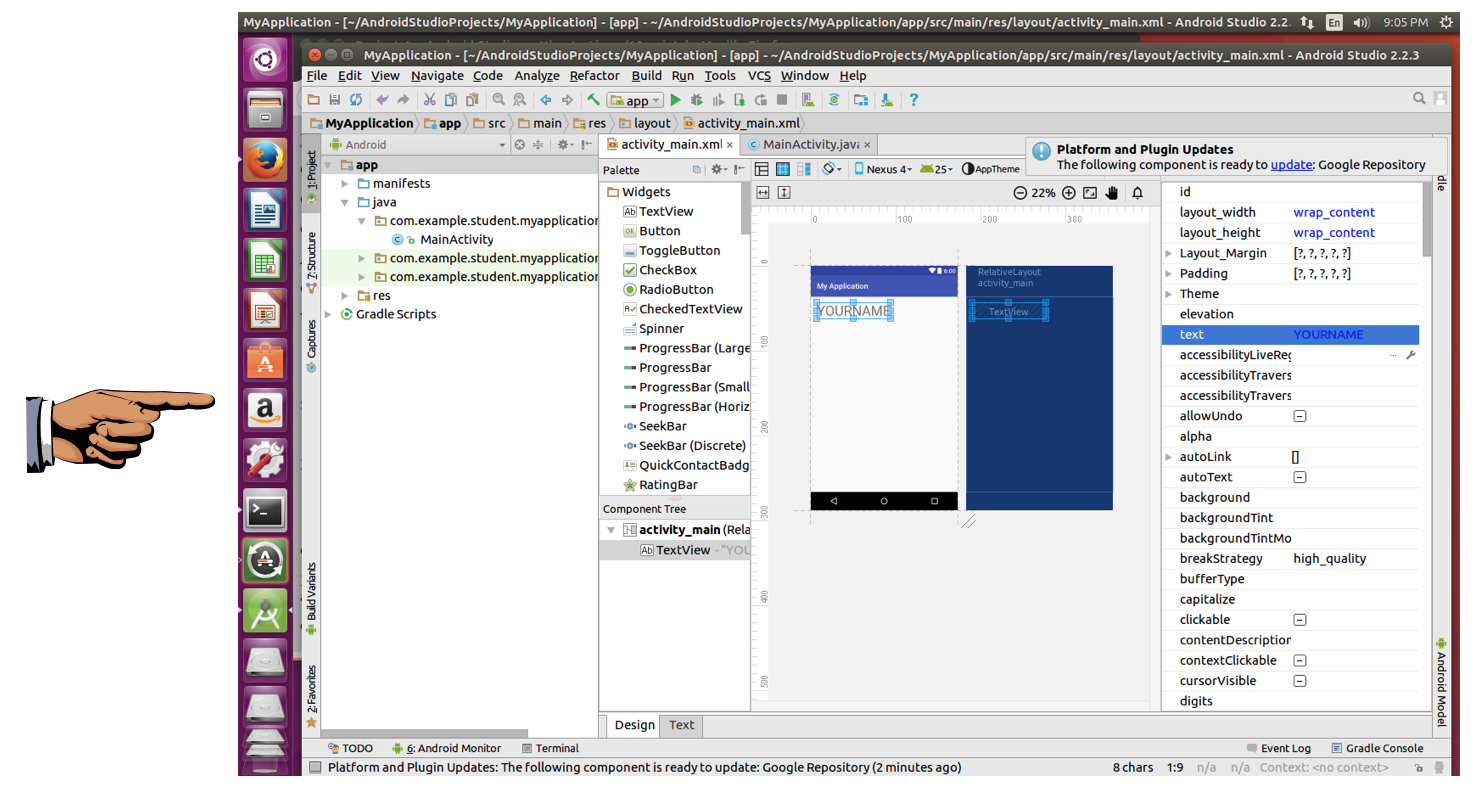
In the right of the Android Studio window, in the Properties section, scroll up to the top. Find text and change it to YOURNAME.
Use your own name, not the literal text "YOUR NAME".
The phone face should now show the revised message containing your name, as shown below.
Save a full-desktop image of this screen. On Ubuntu to capture a desktop image.
YOU MUST SUBMIT A FULL-SCREEN IMAGE FOR FULL CREDIT!
Paste the image into Paint.
Save the image with the filename "YOUR NAME Proj 1", replacing "YOUR NAME" with your real name.