Follow the instructions on the Web page
to download and install Android Studio
for your OS. The Mac version is 234 MB
in size, but the Windows version is 828 MB.
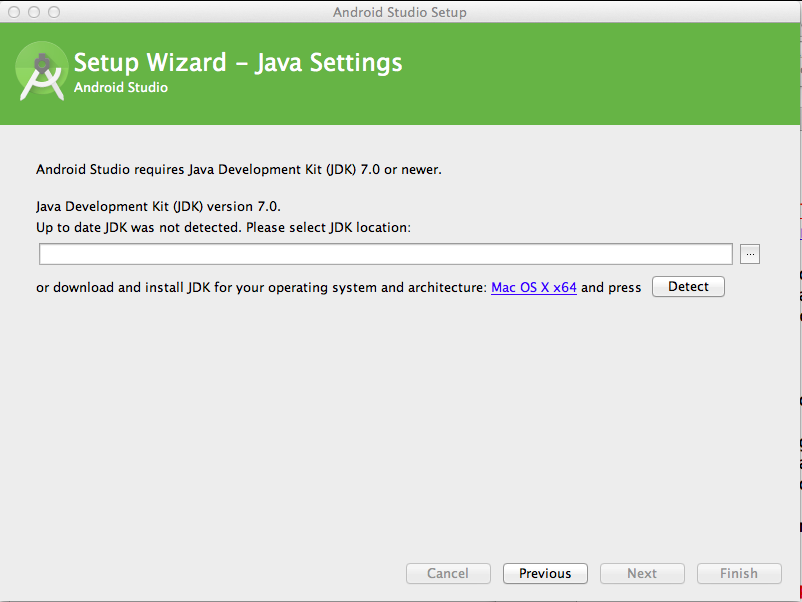
Troubleshooting: Missing Java SDK
During the installation, you may
see an error message
saying that you need the Java SDK,
as shown below.
Installing Java SDK
If JDK was not detected, as shown above,
you need to fix that.
In the Android Studio Setup Wizard,
click the blue link.
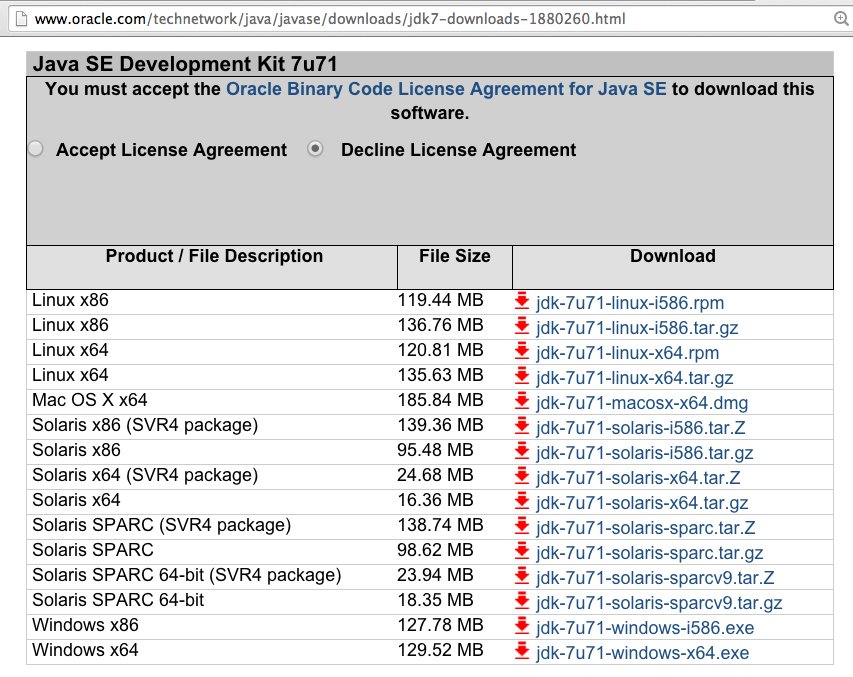
Download
the correct Java SDK for your OS,
as shown below.
Install the Java SDK, with the default
options.
Resuming the Android Studio Setup
If you are using a Mac,
in the Android Studio Setup Wizard,
click Previous and then
Next.
If you are using a PC, cancel the installation
and start it from the beginning again.
Install Android Studio with the default options.
Accept all the license agreements, of course.
It's a long process, with a lot of files downloaded
and installed.
|
Writing an App
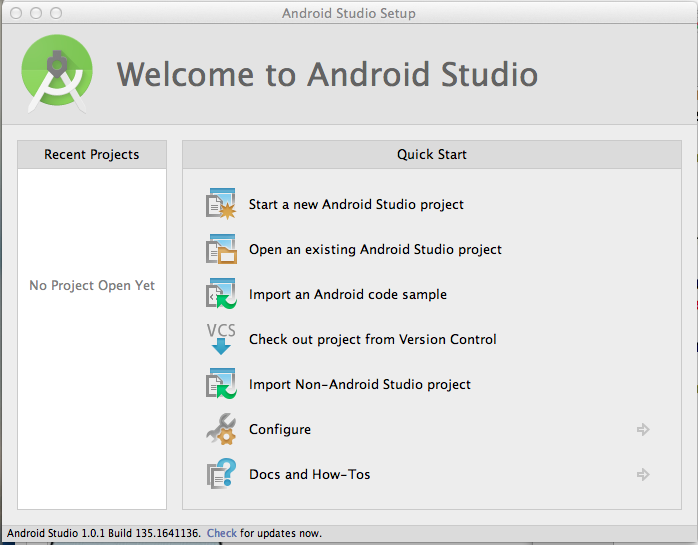
When the install finishes, Android Studio
launches.
You should see the
"Welcome to Android Studio"
screen,
as shown below.
On the right side, click
"Start a new Android
Studio project",
as shown below.
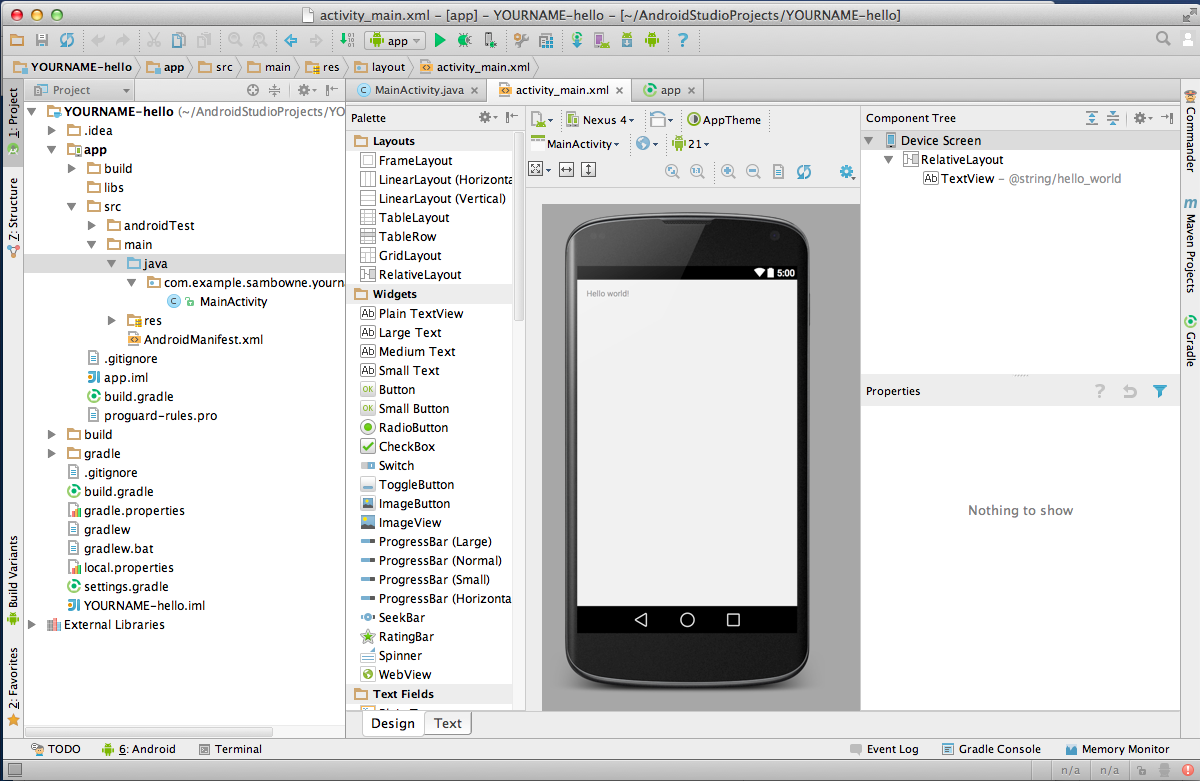
In the "New Project" screen,
enter an Application name of
YOURNAME-hello,
as shown below.
Don't use the literal text
"YOURNAME" -- replace that with
your own name.

Click Next.
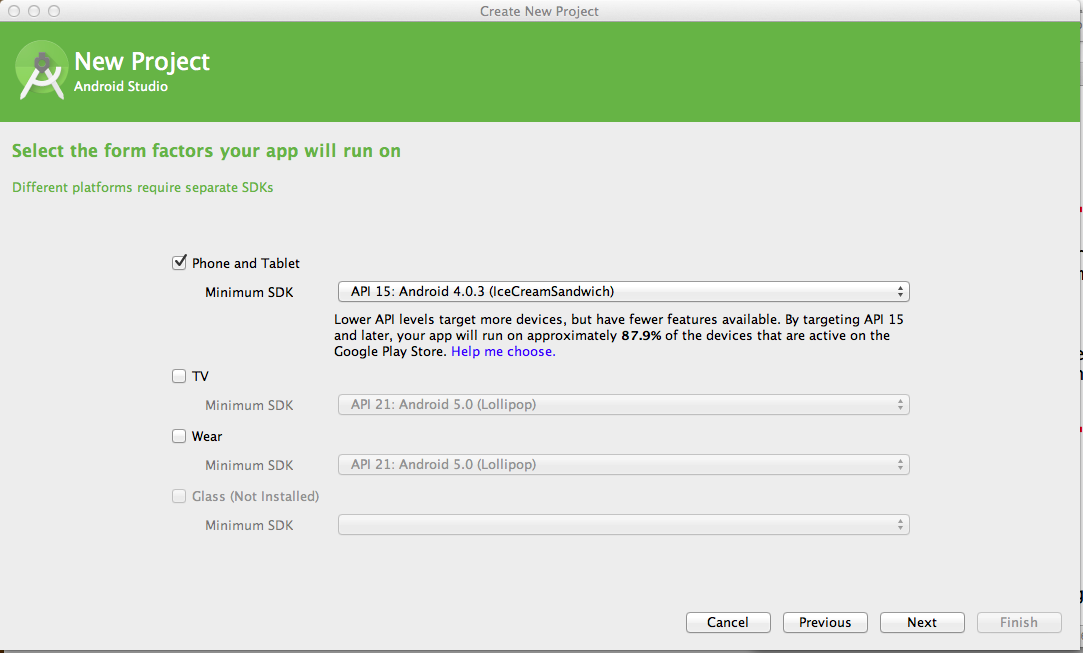
The next screen asks
which versions of Android
you are targeting,
as shown below.
Accept the default selection
and click Next.
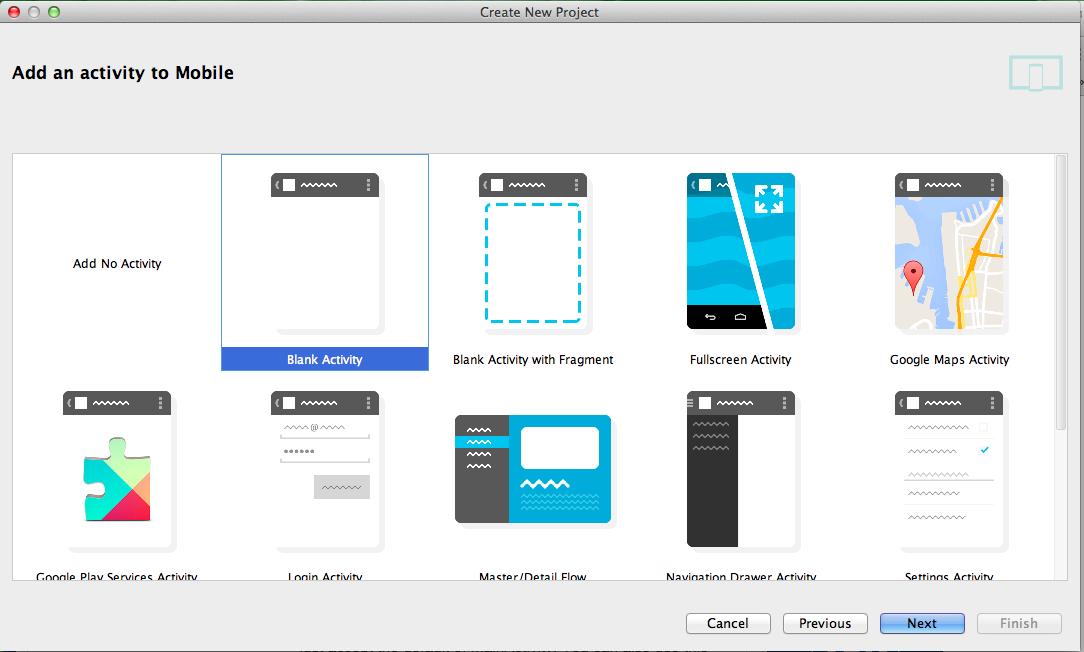
In the "Add an activity to Mobile"
screen, accept the default selection
of "Blank Activity"
as shown below,
and click Next.
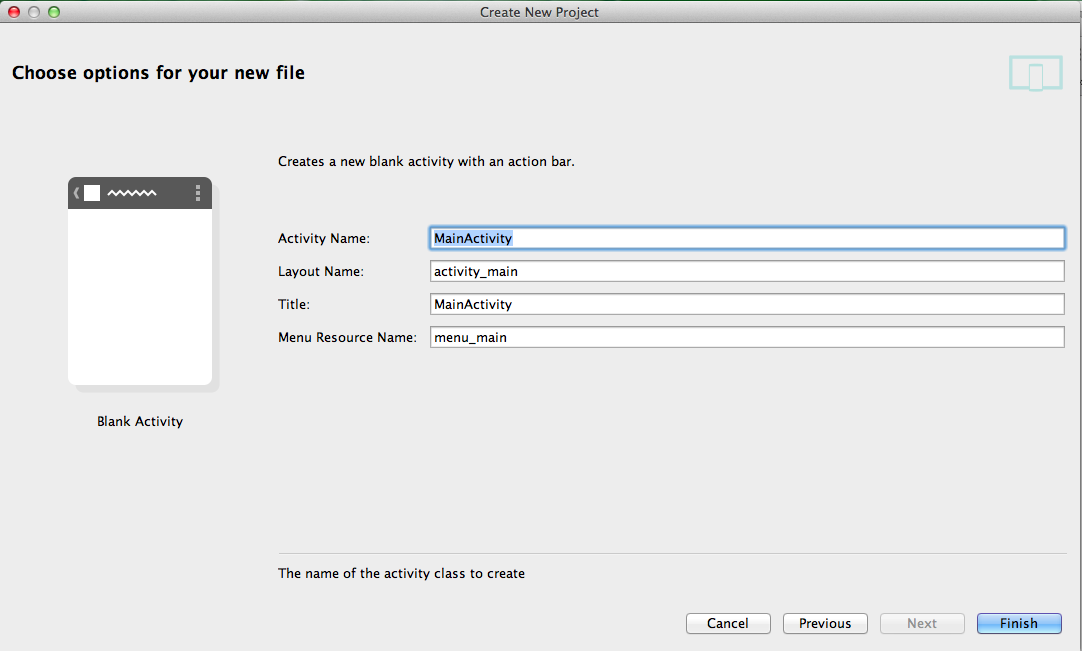
In the "Choose options for your new file"
screen, accept the default selections
as shown below,
and click Finish.
If you are using Windows, it will
spend several minutes "Indexing".
Other messages go by, initializing things
and "Building".
When all that stuff is done,
a project page appears,
as shown below.
If "Windows Firewall" boxes pop up,
approve Java to access the Internet.
If a "Tip of the day" pops up,
close it.
If a "Rendering problems" box appears,
close it.
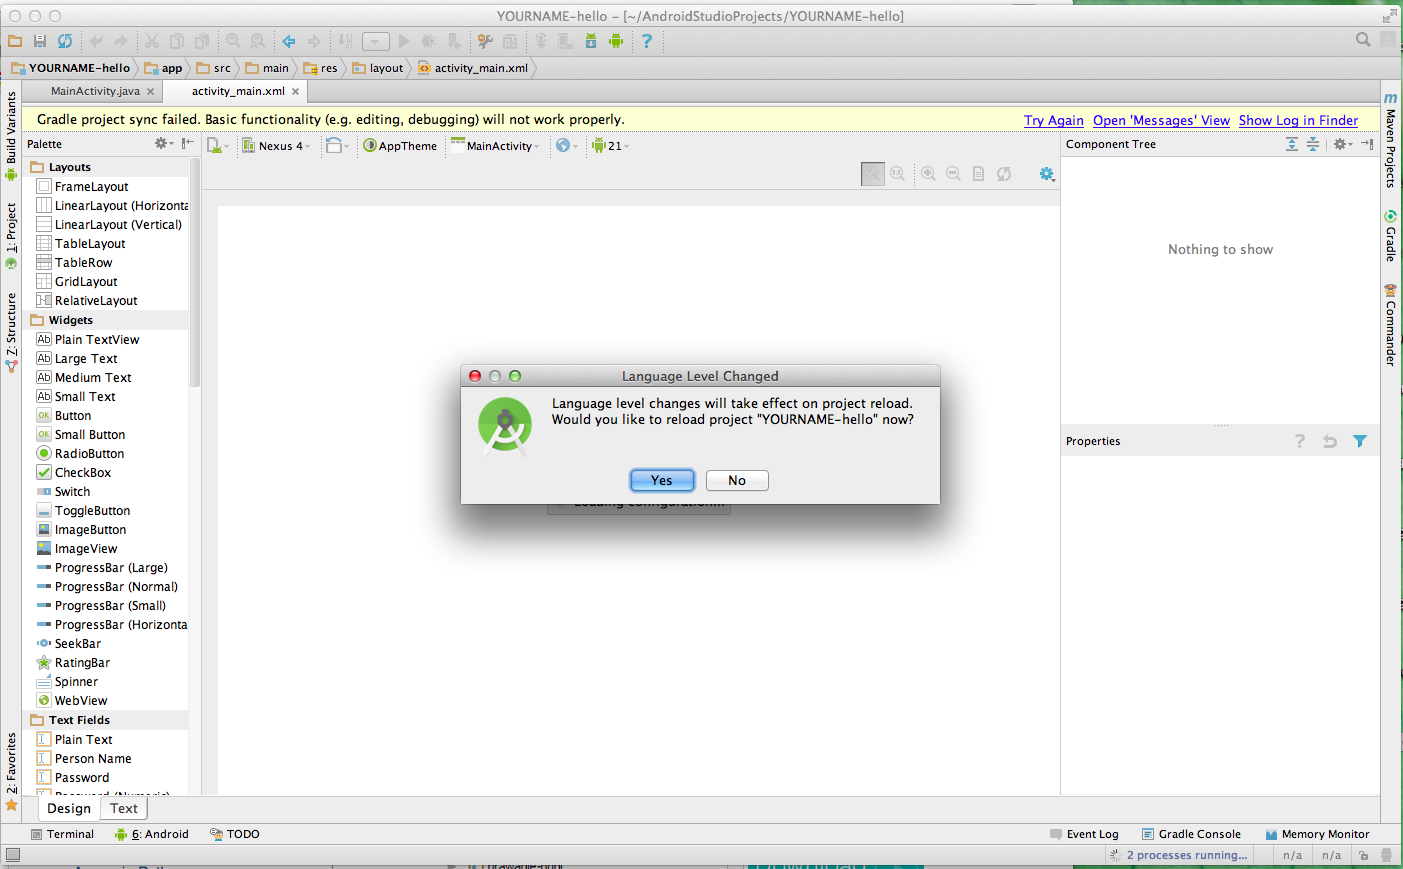
However, if a "Gradle project sync failed"
message appears, as shown above, that means
you have errors that matter, probably
Java errors.
Resolving Java Errors
On my PC, Java worked! But that is
a very rare exception.
Java fails to work most of the time.
It is maddening, but there's no way
to escape it.
The most common problem is that
the Java files are installed in a
directory that the application
cannot find. It's been this way
for many years, and somehow Java
never fixes it.
Here's what I did, but your errors
will probably be different. Expect this
to take time and a lot of Googling.
In my case, there
is a yellow bar saying
"Gradle project sync failed...",
and a pop-up box titled
"Language Level Changed",
as shown above.
In the pop-up box titled
"Language Level Changed", click
Yes.
The project reloads. Now
the lower pane shows some Java
error messages,
as shown below.

Open a Terminal window, and execute
this command:
/usr/libexec/java_home
The response tells you where Java
is installed, as shown
below.

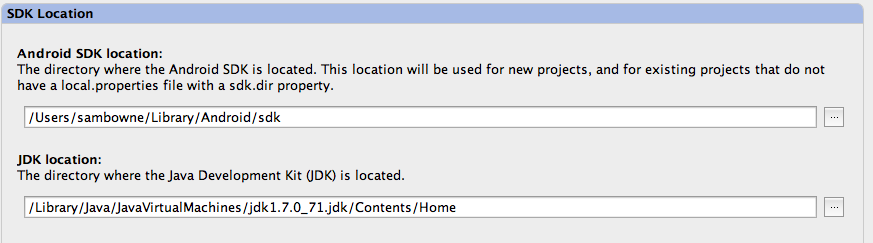
On my Mac, Java is installed at
/Library/Java/JavaVirtualMachines/jdk1.7.0_71.jdk/Contents/Home
In the lower pane of Android
Studio, click
"Open SDK Settings".
As you can see below, the
"JDK location" is wrong.
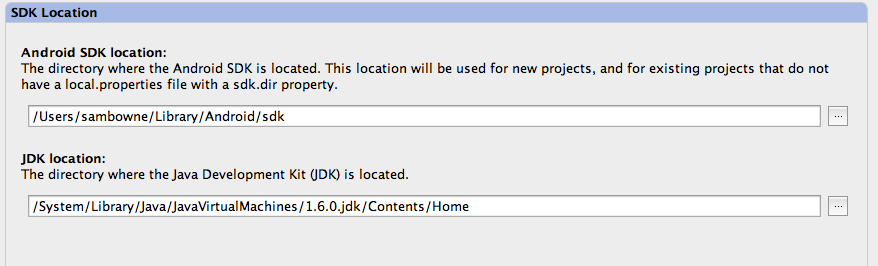
Copy and paste in the correct
location,
as shown below.
Then click OK.
Android Studio displays a yellow bar
at the top, saying "Gradle sync in progress".
After that, the "Language Level Changed"
box pops up again. Click Yes.
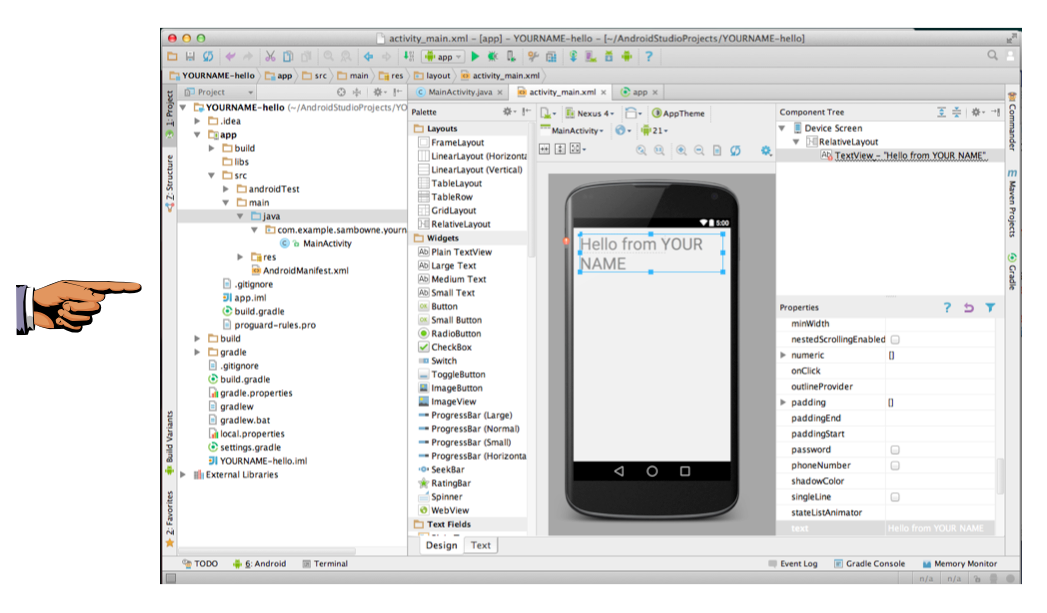
Exploring your App
When the Java problems are fixed,
your project loads without errors,
as shown below.
The left pane shows the files in your
app.
A much easier way to control your app
is to use the right pane. Click the
activity_main.xml tab.
The center now shows the screen of
a phone, showing
"Hello world!" in tiny letters,
as shown above. This is a graphical
view of how your app will look on
a phone.
Customizing your App
In the upper right of the Android
Studio window, in the "Component Tree"
section, click "TextView - @string/hello_world".
In the lower right of the
Android Studio window, in the
Properties section, scroll down
to textSize and change the
size to 40. Press Enter.
The "Hello world" text gets
larger,
as shown below.

On the phone face,
double-click "Hello world".
A little box appears with
a "text" field containing
"@string/hello_world",
as shown below.

Replace the "@string/hello_world"
text with this text:
Hello from YOUR NAME
Use your own name, not the
literal text "YOUR NAME".
In the "id" field, enter
YOURNAME
Replace "YOURNAME" with your own
name,
without any embedded spaces,
as shown below.
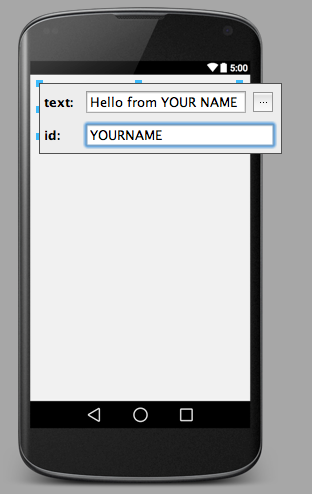
Press Enter.
The phone face should now show
the revised message containing your
name,
as shown below.
Using the Emulator
The next step is to run your app
on an emulated Android device.
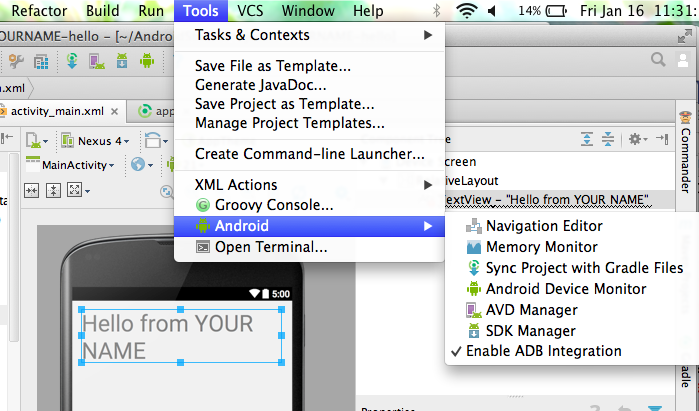
From the Android Studio menu bar,
click Tools, Android,
"AVD Manager",
as shown below.
Toubleshooting
If there is no "Android" item in
the Tools menu, Android Studio
is still loading. You need to
wait a few more minutes.
|
You may see two devices, as shown
below, or only one.
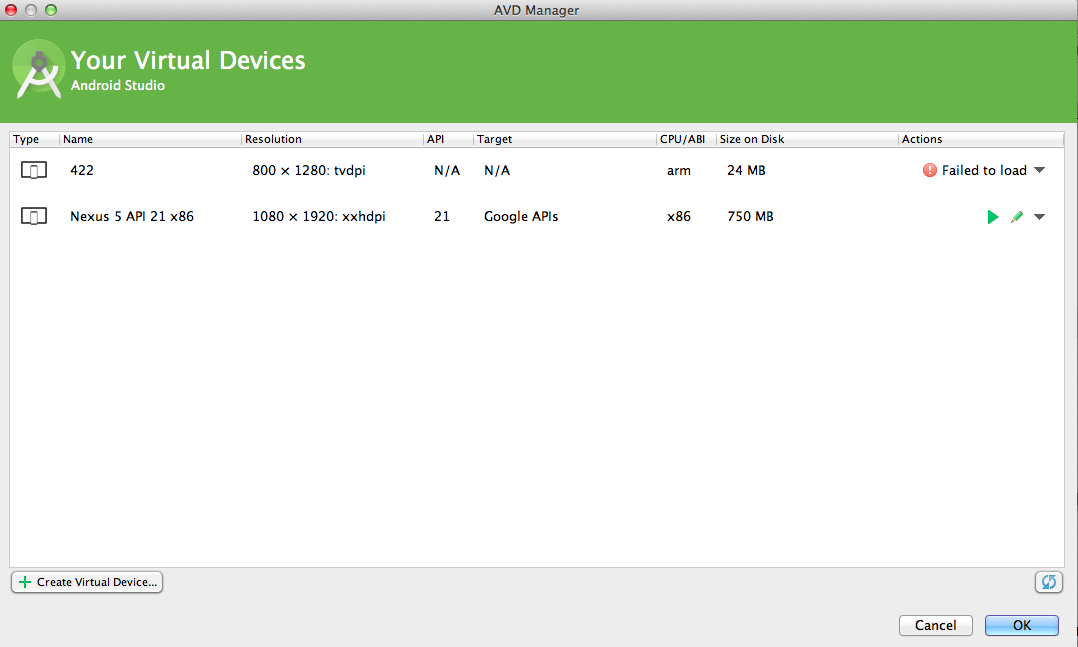
In the "Nexus 5" line, click the green
right-arrow.
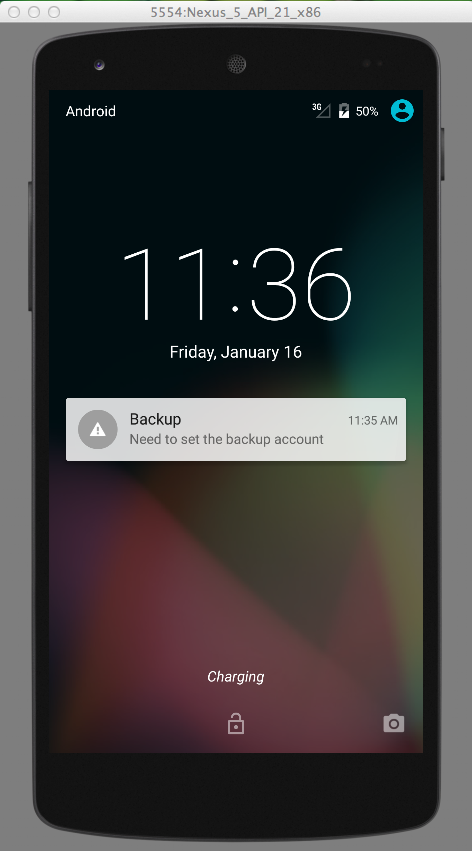
An emulated Nexus 5 phone
launches, and a home screen appears,
as shown below.
Notes for Windows Users
If the emulator does not work, which is
very common on Windows machines,
you can either try to troubleshoot it
with fixes like the next three
"Troubleshooting" steps, or stop
at this point and do the
first section of project 1x
to install Genymotion. Genymotion
is a much better emulator.
Troubleshooting
If you see this error message:
emulator: WARNING: requested RAM is too large for your environment
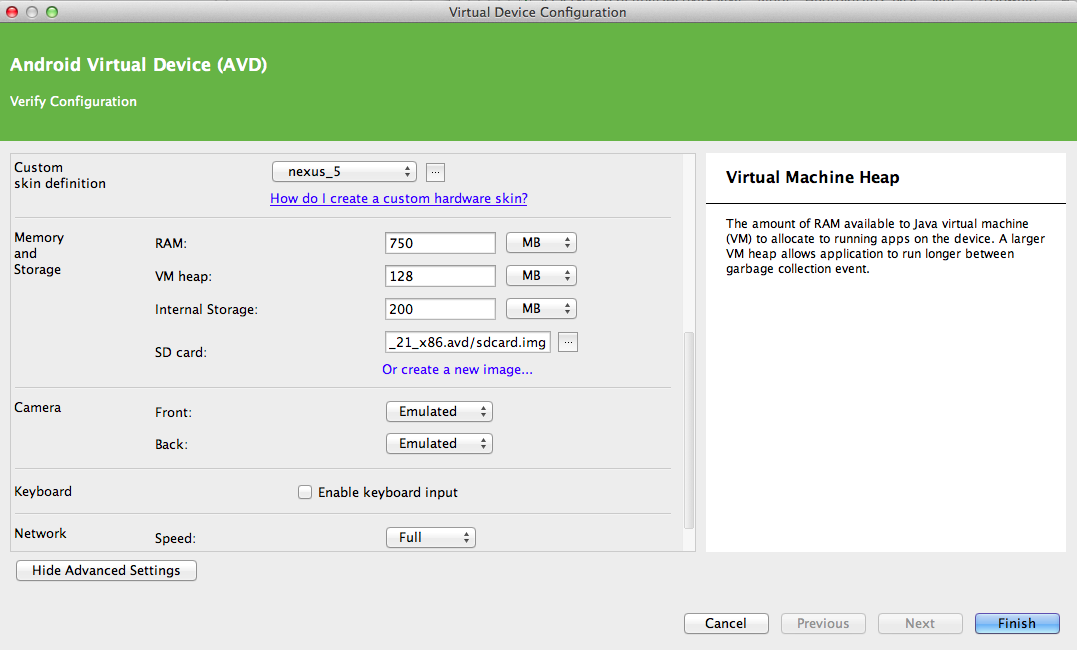
In "AVD Manager", click the pencil icon in the Actions column,
click "Show Advanced Settings", and scroll down
to find the RAM setting. Set the RAM to 750 MB,
and the VM heap to 128 MB,
as shown below.
NOTE: On a PC, you need to scroll to the
right to see the MB label.
Close Android Studio and restart it.
|
Troubleshooting
If the Android device launches,
showing a black screen, and never
shows "ANDROID", go into Windows
Update, Optional Updates, and
update the Display driver,
as shown below.
This helped when working in S214.

|
|
Starting your App
From the Android Studio menu bar,
click Run, "Run 'app'".
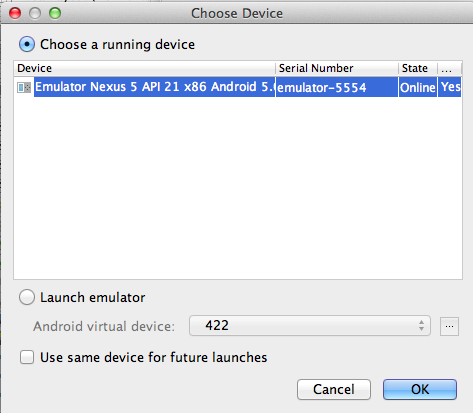
A box pops up, asking you to
"Choose a running device",
as shown below.
Accept the default selection of
"Emulator Nexux 5",
as shown below, and click OK.
In the emulated Android device, click,
hold down the moust button, and swipe up
to unlock.
Your emulated device shows your App
running,
as shown below.

Sources