It runs fast and well on Windows.
Download and install it. During installation, it will download "game data".
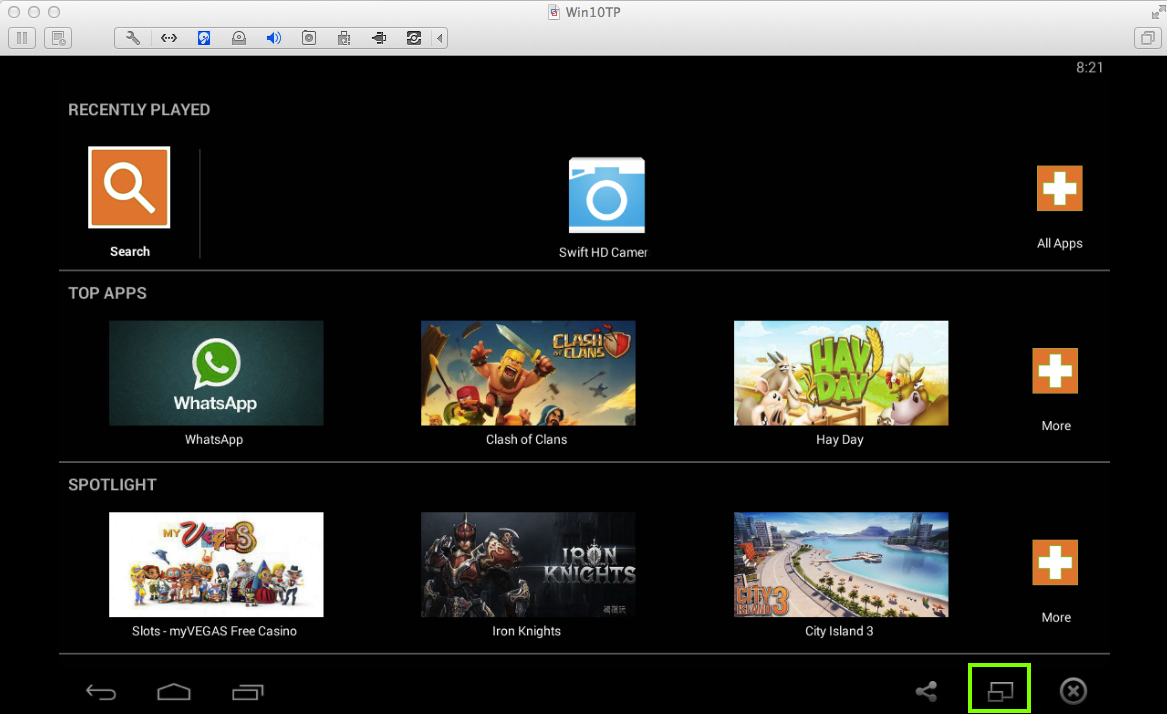
When it's done, you'll see the BlueStacks home page, as shown below.
BlueStacks runs in full-screen mode by default.
To shrink it a bit, on the lower right, click the icon consisting of two rectangles, outlined in green in the image above.
When a "One time setup" box pops up, as shown below, click Continue.

Add a Google account, following the prompts.
Click Tools, Android, "AVD Manager".
Load the app that says "Hello" with your name on it. If you don't have that app prepared, refer to "Project 3: Android Studio" for instructions to make it.
Click Run, "Run 'app'".
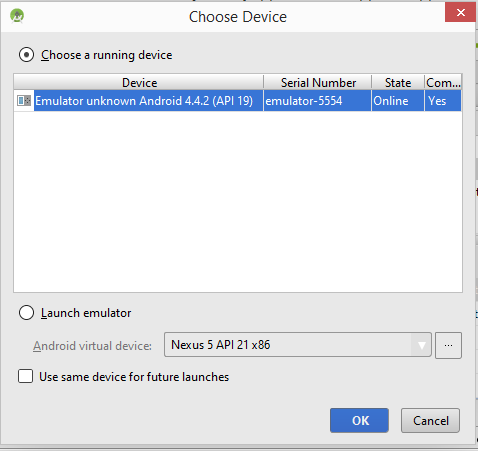
In the "Choose a running device" screen, select the "Unknown" device, as shown below.
The app loads on BlueStacks, as shown below.

Save a full-desktop image. On a Mac, press Commmand+3. On a PC, press Shift+PrntScrn and paste into Paint.
YOU MUST SUBMIT A FULL-SCREEN IMAGE FOR FULL CREDIT!
Save the image with the filename "YOUR NAME Proj 4x", replacing "YOUR NAME" with your real name.