Two difficulties made this project more complicated for me than the previous ones: code errors in the app and defects in the emulator.
To resolve the code errors, I fixed them and uploaded my own version of the app.
To get away from defects in the emulator, we'll use our VirtualBox Android device, which is a far more accurate approximation of a real Android device.
The Master branch has all the labs 3-8 already solved in it, and the Base branch is so buggy you can't even log in.
The patched app is based on the Base branch, with the login problem fixed.
Download this zip file:
https://samsclass.info/128/proj/AndroidLabs-Base-Sam.zip
Unzip the file.
A folder named "AndroidLabs-Base-Sam" appears.
Click File, "Import Project".
Navigate to the "AndroidLabs-Base-Sam" folder and click OK.
Click Next. Click Finish.
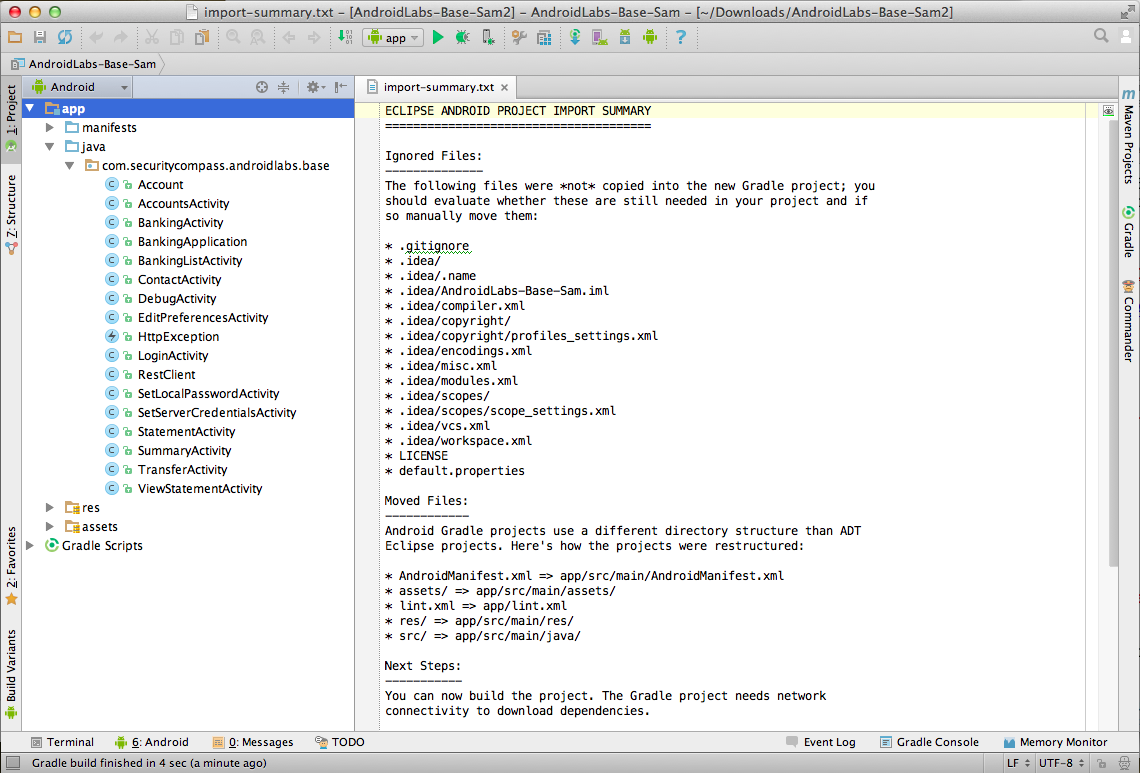
The source code for the app appears, as shown below.
Troubleshooting
If the project opens but there is no "app" in the top left pane, you imported the wrong folder.Look inside the "AndroidLabs-Base-Sam" folder for another "AndroidLabs-Base-Sam" folder and import that.
In the list of virtual devices, click the "Android-YOURNAME" device.
Click Settings.
Adjust the network adapter to "Bridged" mode, bridging to the adapter that goes to the Internet, as shown below.
This image is from the Mac--it may look a little different on a PC.

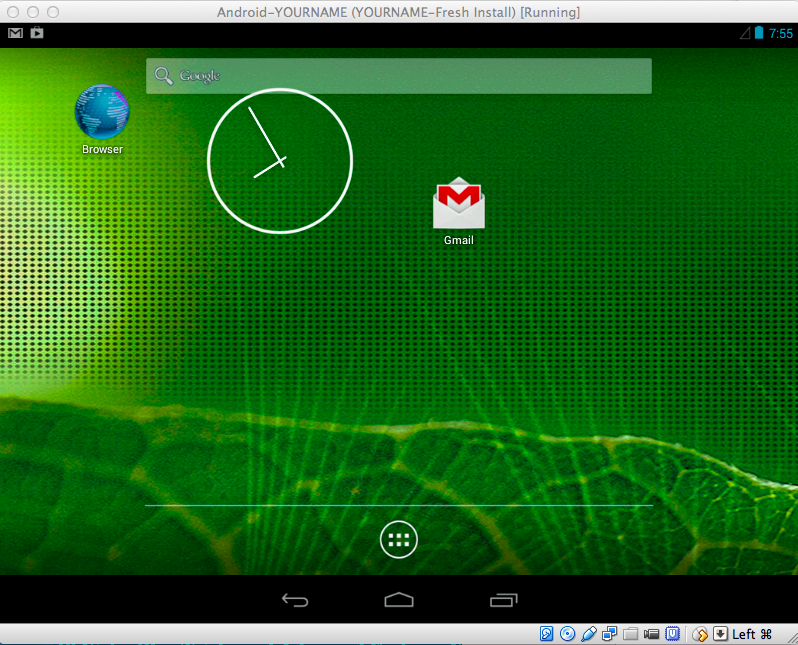
Swipe the padlock to the right to get to the Home screen, as shown below.
On a PC, press Alt+F1. On a Mac, press fn+alt+F1.
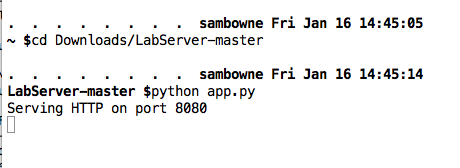
A Terminal window opens. Execute this command, as shown below.
netcfg
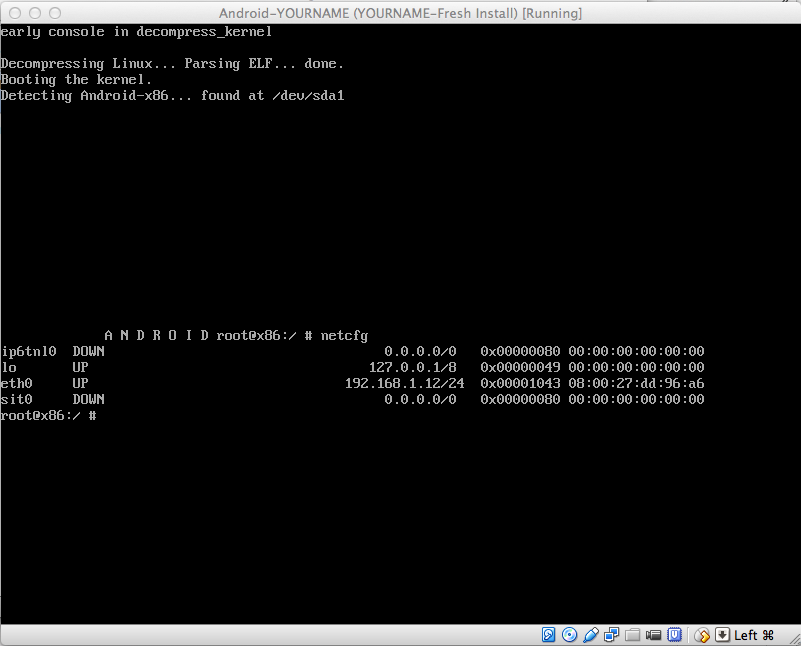
The Android device's IP address is shown in the "eth0" row. When I did it, my address was 192.168.1.12. Find your address and make a note of it.
In the Android device, on a PC, press Alt+F7. On a Mac, press fn+alt+F7.
The Terminal window vanishes and you are back to the Android home page.
Android SDK Manager opens, as shown below.
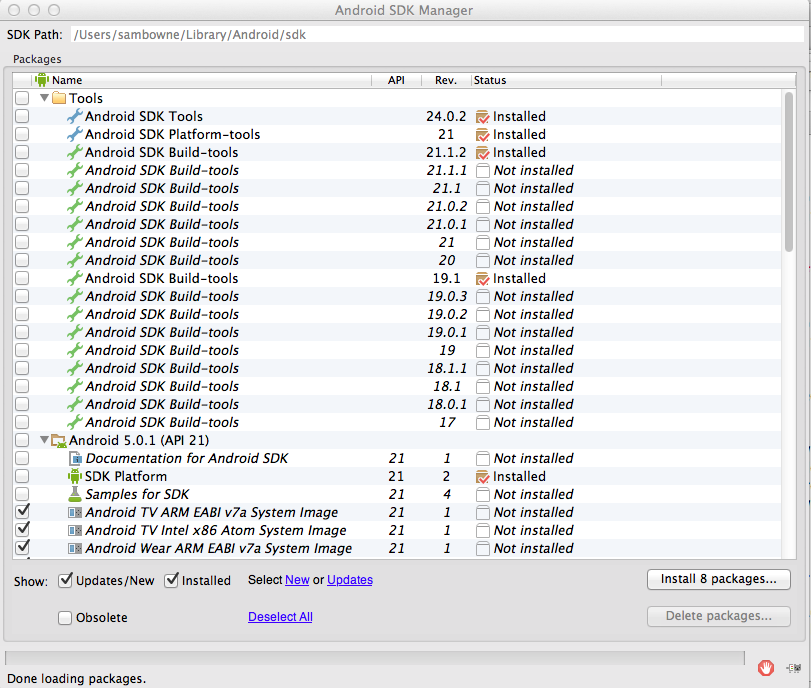
At the top of this window, the SDK Path is shown. On my machine, the path is
/Users/sambowne/Library/Android/sdkFind your SDK path and make a note of it.
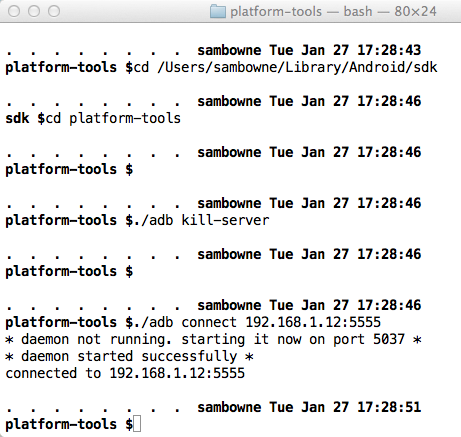
Execute these commands, changing the path in the first command to your correct SDK path, and the IP address in the last command to the IP address of your Android device.
Note: on Windows, omit the "./" before "adb".
cd /Users/sambowne/Library/Android/sdk

cd platform-tools

./adb kill-server

./adb connect 192.168.1.12:5555
A "Choose Device" box pops up, as shown below.
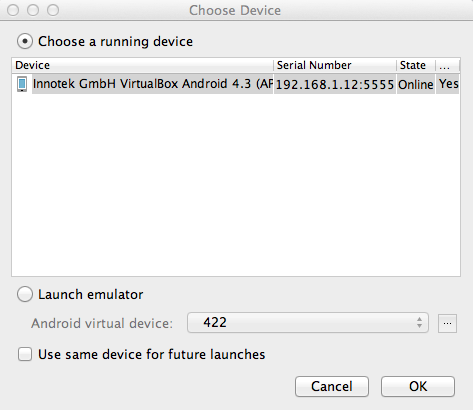
Verify that the "..VirtualBox Android..." device is selected, as shown above, and click OK.
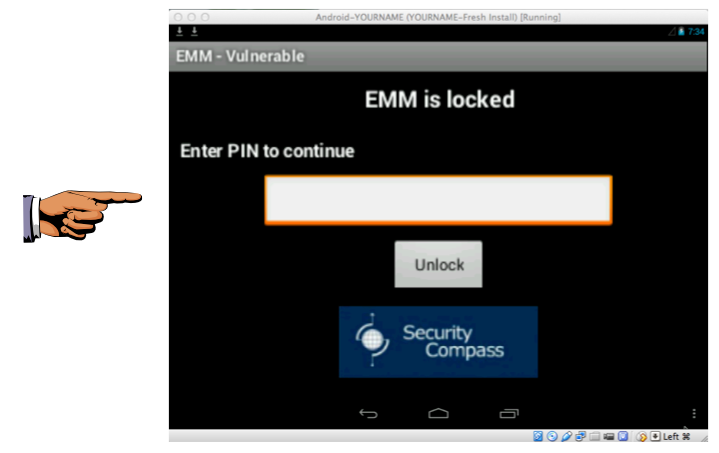
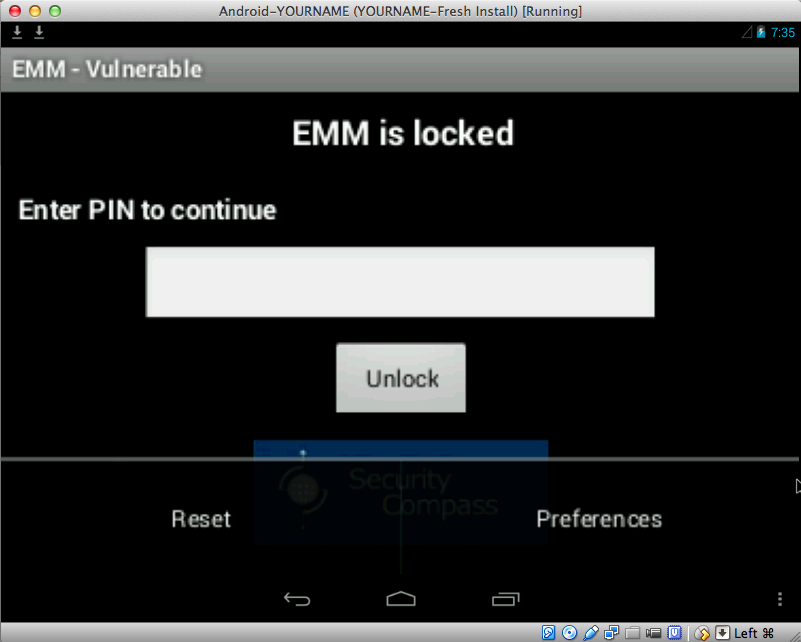
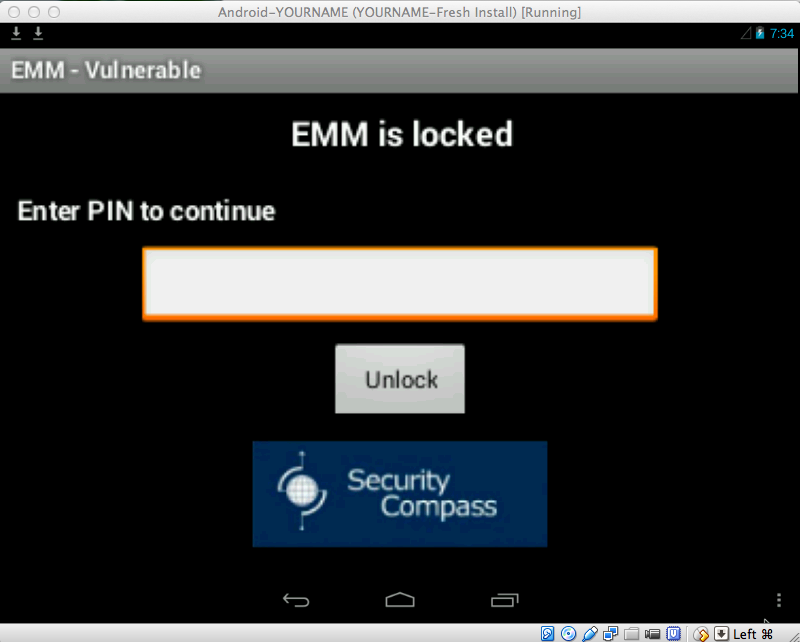
The "EMM - Vulnerable" app appears in the emulator, as shown below.
Save a full-desktop image. On a Mac, press Commmand+3. On a PC, press Shift+PrntScrn and paste into Paint.
YOU MUST SUBMIT A FULL-SCREEN IMAGE FOR FULL CREDIT!
Save the image with the filename "YOUR NAME Proj 6a", replacing "YOUR NAME" with your real name.
Two options appear: "Reset" and "Preferences", as shown below.
Click Preferences.
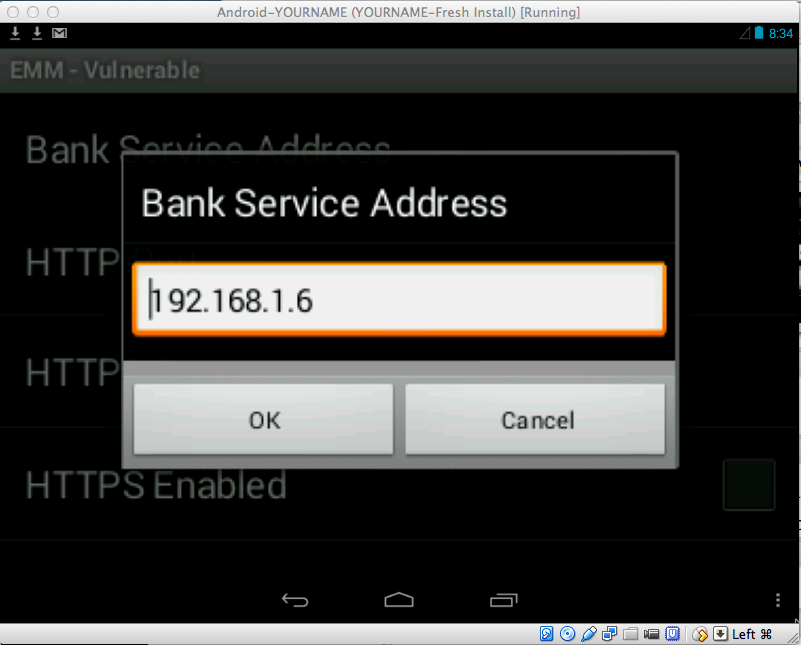
In the next screen, click "Bank Service Address" as shown below.
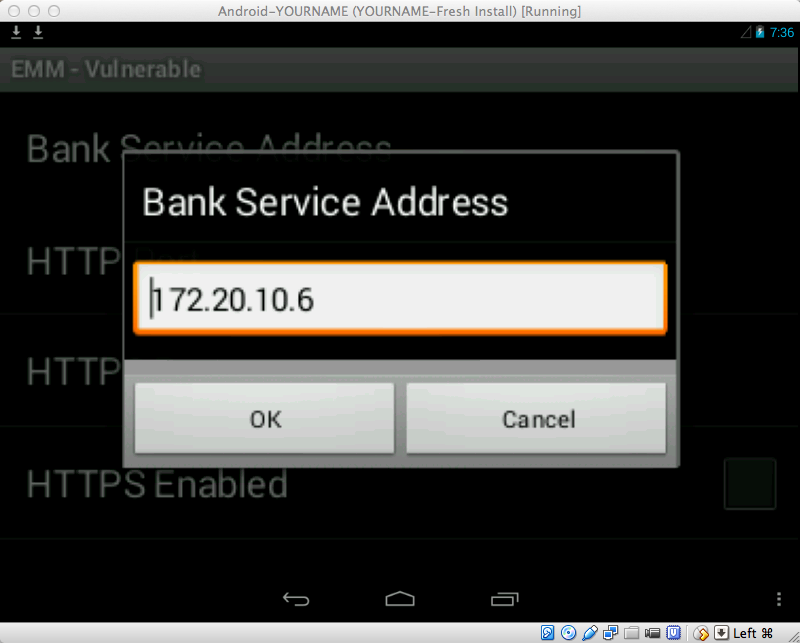
We need to set this address to the address of the host machine.
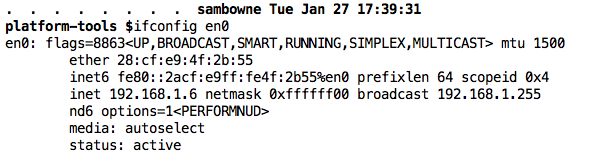
On a PC, execute the ipconfig command.
On a Mac, execute the ifconfig command.
Find your host machine's IP address for its real adapter that goes to the Internet, not a virtual adapter.
When I did it, my address was 192.168.1.6, as shown below.
Then click OK.
At the lower right, click the three-dot icon.
Two options appear: "Reset" and "Preferences", as shown below.
Click Reset.
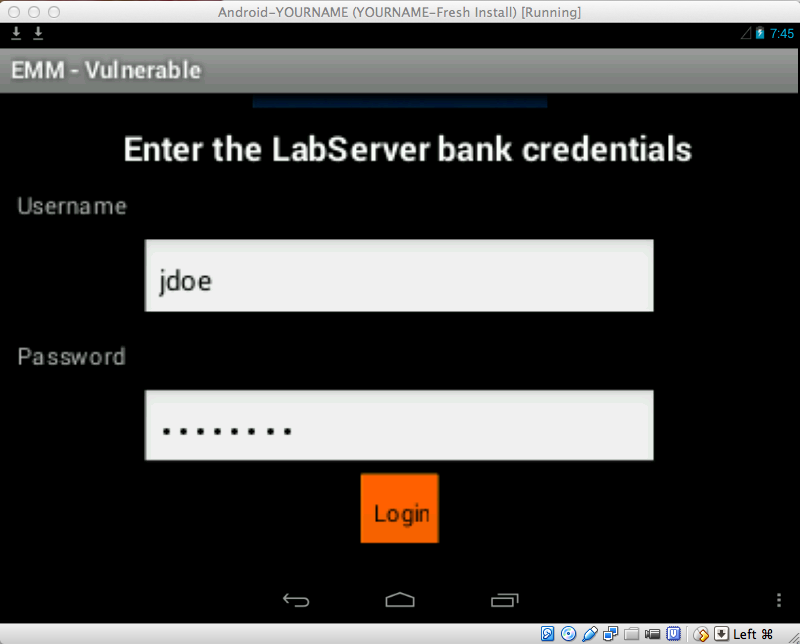
Log in with the credentials jdoe and password
To scroll the screen down, you can use the Tab key on the keyboard, or use the mouse to drag the app up.
When you have logged in, you see the "Setup your keylock..." screen, as shown below.
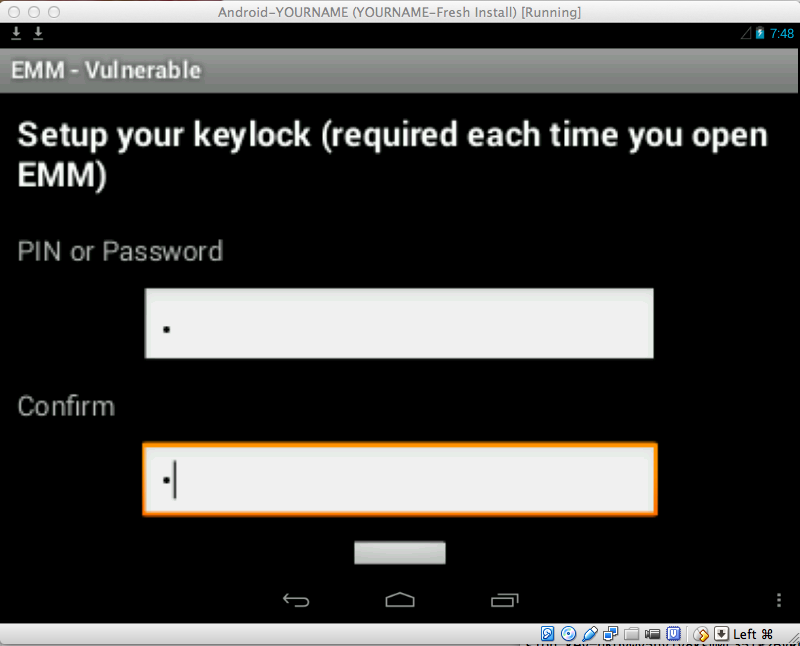
Enter a single-digit code, such as 1 in both fields and press Enter twice.
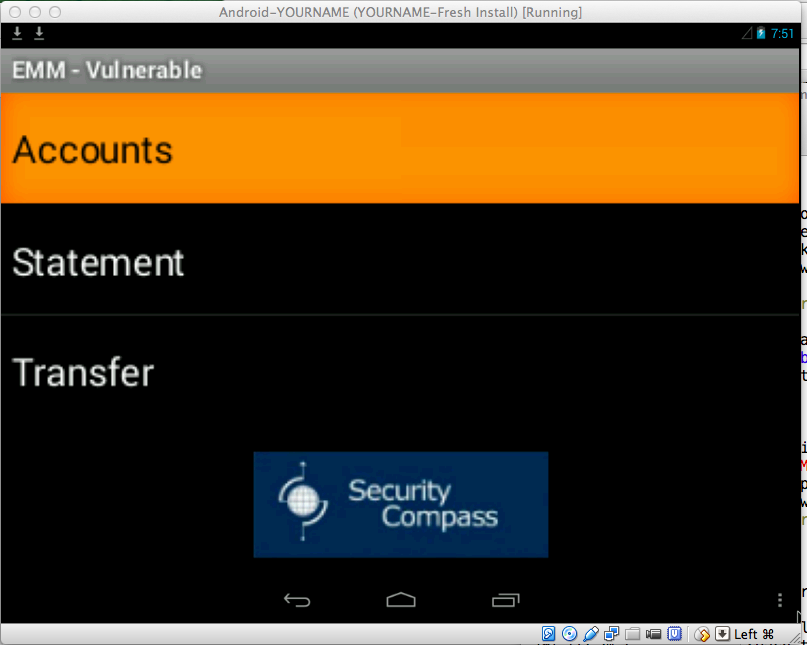
Click Accounts.
You see your two accounts, a Debit and a Credit account.
At the bottom left, click the curved leftward arrow.
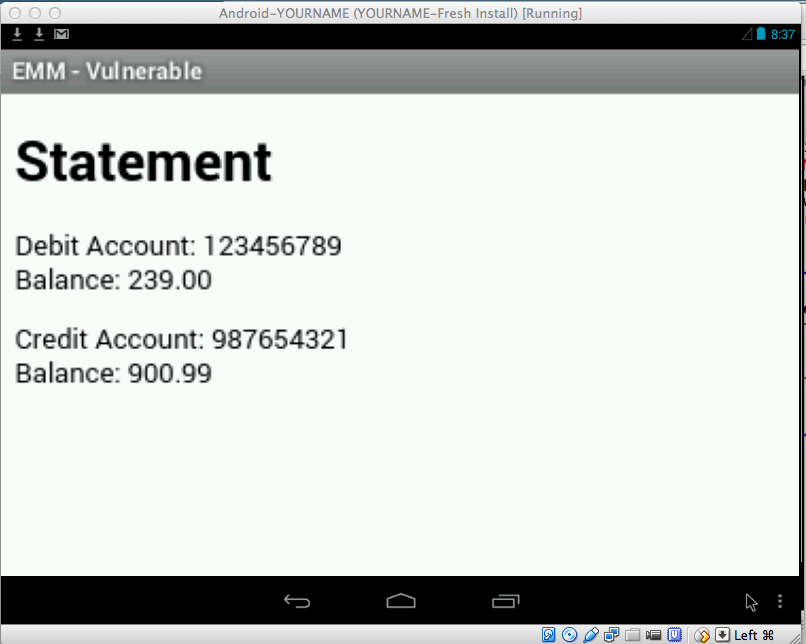
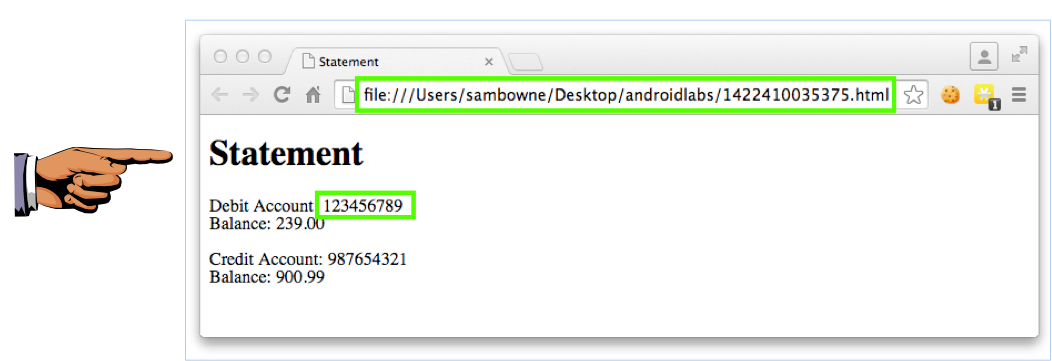
Click Statement.
A date appears. Click it.
A Statement appears, as shown below.
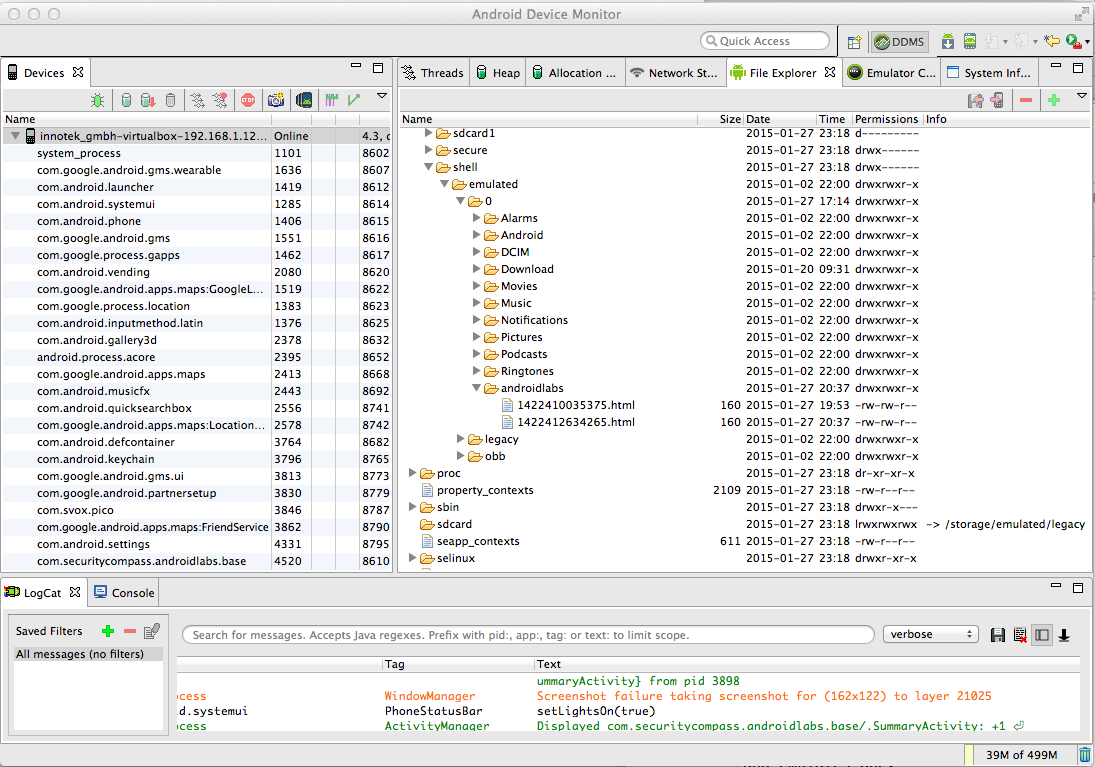
The "Android Device Monitor" opens, showing the file system of the Android device in the top right pane as shown below.
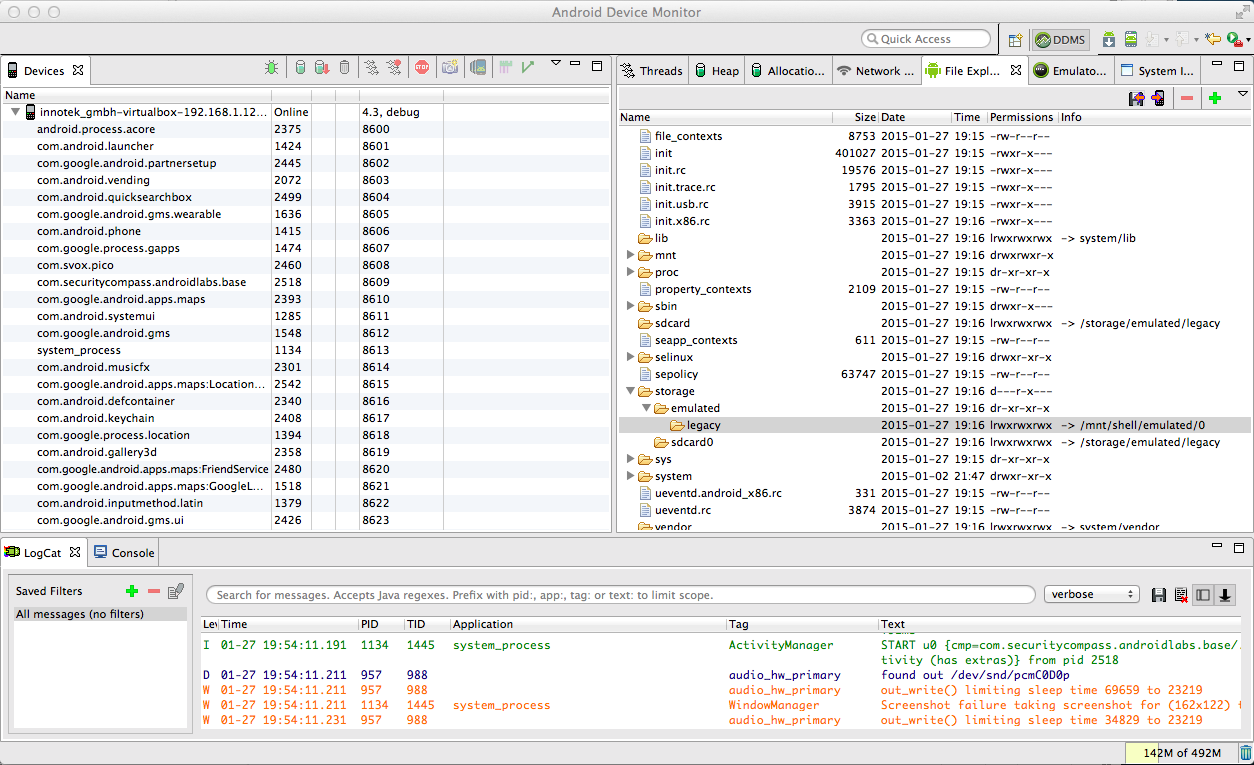
This is a standard Linux file system, with common directories like /etc and /mnt.
Troubleshooting
If no device is visible, your network connection to the Android virtual machine may have timed out.Repeat these adb commands to re-connect, replacing the IP address in the last command to the IP address of your Android device.
Note: on Windows, omit the "./" before "adb".
./adb kill-server./adb connect 192.168.1.12:5555
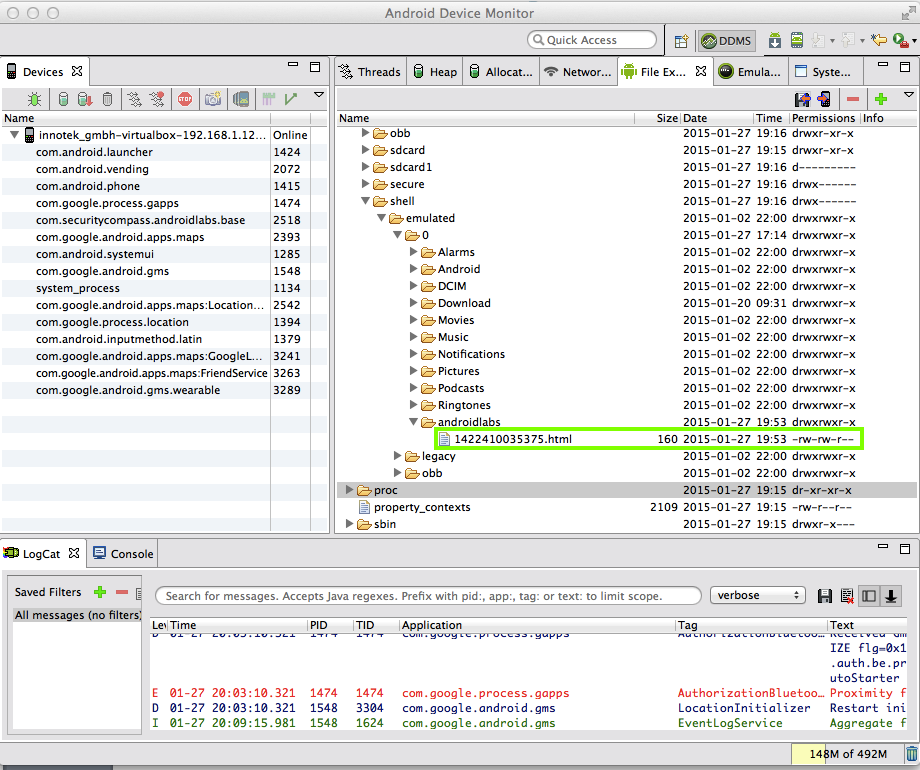
Expand the /storage directory and the legacy folder. Legacy is a link. It points to /mnt/shell/emulated/0, as shown on the right side of the "legacy" line in the figure above.
This app tries to store data on the SD card, but this Android device doesn't have a real SD Card and emulates one.
Expand /mnt/shell/emulated/0/androidlabs, as shown below.
The statement file is visible, with a long numerical filename ending in ".html".
Notice the permissions at the right side of the highlighted region in the image below--they are "rw-rw-r--". The three "r" characters mean that this file can be read by the User (its creator), users in the same Group, and Others.
In other words, everyone can read this file; including every app on the device. Not a good security posture.
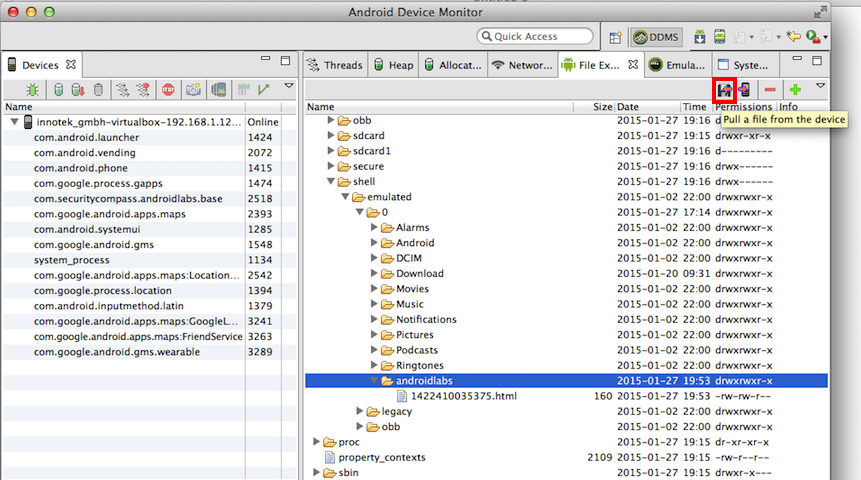
In the top right of the "Android Device Monitor" window, there are four tiny icons; two with red arrows, a minus sign, and a plus sign.
Click the leftmost of the four icons, as indicated below by the red outline.
A "Get Devices/Folders" box pops up.
Navigate to your desktop and click Open.
The "androidlabs" folder is downloaded to your host computer's desktop.
Double-click the HTML file inside.
A Web browser opens, showing the Statement, as shown below.
Save a full-desktop image. On a Mac, press Commmand+3. On a PC, press Shift+PrntScrn and paste into Paint.
YOU MUST SUBMIT A FULL-SCREEN IMAGE FOR FULL CREDIT!
Save the image with the filename "YOUR NAME Proj 6b", replacing "YOUR NAME" with your real name.
To improve security, this information should be stored in a part of the file system that is only accessible to the banking app itself.
mStatementDir=Environment.getExternalStorageDirectory().toString()+"/androidlabs/";
mStatementDir=getFilesDir().toString()+"/androidlabs/";
Double-click BankingApplication.
Scroll down to the onCreate() function, as shown below.
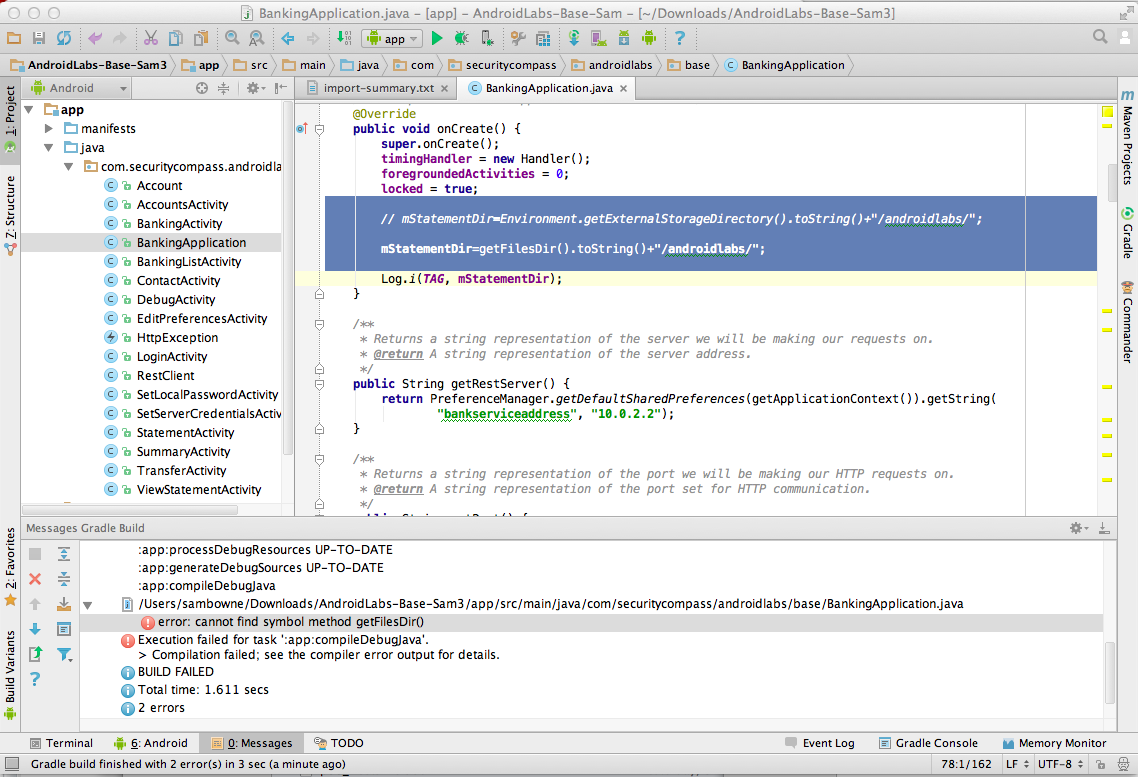
Carefully add two slash marks to the start of the defective line to comment it out, and add the improved line, as highlighted in the image above.
A "Choose Device" box pops up, as shown below.
Verify that the "..VirtualBox Android..." device is selected, as shown above, and click OK.
The "EMM - Vulnerable" app appears in the emulator, as shown below.
Two options appear: "Reset" and "Preferences", as shown below.
Click Reset.
Log in with the credentials jdoe and password
To scroll the screen down, you can use the Tab key on the keyboard, or use the mouse to drag the app up.
When you have logged in, you see the "Setup your keylock..." screen, as shown below.
Enter a single-digit code, such as 1 in both fields and press Enter twice.
Click Statement.
A date appears. Click it.
A Statement appears, as shown below.
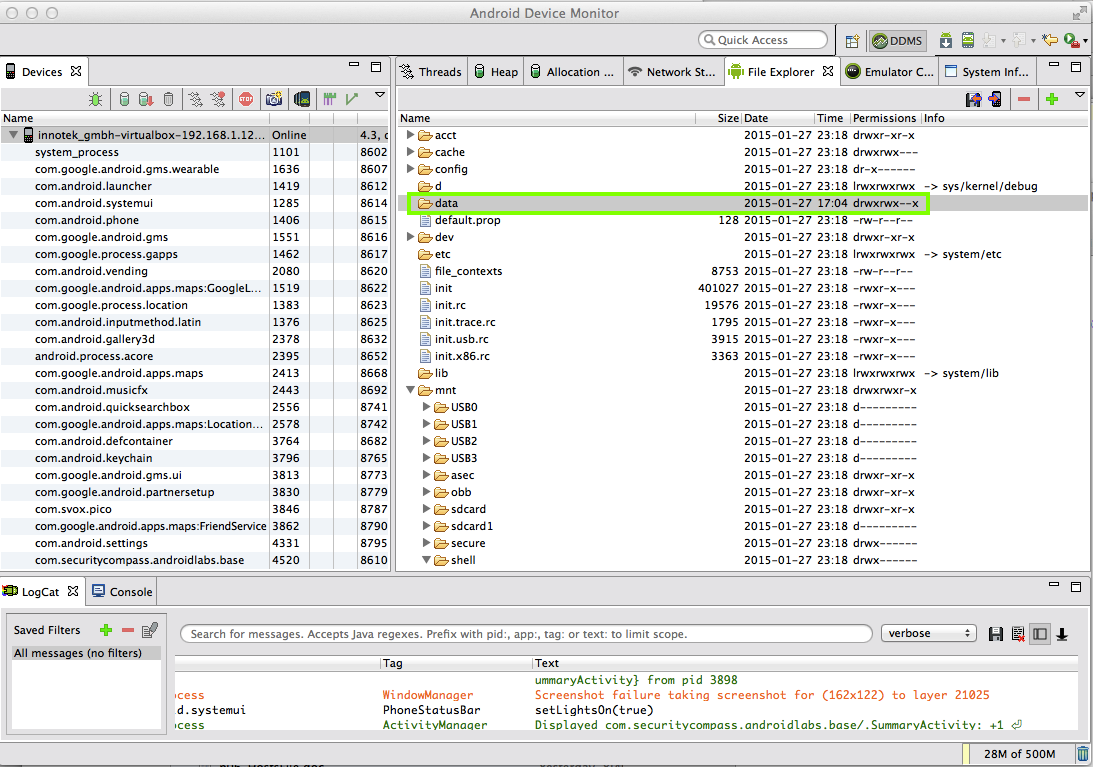
The new statements are in the /data/data directory.
In "Android Device Monitor", double-click /data.
The folder won't open, as shown below.
That's because we aren't root. Look at the right side of the line--the permissions are rwxrwx--x which means that Other people can't read or write the contents of the /data folder.
cd /Users/sambowne/Library/Android/sdk

cd platform-tools

./adb shell

cd /data

ls

As shown above, you cannot view the contents of /data, and get a "Permission denied" error.
You need to elevate to root first.
In a Terminal or Command Prompt window, execute these commands:
su

cd /data/data

ls
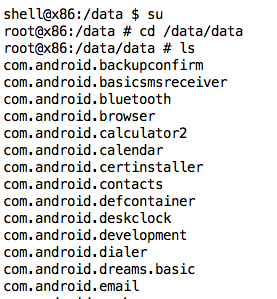
Near the end of the list are the securitycompass directories, as shown below.
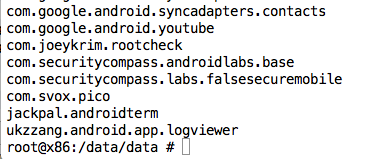
In a Terminal or Command Prompt window, execute these commands:
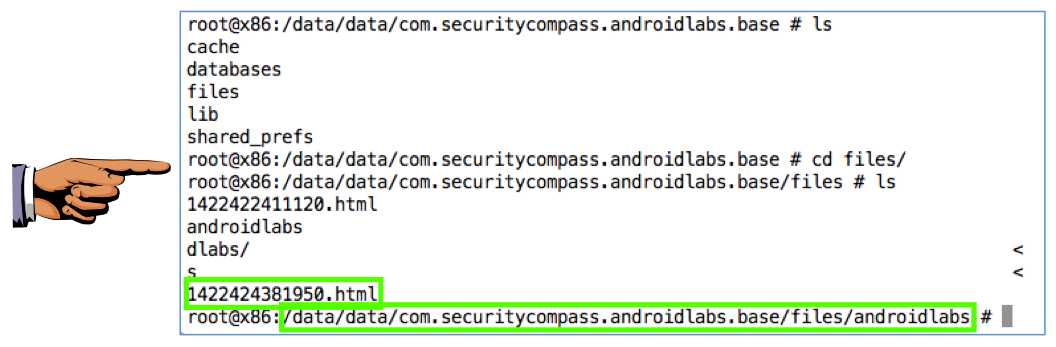
cd com.securitycompass.androidlabs.base

ls

cd files

ls

cd androidlabs

ls
The commands don't display correctly on the screen because the path is too long to fit in the terminal line, as shown below.
Save a full-desktop image. On a Mac, press Commmand+3. On a PC, press Shift+PrntScrn and paste into Paint.
YOU MUST SUBMIT A FULL-SCREEN IMAGE FOR FULL CREDIT!
Save the image with the filename "YOUR NAME Proj 6c", replacing "YOUR NAME" with your real name.