Agree to the agreement.
When you are prompted to, enter your password.
In the "Welcome to Xcode" window, click "Create a new Xcode project" (or choose File > New > Project).
In the iOS section at the left of the dialog, click Application.
In the main area of the dialog, click "Single View Application", as shown below, and then click Next.

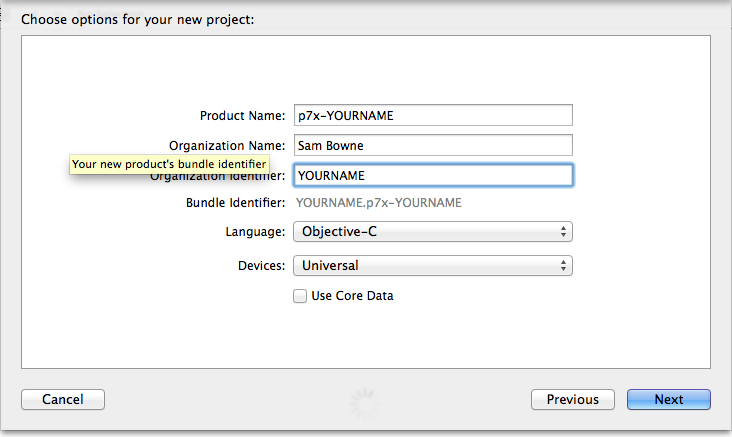
In the next screen, enter a "Product Name" of p7x-YOURNAME, and an "Organization Identifier" of YOURNAME, as shown below, and then click Next.
In the next dialog, choose a location for your project and click Next.
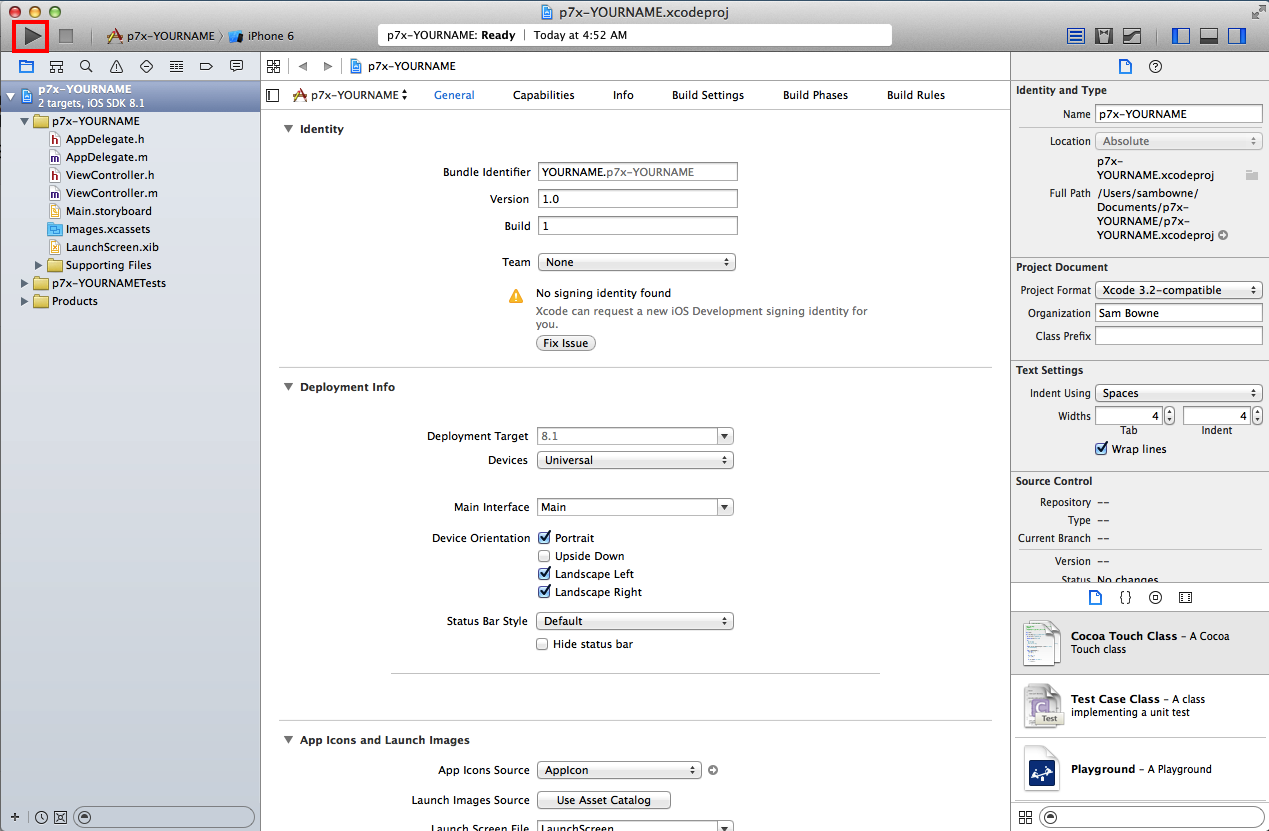
The Xcode workspace window appears, as shown below.
Enable and enter your password.
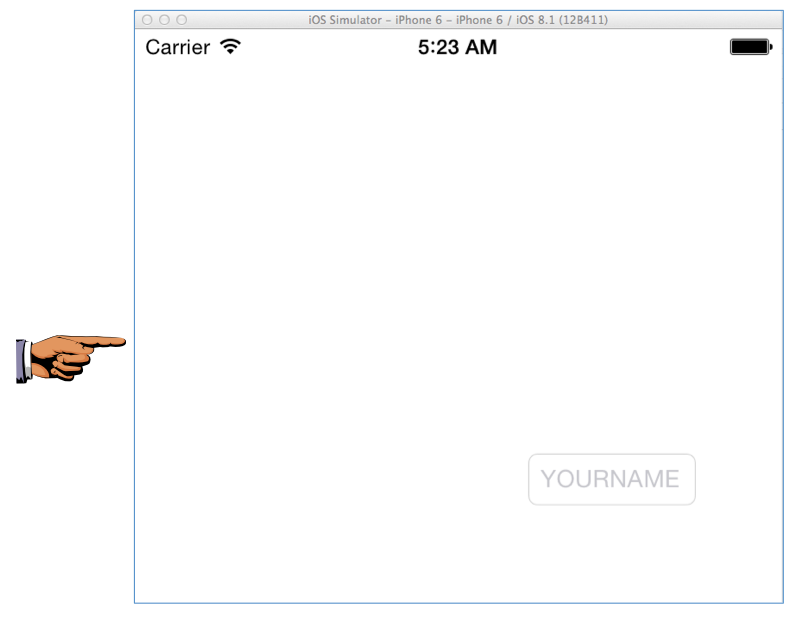
In the "iOS Simulator" window, scroll to the top. You should see a "Carrier" message and the time, as shown below.
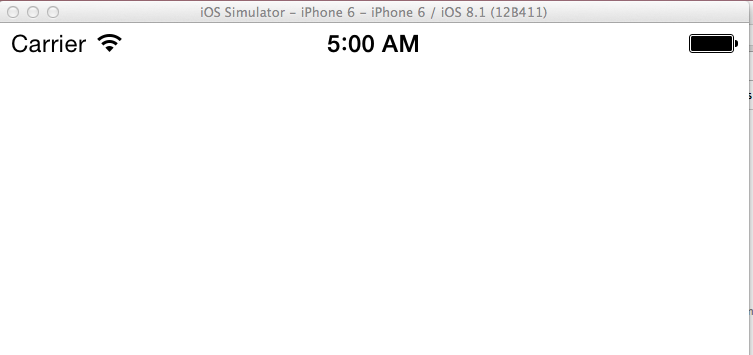
The simulator is working, but the App does nothing so there's a blank screen.
Quit iOS Simulator by choosing iOS Simulator > Quit iOS Simulator (or pressing Command-Q).
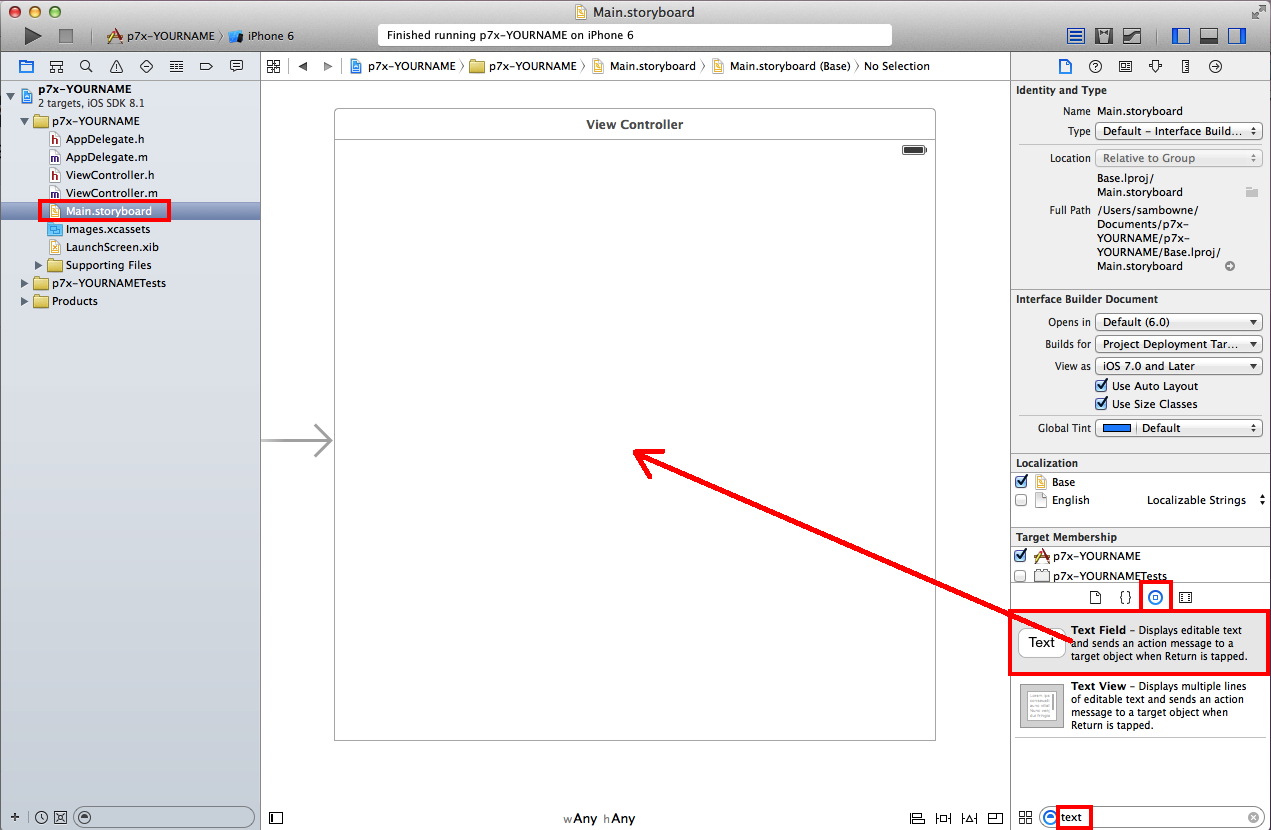
On the bottom right, click the icon marked with a circle containing a square. This opens the Object Library.
In the lower right corner, type text to filter the contents of the Library and make the "Text Field" item visible, as shown below.
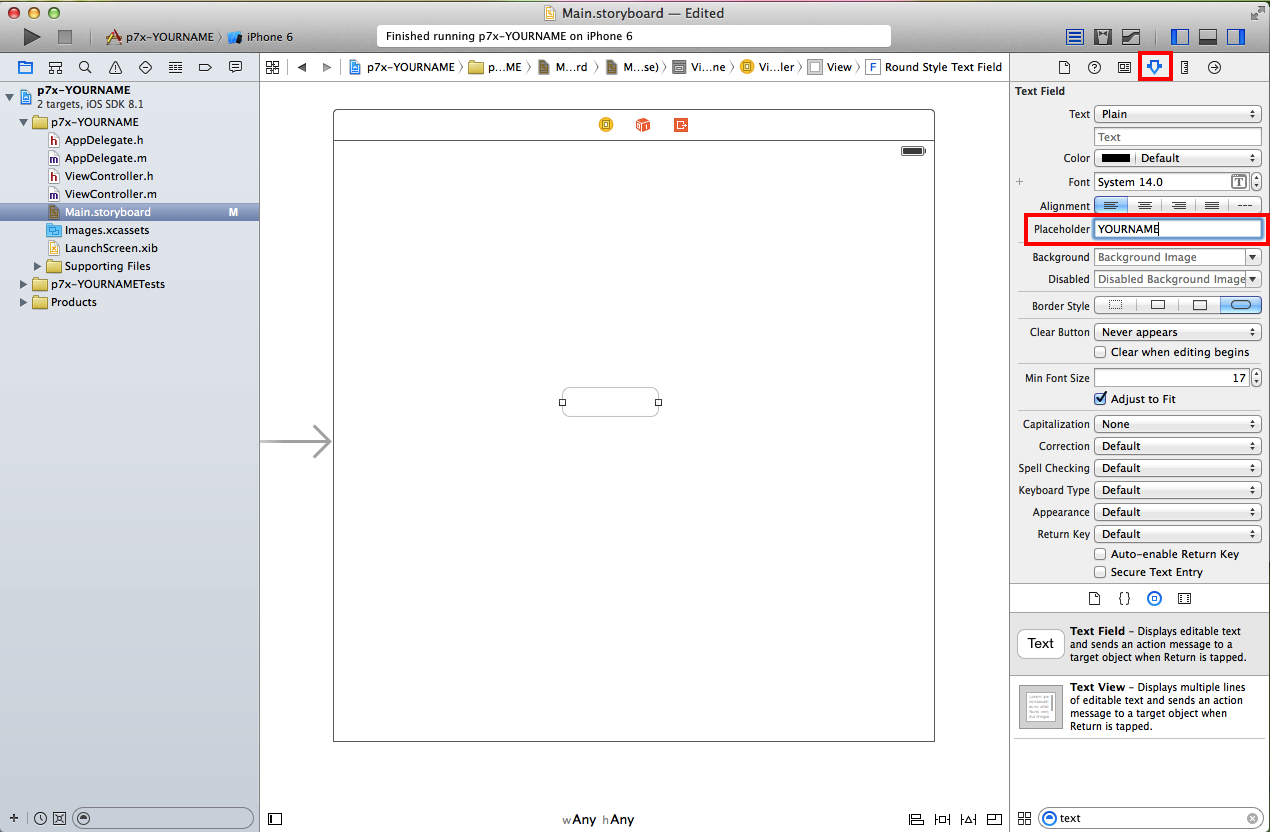
An empty frame appears in the Scene, as shown below.
At the top right, click the down-arrow icon, as outlined in red in the image below. This opens "Attribute Inspector".
In the Placeholder field, type YOURNAME, as shown below.
Press Enter.
Your name appears in faint gray letters in the text field.
When the simulator launches, scroll to the top to show YOURNAME, as shown below.
press Commmand+3 to save a full-desktop image.
YOU MUST SUBMIT A FULL-SCREEN IMAGE FOR FULL CREDIT!
Save the image with the filename "YOUR NAME Proj 7x", replacing "YOUR NAME" with your real name.