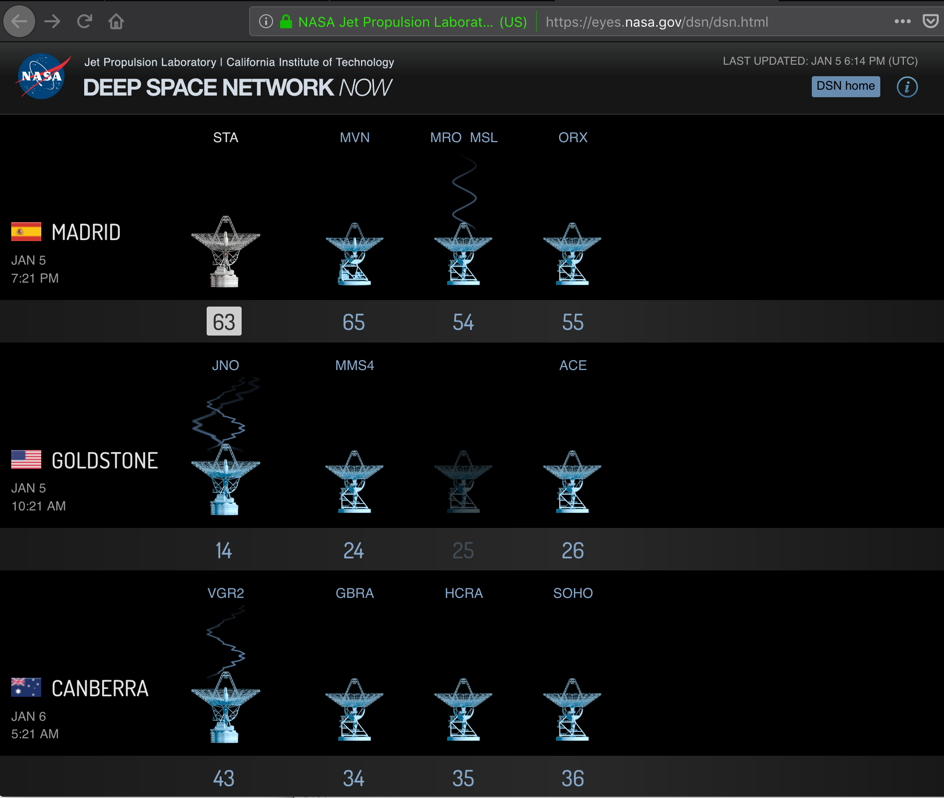
You can see live transmissions to spacecraft on this page, as shown below.
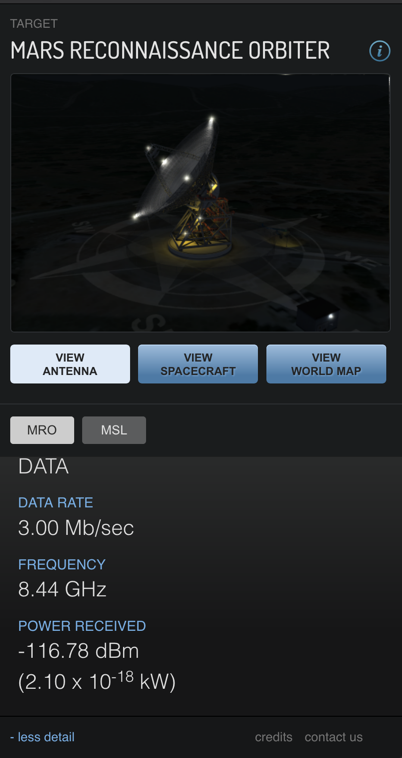
If you click a device that is in use, and click the "more detail" link in the lower right corner of the page, you see more information about the transmissions, as shown below. When I did it, this data link was running at 3 Mb/sec.
https://sourceforge.net/projects/ion-dtn/
Server 149 with IP 172.16.123.149
Server 150 with IP 172.16.123.150
You will have to adjust the network addresses and IDs in the instructions below to match your systems.
sudo apt update
sudo apt install build-essential -y
wget https://sourceforge.net/projects/ion-dtn/files/ion-3.6.2.tar.gz/download
tar xzvf download
cd ion-3.6.2
./configure
make
sudo make install
sudo ldconfig
For complete details of the configuration, see the "ION Deployment Guide.pdf" file in the ion-3.6.2 folder you just created with the previous commands.
In a Terminal, execute these commands:
mkdir dtn
cd dtn
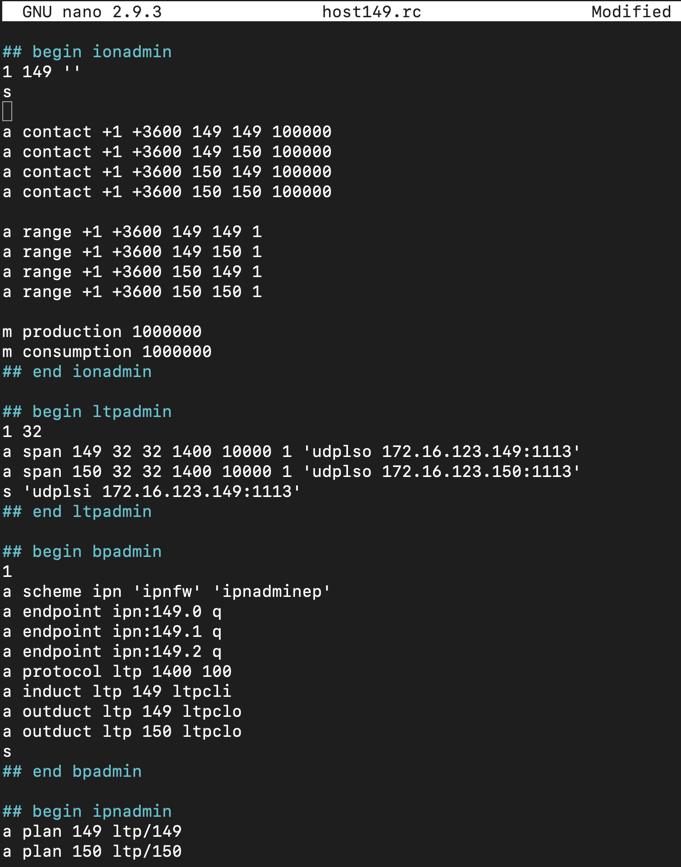
nano host149.rc
You will need to adjust the IP addresses for your network!
## begin ionadmin
1 149 ''
s

a contact +1 +3600 149 149 100000
a contact +1 +3600 149 150 100000
a contact +1 +3600 150 149 100000
a contact +1 +3600 150 150 100000

a range +1 +3600 149 149 1
a range +1 +3600 149 150 1
a range +1 +3600 150 149 1
a range +1 +3600 150 150 1

m production 1000000
m consumption 1000000
## end ionadmin

## begin ltpadmin
1 32
a span 149 32 32 1400 10000 1 'udplso 172.16.123.149:1113' 300
a span 150 32 32 1400 10000 1 'udplso 172.16.123.150:1113' 300
s 'udplsi 172.16.123.149:1113'
## end ltpadmin

## begin bpadmin
1
a scheme ipn 'ipnfw' 'ipnadminep'
a endpoint ipn:149.0 q
a endpoint ipn:149.1 q
a endpoint ipn:149.2 q
a protocol ltp 1400 100
a induct ltp 149 ltpcli
a outduct ltp 149 ltpclo
a outduct ltp 150 ltpclo
s
## end bpadmin

## begin ipnadmin
a plan 149 ltp/149
a plan 150 ltp/150

## end ipnadmin
Save the file with Ctrl+X, Y. Enter.
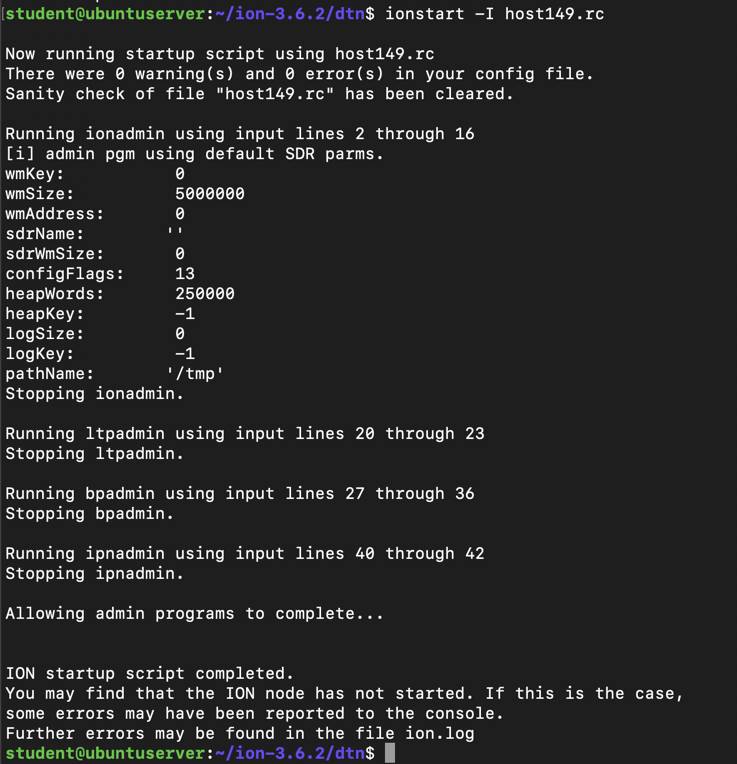
First we'll use the "killm" command, which kills any previously running ION processes. Then we'll start the ION server. On server 149, in a Terminal, execute these commands:
killm
ionstart -I host149.rc
Execute this command to see the listening UDP socket, as highlighted in the image below.
ss -panu

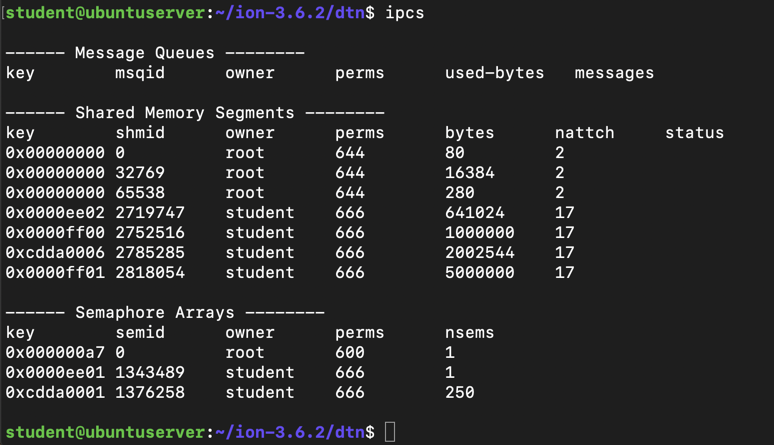
Execute this command to see the status of some ION services:
ipcs
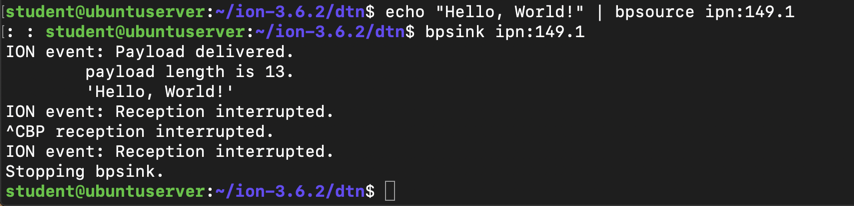
Execute this command to send a "loopback" message from your server to itself, via DTN:
echo "Hello, World!" | bpsource ipn:149.1
bpsink ipn:149.1
mkdir dtn
cd dtn
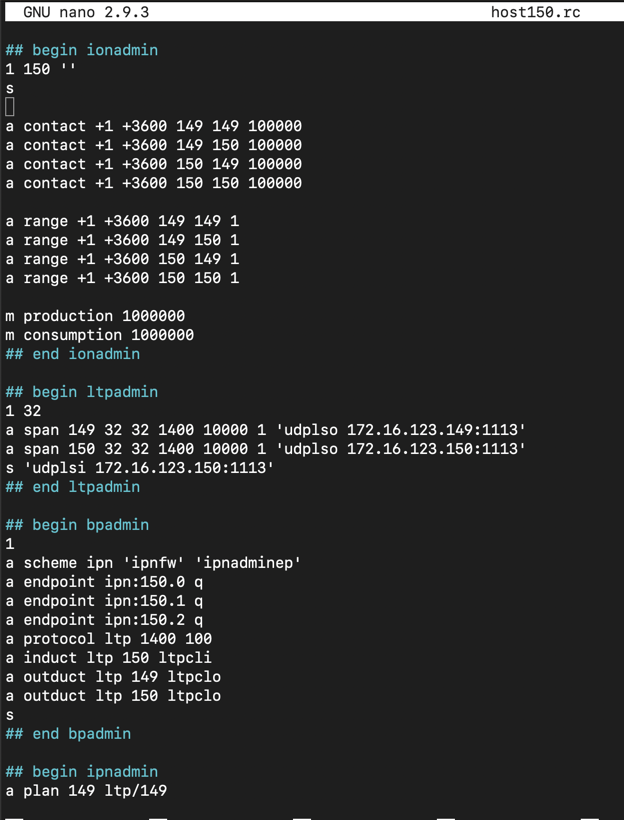
nano host150.rc
You will need to adjust the IP addresses for your network!
## begin ionadmin
1 150 ''
s

a contact +1 +3600 149 149 100000
a contact +1 +3600 149 150 100000
a contact +1 +3600 150 149 100000
a contact +1 +3600 150 150 100000

a range +1 +3600 149 149 1
a range +1 +3600 149 150 1
a range +1 +3600 150 149 1
a range +1 +3600 150 150 1

m production 1000000
m consumption 1000000
## end ionadmin

## begin ltpadmin
1 32
a span 149 32 32 1400 10000 1 'udplso 172.16.123.149:1113' 300
a span 150 32 32 1400 10000 1 'udplso 172.16.123.150:1113' 300
s 'udplsi 172.16.123.150:1113'
## end ltpadmin

## begin bpadmin
1
a scheme ipn 'ipnfw' 'ipnadminep'
a endpoint ipn:150.0 q
a endpoint ipn:150.1 q
a endpoint ipn:150.2 q
a protocol ltp 1400 100
a induct ltp 150 ltpcli
a outduct ltp 149 ltpclo
a outduct ltp 150 ltpclo
s
## end bpadmin

## begin ipnadmin
a plan 149 ltp/149
a plan 150 ltp/150

## end ipnadmin
Save the file with Ctrl+X, Y. Enter.
killm
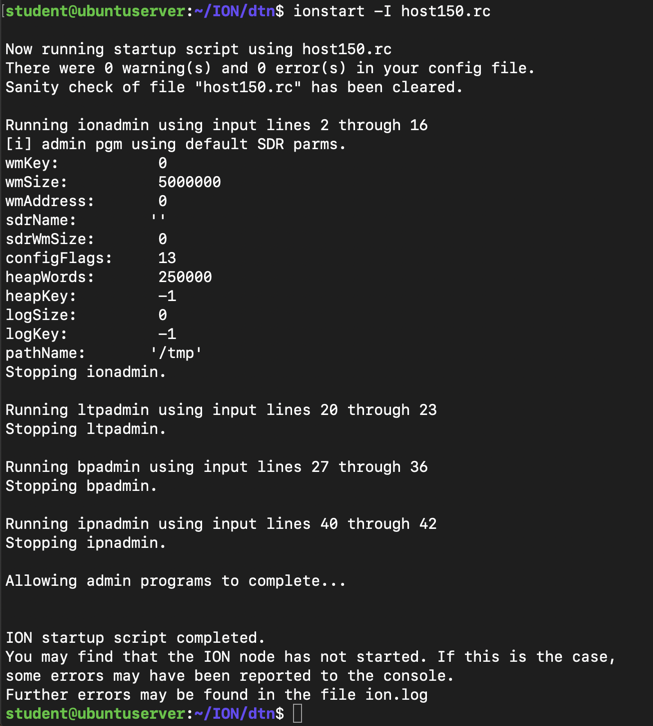
ionstart -I host150.rc
Execute these commands to send a "loopback" message from your server to itself, via DTN:
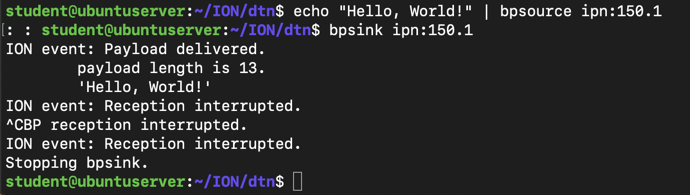
echo "Hello, World!" | bpsource ipn:150.1
bpsink ipn:150.1
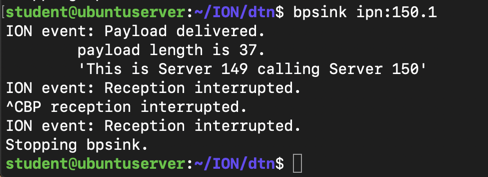
echo "This is Server 149 calling Server 150" | bpsource ipn:150.1

On server 150, execute this command:
bpsink ipn:150.1
At the top of the Wireshark window, in the filter bar, enter this filter:
ltp
echo "This is Server 149 calling Server 150" | bpsource ipn:150.1
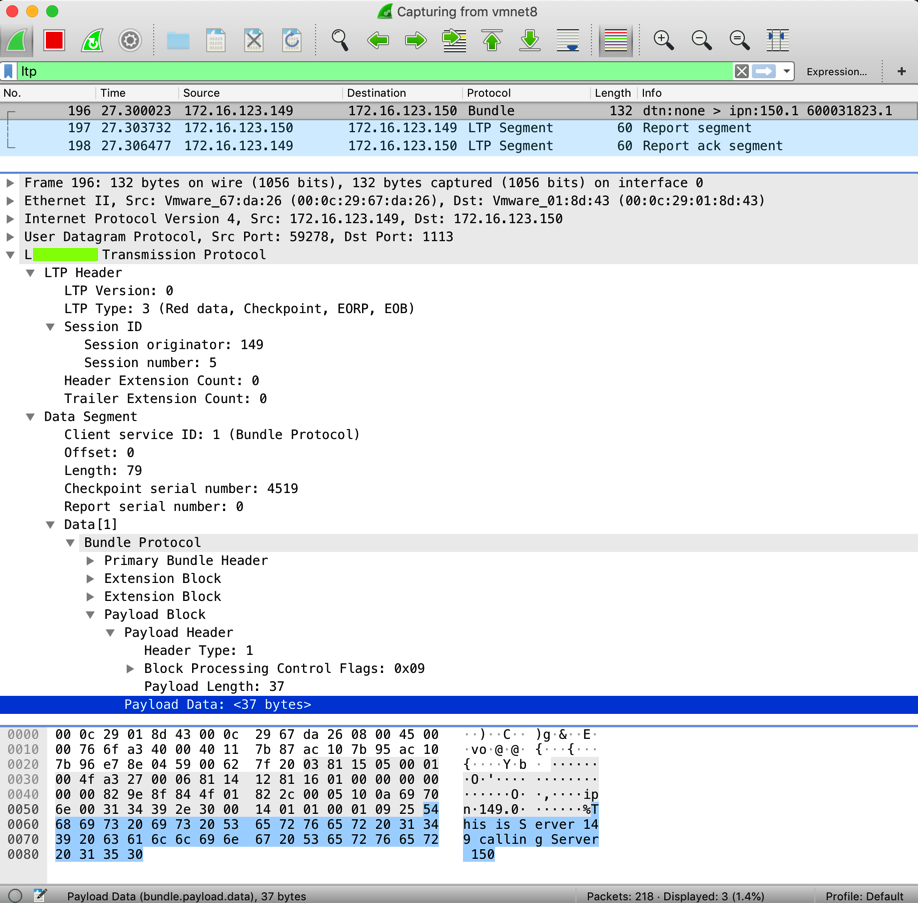
Wireshark uses a different name for this protocol, covered by a green box in the image above.
Enter that name into the form below to record your success.
Converted to a CTF 3-1-19