W 10: Configuring an HTTPS Server (15 pts extra)
What You Need
Purpose
Getting a Domain Name
This will cost a few dollars. Get a domain name at any
name registrar you like, such as
https://www.ionos.com/
or
https://www.namecheap.com/
This process is different for each name registrar.
I can help you do it in the lab.
Put it Behind Cloudflare
Go to
https://cloudflare.com
Click the "Sign up" button and
follow the instructions.
This makes Cloudflare
your authoritative DNS server.
Get a Google Cloud Server
Get a free Debian Google Cloud server,
as explained in other projects.
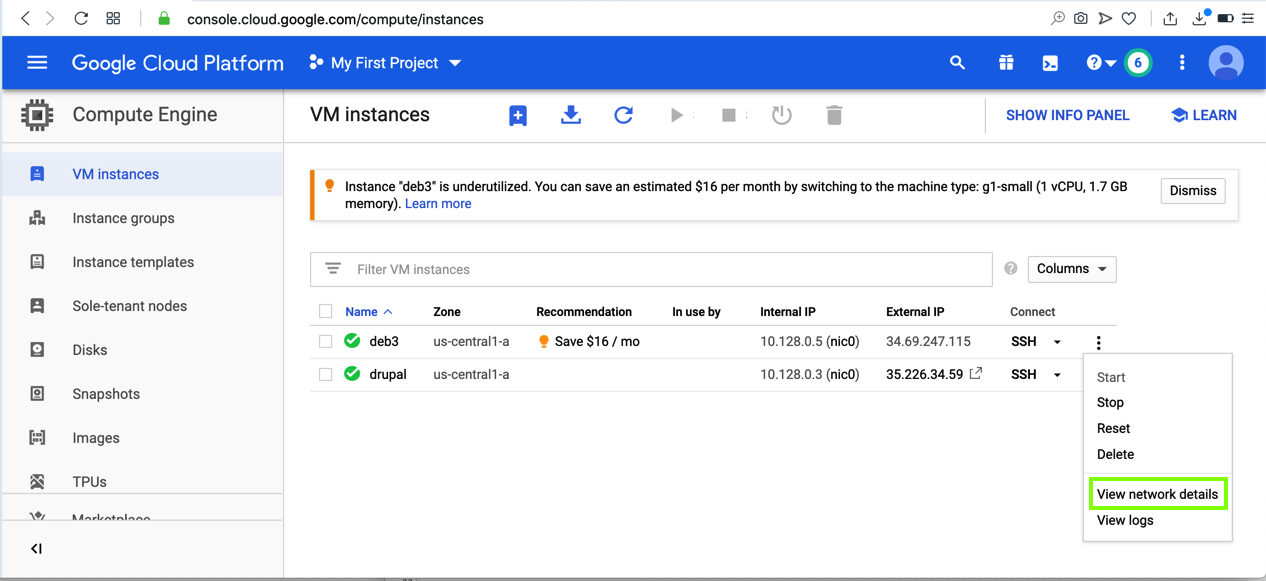
Configuring a Static IP Address
In the "VM instances" page,
on your Debian instance's line,
on the right side,
click the three-dot icon and click
"View network details",
as shown below.
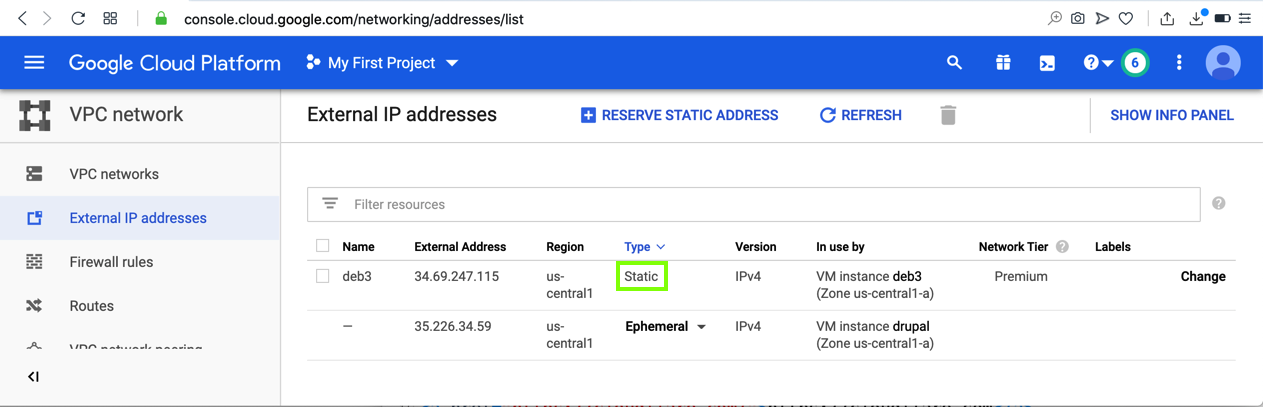
On the next page, on the left side,
click "External IP addresses".
Change your instance's address to
Static,
as shown below.
Make a note of your external IP address.
You'll need it later.
Adjusting the Google Cloud Firewall
On the "Network interface details" page,
on the left side,
click Firewall.
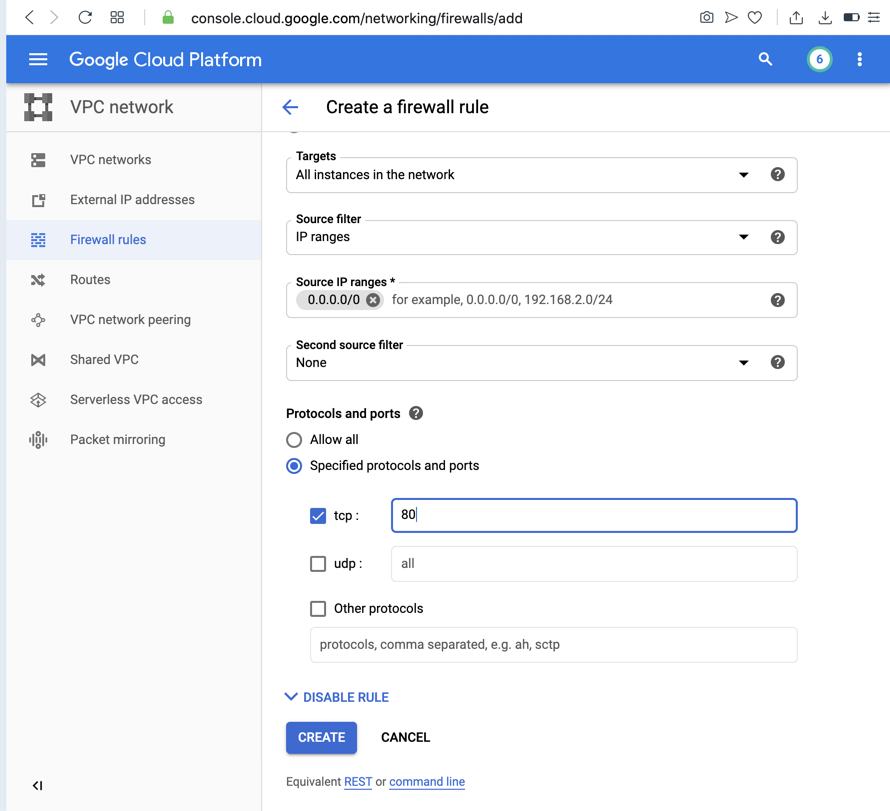
At the top center, click
"CREATE FIREWALL RULE".
Enter these values,
as shown below.
- Name: http
- Targets: All instances on the network
- Source filter: IP ranges
- Source IP ranges: 0.0.0.0/0
- Protocols and ports: Specified protocols and ports
- tcp: 80
At the bottom, click the
CREATE button.
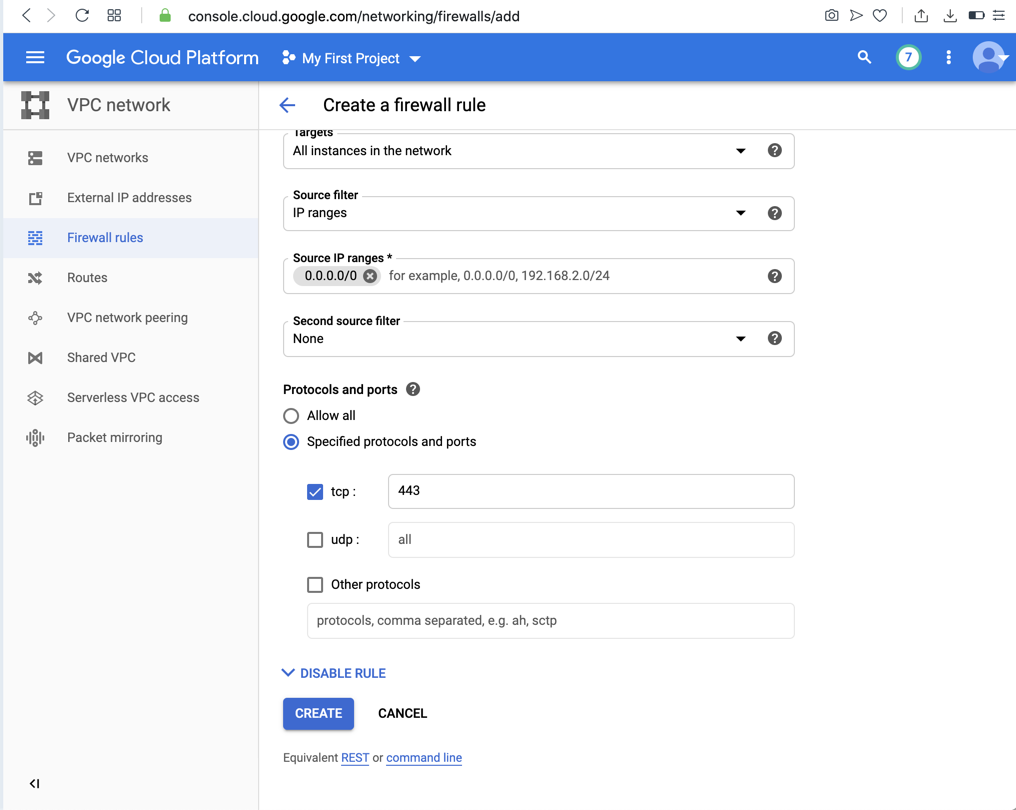
Allowing HTTPS
Repeat the process to allow HTTPS traffic
on port 443,
as shown below.
Installing Apache
On the left side of the Google
Cloud Platform page, click
the three-bar "hamburger" icon.
Click "Compute Engine",
"VM instances".
In the "VM instances" page,
on your Debian instance's line,
on the right side,
click SSH.
In the SSH session, execute
these commands:
sudo apt update
sudo apt install apache2 -y
sudo ss -nltp
Apache is listening on port 80,
as shown below.

Testing your Apache Server
In a Web browser, go to this address,
replacing the IP address with the
external IP address
of your server:
http://34.69.247.115
You should see the default Apache page,
as shown below.

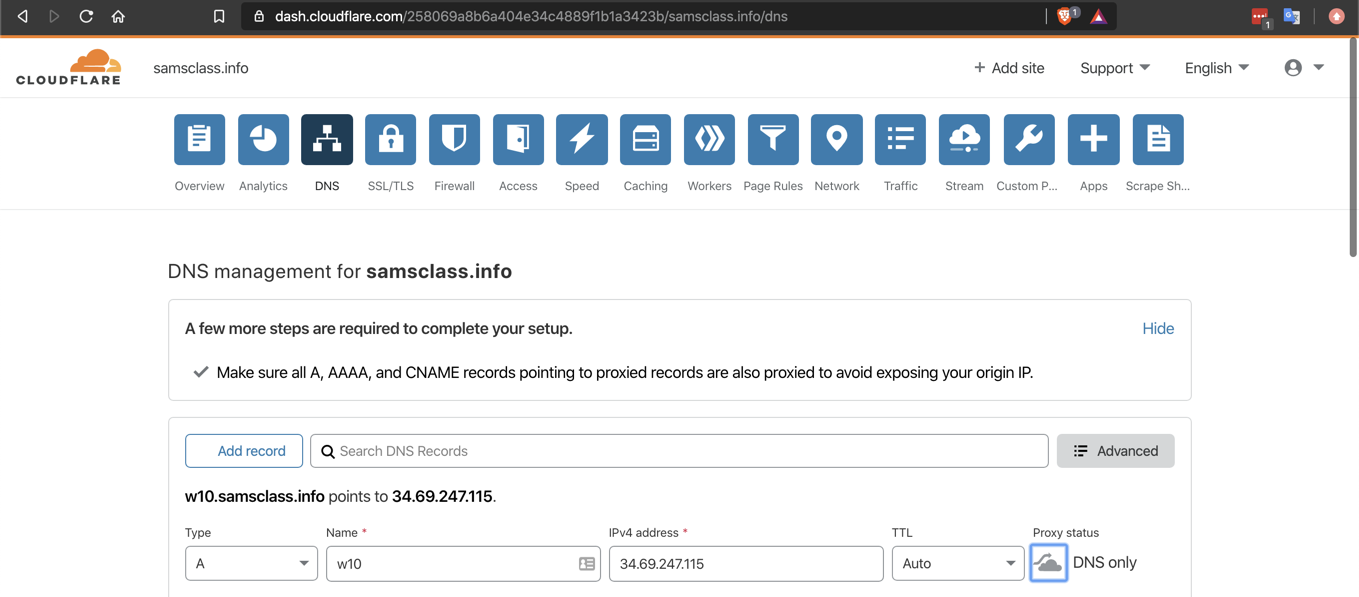
DNS Configuration
Go to
https://cloudflare.com
and log in.
At the top, click DNS. Click
"+Add record".
Create a new A record with these
values:
- Name: w10 or any
other name you wish
- IPv4 address: the
external IP of your Google Cloud server
- Proxy status: "DNS only"
as shown below. Click Save.
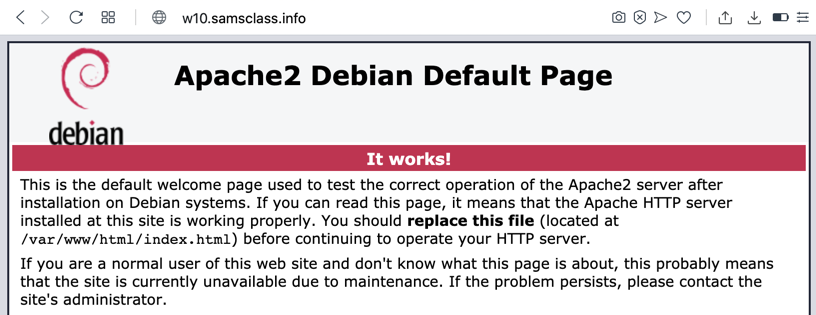
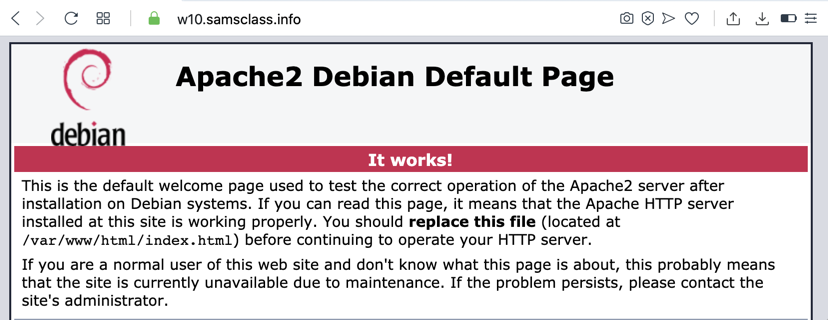
Testing your Domain Name
In a Web browser, go to this address,
replacing the domain name with the
domain name
of your server:
http://w10.samsclass.info
You should see the default Apache page
again,
as shown below.
Getting a Certificate
In a Web browser, go to
https://certbot.eff.org/lets-encrypt/
Enter these values,
as shown below.
- Software: Apache
- System: Linux (snap)
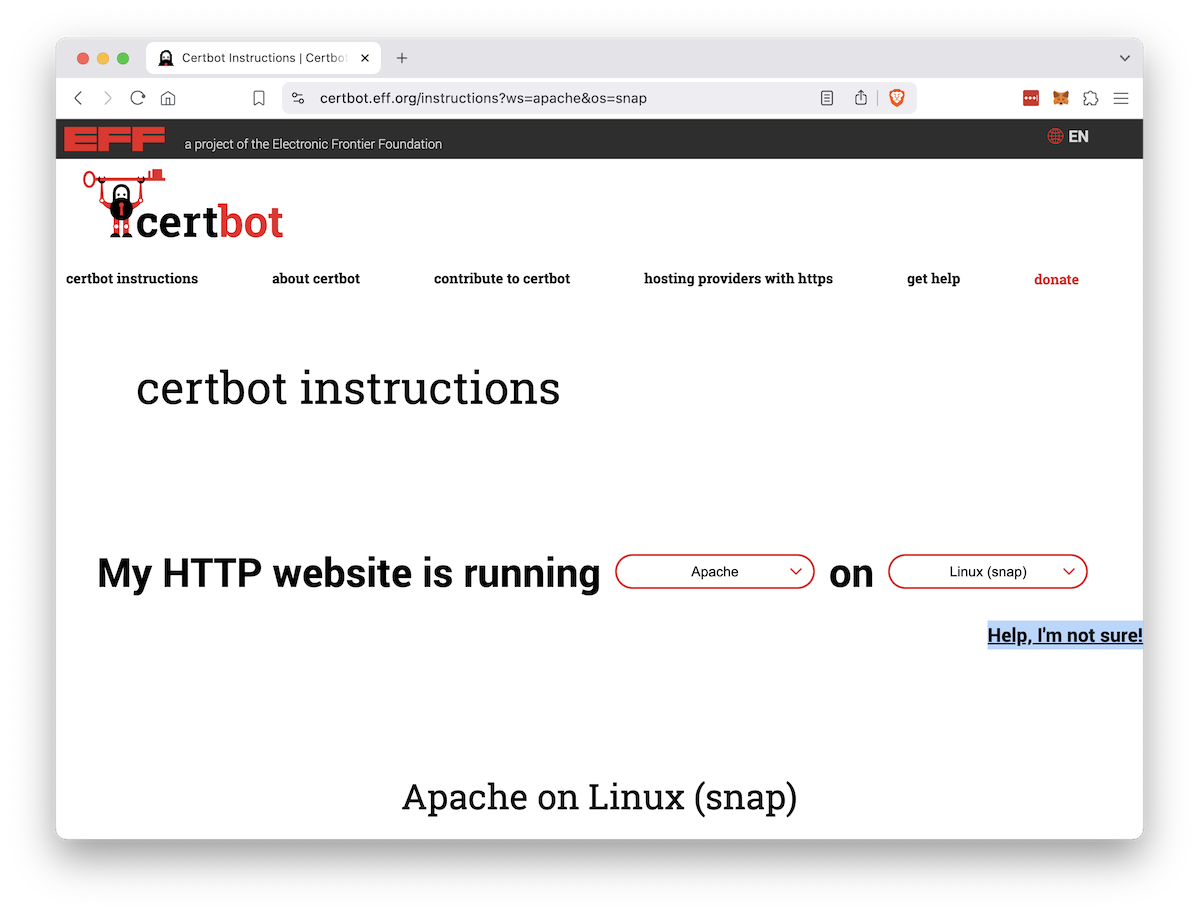
Scroll down to find instructions
for Cerbot,
as shown below.
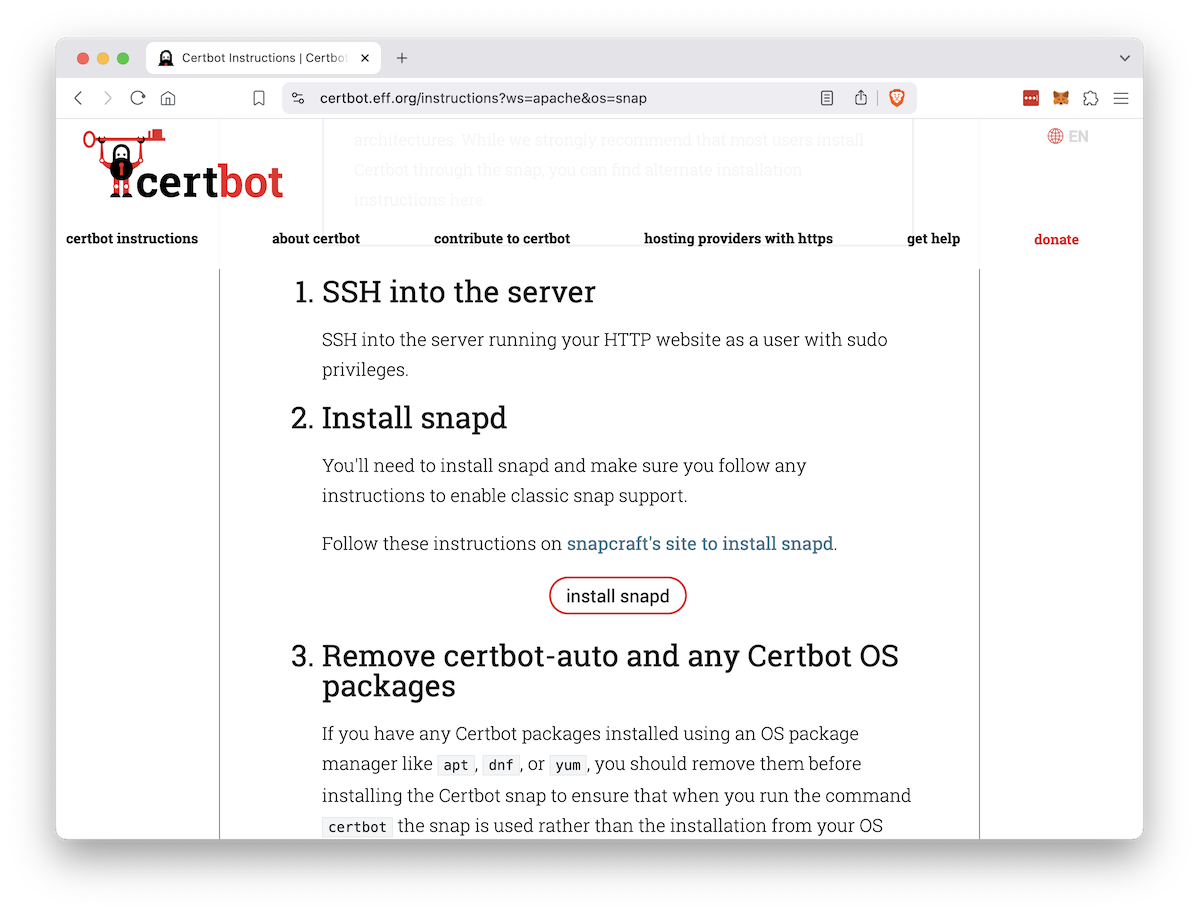
Follow those instructions to install
snapd and add an HTTPS certificate to
your server.
Testing your HTTPS Server
In a Web browser, go to this address,
replacing the domain name with the
domain name
of your server:
http://w10.samsclass.info
The page should automatically redirect to
its HTTPS version, and load, showing
the padlock icon,
as shown below.
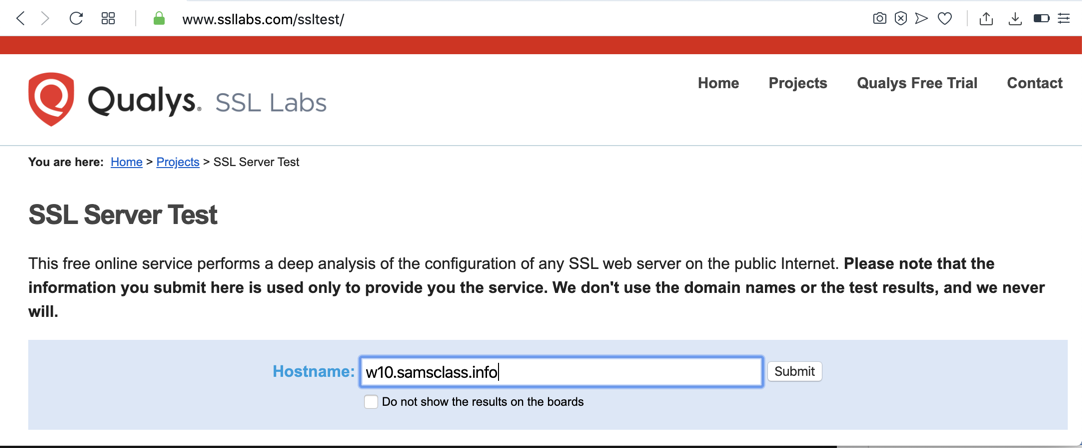
Examining your TLS Certificate
In a Web browser, go to this address:
https://www.ssllabs.com/ssltest/
In the Hostname box, enter your domain name,
as shown below.
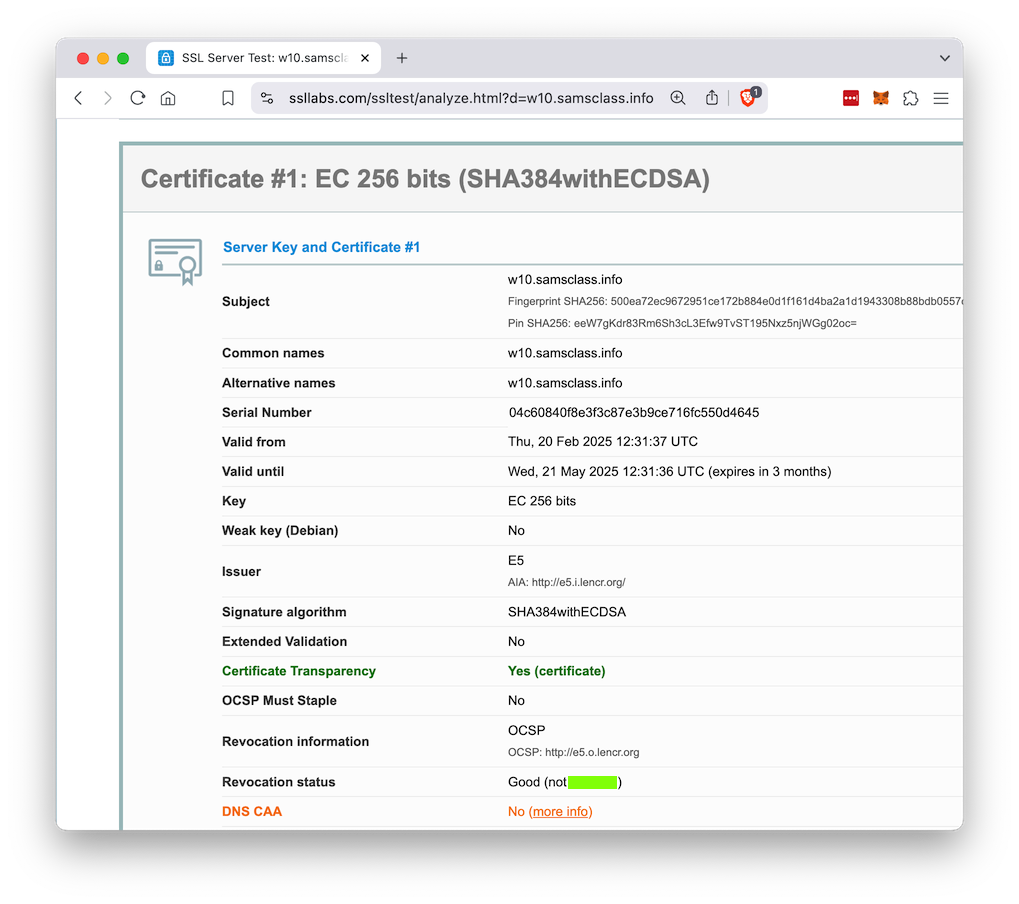
Flag W 10.1: Revocation status (15 pts)
Click the Submit button.
Information about the certificate
appears,
as shown below. The flag is covered by a green
rectangle in the image below.
|
Posted 3-6-2020
Updated 2-20-25