Shadowsocks is a protocol that encrypts network traffic, originally designed to circumvent Web censorship by the Great Firewall of China. However, if you are trying to hide your activities from China or another government, this project won't help you much, because the cloud server is connected to your Google Cloud account. See the explanation here.
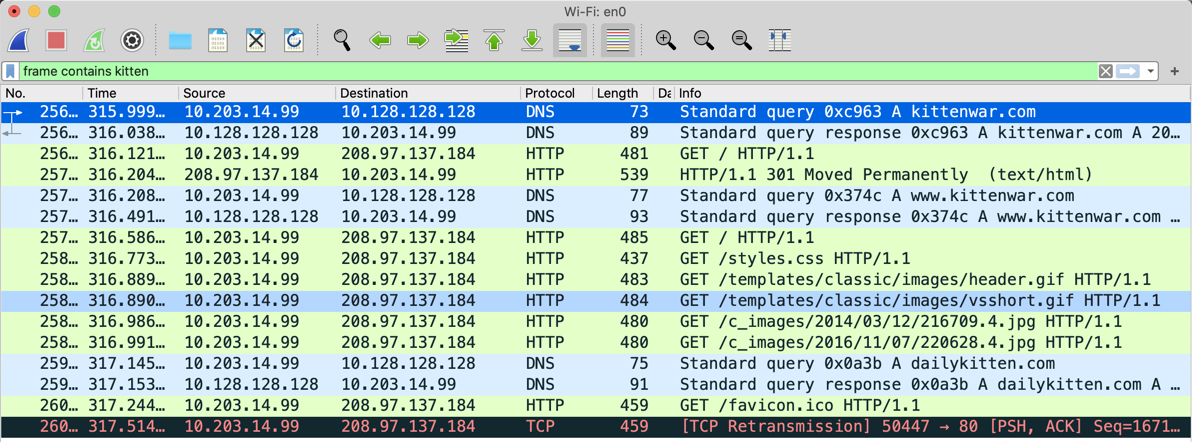
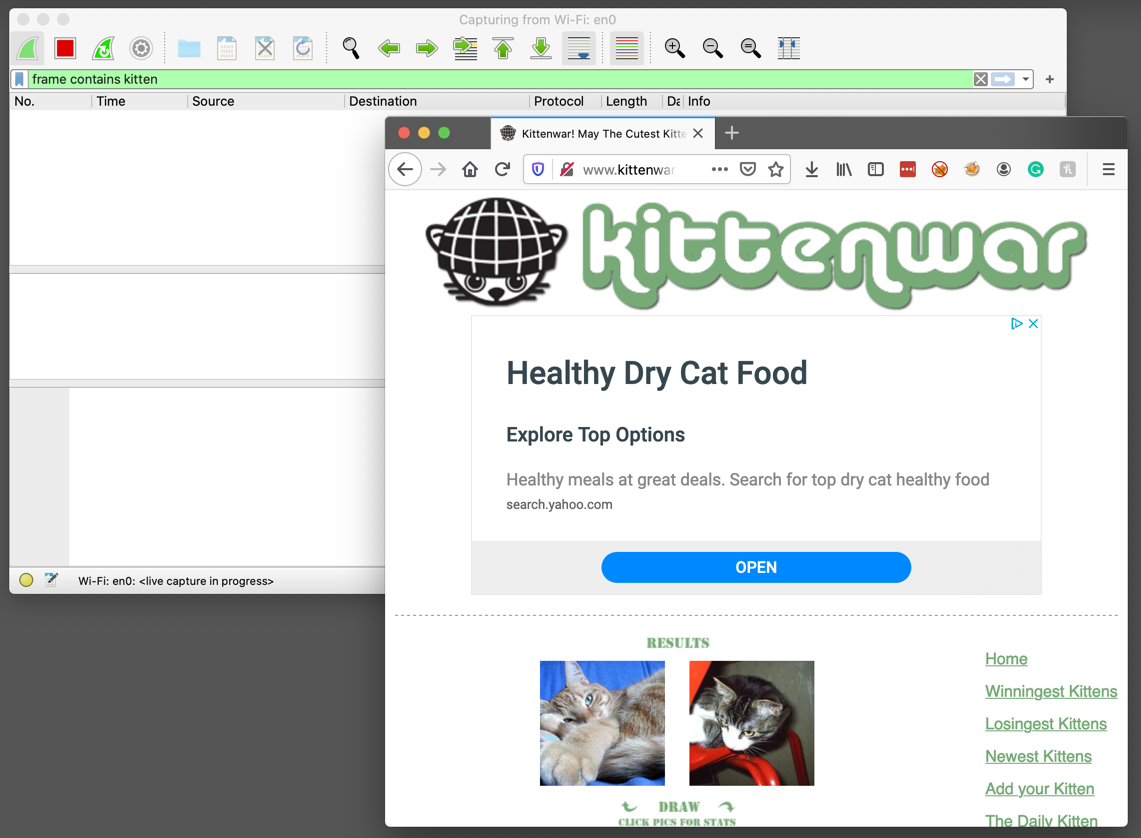
frame contains kitten
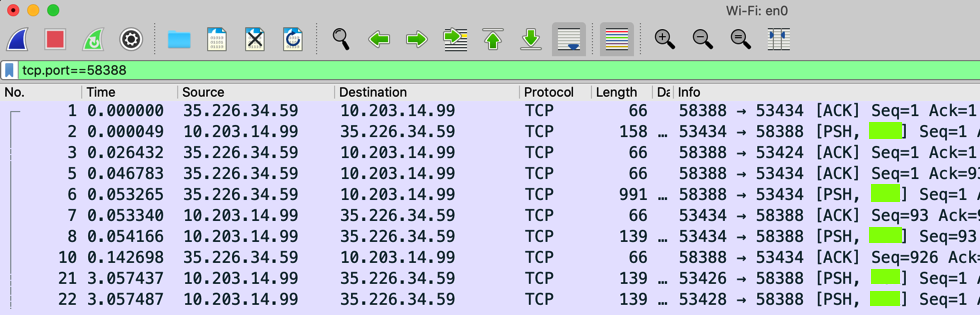
Many packets appear in Wireshark, as shown below.
From the Wireshark menu bar, click Capture, Stop. Many people might see those packets, and see information about your activities: your ISP, other clients sharing your network segment, etc.
sudo apt update

sudo apt install software-properties-common -y

sudo add-apt-repository \
"deb http://ftp.debian.org/debian stretch-backports main"

sudo apt update

sudo apt -t stretch-backports install shadowsocks-libev -y
sudo nano /etc/shadowsocks-libev/config.json
{
 "server":"0.0.0.0",
 "mode":"tcp_and_udp",
 "server_port":58388,
 "local_port":1080,
 "password":"P@ssw0rd",
 "timeout":60,
 "method":"chacha20-ietf-poly1305"
}
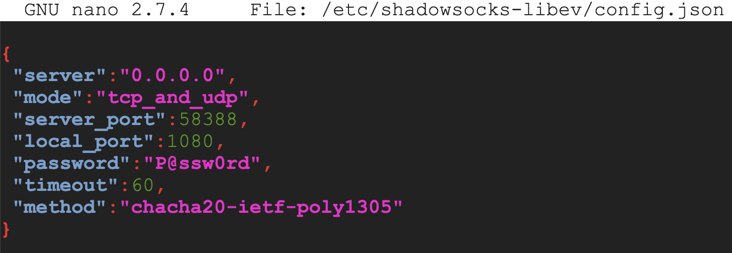
Save the file with Ctrl+X, Y, Enter.
Execute these commands:
sudo systemctl start shadowsocks-libev
sudo systemctl enable shadowsocks-libev
sudo ss -pant

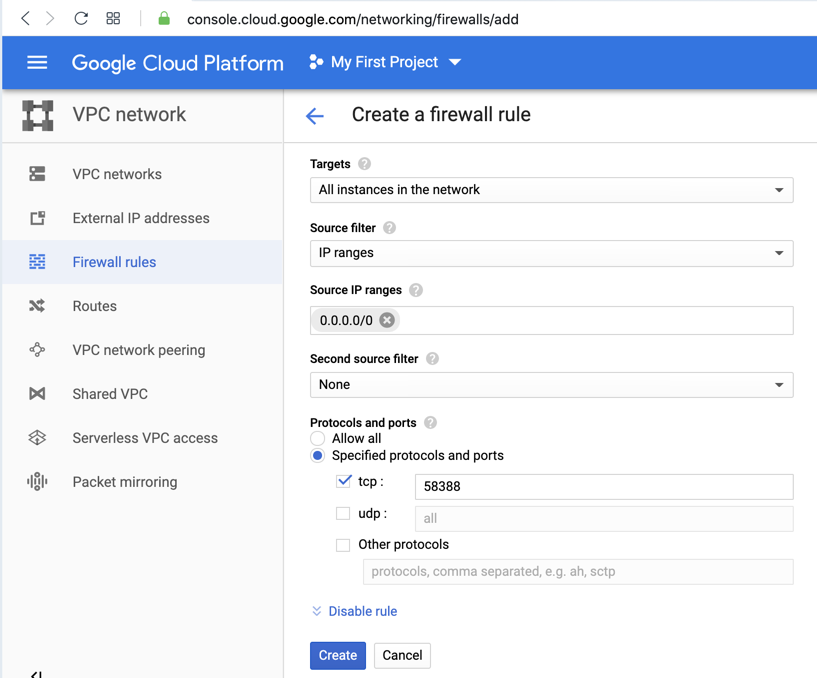
At the top center, click "CREATE FIREWALL RULE".
Enter these values, as shown below.
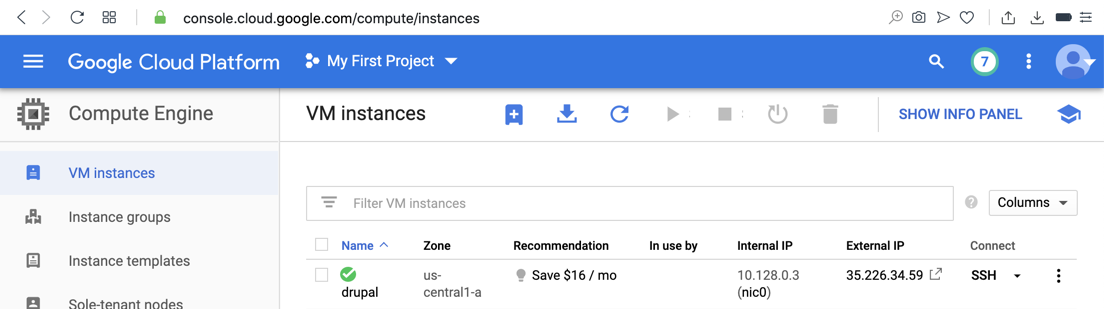
Find your server's public IP address, as shown below.
Make a note of it. You'll need it to configure your client.
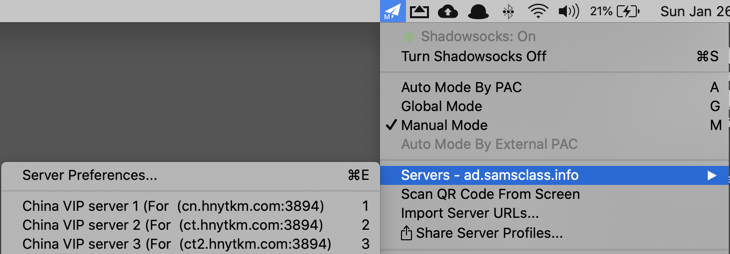
On my Mac, the client shows up as a paper-airplane icon at the top right of my screen, as shown below.
Click that icon, then click Servers, "Server Preferences...", as shown below.
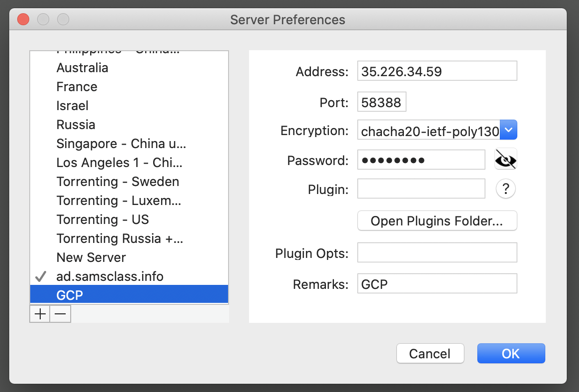
In the Server Preferences box, at the bottom left, click the + sign./Users/sambowne/Desktop/W210-16-answer.png /Users/sambowne/Desktop/W210-16.png
Enter these values, as shown below:
Click the paper-airplane icon at the top right of the desktop, point to Servers, and click GCP.
netstat -ant | grep LISTEN

In the top right of the Preferences page, type proxy. Click the Settings button.
Make these entries, as shown below.
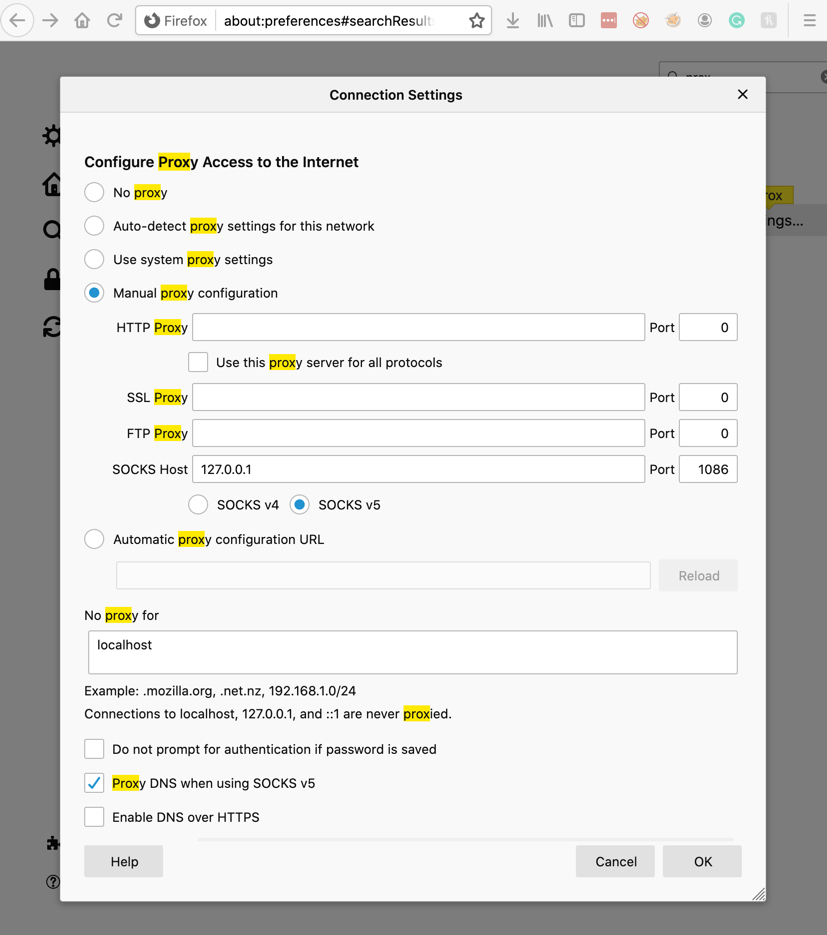
Click OK.
If a box appears, asking whether you want to save the captured packets, click "Continue without Saving".
No packets appear in Wireshark, as shown below.
Your privacy is greatly improved!
Flag W 210.1: TCP Flag (15 pts)
In Wireshark, enter this filter:Press Enter to filter the display. Find the PSH packets, as shown below.The flag is the second TCP flag found in many of the PSH packets, covered by a green rectangle in the image below.
Posted 1-27-2020