
Click Preferences, Advanced, Network, Settings.
Configure your browser to use 127.0.0.1 on port 8080 as a proxy, as shown below.
In Burp, on the Proxy tab, on the Options sub-tab, ensure that Burp is listening on address 127.0.0.1, port 8080, as shown below.
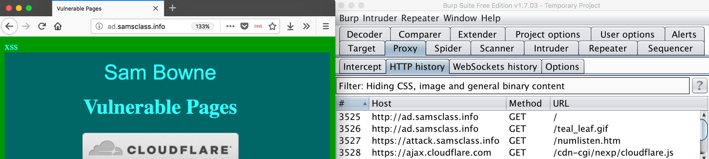
The page should load in Firefox, and Burp should show the requests on the Proxy tab, on the "HTTP history" sub-tab, as shown below.
A message appears, saying "Your connection is not secure", as shown below.
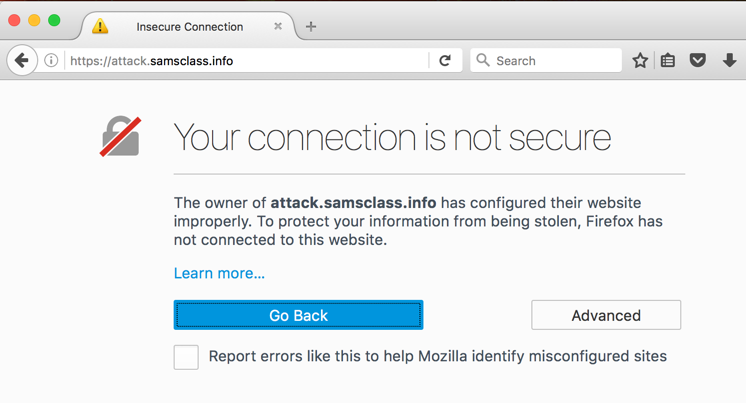
This message is warning you that Burp is intercepting the traffic. To allow that, you must import the certificate into your browser's store of trusted certificates.
Click the "Add Exception..." button.
Click the "Confirm Security Exception" button.
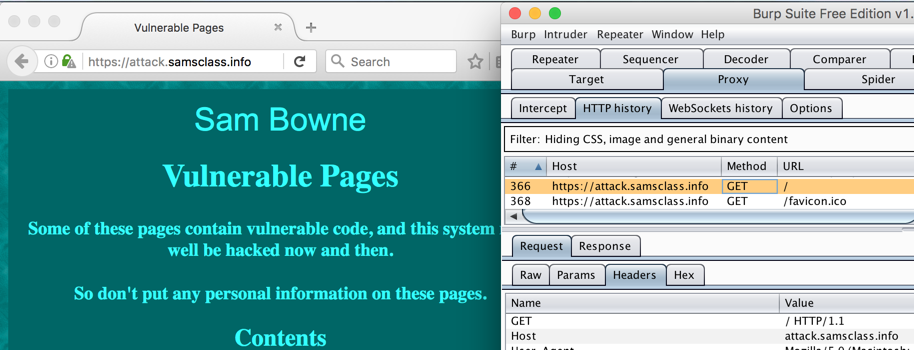
The secure page loads, and Burp shows the requests used to load it, as shown below.
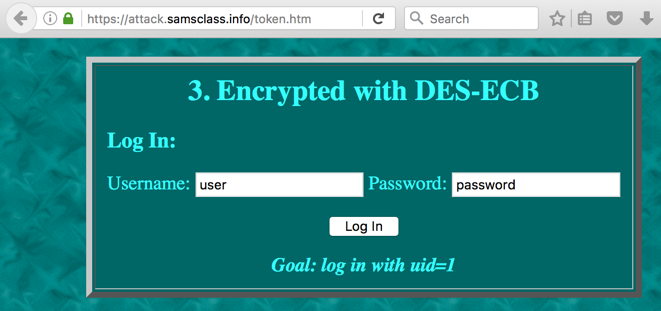
The challenges appear. Scroll down to challenge 3, as shown below.
A "Welcome" page appears, showing you are logged in with uid=5, as shown below.
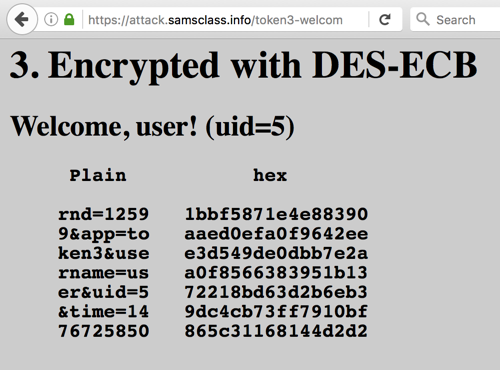
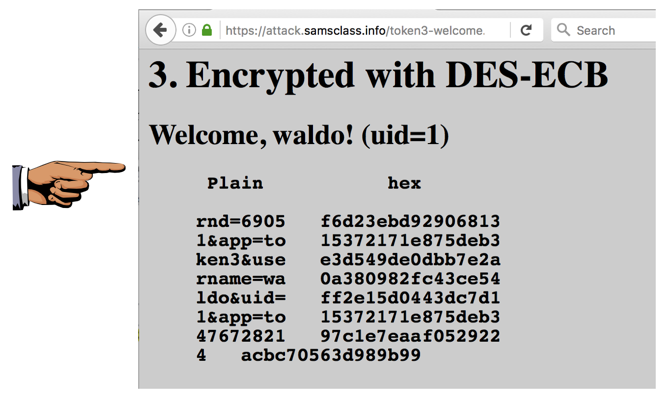
On the left, in the "Plain" section, the parameters are shown. They are grouped into blocks of 8 characters. On the right side the hexadecimal encrypted bytes are shown.
In your browser, click the Back button to return to the Challenge 3 login form. Click "Log in".
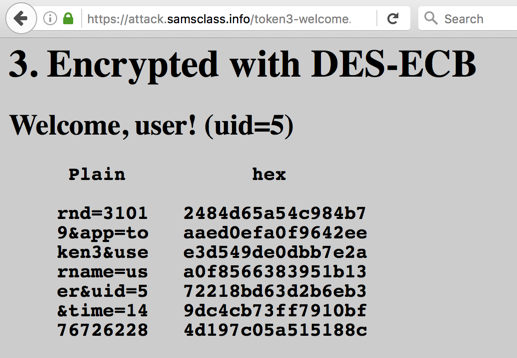
You get another "Welcome" page, as shown below.
Try logging in a few times and verify these things:
Change the username to some abbreviation of your own name that is five letters long. In my example, I'll use waldo. Click "Log in".
You get another "Welcome" page, as shown below.
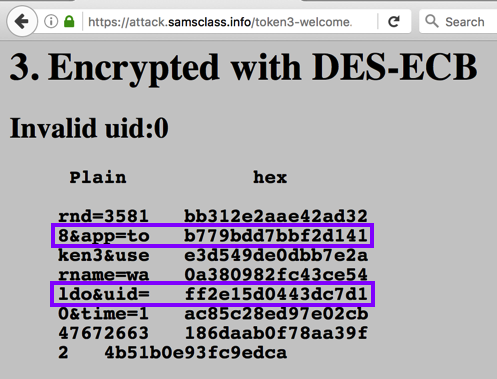
Notice these things:
Second, we need to insert that line of text after the line ending with "uid=".
Click "Log in".
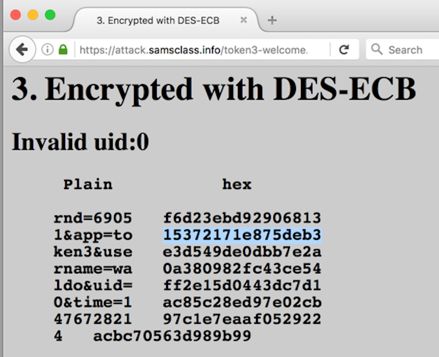
The seond line starts with a single random digit. If it's not "1", repeat the process until it is. It took me 12 tries to get the image below.
When you have a line of text beginning with "1&", proceed to the next section.
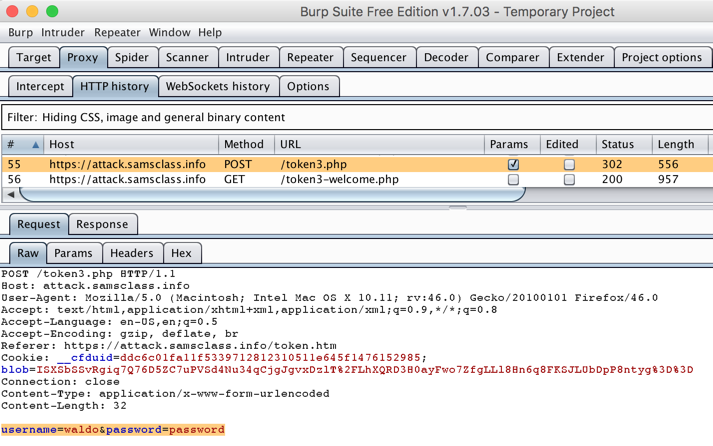
Examine the last two requests: a POST followed by a GET. These perform the login.
The POST request sends the username and password to the server, as shown below.
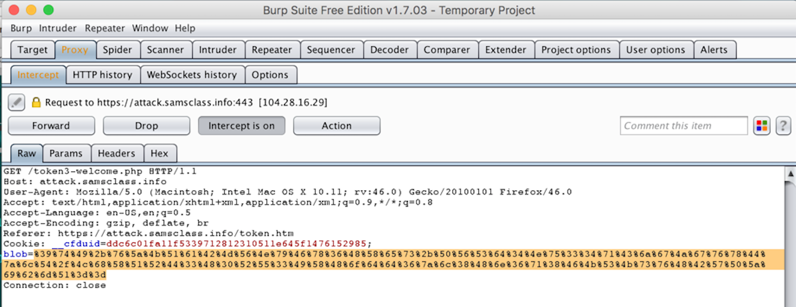
The GET request sends a long blob of encoded data to the server, as shown below.
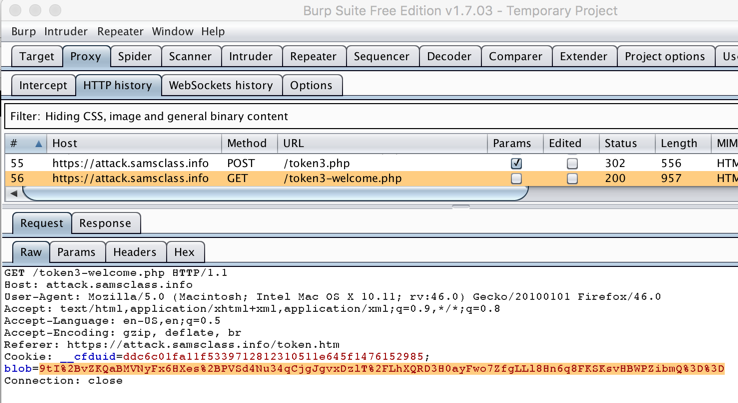
The blob is encoded with Base64, using the characters A-Z, a-z, 0-9, and two more: %2b for "+" and %2f for "/".
We need to manipulate this blob to log in as a different user.
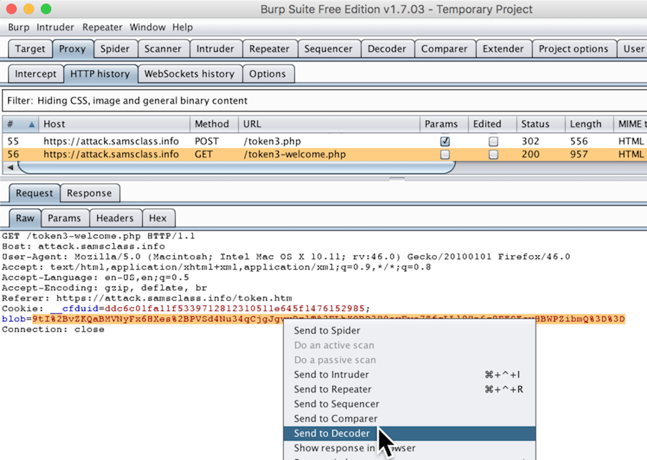
In Burp, click the Decoder tab.
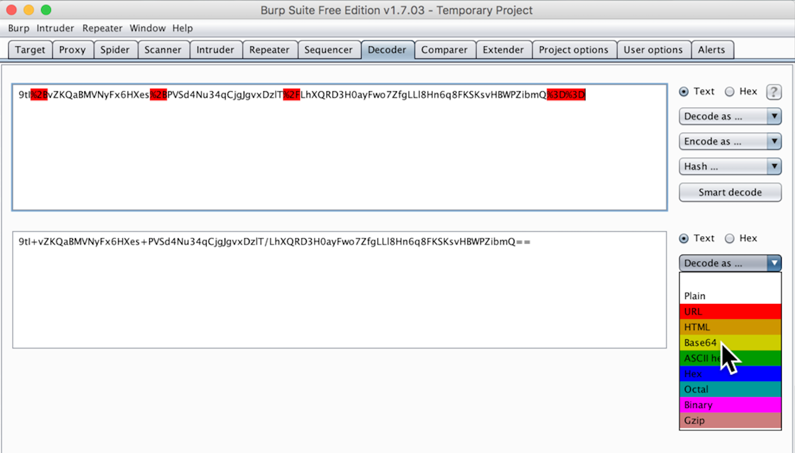
On the right side of Burp, click the "Smart decode" button. The "%2b" and "%2f" characters are highlighted with red, and the normal Base64 blob appears in a new box below, containing "+" and "/" characters.
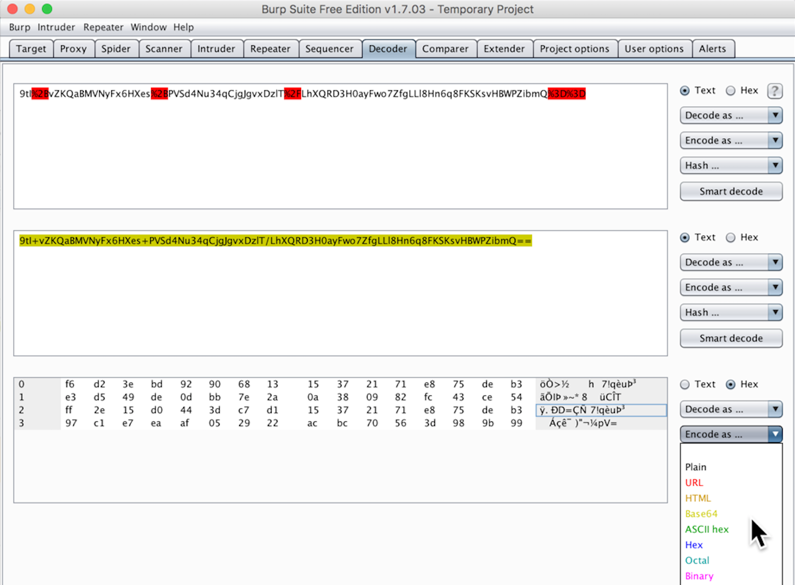
In the second group of buttons, click "Decode as...". In the drop-down menu, click Base64, as shown below.
A third box appears, containing hex values, as shown below.
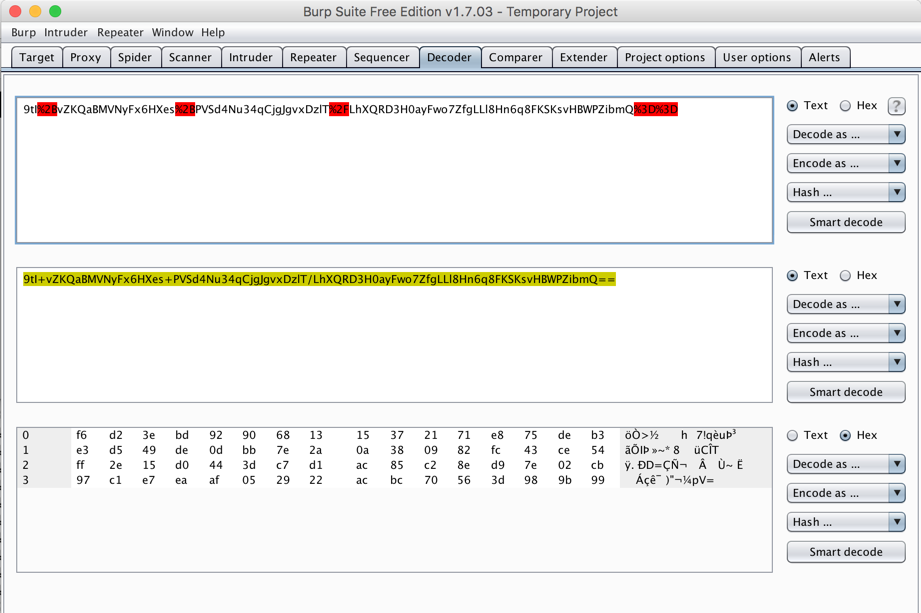
Compare these hex values to the "hex" shown on the "Welcome" page. The bytes we need are in the second half of the first row in Burp, as shown below.

Click in the ninth byte in the third row, press backspace twice to delete its contents, and type in the values from the first row.
Carefully copy the second 8 bytes in the first row into the third row, as shown below.

Highlight all the hex values. Then, on the right side, click "Encode as...", Base64, as shown below.
A line of Base64 text appears in a new row, as shown below. The problem with this blob is that it contains "+" characters which will be interpreted as the end of parameter values--those characters must be URL-encoded.
Burp doesn't seem to have an option to only URL-encode some of the characters, but it can URL-encode them all.
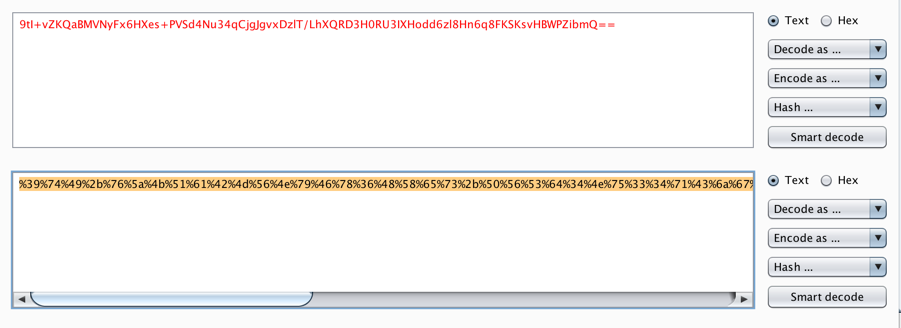
On the right side, click "Encode as...", URL, as shown below.

A new row appears, containing a long blob of URL-encoded text, as shown below.
Highlight this entire row and copy it to the clipboard, using "Command+C" on a Mac, or "Ctrl+C" on a PC.
In your browser, click the Back button to return to the Challenge 3 login form.
Click "Log in".
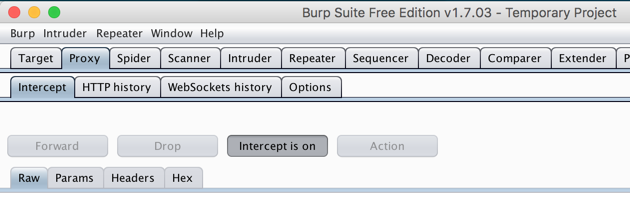
In Burp, on the Proxy tab and the Intercept sub-tab, a POST request appears. Click the Forward button.
A GET request appears. Double-click the blob of data, delete it, and paste in the data you copied earlier, as shown below.
In Burp, click the "Intercept is on" button to allow traffic to flow through.
Your Web browser should now show you logged in with "your name" and uid=1, as shown below.
Press the PrintScrn key to copy the whole desktop to the clipboard.
YOU MUST SUBMIT A FULL-SCREEN IMAGE FOR FULL CREDIT.
In the host machine, open Paint and paste in the captured image. Save it as "Your Name Proj 10".
Posted 10-17-16
Updated because Bing is secure 3-14-18
Updated to remove link to Bing completely 3-21-18
Sam Bowne