Project 7x: Protecting a Server with iptables and iptstate (10 pts.)

What You Need

An Ubuntu or Kali Linux VM, as you prepared in the previous project. Other versions of Linux could be used, but the steps might be different.

You also need another machine to test the connection from, on the same network.

Purpose

To protect a server with the iptables firewall and monitor connections with iptstate.

A firewall is a very powerful defense and every server should use one.
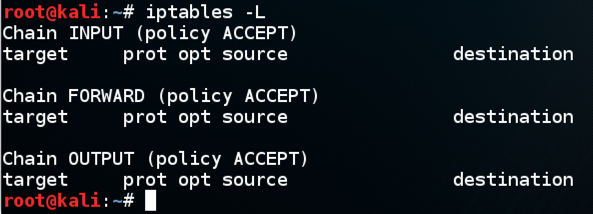
Clearing iptables Rules

On your Linux server, in a Terminal window, execute this command:
sudo iptables -L
You should see three rules, showing "policy ACCEPT" for the three chains named INPUT, FORWARD, and OUTPUT, as shown below.

If you see other rules, execute these commands to clear them:

sudo iptables -F
sudo iptables -X
sudo iptables -t nat -F
sudo iptables -t nat -X
sudo iptables -t mangle -F
sudo iptables -t mangle -X
sudo iptables -t raw -F
sudo iptables -t raw -X
sudo iptables -t security -F
sudo iptables -t security -X
sudo iptables -P INPUT ACCEPT
sudo iptables -P FORWARD ACCEPT
sudo iptables -P OUTPUT ACCEPT

Simple Stateful Firewall

These commands create a simple firewall that acts much like the default Windows firewall, allowing outgoing connections but blocking incoming ones.

Creating TCP and UDP Chains

These chains will be used later to specify what incoming traffic to accept.

On your Linux server, in a Terminal window, execute these commands:

sudo iptables -N TCP
sudo iptables -N UDP

Blocking FORWARDING

If your server were being used as a router, forwarding traffic with network address translation, it would use this rule. But we aren't doing that, so block forwarding with this command:
sudo iptables -P FORWARD DROP

Allow OUTGOING Traffic

We'll allow all traffic that initiates inside, so we can surf the Web and use the Internet from the Linux server.

On your Linux server, in a Terminal window, execute this command:

sudo iptables -P OUTPUT ACCEPT

Assigining INPUT Rules

These rules do the following: On your Linux server, in a Terminal window, execute these commands:
sudo iptables -P INPUT DROP
sudo iptables -A INPUT -m conntrack --ctstate RELATED,ESTABLISHED -j ACCEPT
sudo iptables -A INPUT -i lo -j ACCEPT
sudo iptables -A INPUT -m conntrack --ctstate INVALID -j DROP
sudo iptables -A INPUT -p icmp --icmp-type 8 -m conntrack --ctstate NEW -j ACCEPT
sudo iptables -A INPUT -p udp -m conntrack --ctstate NEW -j UDP
sudo iptables -A INPUT -p tcp --syn -m conntrack --ctstate NEW -j TCP
sudo iptables -A INPUT -p udp -j REJECT --reject-with icmp-port-unreachable
sudo iptables -A INPUT -p tcp -j REJECT --reject-with tcp-reset
sudo iptables -A INPUT -j REJECT --reject-with icmp-proto-unreachable

Allowing Specific Ports

These rules allow traffic to ports you are using. For this project, we'll allow TCP 80, 443, 22, and 9999, and UDP 53.

On your Linux server, in a Terminal window, execute these commands:

sudo iptables -A TCP -p tcp --dport 80 -j ACCEPT
sudo iptables -A TCP -p tcp --dport 443 -j ACCEPT
sudo iptables -A TCP -p tcp --dport 22 -j ACCEPT
sudo iptables -A TCP -p tcp --dport 9999 -j ACCEPT
sudo iptables -A UDP -p udp --dport 53 -j ACCEPT

Installing iptstate (Ubuntu Only)

Iptstate is already installed on Kali. But the Ubuntu repositories have an old version that won't run, so you need to install it using git.

If you are using Ubuntu, execute these commands:

sudo apt-get update
sudo apt-get install git -y
git clone https://github.com/jaymzh/iptstate.git
cd iptstate
sudo apt-get install ncurses-dev libnetfilter-conntrack-dev -y
make
sudo make install

Starting iptstate

On your Linux server, in a Terminal window, execute these command:
sudo iptstate
You see a display showing any active network connections. You may have none at all, but when I did it I saw one connection, as shown below.

Finding your Server's IP Address

Open a new Terminal window and execute this command:
ifconfig
Make a note of your server's IP address.

Starting a Netcat Listener

Open a new Terminal window and execute this command:
nc -nlvp 9999
Leave that window open, listening on port 9999.

Connecting from Outside

On a different machine, connect to the server on port TCP 9999 with netcat or Ncat.

If you are using Linux or the Mac, connect with nc this way, replacing the IP address with the IP address of your Linux server:

nc 172.16.1.203 9999
If you are using Windows, install nmap and then connect this way:
ncat 172.16.1.203 9999

Viewing the Connection with iptstate

On your Linux server, you should see the extablished connection to a local port of 9999, as shown below, highlighted in green.

Blocking Reverse Shells

On a server, you might want to disallow Web surfing and acting as a client. In a competition like CCDC, this is important for defense. In that case, use this rule:
sudo iptables -A OUTPUT -p tcp --tcp-flags ALL SYN -m state --state NEW -j DROP

Saving the Screen Image

Make sure the green ESTABLISHED connection is visible, as shown above.

Click the host computer's desktop. Press Shift+PrntScrn key to capture the entire desktop. If you are using a Mac, press Shift+Cmd+3

YOU MUST SUBMIT A WHOLE-DESKTOP IMAGE FOR FULL CREDIT

Save this image with the filename "Proj 7x from YOUR NAME"

Turning in Your Project

Email the image to cnit.129S@gmail.com with a subject of "Proj 7x from YOUR NAME".

Sources

Simple stateful firewall

What's the right way to prevent shell bounce back?

Saving Iptables Firewall Rules Permanently


Last revised 11-8-16 by Sam Bowne