IBM Backs a Dollar-Pegged Stablecoin Crypto Token on the Stellar Network
IBM Confirm Two Large Banks Using Stellar (XLM) for Foreign Exchange Corridors
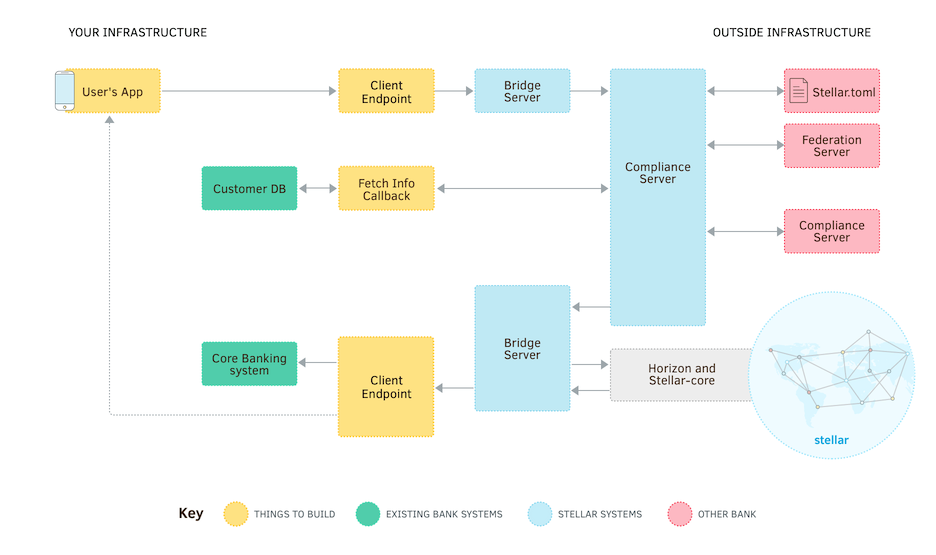
Stellar is a complex system, with several different types of servers, designed to satisfy financial compliance regulations, as shown below.
Stellar is designed to solve the Byzantine Generals' Problem, in which a group of generals must agree on a mutual action, even if some of them are treacherous.
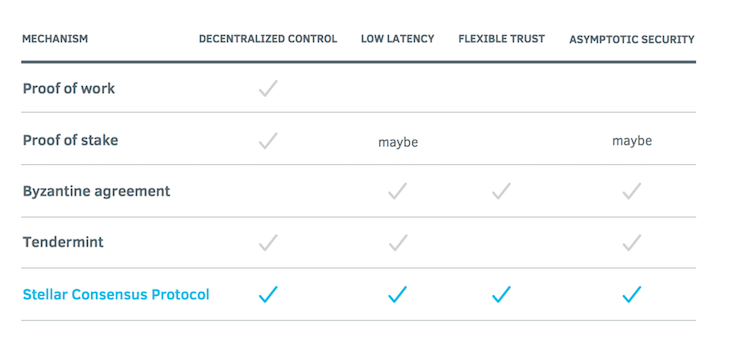
Stellar uses the Stellar Consensus Protocol, which is designed to have many desirable features, as shown below.
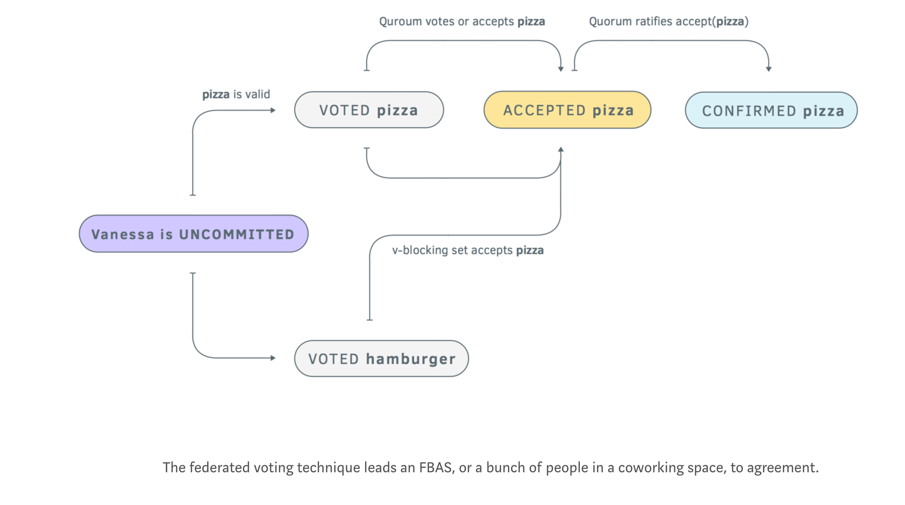
The figure below shows how a group of people decide what to order for lunch, using votes and constraints (called "v-blocking nodes"), eventually ratifying a decision.
This project takes you through connecting to the Stellar test network, creating accounts, and sending cryptocurrency from one account to the other, following this guide:
Exploring Stellar Lumens - Development Tutorial
These instructions are also very helpful:
https://github.com/michielmulders/stellar-js-sdk
curl -sL https://deb.nodesource.com/setup_6.x | sudo -E bash -
sudo apt-get install -y nodejs
sudo npm install npm --global
nano hello.js
// Load HTTP module
var http = require("http");

// Create HTTP server and listen on port 8000 for requests
http.createServer(function(request, response) {

   // Set the response HTTP header with HTTP status and Content type
   response.writeHead(200, {'Content-Type': 'text/plain'});

   // Send the response body "Hello World"
   response.end('Hello World\n');
}).listen(8000);

// Print URL for accessing server
console.log('Server running at http://127.0.0.1:8000/');
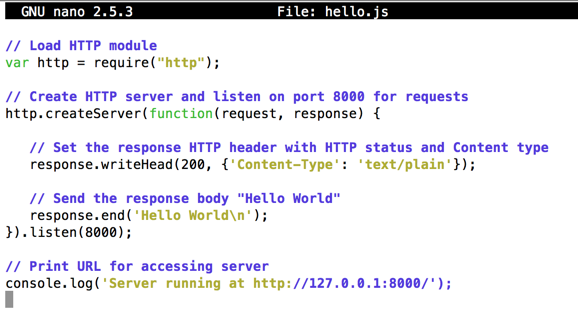
Press Ctrl+X, Y, Enter to save the file.

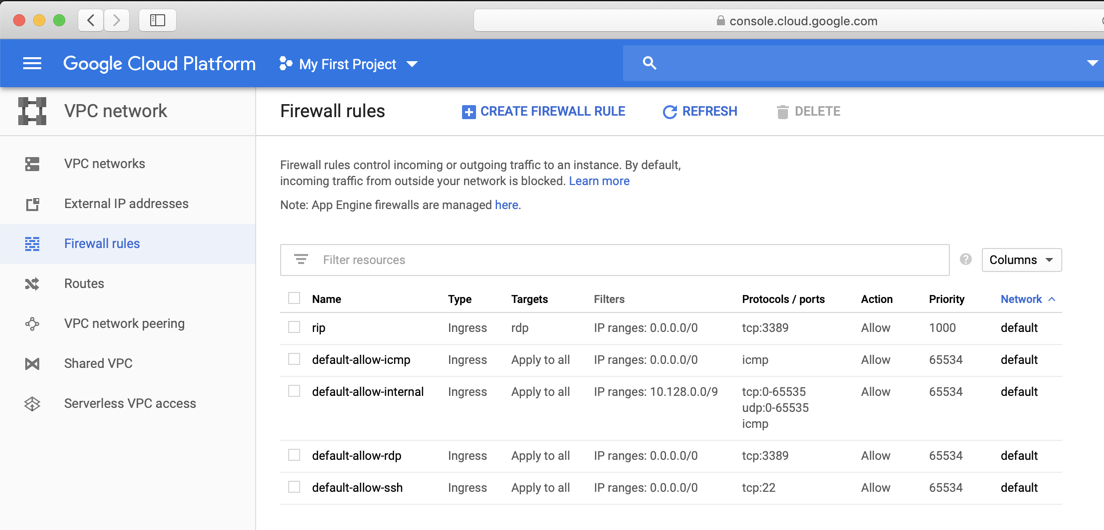
On the "Firewall rules" page, click "CREATE FIREWALL RULE", as shown below.
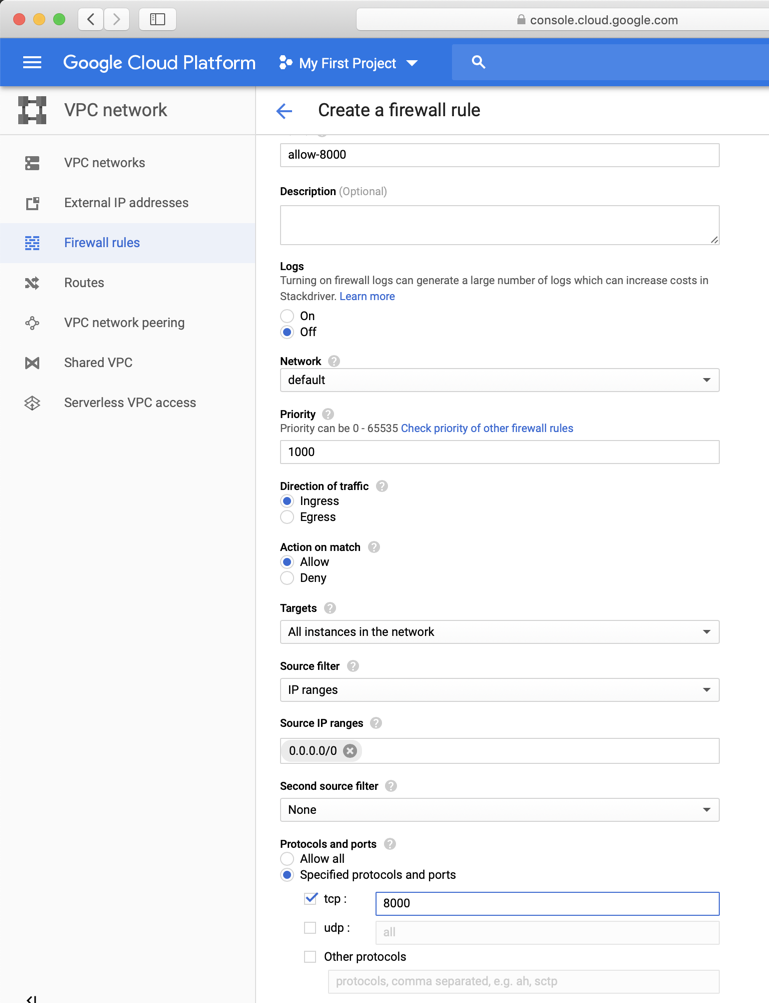
On the 'Create a firewall fule" page, make these entries, as shown below:
At the bottom of the page, click the Create button.
node "hello.js"
In the Terminal, press Ctrl+C to stop the Web server.
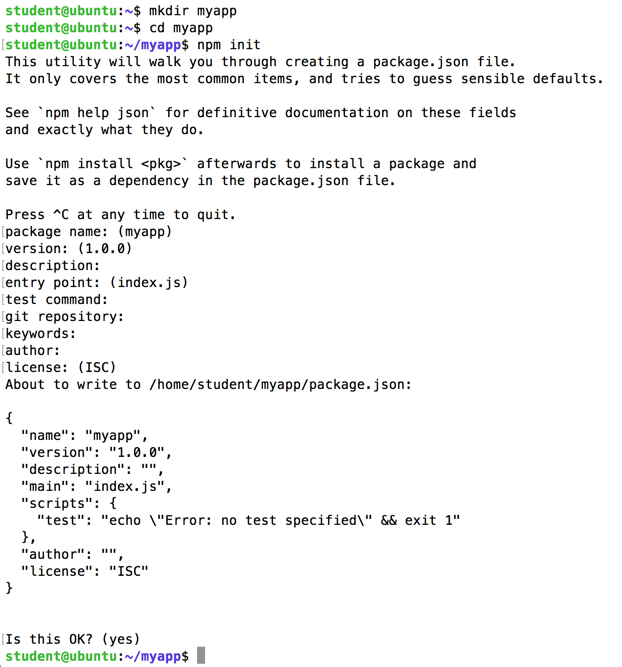
In a Terminal window, execute these commands:
mkdir myapp
cd myapp
npm init
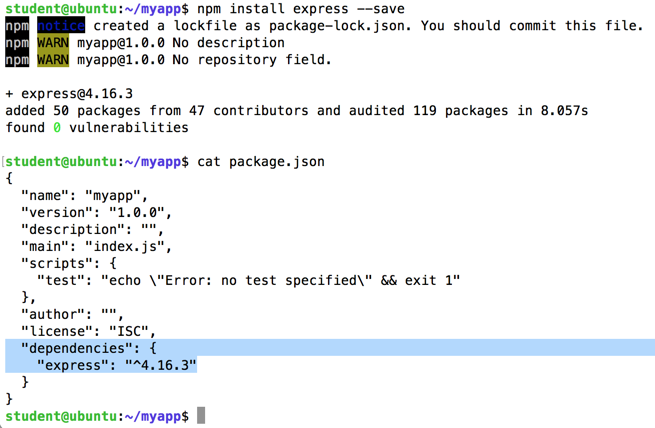
Now we need to install Express in the myapp directory and save it in the dependencies list of your package.json file.
In the Terminal window, execute these commands:
npm install express --save
cat package.json
nano index.js
const express = require('express')
const app = express();

app.get('/', (req, res) => {
  res.send('Hello World! I am using Express!')
});

app.listen(8000, () => {
  console.log('Example app listening on port 8000!')
});
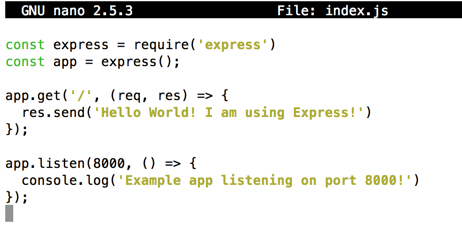
Press Ctrl+X, Y, Enter to save the file.
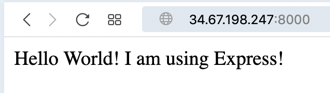
To run your server, in the Terminal window, execute this command:
node index.js
In the Terminal, press Ctrl+C to stop the Web server.
On the "Firewall rules" page, click "CREATE FIREWALL RULE", as shown below.
On the 'Create a firewall fule" page, make these entries, as shown below:
sudo npm install express-generator -g
cd
express helloworld

Execute this command to see its config file:
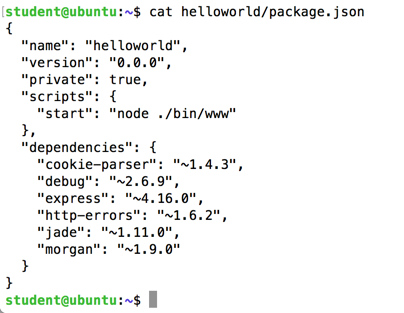
cat helloworld/package.json
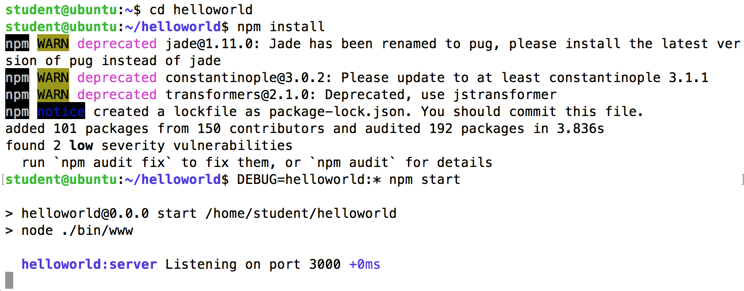
To start the package, execute these commands:
cd helloworld
npm install
DEBUG=helloworld:* npm start
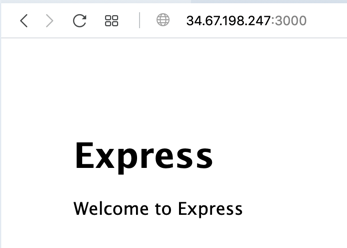
To view your page, in a Web browser, open your server's IP address followed by :3000. You should see a more modern-looking, prettier page, as shown below.
In the Terminal, press Ctrl+C to stop the Web server.
sudo npm cache clean -f
sudo npm install -g n
sudo n stable
curl -sS https://dl.yarnpkg.com/debian/pubkey.gpg | sudo apt-key add -
echo "deb https://dl.yarnpkg.com/debian/ stable main" | sudo tee /etc/apt/sources.list.d/yarn.list
sudo apt-get update
sudo apt-get install yarn -y
On the "Firewall rules" page, click "CREATE FIREWALL RULE", as shown below.
On the 'Create a firewall fule" page, make these entries, as shown below:
cd
git clone https://github.com/michielmulders/stellar-js-sdk.git
cd stellar-js-sdk
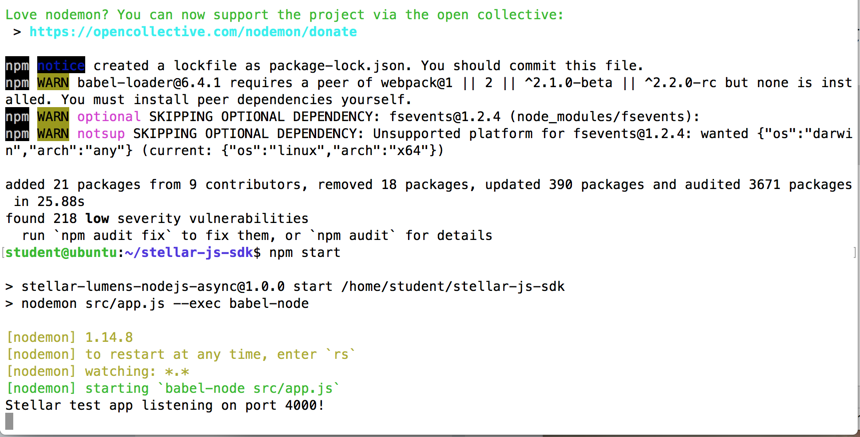
yarn install
npm install
npm start
To view your page, in a Web browser, open your server's IP address followed by :4000.
The page shows an error message, saying "Cannot GET /", as shown below. This is normal--the server does not use GET requests.
Leave the open Terminal window alone, running the app in Node.
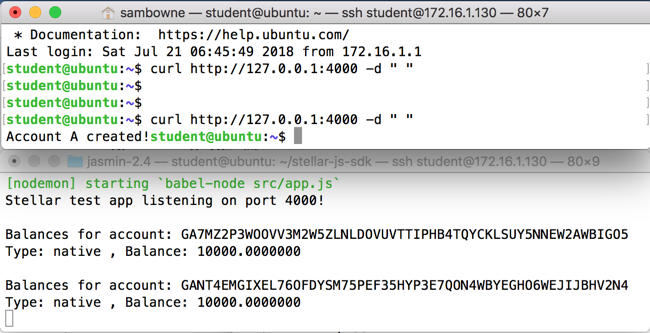
Open a new Terminal window and execute this command to send a POST to the app:
curl http://127.0.0.1:4000 -d " "
The original Terminal window shows balances for two newly created accounts, as shown below.
They both start with a balance of 10000 Lumens (the Stellar cryptocurrency). This is a testnet, however, so they aren't worth any real money.
curl http://127.0.0.1:4000/payment -d " "
The response is "Transaction successful!".
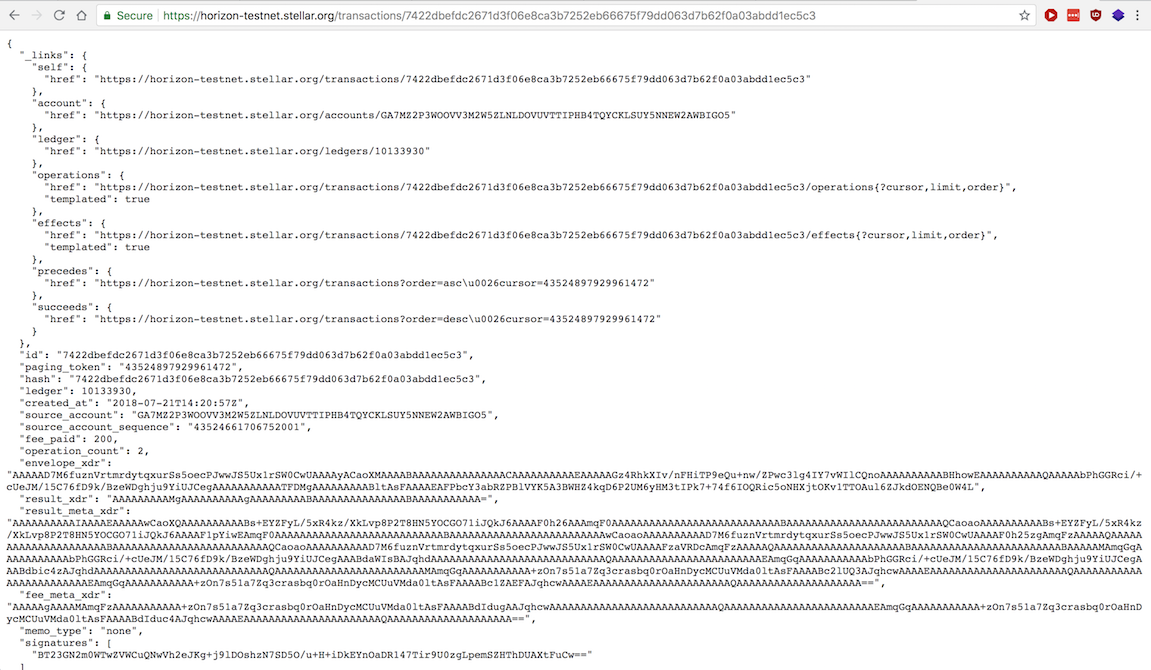
The original Terminal window shows a lot of transaction information, including a URL to view the transaction, highlighted in the image below.
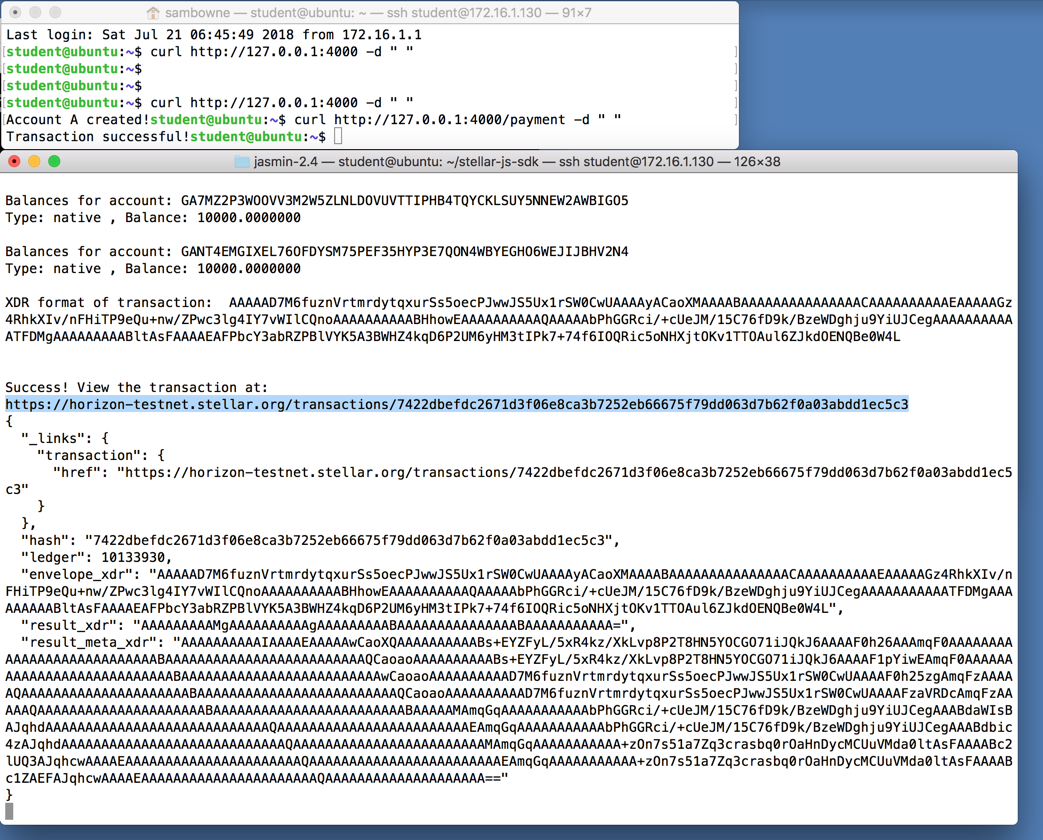
You see a lot of cryptographic data, as shown below.
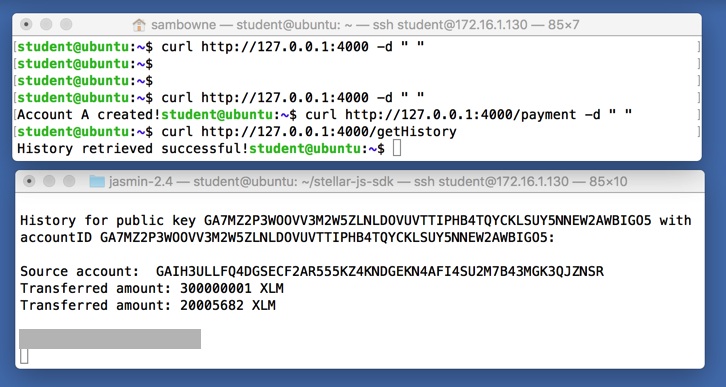
curl http://127.0.0.1:4000/getHistory
The response is "History retrieved successful!".
The original Terminal window shows two transactions: first 300000001 XLM into the account, and then 20005682 XLM out of it, as shown below.
After those numbers, a message appears, covered by a gray box in the image below. Enter that message into the form below to record your success!